
!["[New] Pro-Level 7 DSLRs That Transform Your Digital Storytelling"](https://www.lifewire.com/thmb/bOfNYccWsXItTg-VTVvCOXOEsec=/540x405/filters:no_upscale():max_bytes(150000):strip_icc()/copilotword01-6325e891b0804326a8b01ed1a9e02693.jpg)
"[New] Pro-Level 7 DSLRs That Transform Your Digital Storytelling"
Pro-Level 7 DSLRs That Transform Your Digital Storytelling
Best 7 DSLR Vlogging Cameras

Shanoon Cox
Nov 01, 2022• Proven solutions
DSLR cameras are great for vloggers who are serious about filmmaking. But with so many DSLR cameras to choose from, it can be difficult to make a decision on one. We have come up with a list of seven of the best DSLR vlogging cameras to help you with your search.
WHAT TO LOOK FOR IN A VLOGGING CAMERA
1. Fully articulated screen (flip screen)
2. Good continual autofocus while recording video
3. Good focus priority through face recognition
4. Touch to focus
5. Good low-light performance
6. external mic jack, hot/cold shoe bracket
7. optical image stabilization
8. good battery life
Check out my full list of 10 Things To Look For In A Vlogging Camera to understand the importance of these camera features.
THE 7 BEST DSLR CAMERAS FOR VLOGGING
| Camera | Release Date | Sensor Size | Flip Screen | Mic Port | Price | |
|---|---|---|---|---|---|---|
| CanonEOS6D Mark II | 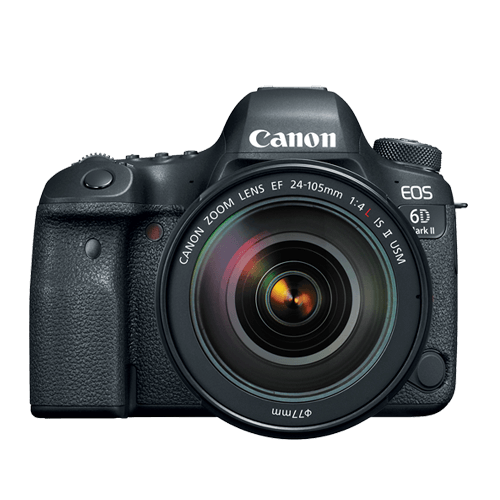 |
June2017 | Full frame(35.9 x 24 mm) | Fully Articulated | Yes | $$ |
| CanonEOS RebelSL2 | 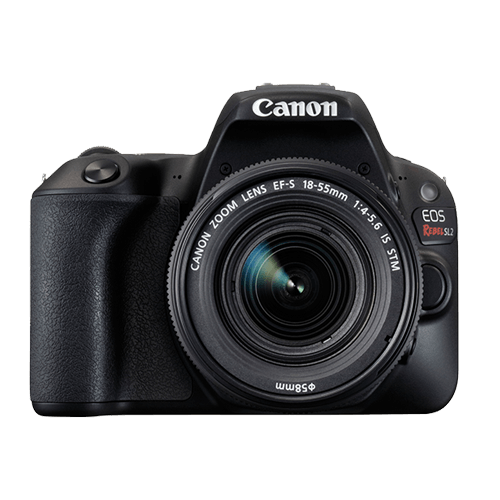 |
June2017 | APS-C(22.3 x 14.9 mm) | Fully Articulated | Yes | $ |
| CanonEOS RebelT7i | 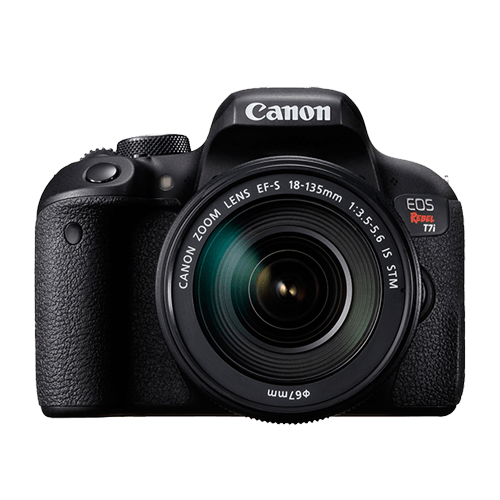 |
February2017 | APS-C(22.3 x 14.9 mm) | Fully Articulated | Yes | $- |
| CanonEOS77D | 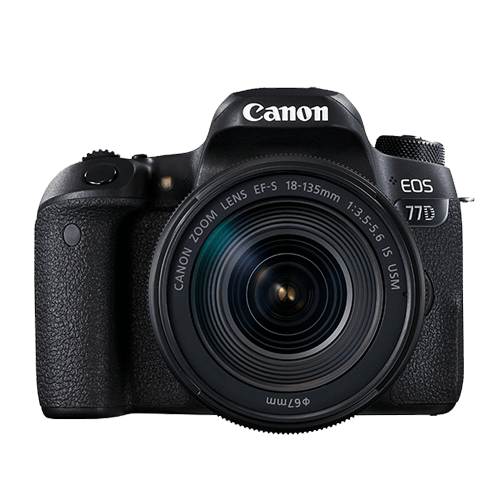 |
February2017 | APS-C(22.3 x 14.9 mm) | Fully Articulated | Yes | $- |
| NikonD5600 |  |
November2016 | APS-C(23.5 x 15.6 mm) | Fully Articulated | Yes | $- |
| CanonEOS5D Mark IV |  |
August2017 | Full frame(36 x 24 mm) | No | Yes | $$$ |
| CanonEOS80D |  |
February2016 | APS-C(22.5 x 15 mm) | Fully Articulated | Yes | $$ |
|
Best daily DSLR camera for vlogging: Canon EOS T7i The camera you use to record your daily vlogs doesn’t have to be the best camera on the market. It just has to offer enough options to make the process of making a vlog as smooth as it can possibly be. The T7i is not the most powerful DSLR camera out there, but its 24.2 MP APS-C CMOS sensor and a DIGIC 7 image processor are more than enough to meet the needs of most daily vloggers. You can record full HD 1080p videos at 60 fps and use this camera to create HDR and time-lapse movies. You can set the T7i’s ISO up as high as 51200, which is pretty good. The T7i’s dual pixel CMOS AF system makes sure that the camera focuses quickly and it helps you avoid creating video clips that are out focus. There’s also a built-in Wi-FI with an NFC feature that enables you to share your videos with a smartphone device you connect to the camera. PROS - Long battery life - Remarkable image quality at high ISO values CONS - Can’t record 4K videos - Viewfinder is tiny |
|---|---|
|
Best entry-level DSLR camera for vlogging: Canon EOS SL2 The Canon EOS SL2 was released just a year ago and it wins our 2018 vote for the best entry-level DSLR camera for vlogging. The SL2 packs a lot of features in a compact camera body. The camera only weighs 1 lb, which is considered light among most DSLR cameras. Many vloggers may enjoy the fact that they can hold up this light camera in front of themselves with more ease. Like a lot of entry-level DSLR cameras, the SL2 comes with an APS-C crop sensor. With ISO capabilities that can reach up to 51200, you’ll be able to film up to full HD 1080p videos at 60 fps, even under low light conditions. All recent Canon cameras perform very well when it comes to autofocus and the SL2 is no exception. It does, however, have fewer points of focus. The SL2 comes with a 9-point AF system. The SL2 also has a fully-articulated screen and a microphone jack. PROS - Microphone jack - Wi-Fi connectivity CONS - No 4K video support - Optical image stabilizer could be better |
|
Best mid-range DSLR camera for vlogging: Canon EOS 80D The Canon EOS 80D is the successor of the 70D which was at one time considered by many YouTubers the ultimate DSLR camera for vlogging. The 80D is a larger camera than the SL2, weighing 1.61 lbs. In its larger build, this camera additionally (compared to the SL2) packs a 45-point AF system, longer battery life, a headphone port, and it is environmentally sealed so you can shoot in tough conditions. This camera’s great performance in autofocusing makes it a great mid-range DSLR camera for vlogging. PROS - Feature-rich - Continuous AF feature performs beautifully while recording high-res videos CONS - Just one SD card slot - PC sync connection features could be better |
|
Best professional DSLR camera for vlogging: Canon EOS 6D Mark II There’s a lot of DSLR cameras that come with a fully-articulated screen and a microphone jack, but the Canon EOS 6D Mark II is actually the only one in the market that comes equipped with both of those, plus a full-frame sensor. It is its full-frame sensor that really sets this camera apart from the other vlogging DLSR cameras. Because of its full-frame sensor, this camera performs much better in low light conditions. With this larger sensor, you’ll also be able to capture footage that looks more cinematic with high-quality bokeh (more blur to your out-of-focus areas). The 6D Mark II also has great battery life compared to all the reviewed cameras above. Unfortunately, this camera does not shoot in 4K. PROS - ISO sensitivity goes up to 102400 - Amazing touchscreen controls CONS - No 4K video recording option - No USB 3.0 |
Want to compare even more cameras? Check out…
12 Best Vlogging Cameras
Top 11 Cheap Vlogging Cameras
8 Best Mirrorless Cameras For Vlogging
12 Best Vlogging Cameras With A Flip Screen
Shanoon Cox
Shanoon Cox is a writer and a lover of all things video.
Follow @Shanoon Cox
Shanoon Cox
Nov 01, 2022• Proven solutions
DSLR cameras are great for vloggers who are serious about filmmaking. But with so many DSLR cameras to choose from, it can be difficult to make a decision on one. We have come up with a list of seven of the best DSLR vlogging cameras to help you with your search.
WHAT TO LOOK FOR IN A VLOGGING CAMERA
1. Fully articulated screen (flip screen)
2. Good continual autofocus while recording video
3. Good focus priority through face recognition
4. Touch to focus
5. Good low-light performance
6. external mic jack, hot/cold shoe bracket
7. optical image stabilization
8. good battery life
Check out my full list of 10 Things To Look For In A Vlogging Camera to understand the importance of these camera features.
THE 7 BEST DSLR CAMERAS FOR VLOGGING
| Camera | Release Date | Sensor Size | Flip Screen | Mic Port | Price | |
|---|---|---|---|---|---|---|
| CanonEOS6D Mark II | |
June2017 | Full frame(35.9 x 24 mm) | Fully Articulated | Yes | $$ |
| CanonEOS RebelSL2 | |
June2017 | APS-C(22.3 x 14.9 mm) | Fully Articulated | Yes | $ |
| CanonEOS RebelT7i | |
February2017 | APS-C(22.3 x 14.9 mm) | Fully Articulated | Yes | $- |
| CanonEOS77D | |
February2017 | APS-C(22.3 x 14.9 mm) | Fully Articulated | Yes | $- |
| NikonD5600 | |
November2016 | APS-C(23.5 x 15.6 mm) | Fully Articulated | Yes | $- |
| CanonEOS5D Mark IV | |
August2017 | Full frame(36 x 24 mm) | No | Yes | $$$ |
| CanonEOS80D | |
February2016 | APS-C(22.5 x 15 mm) | Fully Articulated | Yes | $$ |
|
Best daily DSLR camera for vlogging: Canon EOS T7i The camera you use to record your daily vlogs doesn’t have to be the best camera on the market. It just has to offer enough options to make the process of making a vlog as smooth as it can possibly be. The T7i is not the most powerful DSLR camera out there, but its 24.2 MP APS-C CMOS sensor and a DIGIC 7 image processor are more than enough to meet the needs of most daily vloggers. You can record full HD 1080p videos at 60 fps and use this camera to create HDR and time-lapse movies. You can set the T7i’s ISO up as high as 51200, which is pretty good. The T7i’s dual pixel CMOS AF system makes sure that the camera focuses quickly and it helps you avoid creating video clips that are out focus. There’s also a built-in Wi-FI with an NFC feature that enables you to share your videos with a smartphone device you connect to the camera. PROS - Long battery life - Remarkable image quality at high ISO values CONS - Can’t record 4K videos - Viewfinder is tiny |
|---|---|
|
Best entry-level DSLR camera for vlogging: Canon EOS SL2 The Canon EOS SL2 was released just a year ago and it wins our 2018 vote for the best entry-level DSLR camera for vlogging. The SL2 packs a lot of features in a compact camera body. The camera only weighs 1 lb, which is considered light among most DSLR cameras. Many vloggers may enjoy the fact that they can hold up this light camera in front of themselves with more ease. Like a lot of entry-level DSLR cameras, the SL2 comes with an APS-C crop sensor. With ISO capabilities that can reach up to 51200, you’ll be able to film up to full HD 1080p videos at 60 fps, even under low light conditions. All recent Canon cameras perform very well when it comes to autofocus and the SL2 is no exception. It does, however, have fewer points of focus. The SL2 comes with a 9-point AF system. The SL2 also has a fully-articulated screen and a microphone jack. PROS - Microphone jack - Wi-Fi connectivity CONS - No 4K video support - Optical image stabilizer could be better |
|
Best mid-range DSLR camera for vlogging: Canon EOS 80D The Canon EOS 80D is the successor of the 70D which was at one time considered by many YouTubers the ultimate DSLR camera for vlogging. The 80D is a larger camera than the SL2, weighing 1.61 lbs. In its larger build, this camera additionally (compared to the SL2) packs a 45-point AF system, longer battery life, a headphone port, and it is environmentally sealed so you can shoot in tough conditions. This camera’s great performance in autofocusing makes it a great mid-range DSLR camera for vlogging. PROS - Feature-rich - Continuous AF feature performs beautifully while recording high-res videos CONS - Just one SD card slot - PC sync connection features could be better |
|
Best professional DSLR camera for vlogging: Canon EOS 6D Mark II There’s a lot of DSLR cameras that come with a fully-articulated screen and a microphone jack, but the Canon EOS 6D Mark II is actually the only one in the market that comes equipped with both of those, plus a full-frame sensor. It is its full-frame sensor that really sets this camera apart from the other vlogging DLSR cameras. Because of its full-frame sensor, this camera performs much better in low light conditions. With this larger sensor, you’ll also be able to capture footage that looks more cinematic with high-quality bokeh (more blur to your out-of-focus areas). The 6D Mark II also has great battery life compared to all the reviewed cameras above. Unfortunately, this camera does not shoot in 4K. PROS - ISO sensitivity goes up to 102400 - Amazing touchscreen controls CONS - No 4K video recording option - No USB 3.0 |
Want to compare even more cameras? Check out…
12 Best Vlogging Cameras
Top 11 Cheap Vlogging Cameras
8 Best Mirrorless Cameras For Vlogging
12 Best Vlogging Cameras With A Flip Screen
Shanoon Cox
Shanoon Cox is a writer and a lover of all things video.
Follow @Shanoon Cox
Elevating Visual Experience: YouTube’s Quality Boosting Guide
How to Use YouTube Enhancements

Richard Bennett
Mar 27, 2024• Proven solutions
YouTube has integrated a free video editor to facilitate the work of YouTubers and allow them to process their videos prior to uploading. Although nobody can claim these features can live up to the sophisticated features of the professional video editors, YouTube enhancements are useful and cool which offer a simple way to improve the quality of the videos and do not require any technical knowledge on your behalf.
If you are looking for a more professional approach in video editing, you should try out Wondershare Filmora(for Windows and Mac) . This is an exceptionally versatile and powerful tool, which will allow you to gain full control over the videos you wish to edit. It is very easy to use, and it will open up a new world of potentials in video editing. There is a free trial that you can benefit from, so as to see if Filmora meets your criteria in full prior to your purchase.
 Download Mac Version ](https://tools.techidaily.com/wondershare/filmora/download/ )
- Part 1: How to Use YouTube Enhancements
- Part 2: How to Use Wondershare Filmora to Improve Video Qualtiy
How to Use YouTube Enhancements
First of all, you need to locate YouTube Enhancements. As soon as you have logged into your YouTube channel, you should go to the Video Manager. There you choose Edit and YouTube Enhancements, and you are ready to go. There are three distinctive categories that you can use, in order to edit your video. You can choose among Quick Fix, Filters, and Blurring Effects. As you can see, there are features that pretty much cover the basics in video editing under these categories.

Quick Fix promptly addresses issues that have to do with the contrast and saturation, as well as offers the ability to rotate or trim the video. There is nothing sophisticated there, but it is a really easy and practical solution for those who do not wish to waste time editing. It is cool that you can also stabilize your video or allow for Slow Motion or Timelapse effects. This is definitely an improvement for YouTube videos.

Filters feel a lot like those used on Instagram. They are neat and cool, of course, covering many of the demands for sophisticated editing. You can find filters like Lomo-ish, Old Fashioned, Heat Map, Cartoon, Cross Process, Festival and much more on YouTube Enhancements. You can also adjust the lighting and colors, so as to fine-tune your video.

Blurring Effects are perhaps the most advanced on YouTube Enhancements, and they provide the opportunity to maintain your privacy, by removing people’s distinctive details from the video and blurring them or putting mosaic on their face. With this tool, you can also blur objects on the video, which can increase your privacy even more. For instance, you can blur the plates of your car or your address. Last, there are some hilarious effects that you should check out.

Once you are done, there is an option to preview the video that you have edited. In this way, you will know if the editions that you have made are sufficient for you or not. Finally, you can choose either to save the video as a new file or revert to the original video. These options are welcome, as sometimes you just do not get what you have expected and you do not want to replace the video you have already uploaded.
How to Use Wondershare Filmora to improve YouTube videos
These are the steps that you need to follow, so as to proceed with high-quality video editing on Filmora:
- Open Wordershare Filmora
- Choose if you want 16:9 or 4:3 aspect ratio
- Tap Import so as to upload the files
- Drag and drop them, in order to place them in the right order

- Click Edit and adjust the settings (rotation, contrast, saturation, brightness, hue, auto de-noise and speed)

- Click OK, and you are done with the improvement of Video Quality
If you wish to fine-tune the images of the videos and place special filters, you can go ahead as follows:
- Tap the Effect button
- Drag the effect you want to use on the timeline (you can choose from a wide variety of effects, including Bokeh and Light Leaks, Old Film, etc.)

After having finished with the video editing process, you can preview the video and see if it is of acceptable quality standards. You can do that by clicking on the Play button. Then you can click on the Create button and save the video where you want, in the format of your choosing. It is also possible for you to burn the video on a DVD or share it online using YouTube or Facebook.

Download Mac Version ](https://tools.techidaily.com/wondershare/filmora/download/ )
Richard Bennett
Richard Bennett is a writer and a lover of all things video.
Follow @Richard Bennett
Richard Bennett
Mar 27, 2024• Proven solutions
YouTube has integrated a free video editor to facilitate the work of YouTubers and allow them to process their videos prior to uploading. Although nobody can claim these features can live up to the sophisticated features of the professional video editors, YouTube enhancements are useful and cool which offer a simple way to improve the quality of the videos and do not require any technical knowledge on your behalf.
If you are looking for a more professional approach in video editing, you should try out Wondershare Filmora(for Windows and Mac) . This is an exceptionally versatile and powerful tool, which will allow you to gain full control over the videos you wish to edit. It is very easy to use, and it will open up a new world of potentials in video editing. There is a free trial that you can benefit from, so as to see if Filmora meets your criteria in full prior to your purchase.
Download Mac Version ](https://tools.techidaily.com/wondershare/filmora/download/ )
- Part 1: How to Use YouTube Enhancements
- Part 2: How to Use Wondershare Filmora to Improve Video Qualtiy
How to Use YouTube Enhancements
First of all, you need to locate YouTube Enhancements. As soon as you have logged into your YouTube channel, you should go to the Video Manager. There you choose Edit and YouTube Enhancements, and you are ready to go. There are three distinctive categories that you can use, in order to edit your video. You can choose among Quick Fix, Filters, and Blurring Effects. As you can see, there are features that pretty much cover the basics in video editing under these categories.
Quick Fix promptly addresses issues that have to do with the contrast and saturation, as well as offers the ability to rotate or trim the video. There is nothing sophisticated there, but it is a really easy and practical solution for those who do not wish to waste time editing. It is cool that you can also stabilize your video or allow for Slow Motion or Timelapse effects. This is definitely an improvement for YouTube videos.
Filters feel a lot like those used on Instagram. They are neat and cool, of course, covering many of the demands for sophisticated editing. You can find filters like Lomo-ish, Old Fashioned, Heat Map, Cartoon, Cross Process, Festival and much more on YouTube Enhancements. You can also adjust the lighting and colors, so as to fine-tune your video.
Blurring Effects are perhaps the most advanced on YouTube Enhancements, and they provide the opportunity to maintain your privacy, by removing people’s distinctive details from the video and blurring them or putting mosaic on their face. With this tool, you can also blur objects on the video, which can increase your privacy even more. For instance, you can blur the plates of your car or your address. Last, there are some hilarious effects that you should check out.
Once you are done, there is an option to preview the video that you have edited. In this way, you will know if the editions that you have made are sufficient for you or not. Finally, you can choose either to save the video as a new file or revert to the original video. These options are welcome, as sometimes you just do not get what you have expected and you do not want to replace the video you have already uploaded.
How to Use Wondershare Filmora to improve YouTube videos
These are the steps that you need to follow, so as to proceed with high-quality video editing on Filmora:
- Open Wordershare Filmora
- Choose if you want 16:9 or 4:3 aspect ratio
- Tap Import so as to upload the files
- Drag and drop them, in order to place them in the right order
- Click Edit and adjust the settings (rotation, contrast, saturation, brightness, hue, auto de-noise and speed)
- Click OK, and you are done with the improvement of Video Quality
If you wish to fine-tune the images of the videos and place special filters, you can go ahead as follows:
- Tap the Effect button
- Drag the effect you want to use on the timeline (you can choose from a wide variety of effects, including Bokeh and Light Leaks, Old Film, etc.)
After having finished with the video editing process, you can preview the video and see if it is of acceptable quality standards. You can do that by clicking on the Play button. Then you can click on the Create button and save the video where you want, in the format of your choosing. It is also possible for you to burn the video on a DVD or share it online using YouTube or Facebook.
Download Mac Version ](https://tools.techidaily.com/wondershare/filmora/download/ )
Richard Bennett
Richard Bennett is a writer and a lover of all things video.
Follow @Richard Bennett
- Title: "[New] Pro-Level 7 DSLRs That Transform Your Digital Storytelling"
- Author: Joseph
- Created at : 2024-05-31 13:40:58
- Updated at : 2024-06-01 13:40:58
- Link: https://youtube-stream.techidaily.com/new-pro-level-7-dslrs-that-transform-your-digital-storytelling/
- License: This work is licensed under CC BY-NC-SA 4.0.
