![[New] Improve Video Clarity with Simplified Caption Steps](https://thmb.techidaily.com/4f39ebc55802b5fd29e1ead6db3dfc5174731a378a897f2615b5059637faad66.png)
[New] Improve Video Clarity with Simplified Caption Steps
Improve Video Clarity with Simplified Caption Steps
How To Add Captions to YouTube Videos

Richard Bennett
Mar 27, 2024• Proven solutions
By captioning your YouTube videos you help to make them accessible to more potential viewers. Subtitles are useful to viewers who have hearing impairments, whose first language is different from yours, or who are unable to watch your video with sound. Closed captioning can also be useful for you as a YouTuber because it helps with your SEO, or search engine optimization. Practicing better SEO can get your videos ranked higher in search results. Google and YouTube both index subtitles and transcripts much like they do your video’s description, unless you use automated captions.
This article will first explain how you can turn on subtitles for the videos you watch and then walk you through adding captions to your own videos.
How To Turn On Captions on YouTube
In order for you to be able to view subtitles for a YouTube video the uploader of the video will need to have added them, unless you change your account settings to display automatic captions.

To toggle subtitles on and off click on the Closed Captioning icon in the bottom right of your video player.
If the creator of the video has not added captions then you can enable automatic captions by going into your Account Settings and selecting Playback. Check the box next to Always Show Captions, and then check Show Automatic Captions by Speech Recognition. These captions may be flawed, but you will still be able to see the more accurate user submitted captions on videos that have them. The Always Show Captions feature may be useful not only to the hearing impaired, but to users who do not speak the same language as the video producer.
If you want to change the language of the subtitles click on the settings icon (the one that looks like a gear) next to the closed captioning icon and choose your language next to Subtitles/CC . If the language you want is not there select Auto-Translate and then pick a language. Google Translate will be used to generate subtitles in your chosen language.
Adding YouTube Captions in 4 Steps
1. Go to Video Manager in your Creator Studio and then look at your videos. Decide which one you want to add captions to.
2. Click on the drop-down menu next to the video you want to add captions to and choose Subtitles and CC.
3. Select Add New Subtitles or CC.
4. Choose whether to create your captions, upload a file that has them, transcribe your video, use automatic captioning, or use captioning software.
Create Subtitles or Closed Captions will allow you to create your subtitles on YouTube.
Upload A File allows you to upload a pre-made subtitle file from your computer. Supported file types include SubRip (.srt) and SubViewer (.sbv). You cannot use a word or PDF document for your subtitles.
Transcribe and Set Timings is where you can type a transcript of your video and set timings to sync it to your video. This differs from Create Subtitles or Closed Captions in that your transcript is all typed in to one text field.
Use Automatic Captioning will automatically use speech recognition technology to create captions. You can edit these auto-generated captions later if there are mistakes.
Use Captioning Software or Services is what you choose if you want to use a program or service to create the subtitles for your video.
The easiest way to add subtitles to your videos is to use Automatic Captioning. However, Automatic Captioning is imperfect and may result in your viewers getting a sloppy, skewed, interpretation of your video. Automatic captions are also not indexed by YouTube and Google the way subtitles you create or upload are. This means that they will not have any value to your SEO strategy. If you do not input your own captions or transcript you are missing out on an opportunity for better search engine rankings. Automatic Captions are great if you do not have time to input subtitles and need a temporary solution, though.
Richard Bennett
Richard Bennett is a writer and a lover of all things video.
Follow @Richard Bennett
Richard Bennett
Mar 27, 2024• Proven solutions
By captioning your YouTube videos you help to make them accessible to more potential viewers. Subtitles are useful to viewers who have hearing impairments, whose first language is different from yours, or who are unable to watch your video with sound. Closed captioning can also be useful for you as a YouTuber because it helps with your SEO, or search engine optimization. Practicing better SEO can get your videos ranked higher in search results. Google and YouTube both index subtitles and transcripts much like they do your video’s description, unless you use automated captions.
This article will first explain how you can turn on subtitles for the videos you watch and then walk you through adding captions to your own videos.
How To Turn On Captions on YouTube
In order for you to be able to view subtitles for a YouTube video the uploader of the video will need to have added them, unless you change your account settings to display automatic captions.
To toggle subtitles on and off click on the Closed Captioning icon in the bottom right of your video player.
If the creator of the video has not added captions then you can enable automatic captions by going into your Account Settings and selecting Playback. Check the box next to Always Show Captions, and then check Show Automatic Captions by Speech Recognition. These captions may be flawed, but you will still be able to see the more accurate user submitted captions on videos that have them. The Always Show Captions feature may be useful not only to the hearing impaired, but to users who do not speak the same language as the video producer.
If you want to change the language of the subtitles click on the settings icon (the one that looks like a gear) next to the closed captioning icon and choose your language next to Subtitles/CC . If the language you want is not there select Auto-Translate and then pick a language. Google Translate will be used to generate subtitles in your chosen language.
Adding YouTube Captions in 4 Steps
1. Go to Video Manager in your Creator Studio and then look at your videos. Decide which one you want to add captions to.
2. Click on the drop-down menu next to the video you want to add captions to and choose Subtitles and CC.
3. Select Add New Subtitles or CC.
4. Choose whether to create your captions, upload a file that has them, transcribe your video, use automatic captioning, or use captioning software.
Create Subtitles or Closed Captions will allow you to create your subtitles on YouTube.
Upload A File allows you to upload a pre-made subtitle file from your computer. Supported file types include SubRip (.srt) and SubViewer (.sbv). You cannot use a word or PDF document for your subtitles.
Transcribe and Set Timings is where you can type a transcript of your video and set timings to sync it to your video. This differs from Create Subtitles or Closed Captions in that your transcript is all typed in to one text field.
Use Automatic Captioning will automatically use speech recognition technology to create captions. You can edit these auto-generated captions later if there are mistakes.
Use Captioning Software or Services is what you choose if you want to use a program or service to create the subtitles for your video.
The easiest way to add subtitles to your videos is to use Automatic Captioning. However, Automatic Captioning is imperfect and may result in your viewers getting a sloppy, skewed, interpretation of your video. Automatic captions are also not indexed by YouTube and Google the way subtitles you create or upload are. This means that they will not have any value to your SEO strategy. If you do not input your own captions or transcript you are missing out on an opportunity for better search engine rankings. Automatic Captions are great if you do not have time to input subtitles and need a temporary solution, though.
Richard Bennett
Richard Bennett is a writer and a lover of all things video.
Follow @Richard Bennett
YouTube’s Creative Commons License Explained Simply
What’s YouTube Creative Commons and How to Use it to Make Video
Richard Bennett
Mar 27, 2024• Proven solutions
Creative Commons is a non-profit organization internationally active in providing free licenses that creators can use in order to make their work available to the public. With the creative commons (CC) licenses, the creator has basically given others permission in order to use their work but under specific conditions.
Whenever a work is created, an article or a photograph was taken, there is a copyright that protects it so that it cannot be used in certain ways. On the other hand, the CC licenses allow the creator to choose how they would want others to use their creativity.
If you are new to the video editing world, and want to make your YouTube videos more beautiful, here I recommend an easy-to-use video editing software - Wondershare Filmora which not only allows you cut, crop, rotate, and split your videos in minutes, but also simplify the advanced video editing like green screen effect and PIP. You can also find over 300 video effects
 Download Mac Version ](https://tools.techidaily.com/wondershare/filmora/download/ )
- Part 1: What is YouTube Commons
- Part 2: How to Find Creative Commons (CC) Licensed Videos
- Part 3: Can You Download Creative Commons-licensed YouTube videos to Edit
- Part 4: How to Use YouTube Creative Commons to Make Videos
Part 1: What is YouTube Creative Commons
YouTube utilizes CC licenses in its content. With it, the content creators can grant others to use their work as sort of a standard. YouTube users can use the Creative Commons CC BY license in marking their videos. When they use the CC By license, the system will generate a signature to the video automatically. This indicates that you are using Creative Commons content and will show the source video’s titles below the video player. The creator retains the copyright of the video while others can reuse your video but under the terms of the license.
You May Also Like: Standard YouTube License vs. Creative Commons>>
Part 2: How to Find Creative Commons (CC) Licensed Videos
If you are looking for Creative Commons licensed videos, there are different ways or rather, different websites you can go to. These websites are the best place you can find CC-licensed videos and ensure that what you are sharing is legal.
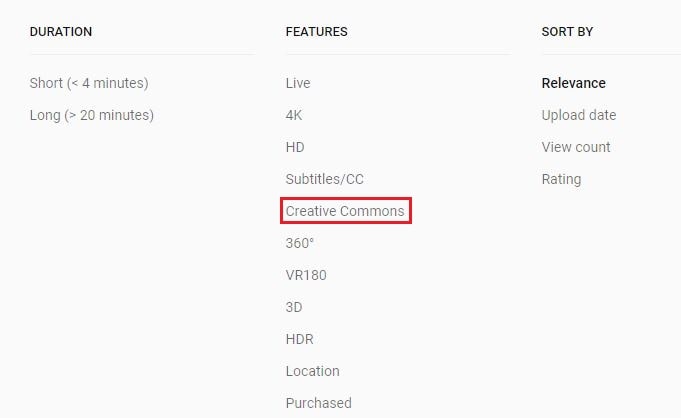
- **YouTube **– YouTube is one of the most common websites you can find CC licensed videos. The easy way to search for CC licensed videos on YouTube is simply to search ‘creative commons’ to the end of the search term you are going for.
- Vimeo – This site offers different licenses complete with an explanation for each in the right side of the main page. Underneath each license, you can find a link to browse all the videos of the specific type of license you chose. You can also search using the Advance Option to find the right video you are looking for.
- SpinXpress – Lets you search for CC licensed videos using just a search term and the kind of Creative Commons license you are looking for. As long as it’s one of the sources they use, you can also specify the media source of the video.
Part 3: Can You Download Creative Commons-licensed YouTube videos to Edit
Many people are asking that can I edit creative commons videos? Well, this is a tricky question because it really depends on what creative commons license is used. If the video is CC-BY, it is no doubt that you can download and edit it. CC-BY-SA means you can edit video under the condition of you also allow others to edit it after you upload it to YouTube. If it is non-commercial, you are definitely not allowed to edit it.
Part 4: How to Use YouTube Creative Commons to Make Videos
YouTube Creative Commons provides you a simple way of using creative works to make your own videos. All you simply need is the YouTube Video Editor and the expanded library of Creative Commons videos o YouTube. There you can choose what videos to edit and then incorporate in your own projects. To find what videos to use, you simply have to search in the YouTube search bar from YouTube Video Editor.
Visit youtube.com/editor and then select CC tab to get started. In order to mark your video with CC license, select the ‘Creative Commons Attribution license’ on the Video Description page or upload page. When using a Creative Commons content to incorporate in your video, you will see the source title of the videos underneath your video player. With that a well, any or all of the videos you used with Creative Commons license, others will be able to share and remix your own creation as long as they give credit for your work.
Richard Bennett
Richard Bennett is a writer and a lover of all things video.
Follow @Richard Bennett
Richard Bennett
Mar 27, 2024• Proven solutions
Creative Commons is a non-profit organization internationally active in providing free licenses that creators can use in order to make their work available to the public. With the creative commons (CC) licenses, the creator has basically given others permission in order to use their work but under specific conditions.
Whenever a work is created, an article or a photograph was taken, there is a copyright that protects it so that it cannot be used in certain ways. On the other hand, the CC licenses allow the creator to choose how they would want others to use their creativity.
If you are new to the video editing world, and want to make your YouTube videos more beautiful, here I recommend an easy-to-use video editing software - Wondershare Filmora which not only allows you cut, crop, rotate, and split your videos in minutes, but also simplify the advanced video editing like green screen effect and PIP. You can also find over 300 video effects
Download Mac Version ](https://tools.techidaily.com/wondershare/filmora/download/ )
- Part 1: What is YouTube Commons
- Part 2: How to Find Creative Commons (CC) Licensed Videos
- Part 3: Can You Download Creative Commons-licensed YouTube videos to Edit
- Part 4: How to Use YouTube Creative Commons to Make Videos
Part 1: What is YouTube Creative Commons
YouTube utilizes CC licenses in its content. With it, the content creators can grant others to use their work as sort of a standard. YouTube users can use the Creative Commons CC BY license in marking their videos. When they use the CC By license, the system will generate a signature to the video automatically. This indicates that you are using Creative Commons content and will show the source video’s titles below the video player. The creator retains the copyright of the video while others can reuse your video but under the terms of the license.
You May Also Like: Standard YouTube License vs. Creative Commons>>
Part 2: How to Find Creative Commons (CC) Licensed Videos
If you are looking for Creative Commons licensed videos, there are different ways or rather, different websites you can go to. These websites are the best place you can find CC-licensed videos and ensure that what you are sharing is legal.
- **YouTube **– YouTube is one of the most common websites you can find CC licensed videos. The easy way to search for CC licensed videos on YouTube is simply to search ‘creative commons’ to the end of the search term you are going for.
- Vimeo – This site offers different licenses complete with an explanation for each in the right side of the main page. Underneath each license, you can find a link to browse all the videos of the specific type of license you chose. You can also search using the Advance Option to find the right video you are looking for.
- SpinXpress – Lets you search for CC licensed videos using just a search term and the kind of Creative Commons license you are looking for. As long as it’s one of the sources they use, you can also specify the media source of the video.
Part 3: Can You Download Creative Commons-licensed YouTube videos to Edit
Many people are asking that can I edit creative commons videos? Well, this is a tricky question because it really depends on what creative commons license is used. If the video is CC-BY, it is no doubt that you can download and edit it. CC-BY-SA means you can edit video under the condition of you also allow others to edit it after you upload it to YouTube. If it is non-commercial, you are definitely not allowed to edit it.
Part 4: How to Use YouTube Creative Commons to Make Videos
YouTube Creative Commons provides you a simple way of using creative works to make your own videos. All you simply need is the YouTube Video Editor and the expanded library of Creative Commons videos o YouTube. There you can choose what videos to edit and then incorporate in your own projects. To find what videos to use, you simply have to search in the YouTube search bar from YouTube Video Editor.
Visit youtube.com/editor and then select CC tab to get started. In order to mark your video with CC license, select the ‘Creative Commons Attribution license’ on the Video Description page or upload page. When using a Creative Commons content to incorporate in your video, you will see the source title of the videos underneath your video player. With that a well, any or all of the videos you used with Creative Commons license, others will be able to share and remix your own creation as long as they give credit for your work.
Richard Bennett
Richard Bennett is a writer and a lover of all things video.
Follow @Richard Bennett
Also read:
- [New] 2024 Approved Top Tools for Effortless Recording of Desktop Screens on Windows 10
- [New] Embark on a Textual Adventure 14 Spectacular Examples
- [Updated] Brighten Up Your Gaming Setup Eliminate Black Screens with OBS for 2024
- [Updated] Digital Broadcasting Battle Comparing Facebook LIVE, YouTube Live, & Twitter Spaces for 2024
- 2024 Approved How to Edit YouTube Channel Description
- 2024 Approved Outstanding Films Not on Mainstream Lists
- 2024 Approved Splitting Screen Techniques for Engaging YouTube Content
- Best Premium H265 Convertors : Optimized for Desktop and Mobile Use
- Bypass iCloud Activation Lock with IMEI Code On your iPhone 14 Pro
- Comprehensive Solutions for Tackling Overloaded Hard Drive Space on Windows 11
- In 2024, Follow the Flow of Forum Fancies
- In 2024, Leading Spots for Advertising on YouTube Videos
- In 2024, Ultimate FreeFire Tag Collection Enhance Your YouTube Channels
- New Multiple Ways How To Remove iCloud Activation Lock On your iPhone 12 Pro
- Top IMEI Unlokers for Your Poco C55 Phone
- Title: [New] Improve Video Clarity with Simplified Caption Steps
- Author: Joseph
- Created at : 2025-02-06 20:01:57
- Updated at : 2025-02-10 19:38:39
- Link: https://youtube-stream.techidaily.com/new-improve-video-clarity-with-simplified-caption-steps/
- License: This work is licensed under CC BY-NC-SA 4.0.