
:max_bytes(150000):strip_icc()/unnamed2-60f231b72c19491683c2166c9285b34d.jpg)
Mastering YouTube Uploads in Adobe Premiere for 2024
Mastering YouTube Uploads in Adobe Premiere
How Do I Use Adobe Premiere To Upload YouTube Videos?

Benjamin Arango
Mar 27, 2024• Proven solutions
Whilst getting the editing and post work just right on any project is what we all aim for, the ultimate aim is for other people to see our creations, and the most popular way to achieve that is YouTube . Chances are, if you are producing video, you will be putting some of it on YouTube at some point, so let’s have a look at the most efficient way to get your work from Premiere to YouTube.
Check if your computer meet the Premiere System Requirements >>
This is a basic tutorial about Adobe Premiere, professional video editing software. However, if video editing is new to you, consider Wondershare Filmora , which is a powerful but easy-to-use tool for users just starting out. Download the free trial version below.
 Download Mac Version ](https://tools.techidaily.com/wondershare/filmora/download/ )
How Do I Use Adobe Premiere To Upload YouTube Videos
1. Master Copy
Before exporting your work, it is important to first create a master copy of your project that is ‘as is’, in that it reflects the settings and codecs used in the original footage.
To do this you simply select the sequence within the Timeline or in the Project Panel, and go through the menu tree via File > Export > Media to bring up the export dialogue.

To create your Master Copy, simply select the first option of ‘Match Sequence Settings’, this exports a file that is of the same quality as your original footage, essentially producing a digital copy of the work for archiving before anything else is done.
With you work safe and secure it is now time to look at ensuring the project is suitable for YouTube. With our sequence selected in the Timeline or Project Panel again, we go through the same File > Export > Media path to bring up the media export dialogue as before.
2. Container
The first option we have to consider is the file format that our finished video needs to be in. Here you should refer to YouTube for its guidelines, whilst they do accept a number of file formats, digging through the YouTube help system to find the settings for highest quality we find that they recommend MPEG4 as the container, using the codec.

We can also see further recommended settings in this screenshot that will be covered later.
The good news is that Premiere automatically selects the appropriate container for us when we select our codec, however it is worth knowing the file type YouTube is expecting just to check yourself.
3. Video Codec
So having established that YouTube recommends the MPEG4 container using the codec, the first option we need to look for in the media export dialogue is to select the appropriate Format.
This is the first drop down in the dialogue box, and in this case we simply select from the list.

Once you select you can check the ‘output name’ field and see that premiere is automatically set the output file to .mp4 which is exactly what we need.
4. Preset
The next field we come to is the ‘Preset’ dropdown menu. This is a major help to most people, as Adobe have very kindly included large numbers of presets to quickly adapt video settings to suit specific uses. They vary depending on the exact version of Premiere you are using, and each format type does have its own list of presets, as we can see has a large number for YouTube, but also has many presets for specific devices (presets for iPad, Kindle, Nook, various other tablets and phones, Vimeo and a host of others) to make getting the right settings that bit easier for us.

It is important here to select the correct preset from the various YouTube options. You want to select the resolution and frame rate that match your source file, for the best results. So, if your source file is 1080p with a frame rate of 29.97 fps then that is the YouTube setting you would select.
Once a preset is selected a summary of the settings is displayed below, normally these will be well suited to your project, however you can fine tune anything you wish by selecting the video or audio tabs at the bottom which give you the chance to adjust each parameter individually. If you do this, you can save these changes as a custom preset by clicking the button at the side of the Preset dropdown menu and simply use it on later projects by selecting it from the list the same as any other, a great time saving tool.

5. Rendering
Once you are satisfied with the settings, either from the Preset alone or if you have adjusted anything yourself, you are nearly ready to render the file and export it.
For YouTube it is recommended you select the ‘Use Maximum Render Quality’ option to maintain the best output you can, it does add time to the render process but if you value the quality of your work it is worthwhile.
Finally you can choose a suitable filename and the destination of the file by clicking on the ‘Output Name’ field.
I normally use a filename that includes the destination medium so I can differentiate between different versions of a project and know which one to upload where, in this case I include ‘youtube’, but if I were planning on uploading clips of the project to vimeo as well for instance there may be a cut of the project with ‘vimeo’ in the name too. The destination is personal preference, because I do use filenames to differentiate versions I can put the various iterations into a single project file, others have folder structures for each type of file , so all YouTube output goes into a single folder and so on, how you organize is entirely dependent on how you work.

Once those are selected clicking ‘Export’ starts the rendering process, and eventually (how long depends on the speed of your computer and the size and type of file involved), you will end up with your YouTube optimized video in the location you chose.
Here I created 4 key frames that let the ‘Animation’ object move around the ‘Demo Text’ Object and finally come to rest below it. Whilst this type of effect does look very effective on screen, such is the ease of use of After Effects it really is just a few minutes work to achieve.
Learn more details about How to add text in Premiere >>
6. Uploading
Now you have your file, the next step is to go to your YouTube account and log in if you need to.
On the top of your homepage on the right is the upload button, selecting that brings up the select file menu as below.

You can either drag your file into the window or click on it to open a standard file browser to locate the desired file, click and the upload will begin. The dropdown underneath allows you to set the video as Public, Unlisted or Private. You can change this at any time once the video is uploaded as well.
This opens the upload progress window, where you can add in a name, description and tags as well as add the video to a playlist or adjust the privacy settings as the video is uploading.

Once the upload as finished, you can do final adjustments to settings and choose a thumbnail for the video. The final step is to click the ‘Publish’ button and your video will be processed and go live.

Benjamin Arango
Benjamin Arango is a writer and a lover of all things video.
Follow @Benjamin Arango
Benjamin Arango
Mar 27, 2024• Proven solutions
Whilst getting the editing and post work just right on any project is what we all aim for, the ultimate aim is for other people to see our creations, and the most popular way to achieve that is YouTube . Chances are, if you are producing video, you will be putting some of it on YouTube at some point, so let’s have a look at the most efficient way to get your work from Premiere to YouTube.
Check if your computer meet the Premiere System Requirements >>
This is a basic tutorial about Adobe Premiere, professional video editing software. However, if video editing is new to you, consider Wondershare Filmora , which is a powerful but easy-to-use tool for users just starting out. Download the free trial version below.
Download Mac Version ](https://tools.techidaily.com/wondershare/filmora/download/ )
How Do I Use Adobe Premiere To Upload YouTube Videos
1. Master Copy
Before exporting your work, it is important to first create a master copy of your project that is ‘as is’, in that it reflects the settings and codecs used in the original footage.
To do this you simply select the sequence within the Timeline or in the Project Panel, and go through the menu tree via File > Export > Media to bring up the export dialogue.
To create your Master Copy, simply select the first option of ‘Match Sequence Settings’, this exports a file that is of the same quality as your original footage, essentially producing a digital copy of the work for archiving before anything else is done.
With you work safe and secure it is now time to look at ensuring the project is suitable for YouTube. With our sequence selected in the Timeline or Project Panel again, we go through the same File > Export > Media path to bring up the media export dialogue as before.
2. Container
The first option we have to consider is the file format that our finished video needs to be in. Here you should refer to YouTube for its guidelines, whilst they do accept a number of file formats, digging through the YouTube help system to find the settings for highest quality we find that they recommend MPEG4 as the container, using the codec.
We can also see further recommended settings in this screenshot that will be covered later.
The good news is that Premiere automatically selects the appropriate container for us when we select our codec, however it is worth knowing the file type YouTube is expecting just to check yourself.
3. Video Codec
So having established that YouTube recommends the MPEG4 container using the codec, the first option we need to look for in the media export dialogue is to select the appropriate Format.
This is the first drop down in the dialogue box, and in this case we simply select from the list.
Once you select you can check the ‘output name’ field and see that premiere is automatically set the output file to .mp4 which is exactly what we need.
4. Preset
The next field we come to is the ‘Preset’ dropdown menu. This is a major help to most people, as Adobe have very kindly included large numbers of presets to quickly adapt video settings to suit specific uses. They vary depending on the exact version of Premiere you are using, and each format type does have its own list of presets, as we can see has a large number for YouTube, but also has many presets for specific devices (presets for iPad, Kindle, Nook, various other tablets and phones, Vimeo and a host of others) to make getting the right settings that bit easier for us.
It is important here to select the correct preset from the various YouTube options. You want to select the resolution and frame rate that match your source file, for the best results. So, if your source file is 1080p with a frame rate of 29.97 fps then that is the YouTube setting you would select.
Once a preset is selected a summary of the settings is displayed below, normally these will be well suited to your project, however you can fine tune anything you wish by selecting the video or audio tabs at the bottom which give you the chance to adjust each parameter individually. If you do this, you can save these changes as a custom preset by clicking the button at the side of the Preset dropdown menu and simply use it on later projects by selecting it from the list the same as any other, a great time saving tool.
5. Rendering
Once you are satisfied with the settings, either from the Preset alone or if you have adjusted anything yourself, you are nearly ready to render the file and export it.
For YouTube it is recommended you select the ‘Use Maximum Render Quality’ option to maintain the best output you can, it does add time to the render process but if you value the quality of your work it is worthwhile.
Finally you can choose a suitable filename and the destination of the file by clicking on the ‘Output Name’ field.
I normally use a filename that includes the destination medium so I can differentiate between different versions of a project and know which one to upload where, in this case I include ‘youtube’, but if I were planning on uploading clips of the project to vimeo as well for instance there may be a cut of the project with ‘vimeo’ in the name too. The destination is personal preference, because I do use filenames to differentiate versions I can put the various iterations into a single project file, others have folder structures for each type of file , so all YouTube output goes into a single folder and so on, how you organize is entirely dependent on how you work.
Once those are selected clicking ‘Export’ starts the rendering process, and eventually (how long depends on the speed of your computer and the size and type of file involved), you will end up with your YouTube optimized video in the location you chose.
Here I created 4 key frames that let the ‘Animation’ object move around the ‘Demo Text’ Object and finally come to rest below it. Whilst this type of effect does look very effective on screen, such is the ease of use of After Effects it really is just a few minutes work to achieve.
Learn more details about How to add text in Premiere >>
6. Uploading
Now you have your file, the next step is to go to your YouTube account and log in if you need to.
On the top of your homepage on the right is the upload button, selecting that brings up the select file menu as below.
You can either drag your file into the window or click on it to open a standard file browser to locate the desired file, click and the upload will begin. The dropdown underneath allows you to set the video as Public, Unlisted or Private. You can change this at any time once the video is uploaded as well.
This opens the upload progress window, where you can add in a name, description and tags as well as add the video to a playlist or adjust the privacy settings as the video is uploading.
Once the upload as finished, you can do final adjustments to settings and choose a thumbnail for the video. The final step is to click the ‘Publish’ button and your video will be processed and go live.
Benjamin Arango
Benjamin Arango is a writer and a lover of all things video.
Follow @Benjamin Arango
Toddler Tycoon Turned Teen Titan: The Income of a Kid Star
If you are curious about Ryan Kaji’s net worth and what led to it, you are at the right place. YouTube as a platform is accessible to a vast global audience, and anyone, regardless of age or lifestyle, can earn high amounts with the right type of content. Ryan Kaji is one such individual who has achieved a lot in his short life with his YouTube channel, Ryan’s World.
Read ahead to get deep knowledge of how much does ryan’s world make, career graph, and how you can emulate a similar path on YouTube.

Part 1: The Biography Box on Ryan Kaji
Before going into this in detail, here is an overall summary of Ryan Kaji and his income structure for a quick look.
| Name | Ryan Kaji |
|---|---|
| Real Name | Ryan Naruto Nguyen |
| Net Worth (as of 2022) | USD 35 million |
| Monthly Income/Salary (approx.) | USD 1.11 million |
| Yearly Income (approx.) | USD 16.66 million |
| Age | 11 years |
| Gender | Male |
| Height | 1.28 m or 128 cm or 4 ft 2 inches |
| Nationality | Asian-American |
| Profession | YouTuber, Influencer |
| YouTube Channel | Ryan’s World |
| Awards and Recognition | · Ranked No. 23 on Top Creators List, Forbes 2022.· Ryan’s World ranks as one of the top 100 YouTube channels. |
Now that we know the primary data about Ryan, read on to learn about how he became famous on YouTube and his overall income, in more detail.
Part 2: Ryan Kaji YouTube Earning and Stats
After seeing the notes about Ryan’s World’s yearly income and other points, you must wonder how it has increased over the years. To simplify, most of his income comes from YouTube in terms of views and ad revenue, like most YouTubers.
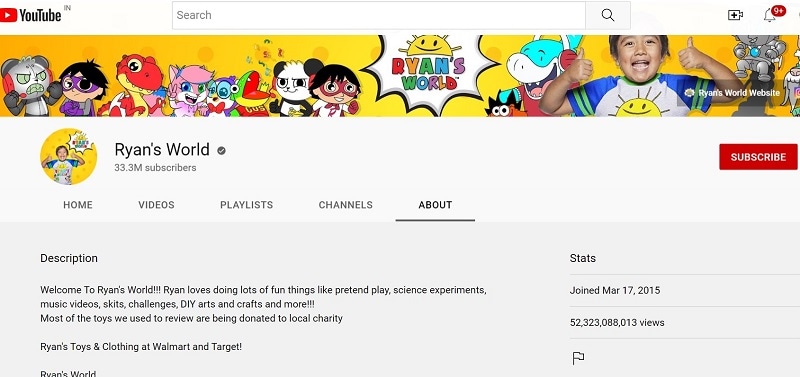
Other than that, his subscriber count also accounts for a portion of what the YouTube algorithm calculates for the income evaluation. Currently, the subscriber counts for the Ryan’s World channel sits at 33.3 million, spread across different age demographics.
To calculate Ryan World net worth in 2020, the jump from 2022, and how it grew since 2015 overall, the ads play a major role. Typically, YouTubers earn around USD 3-7 for every 1000 views. His videos get around 277.59 million views per month. So, the overall count can extend to USD 1.11 million per month.
If he earns higher, like USD 7 for every 1000 views, his annual average can increase reach around USD 29.98 million instead of the estimated USD 16.66 million.
Moreover, YouTubers earn from other sources besides the ads on their videos, so the overall Ryan YouTube income is likely even higher monthly and yearly. These additional sources include affiliate commissions, sponsorships, interviews at other platforms, and product sales/merchandise.

Here is a quantified average of the earning statistics for Ryan’s World income in tabular format.
| Ryan Kaji Ryan’s World Income | |
|---|---|
| Estimated Earnings per Month | USD 1.11 million |
| Estimated Earnings per Year | USD 16.66 million |
| Total Video Uploads (Approx) | 52.323 billion |
| Subscribers | 33.3 million |
| Video Views (on average) | 800,000+ |
| Views for the last 30 days (on average) | 277.59 million |
Ryan Kaji’s Annual Income between 2016-2022
For a better understanding of how much does Ryan ToysReview make, which is the most popular segment in his channel, let’s look at his earning graph over the years.
Here is a bar chart showing the growth in Raji Kaji’s net worth from 2016 to the present.
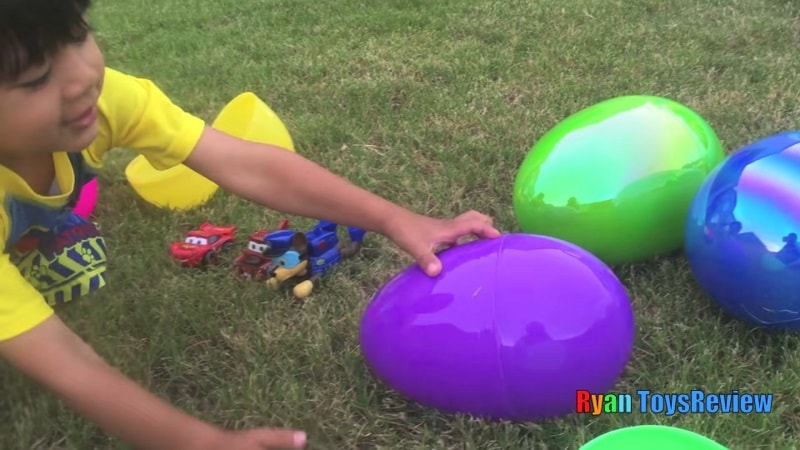
Since Ryan Kaji started his channel in 2015, he has focused mainly on posting reviews and critiques on toys in videos. His personable characteristics and demeanor, plus the type of content he presented, helped him increase his earnings, raking in USD 11 million in 2016 and 2017.
As he grew in age, his content shifted to fit his interests at 6 years of age, which revolved around DIY science, adding animated co-stars, and doodles. He also started his custom merchandise for the subscribers, had his AdSense revenue, and a proprietary toy line. Therefore, regarding how much money did Ryan ToysReview make in 2018, the channel saw growth to USD 22 million, which further increased to USD 26 million in 2019.
In 2020, he earned around USD 29.5 million and USD 27 million in 2021. The Ryan ToysReview income further grew to USD 35 million in 2022, and it is expected to increase in the upcoming time, especially with his videos raking in millions of views in recent times.
Popularity across social media
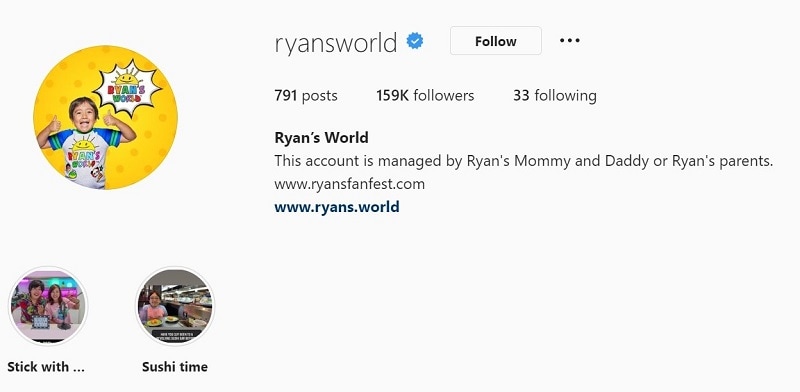
The leading social media platform where Ryan Kaji grew his strength is YouTube, and he currently enjoys a massive fan following. His channel, Ryan’s World, has an overall subscriber base of around 33.3 million YouTube users. These include primarily children as well as other adults, either who enjoy his content or those who watch along with their kids. He also has an Instagram account for his channel with around 159k followers.
Besides that, the total Ryan’s World earnings also come from his other YouTube channels, managed under the company his parents established afterward. These include Ryan ToysReview, The Studio Space, Ryan’s Family Review, EK Doodles, and three more.
All of these channels combined get a substantial overall following base, though there are overlaps between all or some of them. Ryan Kaji also has a television series and video game under the brand, increasing his overall popularity. The series name is “Ryan’s Mystery Playdate” on Nick Jr.
Part 3: Why is Ryan Kaji Trending on YouTube?
The overall view of how much money does Ryan have throughout the years and his social media popularity will surely give you an idea of how he amassed his impressive net worth. However, why exactly is he so popular on the platform when he focuses mainly on kid’s toys instead of other things that appeal to the primarily adult userbase on YouTube?
Charming personality
Ryan has a fun and enthusiastic approach to his videos, showing a bright and adorable personality. This shines through all of his videos, and his excitement translates across the screen to the viewers to captivate their attention well.
Interactive and engaging videos
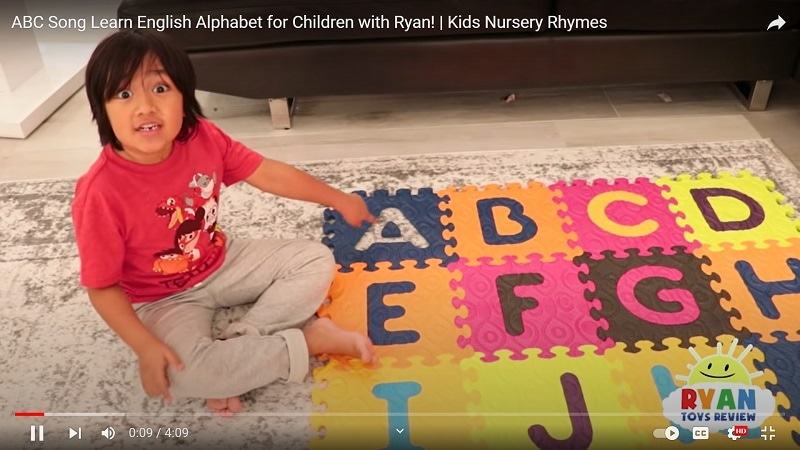
The way the content is presented is engaging, with Ryan speaking to the viewers like friends. That creates a light-hearted environment for his subscribers, who are mostly kids. His videos also include information they learn, like the “ABC Song Learn English Alphabet for Children with Ryan!” video.
High-quality visuals and effects
The videos on the channel are well edited, with bright color scape and high-resolution imagery. The editor also adds fun effects in video, image, and audio format to engage all senses of viewers.
Consistent delivery/updates
The team behind Ryan’s World has the timing of their releases well-planned and relatively consistent with the posting schedule. Subscribers stay engaged since they get the videos they want regularly.
Engaging and eye-catching titles-
The titles of the videos on this channel are framed with the main keywords of what content one can expect. The title card design with effects and other areas where text pop up is properly set.
Top videos on Ryan’s World
To understand these points, you should take a look at his top videos on YouTube. The best videos on Ryan’s World channel include “HUGE EGGS Surprise Toys Challenge with Inflatable Water Slide” with 2 billion views, “Giant Lightning McQueen Egg Surprise with 100+ Disney Cars Toys” with 1.1 billion views, and “ABC Song Learn English Alphabet for Children with Ryan!” with 384 million views.
Video Link: https://www.youtube.com/watch?v=GcmDiyk3NJs
Each video has an engaging title that speaks on the central theme while keeping consistent with his content type, i.e., toys review. Plus, he has visually appealing thumbnails with edited imagery, and his vibrant personality is appealing as well. All in all, he covers all the main points necessary to create engaging content, and that naturally adds to Ryan World salary.
Bonus Tip: How to be a YouTuber and Make Videos like Ryan Kaji
Yes, the quality and presentation of the videos on the channel are one of critical pieces that caused the high Ryan Kaji net worth. If you plan to start your YouTube channel, you should focus on video editing to optimize its quality. In this context, the Filmora software is an excellent tool to use.
Filmora- Why should you use it?
Wondershare Filmora is a high-grade video editing software that allows users to create dynamic, eye-grabbing, and intuitive videos efficiently. You can use the features available in this Mac and Windows-based software to merge, cut, split, and more your video clips into one cohesive project. It is simple to add filters with pre-set FX plugins like Boris FX, among other available options, for a unique video look.
Additionally, you can adjust the coloring of your videos with Color Matching and Color Correction features and add titles/transitions, among others. You can add voiceover and audio effects and adjust the video’s volume, tone, and soundtrack. AI-based features are also available here for quick automated edits (Instant Mode), removing background by focusing on only the subject (AI Portrait), and more.
How to use Filmora to create engaging videos for YouTube?
Free Download For Win 7 or later(64-bit)
Free Download For macOS 10.14 or later
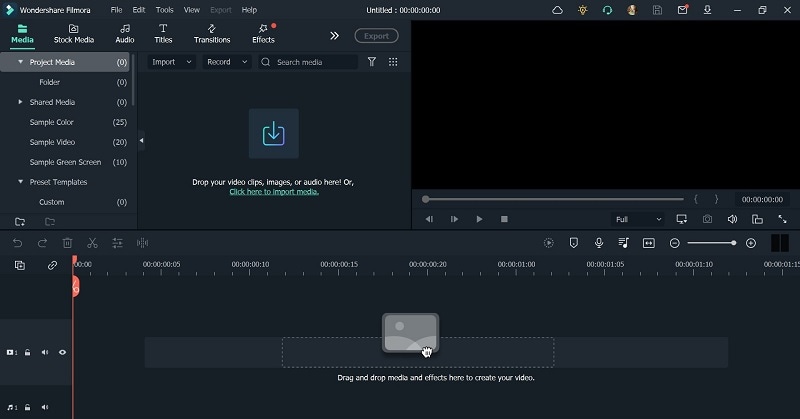
Step1 Download and launch the Filmora software on Mac or Windows PC.
Step2 Tap on New Project > Click here to import media.
Step3 After choosing the video file or files from your device, drag them to the editor timeline below.
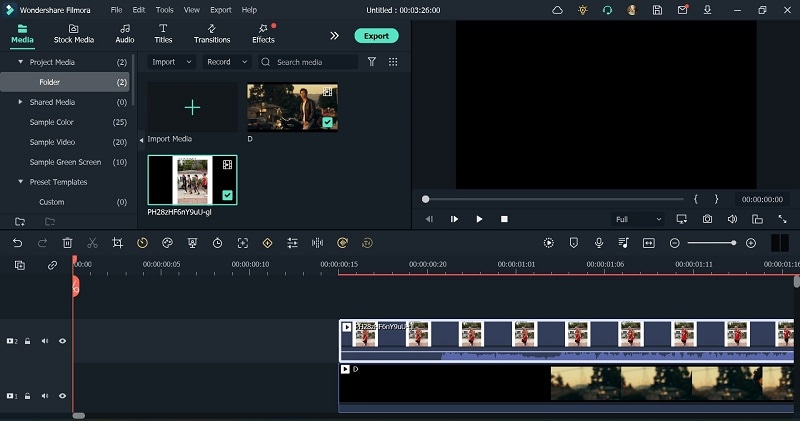
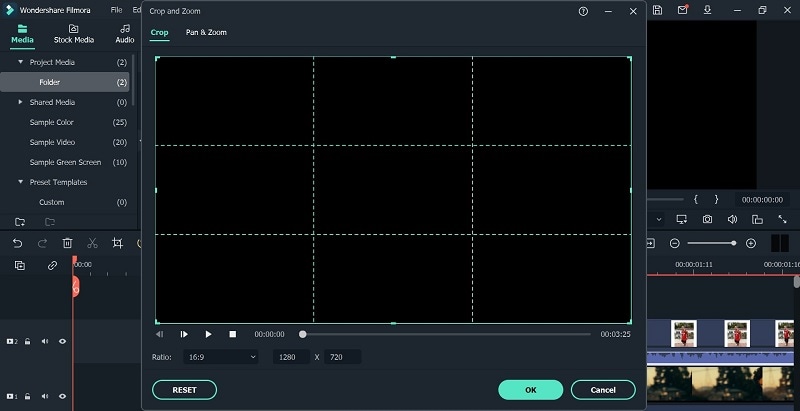
Step4 From the toolbar just above the timeline, click on the standard functions you want to use for editing the video. For example, click on the file and press the Crop icon.
Step5 At the top-most toolbar, you can see many tabs for editing, like Effects, Audio, Titles, etc. Click on them to get the drop-down menu of available effects, audio clips, and more. Add the ones you choose by dragging them to the video on the timeline.
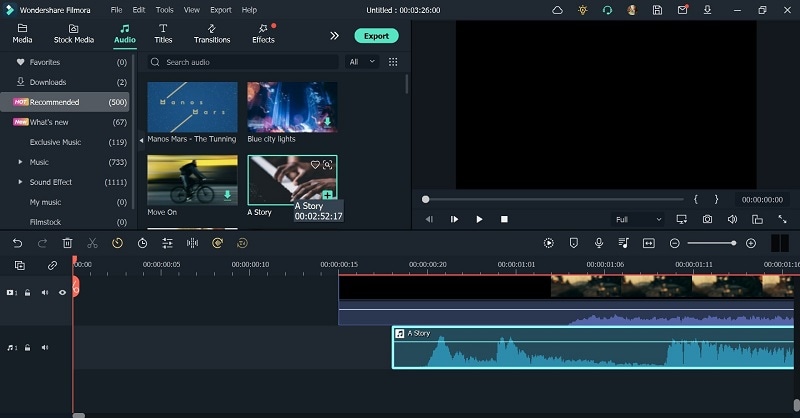
Continue with further editing work using other tools available, like speed adjustment, background removal (chroma key), and more.
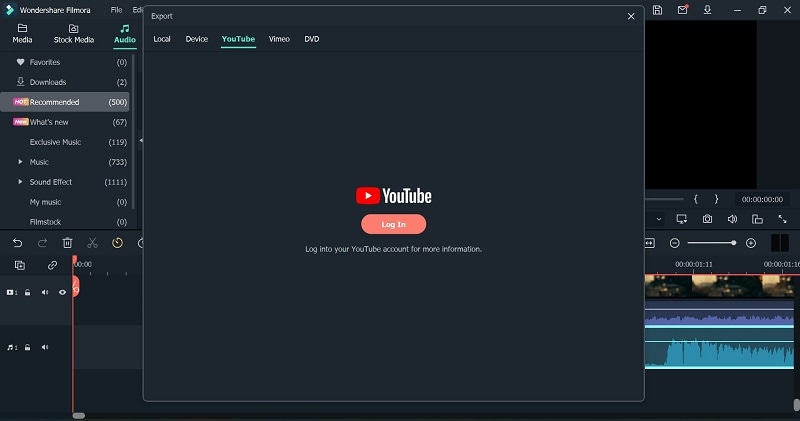
Step6 After completing the edits, click the Export button. Choose to download it offline by selecting Local and choosing your preferred format. Make further changes in the settings.
Or, you can directly post the video to your linked YouTube account.
Step7 Tap the Export button.
Final Words
Overall, Ryan Kaji saw great success with his stunning and engaging videos on his YouTube channel over the years. Also, he focused on other ventures, with the support of the team behind his channel, for income and editing work.
But, while starting, your funding will be less. It would help if you handled the video editing work on your own first, with reliable software like Filmora . Also, use other analytics tools and strategies to improve your channel further.
Free Download For Win 7 or later(64-bit)
Free Download For macOS 10.14 or later
Part 1: The Biography Box on Ryan Kaji
Before going into this in detail, here is an overall summary of Ryan Kaji and his income structure for a quick look.
| Name | Ryan Kaji |
|---|---|
| Real Name | Ryan Naruto Nguyen |
| Net Worth (as of 2022) | USD 35 million |
| Monthly Income/Salary (approx.) | USD 1.11 million |
| Yearly Income (approx.) | USD 16.66 million |
| Age | 11 years |
| Gender | Male |
| Height | 1.28 m or 128 cm or 4 ft 2 inches |
| Nationality | Asian-American |
| Profession | YouTuber, Influencer |
| YouTube Channel | Ryan’s World |
| Awards and Recognition | · Ranked No. 23 on Top Creators List, Forbes 2022.· Ryan’s World ranks as one of the top 100 YouTube channels. |
Now that we know the primary data about Ryan, read on to learn about how he became famous on YouTube and his overall income, in more detail.
Part 2: Ryan Kaji YouTube Earning and Stats
After seeing the notes about Ryan’s World’s yearly income and other points, you must wonder how it has increased over the years. To simplify, most of his income comes from YouTube in terms of views and ad revenue, like most YouTubers.
Other than that, his subscriber count also accounts for a portion of what the YouTube algorithm calculates for the income evaluation. Currently, the subscriber counts for the Ryan’s World channel sits at 33.3 million, spread across different age demographics.
To calculate Ryan World net worth in 2020, the jump from 2022, and how it grew since 2015 overall, the ads play a major role. Typically, YouTubers earn around USD 3-7 for every 1000 views. His videos get around 277.59 million views per month. So, the overall count can extend to USD 1.11 million per month.
If he earns higher, like USD 7 for every 1000 views, his annual average can increase reach around USD 29.98 million instead of the estimated USD 16.66 million.
Moreover, YouTubers earn from other sources besides the ads on their videos, so the overall Ryan YouTube income is likely even higher monthly and yearly. These additional sources include affiliate commissions, sponsorships, interviews at other platforms, and product sales/merchandise.
Here is a quantified average of the earning statistics for Ryan’s World income in tabular format.
| Ryan Kaji Ryan’s World Income | |
|---|---|
| Estimated Earnings per Month | USD 1.11 million |
| Estimated Earnings per Year | USD 16.66 million |
| Total Video Uploads (Approx) | 52.323 billion |
| Subscribers | 33.3 million |
| Video Views (on average) | 800,000+ |
| Views for the last 30 days (on average) | 277.59 million |
Ryan Kaji’s Annual Income between 2016-2022
For a better understanding of how much does Ryan ToysReview make, which is the most popular segment in his channel, let’s look at his earning graph over the years.
Here is a bar chart showing the growth in Raji Kaji’s net worth from 2016 to the present.
Since Ryan Kaji started his channel in 2015, he has focused mainly on posting reviews and critiques on toys in videos. His personable characteristics and demeanor, plus the type of content he presented, helped him increase his earnings, raking in USD 11 million in 2016 and 2017.
As he grew in age, his content shifted to fit his interests at 6 years of age, which revolved around DIY science, adding animated co-stars, and doodles. He also started his custom merchandise for the subscribers, had his AdSense revenue, and a proprietary toy line. Therefore, regarding how much money did Ryan ToysReview make in 2018, the channel saw growth to USD 22 million, which further increased to USD 26 million in 2019.
In 2020, he earned around USD 29.5 million and USD 27 million in 2021. The Ryan ToysReview income further grew to USD 35 million in 2022, and it is expected to increase in the upcoming time, especially with his videos raking in millions of views in recent times.
Popularity across social media
The leading social media platform where Ryan Kaji grew his strength is YouTube, and he currently enjoys a massive fan following. His channel, Ryan’s World, has an overall subscriber base of around 33.3 million YouTube users. These include primarily children as well as other adults, either who enjoy his content or those who watch along with their kids. He also has an Instagram account for his channel with around 159k followers.
Besides that, the total Ryan’s World earnings also come from his other YouTube channels, managed under the company his parents established afterward. These include Ryan ToysReview, The Studio Space, Ryan’s Family Review, EK Doodles, and three more.
All of these channels combined get a substantial overall following base, though there are overlaps between all or some of them. Ryan Kaji also has a television series and video game under the brand, increasing his overall popularity. The series name is “Ryan’s Mystery Playdate” on Nick Jr.
Part 3: Why is Ryan Kaji Trending on YouTube?
The overall view of how much money does Ryan have throughout the years and his social media popularity will surely give you an idea of how he amassed his impressive net worth. However, why exactly is he so popular on the platform when he focuses mainly on kid’s toys instead of other things that appeal to the primarily adult userbase on YouTube?
Charming personality
Ryan has a fun and enthusiastic approach to his videos, showing a bright and adorable personality. This shines through all of his videos, and his excitement translates across the screen to the viewers to captivate their attention well.
Interactive and engaging videos
The way the content is presented is engaging, with Ryan speaking to the viewers like friends. That creates a light-hearted environment for his subscribers, who are mostly kids. His videos also include information they learn, like the “ABC Song Learn English Alphabet for Children with Ryan!” video.
High-quality visuals and effects
The videos on the channel are well edited, with bright color scape and high-resolution imagery. The editor also adds fun effects in video, image, and audio format to engage all senses of viewers.
Consistent delivery/updates
The team behind Ryan’s World has the timing of their releases well-planned and relatively consistent with the posting schedule. Subscribers stay engaged since they get the videos they want regularly.
Engaging and eye-catching titles-
The titles of the videos on this channel are framed with the main keywords of what content one can expect. The title card design with effects and other areas where text pop up is properly set.
Top videos on Ryan’s World
To understand these points, you should take a look at his top videos on YouTube. The best videos on Ryan’s World channel include “HUGE EGGS Surprise Toys Challenge with Inflatable Water Slide” with 2 billion views, “Giant Lightning McQueen Egg Surprise with 100+ Disney Cars Toys” with 1.1 billion views, and “ABC Song Learn English Alphabet for Children with Ryan!” with 384 million views.
Video Link: https://www.youtube.com/watch?v=GcmDiyk3NJs
Each video has an engaging title that speaks on the central theme while keeping consistent with his content type, i.e., toys review. Plus, he has visually appealing thumbnails with edited imagery, and his vibrant personality is appealing as well. All in all, he covers all the main points necessary to create engaging content, and that naturally adds to Ryan World salary.
Bonus Tip: How to be a YouTuber and Make Videos like Ryan Kaji
Yes, the quality and presentation of the videos on the channel are one of critical pieces that caused the high Ryan Kaji net worth. If you plan to start your YouTube channel, you should focus on video editing to optimize its quality. In this context, the Filmora software is an excellent tool to use.
Filmora- Why should you use it?
Wondershare Filmora is a high-grade video editing software that allows users to create dynamic, eye-grabbing, and intuitive videos efficiently. You can use the features available in this Mac and Windows-based software to merge, cut, split, and more your video clips into one cohesive project. It is simple to add filters with pre-set FX plugins like Boris FX, among other available options, for a unique video look.
Additionally, you can adjust the coloring of your videos with Color Matching and Color Correction features and add titles/transitions, among others. You can add voiceover and audio effects and adjust the video’s volume, tone, and soundtrack. AI-based features are also available here for quick automated edits (Instant Mode), removing background by focusing on only the subject (AI Portrait), and more.
How to use Filmora to create engaging videos for YouTube?
Free Download For Win 7 or later(64-bit)
Free Download For macOS 10.14 or later
Step1 Download and launch the Filmora software on Mac or Windows PC.
Step2 Tap on New Project > Click here to import media.
Step3 After choosing the video file or files from your device, drag them to the editor timeline below.
Step4 From the toolbar just above the timeline, click on the standard functions you want to use for editing the video. For example, click on the file and press the Crop icon.
Step5 At the top-most toolbar, you can see many tabs for editing, like Effects, Audio, Titles, etc. Click on them to get the drop-down menu of available effects, audio clips, and more. Add the ones you choose by dragging them to the video on the timeline.
Continue with further editing work using other tools available, like speed adjustment, background removal (chroma key), and more.
Step6 After completing the edits, click the Export button. Choose to download it offline by selecting Local and choosing your preferred format. Make further changes in the settings.
Or, you can directly post the video to your linked YouTube account.
Step7 Tap the Export button.
Final Words
Overall, Ryan Kaji saw great success with his stunning and engaging videos on his YouTube channel over the years. Also, he focused on other ventures, with the support of the team behind his channel, for income and editing work.
But, while starting, your funding will be less. It would help if you handled the video editing work on your own first, with reliable software like Filmora . Also, use other analytics tools and strategies to improve your channel further.
Free Download For Win 7 or later(64-bit)
Free Download For macOS 10.14 or later
- Title: Mastering YouTube Uploads in Adobe Premiere for 2024
- Author: Joseph
- Created at : 2024-05-31 13:51:07
- Updated at : 2024-06-01 13:51:07
- Link: https://youtube-stream.techidaily.com/mastering-youtube-uploads-in-adobe-premiere-for-2024/
- License: This work is licensed under CC BY-NC-SA 4.0.
