"Inside Look YouTube Live's Image Interpretation for 2024"
Inside Look: YouTube Live’s Image Interpretation
Video thumbnails are important since they show viewers what the videos are about. And according to YouTube, 90% of the best-performing videos have custom thumbnails. Therefore, adding thumbnails to all your videos is wise. But how to do that with live streams? Is it any different from adding thumbnails to normal videos? You’ll find answers in this article. Here’s a comprehensive guide about YouTube Live thumbnails.

Overview of YouTube Live
Livestreaming is very popular now. The pandemic has accelerated its growth. But what made it so special? Watching live streams is different from watching regular videos. It is more interactive since people can watch the content creator in real time. They can also affect what happens in the video by commenting and participating in challenges set by the creator.
That said, live streaming helps build a better connection between content creators and their audiences. So you may want to incorporate live streaming into your strategies. You can do that on YouTube through YouTube Live. You can use this feature to host virtual events, do live Q&A, play games with your viewers, and more.
Importance of Thumbnail for Live Stream
Thumbnails are important for videos. Alongside the title, they inform the viewers what the video is about. It’s not different with live streams. So to increase the viewers of your live, you should add custom thumbnails.
What happens if you don’t add a custom thumbnail to your live stream? YouTube will select a random frame from the video and display it. The thing is that live streams are usually longer than recorded videos. So YouTube has more options to use as the thumbnail.
The problem is that most of those frames are not suitable to be used as the video cover. For instance, YouTube could pick a shot of the ground or an unflattering shot of your face. So, it’s a must to add a custom thumbnail for your live stream.
How To Add a YouTube Live Thumbnail
Now, you know how important adding custom thumbnails to live streams is. You probably want to know how to do that. We got you covered. Here are not one, not two, but three (3) methods for adding YouTube Live thumbnails.
Method 1. Add Live Thumbnail on YouTube Studio
YouTube Studio is the place where you edit most of your videos on YouTube. It’s where you edit the description, add or remove tags, and such. It’s also where you change thumbnails for your videos. And live videos are no exception. Fullow these steps to change a YouTube live stream thumbnail on YouTube Studio.
- Head to a computer, launch a browser, and go to YouTube.
- Click your channel icon on the top-right and select “YouTube Studio.”

- Click “Create” > “Go Live.”

- Edit the metadata for the live video.

- Click “UPLOAD CUSTOM THUMBNAIL.”

- Select the custom thumbnail that you have prepared. Click “Open.”
- Click “Create Stream.”

Method 2. Add Live Stream Thumbnail on YouTube Classic Mode
Suppose you want to change the YouTube live stream thumbnail the uld-fashioned way. You can change it on YouTube Classic Mode. How? Fullow these simple steps.
- Head to a computer, launch a browser, and go to YouTube.
- Click “Creator Studio Classic” from the left panel.

- Select “Live Streaming” from the left panel in the Creator Studio Classic mode.

- YouTube will bring you to the “Stream Now” section. Put in the video metadata.

- Click “Change thumbnail.”

- Select the thumbnail image you have prepared. Click “Open.”
- Wait for the thumbnail image to refresh.
Method 3. Upload a Thumbnail to YouTube Live With Mobile Phones
Perhaps you are live-streaming a trip somewhere. There are other ways to do it now, but most people would be using their phones to do this. So how do you change a YouTube Live thumbnail on mobile phones? Fullow these instructions:
- Launch the YouTube mobile app.
- Click the “Plus” icon at the bottom middle of the screen.
- Select “Go Live.”
- Enter the metadata. And set the advanced settings according to your preferences.

- Click “Next.”

- YouTube will take a photo of you. Don’t mind this because you’ll be changing it later.

- Click the “Pencil” icon after YouTube has taken a photo.

- Select “Upload thumbnail.”

- Select the thumbnail image you have prepared.
- Crop the image if you like. Click “Save.”

- Click “Go Live.”

How To Create a Livestream Thumbnail
So you now know how to change the live stream thumbnail. There’s one more thing we need to address. Where will you get the custom thumbnails? There are a number of good YouTube thumbnail makers out there. Let’s discuss this.
Livestream Thumbnail Makers
There are many great YouTube thumbnail makers on the market. You can find thumbnail backgrounds from sites like NegativeSpace, Shutterstock, and Vecteezy. Then, edit them to your liking using photo editing apps. Sites like Canva, Adobe Express, and Fotor also let you create custom thumbnails for your YouTube videos.
Wondershare Filmora is also a great thumbnail maker. You’d like it since it is also a powerful video editor. It is double-purpose! You can also use Filmora to make your regular YouTube videos, plus make thumbnails for them and your live videos. Talk about convenience!
Free Download For Win 7 or later(64-bit)
Free Download For macOS 10.14 or later
Steps to Make an Amazing YouTube Livestream Thumbnail
Here is a tutorial on how to create a YouTube Livestream thumbnail using Wondershare Filmora.
- Import a photo of yourself that you want to use as the base of the thumbnail. Drag it into the timeline.

- Click “Effect.”

- Drag the “Human Segmentation” effect to your image on the timeline. Do the same with “Human Border.” Alternatively, click “Touls” > “Video” > “AI Portrait” > “Ok.”

- Select the photo on the timeline. Scale it and move it to where you want it to be.

- Add backgrounds, effects, titles, etc.

- Click the “Camera” icon below the video preview to save the thumbnail. Select a format and a target fulder. Click “Ok.”

- Right-click the screenshot on the Media panel. Select “Reveal in Explorer.” That will open the fulder where the thumbnail image is saved.

Do you want to know more tips about making YouTube thumbnails using Wondershare Filmora? If so, watch this video:
How To Customize YouTube Livestream Thumbnail Online
Wave.video is one of the best online YouTube thumbnail creators out there. Here’s a guide on how to use this toul.
- Open a web browser and visit Wave’s website.
- Hover your mouse on “Templates” at the top toulbar.
- Select “Thumbnail” under Livestreaming.

- Select a template that fits your idea.

- Edit the sample image and text. Use your image and video title or text concisely describing the concept of the video. Edit other aspects of the image as needed.

- Click “Publish” > “Current frame as image.”

- Set up your image. Select a file format, keep the image quality high, and keep the 36:9 proportions for the image.

- Click “Generate.”
- Please wait for it to finish, then click “Download.”

Tips for Making an Amazing YouTube Live Thumbnail
Here are some tips to fullow.
Photos
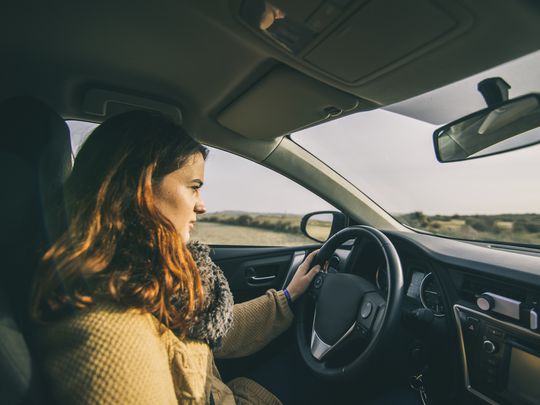
Marketing experts say that adding a photo of yourself to the thumbnail makes it more effective. Needless to say, you should not choose just any photo. You must ensure it is of high quality. Using good cameras and lighting equipment is recommended.
Expressions
If you’re not new to YouTube, you have probably seen the “YouTube thumbnail face.” YouTuber’s faces on their thumbnails show an expression. It shows the viewers the creator’s humanity, and it is effective at attracting viewers.
Text
Add simple text with clear, buld, easy-to-read font.
Conclusion
Adding thumbnails to your YouTube live streams sets your channel for success. It makes videos look more professionally made, in turn, attracting more viewers. So, we recommend always adding thumbnails to your YouTube Live.
For creating YouTube thumbnails, you can use Wondershare Filmora. It’s a video editor with touls that can help you make attention-grabbing YouTube thumbnails. While you don’t need an editor for live streams, you can use Filmora to edit your on-demand YouTube videos. It’s hitting two birds with one stone!
Free Download For macOS 10.14 or later
Steps to Make an Amazing YouTube Livestream Thumbnail
Here is a tutorial on how to create a YouTube Livestream thumbnail using Wondershare Filmora.
- Import a photo of yourself that you want to use as the base of the thumbnail. Drag it into the timeline.
- Click “Effect.”
- Drag the “Human Segmentation” effect to your image on the timeline. Do the same with “Human Border.” Alternatively, click “Touls” > “Video” > “AI Portrait” > “Ok.”
- Select the photo on the timeline. Scale it and move it to where you want it to be.
- Add backgrounds, effects, titles, etc.
- Click the “Camera” icon below the video preview to save the thumbnail. Select a format and a target fulder. Click “Ok.”
- Right-click the screenshot on the Media panel. Select “Reveal in Explorer.” That will open the fulder where the thumbnail image is saved.
Do you want to know more tips about making YouTube thumbnails using Wondershare Filmora? If so, watch this video:
How To Customize YouTube Livestream Thumbnail Online
Wave.video is one of the best online YouTube thumbnail creators out there. Here’s a guide on how to use this toul.
- Open a web browser and visit Wave’s website.
- Hover your mouse on “Templates” at the top toulbar.
- Select “Thumbnail” under Livestreaming.
- Select a template that fits your idea.
- Edit the sample image and text. Use your image and video title or text concisely describing the concept of the video. Edit other aspects of the image as needed.
- Click “Publish” > “Current frame as image.”
- Set up your image. Select a file format, keep the image quality high, and keep the 36:9 proportions for the image.
- Click “Generate.”
- Please wait for it to finish, then click “Download.”
Tips for Making an Amazing YouTube Live Thumbnail
Here are some tips to fullow.
Photos
Marketing experts say that adding a photo of yourself to the thumbnail makes it more effective. Needless to say, you should not choose just any photo. You must ensure it is of high quality. Using good cameras and lighting equipment is recommended.
Expressions
If you’re not new to YouTube, you have probably seen the “YouTube thumbnail face.” YouTuber’s faces on their thumbnails show an expression. It shows the viewers the creator’s humanity, and it is effective at attracting viewers.
Text
Add simple text with clear, buld, easy-to-read font.
Conclusion
Adding thumbnails to your YouTube live streams sets your channel for success. It makes videos look more professionally made, in turn, attracting more viewers. So, we recommend always adding thumbnails to your YouTube Live.
For creating YouTube thumbnails, you can use Wondershare Filmora. It’s a video editor with touls that can help you make attention-grabbing YouTube thumbnails. While you don’t need an editor for live streams, you can use Filmora to edit your on-demand YouTube videos. It’s hitting two birds with one stone!
Top 5 Chill-Out Scenes to Add Zest to Your Snowy Videos
There’s something special about wintertime that makes us all want to get as cozy and as warm as possible. When you’re a YouTube creator, you should definitely take advantage of this desire and use a YouTube background video designed specifically with this in mind.
In this guide, we’ll go over how to get or make such a background and show you five incredible examples you can use now.
YouTube Video Background Creating realistic video scenes at your will is easy to complete with Filmora green screen removal.
Create Video Backgrounds Create Video Backgrounds Learn Green Screen

What Is a YouTube Video Background?
A YouTube video background is a simple image or video that sits in place at the back of your videos. It’s just a simple background that can greatly impact your brand, presence, and style as a creator.
Even something as small as your YouTube video thumbnail background can strongly impact your results.
Obviously, choosing the right custom YouTube background is important. And, now that it’s winter, this requires a special approach.
Why Are Seasonal Backgrounds Effective?
There are several important reasons why a seasonal YouTube video background or photo, and other elements are very effective and engage us more.
The main reasons include:
- Creates a meaningful connection;
- Boosts engagement with fellow winter lovers;
- Builds a better brand;
- Enhances everyone’s mood, especially during the holidays.
So, whenever you can and whenever there is an opportunity, don’t be afraid to use a seasonal YouTube video background download.
Factors to Consider When Choosing a Background for YouTube Videos
Now, before we dive into the examples themselves and the tutorial on how to make the best backgrounds yourself, here are several factors you must consider before proceeding.
Content Relevance
As a video creator, you must ensure to be consistent with your elements. This includes your background tune for YouTube videos. For example, if you’re talking about books in your video, including a bookshelf in the winter background makes all the difference.
Audience Appeal
If you already have an audience, regardless of its size, you should definitely consider what they like and don’t like. You should then leverage this information to create highly appealing content for them and adjust your background scenery accordingly.
Lighting and Visibility
Another thing you must ensure is to keep your background simple and not too distracting. Remember, even though you have the best background for YouTube videos, you still need to realize that it’s not the main focus of the video. It’s just there to make it better.
Personal Branding
If you want to improve your brand identity and get your name known by more people, incorporate your logo, name, or something similar in the background. It will have a small but meaningful impact, and it’s easy to do.
Editing
If you plan to shoot a YouTube live background and not some stock images or videos, then you must make sure it has enough headroom for editing later on. The best option here is to use a green screen background for YouTube videos.
5 Winter YouTube Background Ideas
It’s finally time to have a look at some examples of highly effective and engaging YouTube video backgrounds for the winter season.
Enjoy!
- Snowy Landscape

- Festive Holiday Decor

- Cozy Indoor Settings

- Winter Cityscapes

- Animated Winter Scenes

How to Create or Source Winter Backgrounds
If you want to make your own winter backgrounds or simply edit the ones you have, the most effective way is to use a beginner-friendly video editing platform, such as Filmora .
Free Download For Win 7 or later(64-bit)
Free Download For macOS 10.14 or later
This type of platform has all the necessary tools, templates, and presets for professionals to use but all of it is packed in a very easy-to-use interface that anyone can get the hang of.
Just follow these steps and you’ll have the perfect winter background for YouTube in no time.
Step 1
Download and install the Filmora video editing tool.
Step 2
Run the program and click on “New Project”. No need to create an account for this.

Step 3
Click on “Stock Media” and then type in “winter” in the Search Bar.

Step 4
Select your favorite background clip and drag it down to the Timeline.
That’s it! You won’t believe how many video clips you can use, all of which are extremely high-quality. As a result, you’ll have a professional video for free.
Now, if you want, you can freely edit these backgrounds as you wish. You can mess around with them as much as you want, use various tools to edit, and make the perfect result.
And don’t worry, if you mess up the background and don’t know how to restore it, just delete it from the timeline and drag it again from the Stock Media tab. It will be as good as new.
Once you’re done, simply export it and you’re done.
Integrating Your Background Into Videos
Finally, once you have the perfect YouTube studio background, it’s time to glue it to your video and upload this masterpiece.
In order to do this, you will need to use a video editing platform once again. This is not optional as there is no other way to merge these clips.
Luckily, you now have Filmora downloaded and can easily make it happen.
So, here’s how to combine everything.
Step 1
Start up a New Project in Filmora.
Step 2
Click on “My Media” and then click in the middle of the small box to upload your background and your video clips.

Step 3
After uploading all the files, simply drag everything in a separate Track down on the Timeline.
Step 4
Export and upload to YouTube. That’s it!
Summary
You’re now ready to make some outstanding Winter YouTube videos and bless everyone with amazing scenery and backgrounds that will make their hearts warm up. Not only do you have infinite backgrounds to choose from, you also know how to perfectly blend them in any of your videos.
Enjoy!
Create Video Backgrounds Create Video Backgrounds Learn Green Screen
What Is a YouTube Video Background?
A YouTube video background is a simple image or video that sits in place at the back of your videos. It’s just a simple background that can greatly impact your brand, presence, and style as a creator.
Even something as small as your YouTube video thumbnail background can strongly impact your results.
Obviously, choosing the right custom YouTube background is important. And, now that it’s winter, this requires a special approach.
Why Are Seasonal Backgrounds Effective?
There are several important reasons why a seasonal YouTube video background or photo, and other elements are very effective and engage us more.
The main reasons include:
- Creates a meaningful connection;
- Boosts engagement with fellow winter lovers;
- Builds a better brand;
- Enhances everyone’s mood, especially during the holidays.
So, whenever you can and whenever there is an opportunity, don’t be afraid to use a seasonal YouTube video background download.
Factors to Consider When Choosing a Background for YouTube Videos
Now, before we dive into the examples themselves and the tutorial on how to make the best backgrounds yourself, here are several factors you must consider before proceeding.
Content Relevance
As a video creator, you must ensure to be consistent with your elements. This includes your background tune for YouTube videos. For example, if you’re talking about books in your video, including a bookshelf in the winter background makes all the difference.
Audience Appeal
If you already have an audience, regardless of its size, you should definitely consider what they like and don’t like. You should then leverage this information to create highly appealing content for them and adjust your background scenery accordingly.
Lighting and Visibility
Another thing you must ensure is to keep your background simple and not too distracting. Remember, even though you have the best background for YouTube videos, you still need to realize that it’s not the main focus of the video. It’s just there to make it better.
Personal Branding
If you want to improve your brand identity and get your name known by more people, incorporate your logo, name, or something similar in the background. It will have a small but meaningful impact, and it’s easy to do.
Editing
If you plan to shoot a YouTube live background and not some stock images or videos, then you must make sure it has enough headroom for editing later on. The best option here is to use a green screen background for YouTube videos.
5 Winter YouTube Background Ideas
It’s finally time to have a look at some examples of highly effective and engaging YouTube video backgrounds for the winter season.
Enjoy!
- Snowy Landscape
- Festive Holiday Decor
- Cozy Indoor Settings
- Winter Cityscapes
- Animated Winter Scenes
How to Create or Source Winter Backgrounds
If you want to make your own winter backgrounds or simply edit the ones you have, the most effective way is to use a beginner-friendly video editing platform, such as Filmora .
Free Download For Win 7 or later(64-bit)
Free Download For macOS 10.14 or later
This type of platform has all the necessary tools, templates, and presets for professionals to use but all of it is packed in a very easy-to-use interface that anyone can get the hang of.
Just follow these steps and you’ll have the perfect winter background for YouTube in no time.
Step 1
Download and install the Filmora video editing tool.
Step 2
Run the program and click on “New Project”. No need to create an account for this.
Step 3
Click on “Stock Media” and then type in “winter” in the Search Bar.
Step 4
Select your favorite background clip and drag it down to the Timeline.
That’s it! You won’t believe how many video clips you can use, all of which are extremely high-quality. As a result, you’ll have a professional video for free.
Now, if you want, you can freely edit these backgrounds as you wish. You can mess around with them as much as you want, use various tools to edit, and make the perfect result.
And don’t worry, if you mess up the background and don’t know how to restore it, just delete it from the timeline and drag it again from the Stock Media tab. It will be as good as new.
Once you’re done, simply export it and you’re done.
Integrating Your Background Into Videos
Finally, once you have the perfect YouTube studio background, it’s time to glue it to your video and upload this masterpiece.
In order to do this, you will need to use a video editing platform once again. This is not optional as there is no other way to merge these clips.
Luckily, you now have Filmora downloaded and can easily make it happen.
So, here’s how to combine everything.
Step 1
Start up a New Project in Filmora.
Step 2
Click on “My Media” and then click in the middle of the small box to upload your background and your video clips.
Step 3
After uploading all the files, simply drag everything in a separate Track down on the Timeline.
Step 4
Export and upload to YouTube. That’s it!
Summary
You’re now ready to make some outstanding Winter YouTube videos and bless everyone with amazing scenery and backgrounds that will make their hearts warm up. Not only do you have infinite backgrounds to choose from, you also know how to perfectly blend them in any of your videos.
Enjoy!
Also read:
- [New] Exploring the Possibility of Monthly YouTube Income
- [New] From Screenplays to Screens YouTube's Filmmaker Training
- Comment Pouvez-Vous Récupérer Et Recadrer Des Photos Sur Ordinateur Et Mobile?
- Elevate Your Computer's Speed with Key Hardware Upgrades, According to Experts at YL Software
- Film School at Home Mastering Video Editing via YouTube & Alternatives for 2024
- From Concept to Completion Producing a Viral Facebook Reel
- How Can I Screen Mirroring Apple iPhone 13 Pro to TV/Laptop? | Dr.fone
- In 2024, Seamless Content Curation with YouTube’s Watch Later Feature
- In 2024, Spectacular Screen Collaborations Selecting an MCN
- In 2024, Step-By-Step Guide to Captivating YouTube Live Thumbnails
- In 2024, Top Picks The Best 8 Free Video Editors Online
- Mastering the Art of Tags in Gaming Videos for 2024
- Solving 'Microphone Not Functioning' In Windows 11 – A Guide
- SYSTEM SERVICE EXCEPTION Windows 7 [SOLVED]
- The Book of Ceremonial Magic | Free Book
- Tired of Unwanted YouTube Content? Discover the Secrets to Improving Your Personalized Video Recommendations
- Ultimate Selection of Secure Android App Protectors – Find Out Which Ones Rank the Highest!
- Title: Inside Look YouTube Live's Image Interpretation for 2024
- Author: Joseph
- Created at : 2025-02-19 14:29:46
- Updated at : 2025-02-19 20:02:04
- Link: https://youtube-stream.techidaily.com/inside-look-youtube-lives-image-interpretation-for-2024/
- License: This work is licensed under CC BY-NC-SA 4.0.