
"In 2024, Understanding User Engagement Measuring Own and Enemy Content"
Understanding User Engagement: Measuring Own and Enemy Content
YouTube Analytics – How to analyze your and Competitor’s YouTube Video

Richard Bennett
Mar 27, 2024• Proven solutions
Tracking your brand’s YouTube metrics is not enough to ensure success in YouTube. Unless you garner deep insights of your competitors. You must be thinking how can you gauge their company insights using YouTube and track the data movement as well. There is nothing to worry about, we have got you covered. We will show you how to analyze your own channel as well as that of your competitors’ YouTube analytics. Let’s now explore about it!
How to analyze your own YouTube channel/video?
It is important to have reliable YouTube analytics tools for your brand, as videos on YouTube are searchable through Google. They contribute to generate organic traffic for you using both Google and YouTube as a medium. YouTube has a default dedicated analytics mechanism to measure how the video fares in YouTube to gain the most out of it.
Here we have collated the broadly used YouTube insights to ensure that your highly equipped, SEO compatible video engages more audience and performs well. The matrix sums up the most essential parts of YouTube analytics. Let’s go through them.
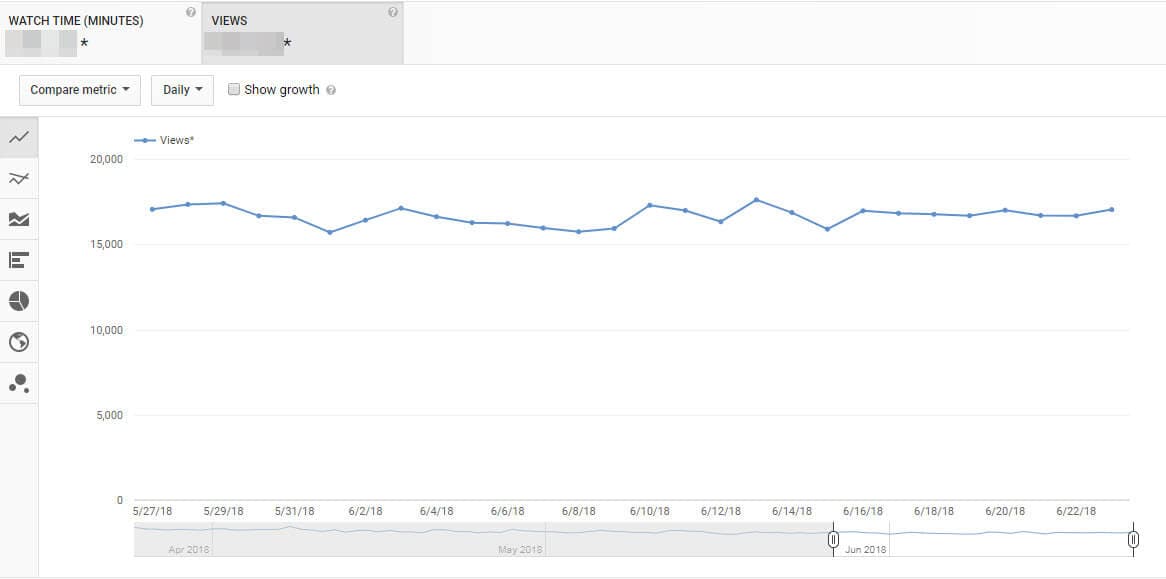
1. Views
Though, views determine the number of people clicked on a certain video on YouTube, it’s impossible to figure out whether the video has been watched till the end or not. Moreover, they can be altered through clickbait tricks and hence YouTube doesn’t solely put much value on them.
Views along with watch time turn out to be the best bet. Watch time sums up the total amount of time spent (in terms of minutes) on your brand’ videos. With the updated dashboard it becomes easy to get the YouTube analytics and gauge the video’s performance. Using the average view duration, you can know whether your video is being watched till the end or not.
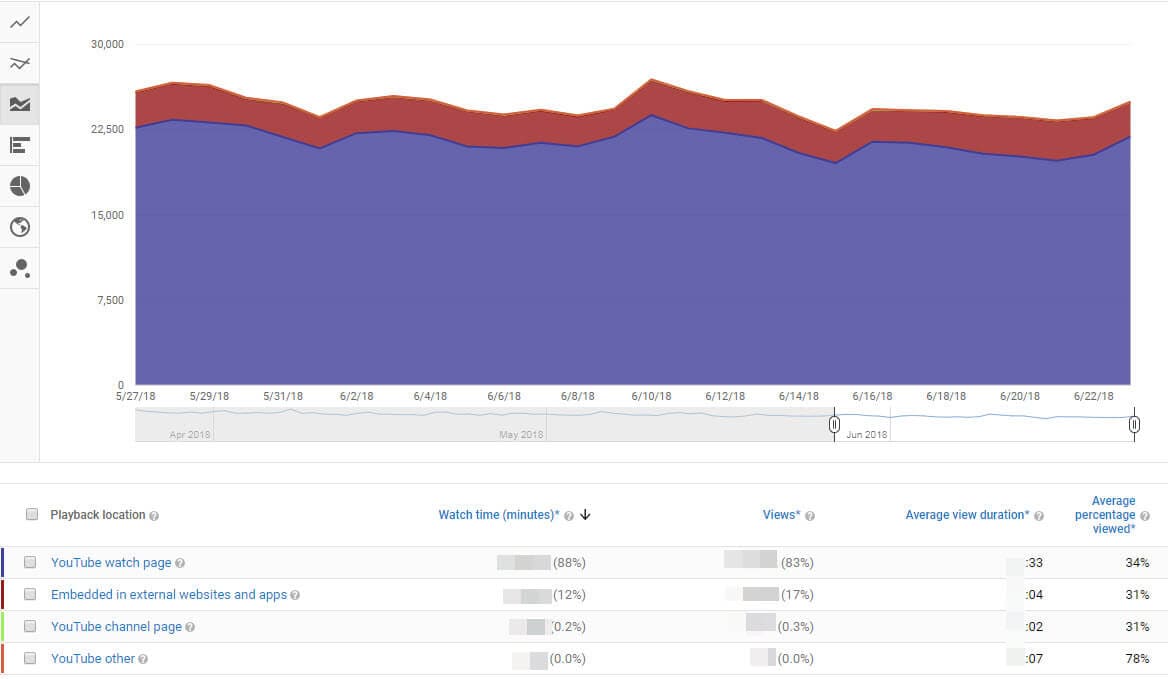
2. Playback Location
As ‘Playback locations’ of YouTube videos can reveal where does all the traffic come from, it would help your channel figure out for which location the video has fared well. It will guide you to reach the backlinks locations/sites. Knowing the popular locations for your YouTube video being played, you can know whether YouTube is the search engine or they have been diverted from somewhere else. Depending on the video playing locations, the views will be segregated in to embedded video, YouTube watch page, mobile devices, and YouTube channel page. Understanding location specific views would help you decide where should you focus to enhance the performance of your video.
3. Demographics
The demographics page helps you get YouTube insights, using them you can know the audience in a gender and location specific manner. For local businesses targeting a certain region, YouTube analytics would prove to be a boon. You can also know the geography and device used by the viewers with this feature. Understanding the gender and location of people will help you create dedicated product videos that would be helpful to them.

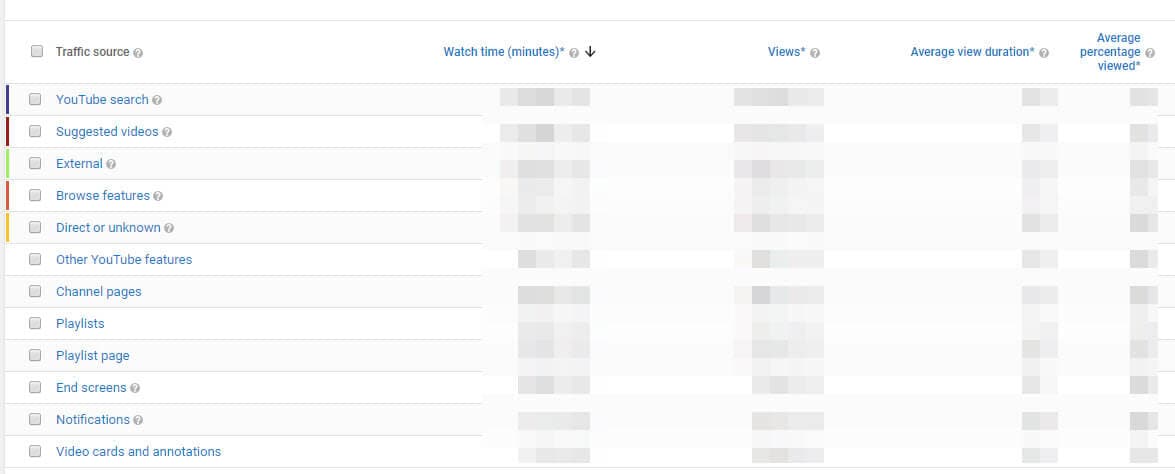
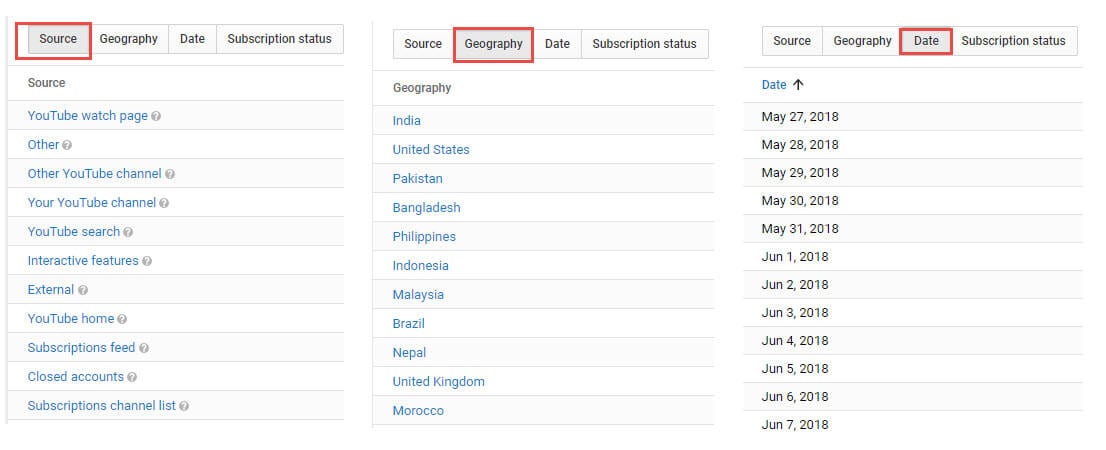
4. Traffic sources
Understanding the source of your YouTube video’s traffic would help you track the prominent keywords that viewers use for landing at your YouTube video. You can figure out their choice and their search patterns this way. The YouTube insights will show you whether the viewers found your video by searching YouTube, a channel on YouTube, through suggested videos, or an external link. The YouTube Analytics tool’s panel would assist you in finalizing the most beneficial traffic source for your brand. You can optimize your video and keyword strategy with this.
5. Audience Retention
This data explains how far your video has engaged your audience. Along with views, the duration that a viewer is on your video weighs too. From the audience retention page, you can find out the specific time that a viewer has exited your video and see what made them do so. There are 2 types of audience retention features – absolute audience retention and relative audience retention.
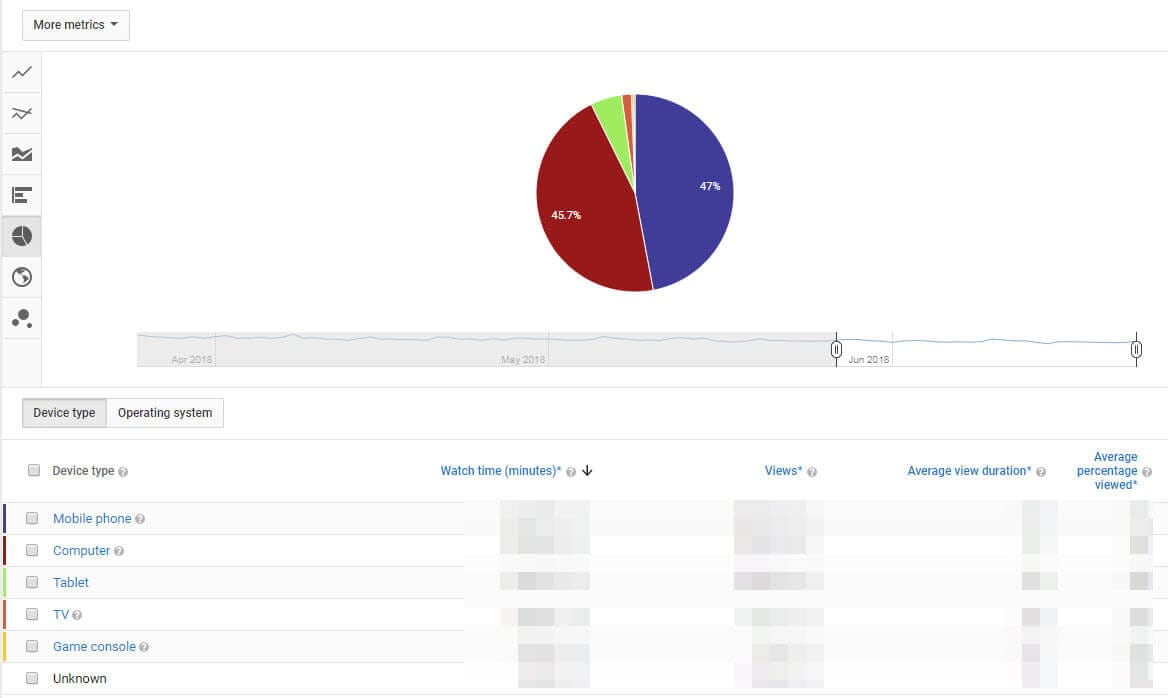
6. Devices
It is important to know which device is being used to watch the video. The metrics is distributed among mobile phones, computer, TV, tablet etc. you will be able to understand whether your video needs to be optimized for a certain video or not.
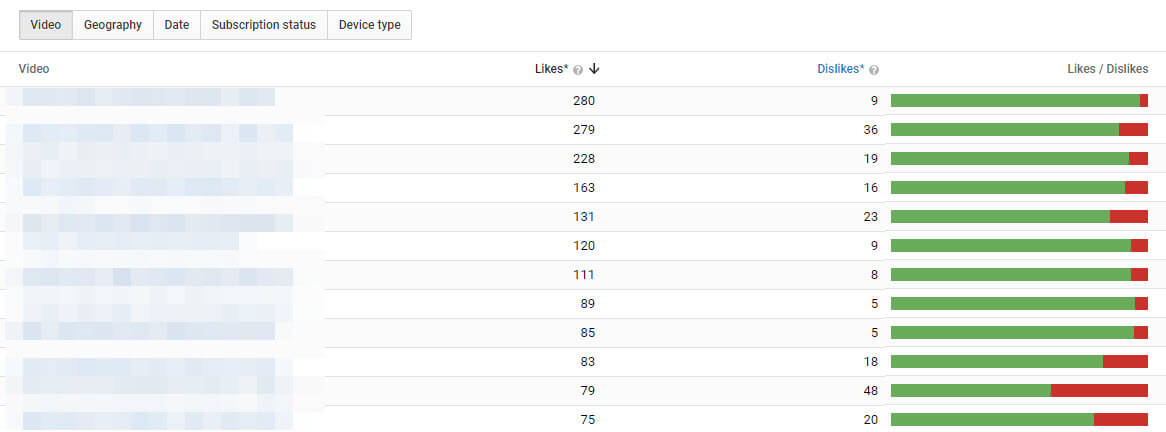
7. Likes and dislikes
YouTube insights gauge the audience acceptance for your video by the number of likes and dislikes. Videos with a huge number of like implies that it is loved by people, though, the quality of video can’t exactly be defined by the number of likes or dislikes. Even the best quality video created for asking opinions about a certain situation/issue might be good enough but still get dislikes.
8. Subscribers
YouTube analytics help you determine the engagement metrics to explain the origin of your subscribers. It includes both their geo-location, the date of subscription, and the source/medium they used to land with your video on YouTube. You can observe the number of people subscribing and unsubscribing from your YouTube channel.
The subscription stream enables your audience to get suggestions for new videos from your channel and offer better exposure to the service and products you offer.
You May Also Like : How to Get More Subscribers
9. Annotations
While considering YouTube Analytics, it is essential to understand that there are annotations to guide viewers to your business site for more content. It is not necessary that the content is video only, it might include a blog post as well. This will let you understand the click through rate and ‘close’ rates for every annotation. This in turn will assist you in optimizing how to reach your audience and where to place the annotations.

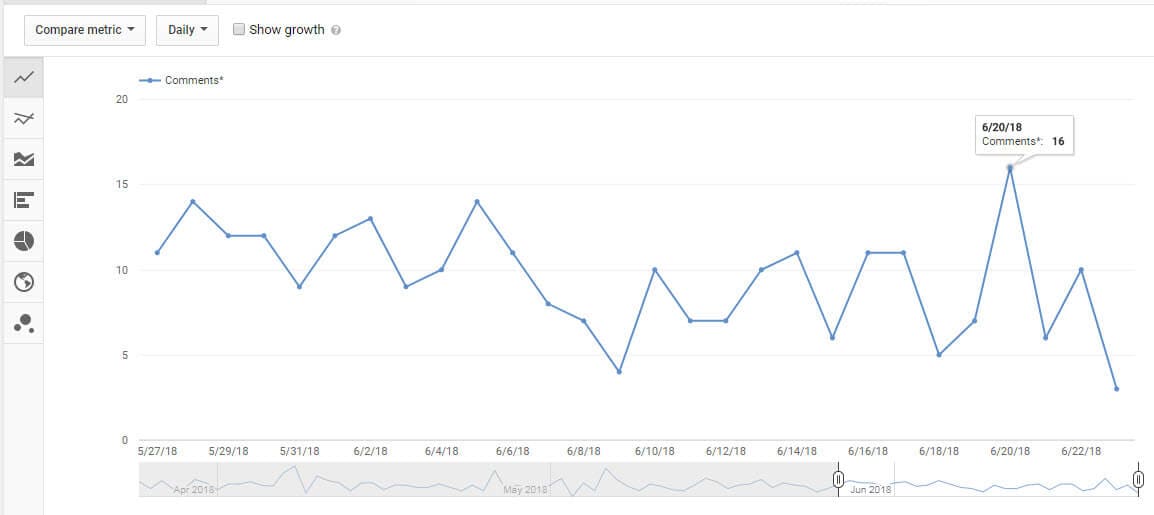
10. Comments
Audience engagement on any YouTube video can easily be gauged by using the vital aspect known as comments. Either it touched a chord in their heart, inspired or motivated them, or simply made them smile, the comments will say it all. Sometimes the audience simply taps ‘Like’ in place of commenting at their convenient.
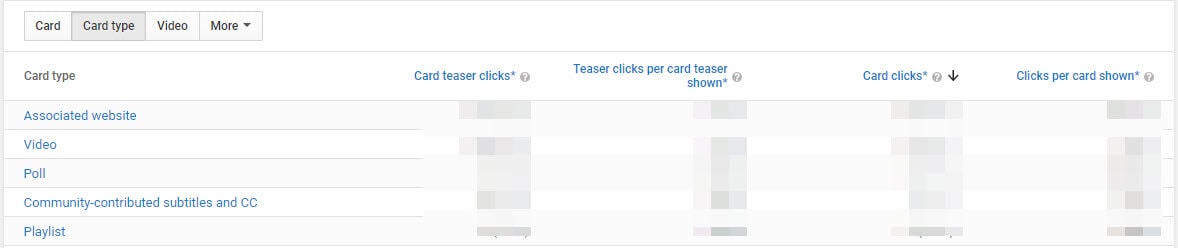
11. Cards
Cards is a new feature in YouTube analytics and aimed at replacing annotations. This will improve user interactivity of any video and accelerate the engagement. They will act as call to action for informing visitors regarding playlists, videos, merchandising, fan funding, and associated website etc.
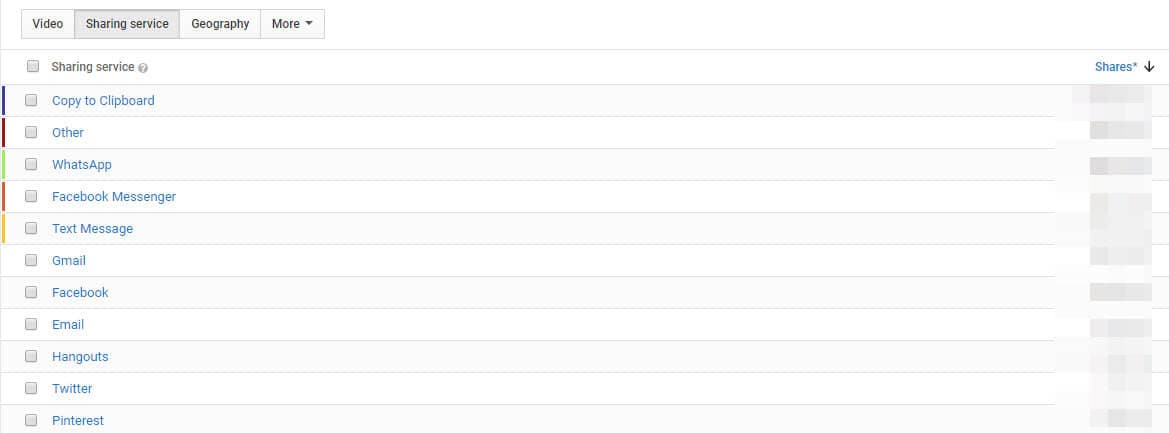
12. Sharing
This aspect sums up the amount of shares of the YouTube video across different social networks along with the share date. Google ranking is influenced with the share numbers, as higher the number more the chances of unique backlinks for your videos.
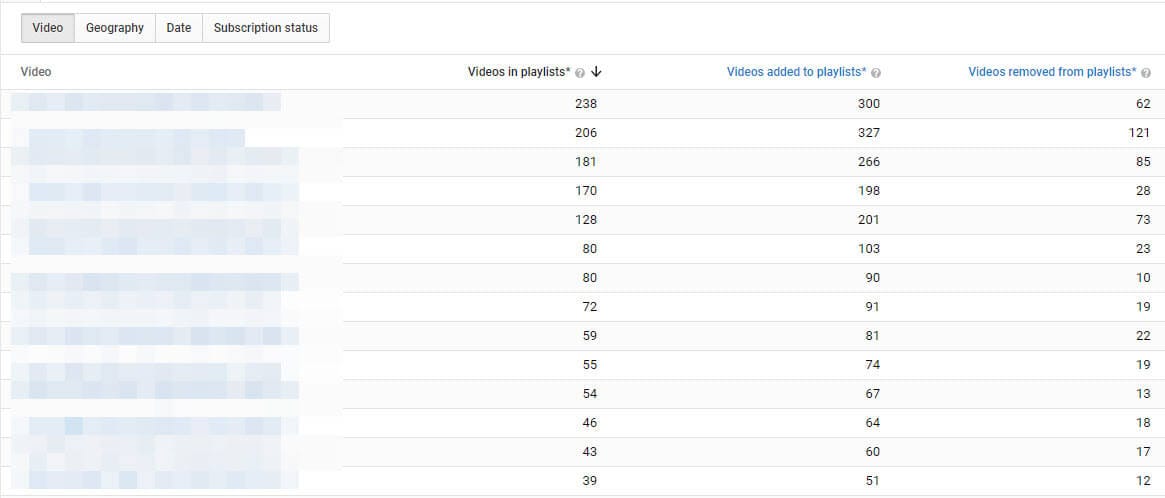
13. Videos in playlists
Favorites has been renamed to ‘Videos in playlists’. Your reach broadens as people keep marking your videos as favorites on their playlist. This is visible to the public on the YouTube channel itself.
How to analyze your competitors
Although, you can’t see the dashboard data of your competitor, there are still some ways to observe and study your competitors’ successful videos and from their views, favorites, ratings, and comments find out the driving force behind it.
For example, reading the comments and see what they are saying. Notice both the positive and negative ones so that you can incorporate the ideas in your videos. You can also make a better video by understanding what a specific demographic region is fond of watching in the said niche.
Or you can use those analyzing tools below to discover the more stats of your competitors.
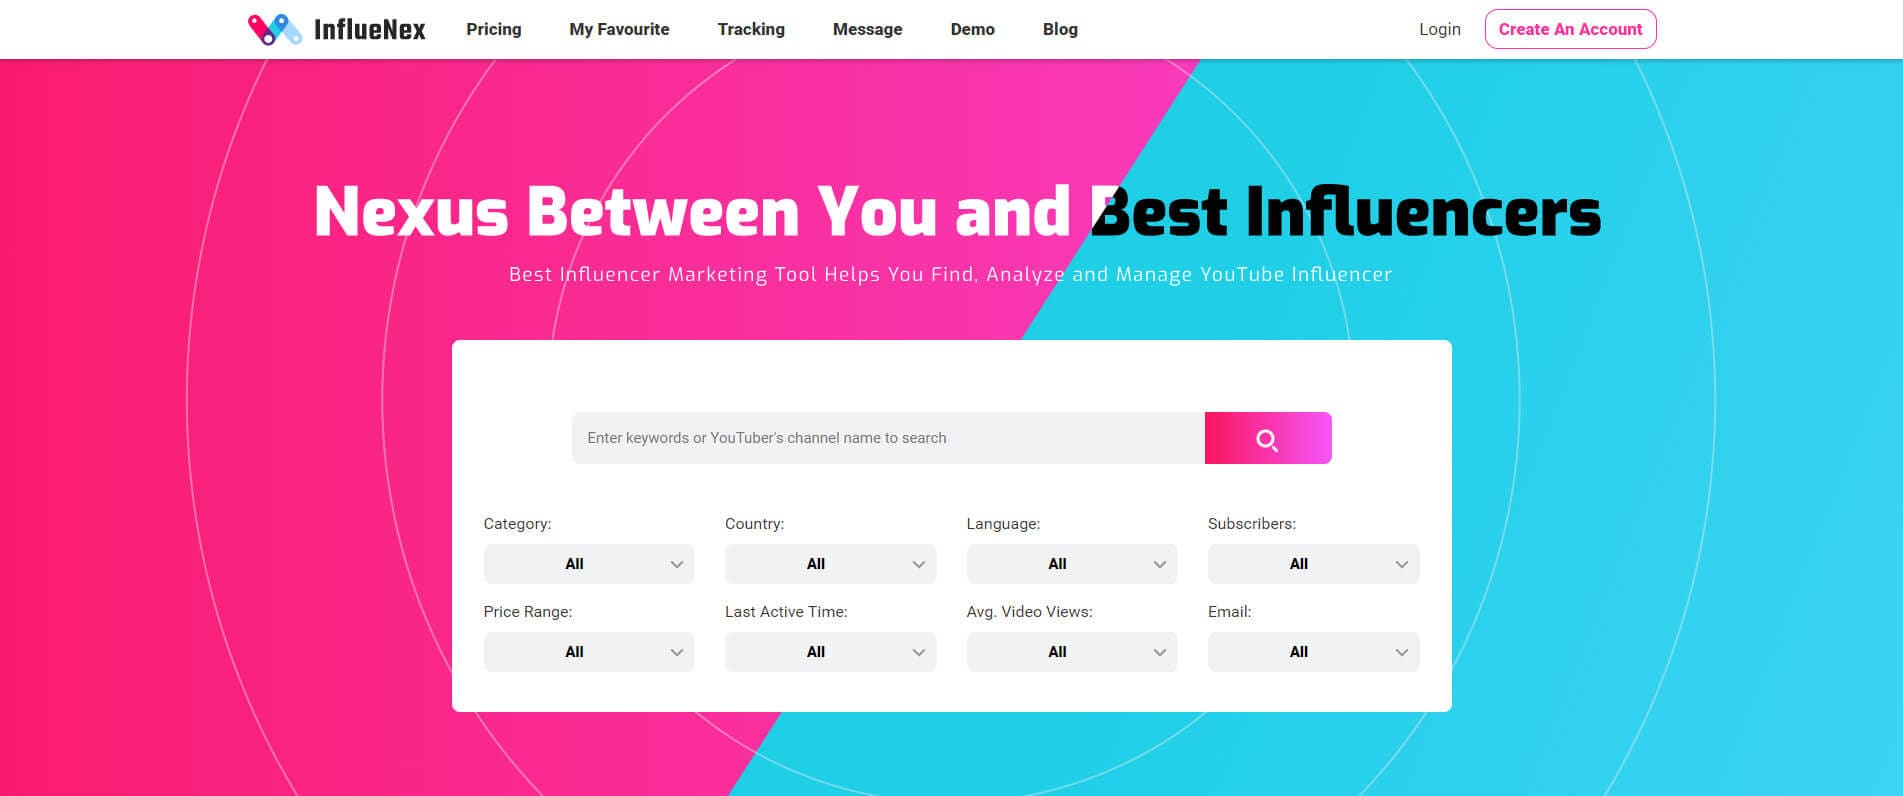
1. InflueNex
InflueNex is a helpful influencer marketing tool for Analyzing, searching, and managing YouTubers. With the help of this YouTube analytics tool, you’re able to learn your competitors’ channels and videos with detailed information.
2. Rival IQ
This YouTube analytics tool helps you increase social media engagement, conduct competitive analysis to track competition, discovers new content ideas for your target audience. You can use it to leverage your foothold in YouTube.
3. SocialBlade
SocialBlade helps you gain YouTube insights and enables you to understand how your rival brands fare. You can learn from them and enhance your own strategy to beat them.
Read More to Get: 5 Methods to Go Frame by Frame on YouTube Video >>
Richard Bennett
Richard Bennett is a writer and a lover of all things video.
Follow @Richard Bennett
Richard Bennett
Mar 27, 2024• Proven solutions
Tracking your brand’s YouTube metrics is not enough to ensure success in YouTube. Unless you garner deep insights of your competitors. You must be thinking how can you gauge their company insights using YouTube and track the data movement as well. There is nothing to worry about, we have got you covered. We will show you how to analyze your own channel as well as that of your competitors’ YouTube analytics. Let’s now explore about it!
How to analyze your own YouTube channel/video?
It is important to have reliable YouTube analytics tools for your brand, as videos on YouTube are searchable through Google. They contribute to generate organic traffic for you using both Google and YouTube as a medium. YouTube has a default dedicated analytics mechanism to measure how the video fares in YouTube to gain the most out of it.
Here we have collated the broadly used YouTube insights to ensure that your highly equipped, SEO compatible video engages more audience and performs well. The matrix sums up the most essential parts of YouTube analytics. Let’s go through them.
1. Views
Though, views determine the number of people clicked on a certain video on YouTube, it’s impossible to figure out whether the video has been watched till the end or not. Moreover, they can be altered through clickbait tricks and hence YouTube doesn’t solely put much value on them.
Views along with watch time turn out to be the best bet. Watch time sums up the total amount of time spent (in terms of minutes) on your brand’ videos. With the updated dashboard it becomes easy to get the YouTube analytics and gauge the video’s performance. Using the average view duration, you can know whether your video is being watched till the end or not.
2. Playback Location
As ‘Playback locations’ of YouTube videos can reveal where does all the traffic come from, it would help your channel figure out for which location the video has fared well. It will guide you to reach the backlinks locations/sites. Knowing the popular locations for your YouTube video being played, you can know whether YouTube is the search engine or they have been diverted from somewhere else. Depending on the video playing locations, the views will be segregated in to embedded video, YouTube watch page, mobile devices, and YouTube channel page. Understanding location specific views would help you decide where should you focus to enhance the performance of your video.
3. Demographics
The demographics page helps you get YouTube insights, using them you can know the audience in a gender and location specific manner. For local businesses targeting a certain region, YouTube analytics would prove to be a boon. You can also know the geography and device used by the viewers with this feature. Understanding the gender and location of people will help you create dedicated product videos that would be helpful to them.
4. Traffic sources
Understanding the source of your YouTube video’s traffic would help you track the prominent keywords that viewers use for landing at your YouTube video. You can figure out their choice and their search patterns this way. The YouTube insights will show you whether the viewers found your video by searching YouTube, a channel on YouTube, through suggested videos, or an external link. The YouTube Analytics tool’s panel would assist you in finalizing the most beneficial traffic source for your brand. You can optimize your video and keyword strategy with this.
5. Audience Retention
This data explains how far your video has engaged your audience. Along with views, the duration that a viewer is on your video weighs too. From the audience retention page, you can find out the specific time that a viewer has exited your video and see what made them do so. There are 2 types of audience retention features – absolute audience retention and relative audience retention.
6. Devices
It is important to know which device is being used to watch the video. The metrics is distributed among mobile phones, computer, TV, tablet etc. you will be able to understand whether your video needs to be optimized for a certain video or not.
7. Likes and dislikes
YouTube insights gauge the audience acceptance for your video by the number of likes and dislikes. Videos with a huge number of like implies that it is loved by people, though, the quality of video can’t exactly be defined by the number of likes or dislikes. Even the best quality video created for asking opinions about a certain situation/issue might be good enough but still get dislikes.
8. Subscribers
YouTube analytics help you determine the engagement metrics to explain the origin of your subscribers. It includes both their geo-location, the date of subscription, and the source/medium they used to land with your video on YouTube. You can observe the number of people subscribing and unsubscribing from your YouTube channel.
The subscription stream enables your audience to get suggestions for new videos from your channel and offer better exposure to the service and products you offer.
You May Also Like : How to Get More Subscribers
9. Annotations
While considering YouTube Analytics, it is essential to understand that there are annotations to guide viewers to your business site for more content. It is not necessary that the content is video only, it might include a blog post as well. This will let you understand the click through rate and ‘close’ rates for every annotation. This in turn will assist you in optimizing how to reach your audience and where to place the annotations.
10. Comments
Audience engagement on any YouTube video can easily be gauged by using the vital aspect known as comments. Either it touched a chord in their heart, inspired or motivated them, or simply made them smile, the comments will say it all. Sometimes the audience simply taps ‘Like’ in place of commenting at their convenient.
11. Cards
Cards is a new feature in YouTube analytics and aimed at replacing annotations. This will improve user interactivity of any video and accelerate the engagement. They will act as call to action for informing visitors regarding playlists, videos, merchandising, fan funding, and associated website etc.
12. Sharing
This aspect sums up the amount of shares of the YouTube video across different social networks along with the share date. Google ranking is influenced with the share numbers, as higher the number more the chances of unique backlinks for your videos.
13. Videos in playlists
Favorites has been renamed to ‘Videos in playlists’. Your reach broadens as people keep marking your videos as favorites on their playlist. This is visible to the public on the YouTube channel itself.
How to analyze your competitors
Although, you can’t see the dashboard data of your competitor, there are still some ways to observe and study your competitors’ successful videos and from their views, favorites, ratings, and comments find out the driving force behind it.
For example, reading the comments and see what they are saying. Notice both the positive and negative ones so that you can incorporate the ideas in your videos. You can also make a better video by understanding what a specific demographic region is fond of watching in the said niche.
Or you can use those analyzing tools below to discover the more stats of your competitors.
1. InflueNex
InflueNex is a helpful influencer marketing tool for Analyzing, searching, and managing YouTubers. With the help of this YouTube analytics tool, you’re able to learn your competitors’ channels and videos with detailed information.
2. Rival IQ
This YouTube analytics tool helps you increase social media engagement, conduct competitive analysis to track competition, discovers new content ideas for your target audience. You can use it to leverage your foothold in YouTube.
3. SocialBlade
SocialBlade helps you gain YouTube insights and enables you to understand how your rival brands fare. You can learn from them and enhance your own strategy to beat them.
Read More to Get: 5 Methods to Go Frame by Frame on YouTube Video >>
Richard Bennett
Richard Bennett is a writer and a lover of all things video.
Follow @Richard Bennett
Strengthen Your Footage: Using a Tripod in Vlogging
How To Use a Tripod for Vlogging
Richard Bennett
Mar 27, 2024• Proven solutions
As you grow into a serious vlogger, a tripod will become an essential piece of equipment. You can get by for a long time setting your camera up on a stack of books, or an upside-down laundry hamper, but not forever. While these setups are great for a beginner, an intermediate vlogger will start to find them limiting. Even if you are an amazingly creative person who can create any camera setup without a tripod there will come a point where you will decide your creative energy is better spent on your video content.
This article will explain how to use a tripod and then introduce you to four different types.
Part 1: How To Set a Tripod for Vlogging
1. Setting Up Your Tripod
Step 1 – Pull out all three legs of your tripod and make sure it is standing stably. There will be tensioners on the legs which you can release in order to adjust your height. Once your legs are extended to the height you want continue adjusting them until your tripod is level. Some tripods have a built in bubble level, but if yours does not you can use a separate bubble level or make a guestimate.
Make sure when you are setting up your tripod that you point one of its legs towards your subject. This will give you room to stand behind your camera, in-between the other two legs. If you have one leg pointed directly behind your camera then you may trip over it. Or, you may knock over and damage your camera.
Step 2 – On the top of your tripod there will be a plate with a small hole and a screw. Remove this plate using either a clip or lever, depending on your tripod. Once your plate is detached screw it into the bottom of your camera. It should be tight, but not too tight or you risk damaging your camera.
Step 3 – Attach your plate, which now has your camera mounted to it, back onto your tripod.
Your tripod comes with a ‘head’. Your tripod’s head is what your camera is mounted on top of. There are several different types of tripod heads and mounts which are all useful for different things.
Ball Heads and Pan/Tilt Heads are the two most common types of tripod heads. Ball Heads allow you to adjust your camera’s position quite a bit before you start shooting. They are not good for adding in camera movements while you are filming, however, because you need to lock them in place. Pan/Tilt heads are great for creating camera movement. Most Pan/Tilt heads have a handle which you can use to make a smooth panning motion.
Part 2: Why Do You Need a Tripod: Benefits of Using Tripod
Why can’t you just hold a camera in your hand while shooting vlog entries for your YouTube channel? Honestly, you can, but the camera may shake a lot and your footage might end up being unusable. Putting a camera on a tripod reduces the probability of camera shake to the minimum and that is just the tip of the iceberg.
A huge amount of vlogs can be described as sit down videos, in which the host of the video sits in front of a camera and talks to the audience. Holding a camera while talking or trying to present a product to the viewers is next to impossible, so in order to avoid having to deal with a camera, you can simply put it on a tripod, find the best angle, and push the record button.
On the go videos, are recorded at exterior locations, and a lot of YouTubers choose to shoot these types of videos handheld, but this approach makes it difficult to maintain the same shot composition for long. A Monopod, Gorillapod or just a simple selfie stick can make your job much easier because they stabilize the camera. In addition, shooting smooth panning shots without a tripod is as difficult as it sounds.
Part 3: A Few Things You’ll Need to Consider Before You Buy a Tripod
There are thousands of different tripod models you can use for vlogging, but which model you’re going to choose depends mostly on the type of vlog you want to make. If you are planning on shooting all of your videos in the studio-like conditions, then portability isn’t such an important feature, while quite the opposite is true if you intend on filming all of your footage on outdoor locations.
However, there are certain traits you have to consider when choosing a tripod you’re going to use while recording your vlog entries.
Sturdiness: There is absolutely no point in spending money on a tripod that breaks easily. Although if your plan is to shoot vlogs at home or in a studio, then buying a cheaper plastic tripod isn’t such a bad option, since the clamps and joints won’t have to endure a lot of wear and tear. Consider buying a more durable tripod if you are going to be traveling a lot while working on your vlogs.
The Type of Camera: A number of factors can contribute to the weight of a camera, including battery grips or lenses, so before you buy a tripod make sure that it can support the weight of the camera you want to use to record your videos.
The Maximum Height: Most vloggers don’t really have to worry about how tall their tripod is, because they are not on their feet in any of the shots featured in the video. Vloggers working on DIY videos, cooking tutorials or any other type of vlog that involves movement and action should pay attention to this trait.
Photo or Video Tripods: Do you want to take beautiful panning shots? If the answer is yes then you should get a video tripod that enables you to move the camera smoothly in any direction. Photo tripods are a great option for static shots that don’t involve a lot of camera movement.
Mobility: The heavier a tripod is, the more stability it can provide, but carrying a tripod that weighs over 10 pounds to shoot sports or adventure vlogs can be a tiring endeavor. Although portability is a factor, it shouldn’t prevent you from buying a high-quality tripod that will ensure your footage is perfectly smooth and stable.
Part 4: 4 Types of Tripods
Full-Sized Tripods: are very sturdy, and as a result can be fairly heavy. Although you can take them a lot of places they are not convenient to carry for extended periods of time. They are the most reliable way to ensure you have absolutely no camera shake.
Compact Tripods: appear to be the same size as Full-Sized tripods, but they are actually much lighter. You can get the same height with a Compact Tripod as a Full-Sized tripod and it will be much easier to travel with. However, Compact Tripods are not as stable. If you are shooting for an extended period of time you may need to weigh your Compact Tripod down with sandbags to keep it steady.
Gorillapods: have flexible legs which can be wrapped around posts, fences, or anything else you may want to mount your camera on. They are also lightweight enough that you can carry them around while you shoot. If you bend it right you can essentially use your Gorillapod as a heavy-duty selfie-stick for your camera.
Table-Top Tripods: are very small and easy to travel with. You can leave one in your camera bag or your glove box. Table-Top Tripods are meant to be set up on top of desks or other stable surfaces and may not be ideal for heavier cameras.
Part 5: The 5 Best Tripods For YouTube Vlogging
Even if you know everything there is to know about tripods, the selection process can be daunting. That’s why we’ve shortlisted the top 5 tripods on the market, in an effort to make finding the right tripod for your vlog videos as quick an easy as it can possibly be. Let’s have a look.
1. CamRah Smartphone Tripod
Price: $24.99

An increasing number of Smartphones features powerful cameras that can record videos at high resolutions. Unfortunately, most iPhones and Android devices are lightweight, which makes it difficult to hold them perfectly still while shooting a video. CamRah Smartphone Tripod offers a perfect solution to this problem because it is easy to pack and you can carry it wherever you go, without needing the extra space.
It weighs just 0.6lbs and it is 10.8 inches tall. The tripod has a maximum load of 11lbs which means that besides Smartphones, you can also mount action cameras, webcams, or even smaller DSLR cameras onto it. The flexible legs made from high-density foam offer stability even when the CamRah Tripod is placed on an uneven surface.
Pros:
- Easily portable
- Affordable
- Jaws technology provides an extra strong grip of the camera
Cons:
- The tripod’s legs can’t be extended
- Can’t be used with professional cameras
2. Manfrotto Mini Travel Tripod
Price: $34.99

Yet another great option for shooting vlogs with a Smartphone. The Manfrotto Mini Travel Tripod kit is also an excellent choice for all vloggers who shoot their videos with compact cameras. The tripod weighs just 0.51lbs and it is 5.31 inches tall, which makes it a perfect travel companion. However, it can’t support cameras heavier than 2.2lbs, so you have to carefully choose the camera you want to put on this tripod.
The tripod’s rotatable head features a lock button that enables you to fix the camera at a certain position and to shoot a video from an angle you selected. You can’t extend the legs on this tripod so shooting high angle shots is not an option.
Pros:
- Small and durable
- Allows you to mount almost any Smartphone model
- Compatible with compact cameras
Cons:
- Limits your shot selection
- Tripod’s legs can’t be extended
3. Joby Gorilla Pod
Price: $22.50

This tripod is a superstar in the vlogging community because it is flexible, easy to set up and it fits into a pocket. Joby Gorilla Pod’s legs are segmented, so you can freely choose an angle from which you want to shoot, without having to worry about the camera’s stability. You can use this tripod on flat and uneven surfaces equally effectively.
Joby Gorilla weighs just 1lbs and its maximum height 11.6 inches, which makes it perfectly suited for talking heads videos. Using this tripod while you are on the go is also an option if you have a camera that weighs less than 3lbs.
Pros:
- Highly adjustable
- Sturdy and Lightweight
- Made from stainless steel
Cons:
- Can’t be used for panning shots
- Legs can be extended for just one inch
4. Manfrotto Compact Action Tripod
Price: $64.49
If you love shooting your vlogs at night or if you simply want a tripod you can use in the studio an outdoor conditions, then Manfrotto’s Compact Action Tripod is one the best options you have at your disposal. The ergonomic head features a mounting plate that is easy to use and which provides a perfect grip of a camera.
This tripod is designed to be used with consumer-level DSLR cameras, but you can use it to shoot videos with almost all types of cameras. The Compact Action Tripod has a maximum height of 51.57 inches, and it can’t hold cameras heavier than 3.30lbs.
Pros:
- Suitable for both photography and video
- Great for outdoor use
- Allows you to take a wide variety of shots
Cons:
- Can’t support a lot of weight
- Not perfectly suited for professional-level cameras
5. Magnus VT-4000 Fluid Head Tripod
Price: $159.95
Experienced vloggers who record their videos with professional cameras, will enjoy using the Magnus VT-4000 Fluid Head Tripod. The 59-inch tall tripod can support as much as 8.8lbs of weight, and it is designed to help you create perfectly stable shots. The superb panning and tilting option enable you to move your camera freely while recording smooth shots, free of camera shakes.
The quick release mounting plate is compatible with a wide range of cameras, so you can experiment and work with several different cameras while using the same tripod. You can hardly make a mistake if you choose to buy this tripod because you’ll be able to use it to record vlogs at interior and exterior locations.
Pros:
- Easily adjustable to any surface
- Perfect for high angle shots
- Heavy-duty locks
Cons:
- Weighs 7.9lbs
- Not the best choice for action and adventure vlogs
Richard Bennett
Richard Bennett is a writer and a lover of all things video.
Follow @Richard Bennett
Richard Bennett
Mar 27, 2024• Proven solutions
As you grow into a serious vlogger, a tripod will become an essential piece of equipment. You can get by for a long time setting your camera up on a stack of books, or an upside-down laundry hamper, but not forever. While these setups are great for a beginner, an intermediate vlogger will start to find them limiting. Even if you are an amazingly creative person who can create any camera setup without a tripod there will come a point where you will decide your creative energy is better spent on your video content.
This article will explain how to use a tripod and then introduce you to four different types.
Part 1: How To Set a Tripod for Vlogging
1. Setting Up Your Tripod
Step 1 – Pull out all three legs of your tripod and make sure it is standing stably. There will be tensioners on the legs which you can release in order to adjust your height. Once your legs are extended to the height you want continue adjusting them until your tripod is level. Some tripods have a built in bubble level, but if yours does not you can use a separate bubble level or make a guestimate.
Make sure when you are setting up your tripod that you point one of its legs towards your subject. This will give you room to stand behind your camera, in-between the other two legs. If you have one leg pointed directly behind your camera then you may trip over it. Or, you may knock over and damage your camera.
Step 2 – On the top of your tripod there will be a plate with a small hole and a screw. Remove this plate using either a clip or lever, depending on your tripod. Once your plate is detached screw it into the bottom of your camera. It should be tight, but not too tight or you risk damaging your camera.
Step 3 – Attach your plate, which now has your camera mounted to it, back onto your tripod.
Your tripod comes with a ‘head’. Your tripod’s head is what your camera is mounted on top of. There are several different types of tripod heads and mounts which are all useful for different things.
Ball Heads and Pan/Tilt Heads are the two most common types of tripod heads. Ball Heads allow you to adjust your camera’s position quite a bit before you start shooting. They are not good for adding in camera movements while you are filming, however, because you need to lock them in place. Pan/Tilt heads are great for creating camera movement. Most Pan/Tilt heads have a handle which you can use to make a smooth panning motion.
Part 2: Why Do You Need a Tripod: Benefits of Using Tripod
Why can’t you just hold a camera in your hand while shooting vlog entries for your YouTube channel? Honestly, you can, but the camera may shake a lot and your footage might end up being unusable. Putting a camera on a tripod reduces the probability of camera shake to the minimum and that is just the tip of the iceberg.
A huge amount of vlogs can be described as sit down videos, in which the host of the video sits in front of a camera and talks to the audience. Holding a camera while talking or trying to present a product to the viewers is next to impossible, so in order to avoid having to deal with a camera, you can simply put it on a tripod, find the best angle, and push the record button.
On the go videos, are recorded at exterior locations, and a lot of YouTubers choose to shoot these types of videos handheld, but this approach makes it difficult to maintain the same shot composition for long. A Monopod, Gorillapod or just a simple selfie stick can make your job much easier because they stabilize the camera. In addition, shooting smooth panning shots without a tripod is as difficult as it sounds.
Part 3: A Few Things You’ll Need to Consider Before You Buy a Tripod
There are thousands of different tripod models you can use for vlogging, but which model you’re going to choose depends mostly on the type of vlog you want to make. If you are planning on shooting all of your videos in the studio-like conditions, then portability isn’t such an important feature, while quite the opposite is true if you intend on filming all of your footage on outdoor locations.
However, there are certain traits you have to consider when choosing a tripod you’re going to use while recording your vlog entries.
Sturdiness: There is absolutely no point in spending money on a tripod that breaks easily. Although if your plan is to shoot vlogs at home or in a studio, then buying a cheaper plastic tripod isn’t such a bad option, since the clamps and joints won’t have to endure a lot of wear and tear. Consider buying a more durable tripod if you are going to be traveling a lot while working on your vlogs.
The Type of Camera: A number of factors can contribute to the weight of a camera, including battery grips or lenses, so before you buy a tripod make sure that it can support the weight of the camera you want to use to record your videos.
The Maximum Height: Most vloggers don’t really have to worry about how tall their tripod is, because they are not on their feet in any of the shots featured in the video. Vloggers working on DIY videos, cooking tutorials or any other type of vlog that involves movement and action should pay attention to this trait.
Photo or Video Tripods: Do you want to take beautiful panning shots? If the answer is yes then you should get a video tripod that enables you to move the camera smoothly in any direction. Photo tripods are a great option for static shots that don’t involve a lot of camera movement.
Mobility: The heavier a tripod is, the more stability it can provide, but carrying a tripod that weighs over 10 pounds to shoot sports or adventure vlogs can be a tiring endeavor. Although portability is a factor, it shouldn’t prevent you from buying a high-quality tripod that will ensure your footage is perfectly smooth and stable.
Part 4: 4 Types of Tripods
Full-Sized Tripods: are very sturdy, and as a result can be fairly heavy. Although you can take them a lot of places they are not convenient to carry for extended periods of time. They are the most reliable way to ensure you have absolutely no camera shake.
Compact Tripods: appear to be the same size as Full-Sized tripods, but they are actually much lighter. You can get the same height with a Compact Tripod as a Full-Sized tripod and it will be much easier to travel with. However, Compact Tripods are not as stable. If you are shooting for an extended period of time you may need to weigh your Compact Tripod down with sandbags to keep it steady.
Gorillapods: have flexible legs which can be wrapped around posts, fences, or anything else you may want to mount your camera on. They are also lightweight enough that you can carry them around while you shoot. If you bend it right you can essentially use your Gorillapod as a heavy-duty selfie-stick for your camera.
Table-Top Tripods: are very small and easy to travel with. You can leave one in your camera bag or your glove box. Table-Top Tripods are meant to be set up on top of desks or other stable surfaces and may not be ideal for heavier cameras.
Part 5: The 5 Best Tripods For YouTube Vlogging
Even if you know everything there is to know about tripods, the selection process can be daunting. That’s why we’ve shortlisted the top 5 tripods on the market, in an effort to make finding the right tripod for your vlog videos as quick an easy as it can possibly be. Let’s have a look.
1. CamRah Smartphone Tripod
Price: $24.99
An increasing number of Smartphones features powerful cameras that can record videos at high resolutions. Unfortunately, most iPhones and Android devices are lightweight, which makes it difficult to hold them perfectly still while shooting a video. CamRah Smartphone Tripod offers a perfect solution to this problem because it is easy to pack and you can carry it wherever you go, without needing the extra space.
It weighs just 0.6lbs and it is 10.8 inches tall. The tripod has a maximum load of 11lbs which means that besides Smartphones, you can also mount action cameras, webcams, or even smaller DSLR cameras onto it. The flexible legs made from high-density foam offer stability even when the CamRah Tripod is placed on an uneven surface.
Pros:
- Easily portable
- Affordable
- Jaws technology provides an extra strong grip of the camera
Cons:
- The tripod’s legs can’t be extended
- Can’t be used with professional cameras
2. Manfrotto Mini Travel Tripod
Price: $34.99
Yet another great option for shooting vlogs with a Smartphone. The Manfrotto Mini Travel Tripod kit is also an excellent choice for all vloggers who shoot their videos with compact cameras. The tripod weighs just 0.51lbs and it is 5.31 inches tall, which makes it a perfect travel companion. However, it can’t support cameras heavier than 2.2lbs, so you have to carefully choose the camera you want to put on this tripod.
The tripod’s rotatable head features a lock button that enables you to fix the camera at a certain position and to shoot a video from an angle you selected. You can’t extend the legs on this tripod so shooting high angle shots is not an option.
Pros:
- Small and durable
- Allows you to mount almost any Smartphone model
- Compatible with compact cameras
Cons:
- Limits your shot selection
- Tripod’s legs can’t be extended
3. Joby Gorilla Pod
Price: $22.50
This tripod is a superstar in the vlogging community because it is flexible, easy to set up and it fits into a pocket. Joby Gorilla Pod’s legs are segmented, so you can freely choose an angle from which you want to shoot, without having to worry about the camera’s stability. You can use this tripod on flat and uneven surfaces equally effectively.
Joby Gorilla weighs just 1lbs and its maximum height 11.6 inches, which makes it perfectly suited for talking heads videos. Using this tripod while you are on the go is also an option if you have a camera that weighs less than 3lbs.
Pros:
- Highly adjustable
- Sturdy and Lightweight
- Made from stainless steel
Cons:
- Can’t be used for panning shots
- Legs can be extended for just one inch
4. Manfrotto Compact Action Tripod
Price: $64.49
If you love shooting your vlogs at night or if you simply want a tripod you can use in the studio an outdoor conditions, then Manfrotto’s Compact Action Tripod is one the best options you have at your disposal. The ergonomic head features a mounting plate that is easy to use and which provides a perfect grip of a camera.
This tripod is designed to be used with consumer-level DSLR cameras, but you can use it to shoot videos with almost all types of cameras. The Compact Action Tripod has a maximum height of 51.57 inches, and it can’t hold cameras heavier than 3.30lbs.
Pros:
- Suitable for both photography and video
- Great for outdoor use
- Allows you to take a wide variety of shots
Cons:
- Can’t support a lot of weight
- Not perfectly suited for professional-level cameras
5. Magnus VT-4000 Fluid Head Tripod
Price: $159.95
Experienced vloggers who record their videos with professional cameras, will enjoy using the Magnus VT-4000 Fluid Head Tripod. The 59-inch tall tripod can support as much as 8.8lbs of weight, and it is designed to help you create perfectly stable shots. The superb panning and tilting option enable you to move your camera freely while recording smooth shots, free of camera shakes.
The quick release mounting plate is compatible with a wide range of cameras, so you can experiment and work with several different cameras while using the same tripod. You can hardly make a mistake if you choose to buy this tripod because you’ll be able to use it to record vlogs at interior and exterior locations.
Pros:
- Easily adjustable to any surface
- Perfect for high angle shots
- Heavy-duty locks
Cons:
- Weighs 7.9lbs
- Not the best choice for action and adventure vlogs
Richard Bennett
Richard Bennett is a writer and a lover of all things video.
Follow @Richard Bennett
- Title: "In 2024, Understanding User Engagement Measuring Own and Enemy Content"
- Author: Joseph
- Created at : 2024-05-31 13:40:55
- Updated at : 2024-06-01 13:40:55
- Link: https://youtube-stream.techidaily.com/in-2024-understanding-user-engagement-measuring-own-and-enemy-content/
- License: This work is licensed under CC BY-NC-SA 4.0.
