
:max_bytes(150000):strip_icc()/Screenshot2024-02-13at9.50.30AM-1b8b8f8ed26f41bc9bf019e65c3a20ce.png)
In 2024, The Ultimate Guide to Producing Hysterical YouTube Video Reactions (3 Key Techniques)
The Ultimate Guide to Producing Hysterical YouTube Video Reactions (3 Key Techniques)
How to Make a YouTube Reaction Video?

Richard Bennett
Mar 27, 2024• Proven solutions
Sharing ideas and opinions on virtually any topic you can think of with millions of people around the world is arguably one of the greatest benefits YouTube gives to content creators. Even so, building your channel exclusively around reaction videos may prove to be difficult, but this doesn’t mean that you can’t use this type of video to comment on what other YouTubers are saying.
The process of making a YouTube reaction video is not overly technical, although you will have to decide which video editing technique you are going to use to make a reaction video. That is why in this article we are going to take a look at different ways to make a YouTube reaction video.
- Method 1: Making Reaction Videos with PIP feature in Filmora
- Method 2: Create YouTube Reaction Video with Split Screen Templates
- Method 3: Make A Reaction Video for YouTube with AI Portrait
How to Make a Reaction Video for Your YouTube Channel? [3 Ways]
Using the footage without the consent of the copyright owner is punishable by the law, which means that you can only include the footage in a reaction video if you have the owner’s consent. Consequently, the selection of videos you can comment on is going to be limited, since it is entirely up to the creator of the video if they are going to give you permission to use their footage in your reaction video.
You can use the following video editing techniques, once you have access to the video you would like to comment on.
Method 1: Making a reaction video with the Picture-in-Picture feature in Filmora
Video editing software, like Filmora , can also be used to create YouTube reaction videos, but you must have all the footage you would like to include in that video before you can start putting it together.
The first step is to create a new project in Filmora and then import the media assets into the editor. Besides video clips, you can also add music, pictures, or create opening titles and end credits for your reaction video.


Place the video you’re reacting to on a video track on the timeline and then add the video of your reaction to the timeline that is directly above the one to which you added the first video clip. Click on the top video in the preview window and use the handles that are positioned around the edges of the video to adjust its size.
If you would like to change the on-screen position of the overlay clip, you should simply click on it and drag it to the new location within the preview window.

Filmora offers more than sixty motion effects, hundreds of transitions, and visual effects that can make your reaction video more visually appealing to the audience.

Moreover, Filmora video editing software offers a variety of blending modes, and it lets you control the opacity of the overlay video so that you can make it more transparent. Whether or not you are going to use these options depends on the footage you’re working with and the demands of a particular project.
Pros of using the Picture in Picture feature to make reaction videos in Filmora: You can place and adjust the videos with more customizable options. Get more tips about Making a PIP video in Filmora .
Method 2: Create several reaction windows with the Split Screen feature
Besides the Picture-in-Picture option, Filmora also enables you to play two or more videos simultaneously with Split Screen templates. Drag and drop the template you want to use in your reaction video to the timeline and click on the Enable Split Screen Animation tick box if you want to use the template without animations.

Afterward, you should drag the video clips from the Media tab and drop them onto the section of the preview window where you want them to be located. Keep in mind that you cannot add more than six videos to a split-screen template.

All videos you add to a split-screen template can be edited, and you just have to click on them if you want to adjust their sizes, enhance colors, mute their audio tracks or add a new audio file to the template.
Check the details about How to make a split-screen video step by step.
Pros of using Split-screen template to make reaction video in Filmora: various templates for creating stylish video side by side easily.
Method 3: Create A YouTube Reaction Video with AI Portrait
With the human segmentation effect in AI Portrait, you can now blend the reaction video in a more natural way. The human segmentation effect will isolate people from the background, you can use any background in the video.
Note: You can use this feature after version after V 10.5 for Windows, and V 10.4 for Mac. Click the button below to get the latest version of Filmora on your desktop.
Step 1: Import the videos to the media library, and then drag the background video to the first video track, and the reaction video to the track above.

Step 2: Go to the Effects tab at the top, and click the AI Portrait category, and then you will see many effects such as Human Segmentation, Human Pixelate, Human Noise, and lighting flash. Here, drag and drop the Human segmentation effect to the reaction video.

Step 3: Select the reaction video in the timeline, and then adjust its size and position by dragging it on the preview window. See, the reaction video is fine blended with the background video.

Step 4: That’s the basic editing of making a reaction video. You can also add the neon or flashing effect to the video. If everything goes well, click Export and save the video.

You can find out more details about using the AI Portrait effect to make a reaction video .
How to Avoid Copyright Infringements While Making a YouTube Reaction Video
All videos you can find on YouTube are protected by intellectual property regulations, and you can’t use them without the copyright owner’s permission. The only way to avoid being absolutely sure that your reaction video isn’t violating the law is to contact the video creator and ask for permission to use their intellectual property. However, most YouTubers are reluctant to let others download and edit their videos unless they already have a large fan base.
In case you’re granted permission to comment on a video, you have nothing to worry about. However, if you don’t get the permission you’re all the money the reaction video generates will go to the copyright owner or you will be forced to delete the video from your channel. There are still a few things you can do, even if you don’t get permission to use the video you would like to comment on.
Muting the video’s audio or altering its pitch will make it more difficult for YouTube’s bots to detect copyright infringement, although this method may not always work. In addition, you can play a video for up to thirty seconds, then comment on that segment, and then play another segment of that video.
There is no way of saying whether any of these editing tricks are going to help you avoid a copyright claim, and you should only use them if you have no other option.
Conclusion
Anyone can master the technical aspects of making a reaction video, but the topics you react to need to be related to the general topic your channel covers. What’s more, the idea of your reaction video has to be relevant for your audience if you want to attract their attention. Which video editing techniques are you using to make a YouTube reaction video?
Download Mac Version ](https://tools.techidaily.com/wondershare/filmora/download/ )
Richard Bennett
Richard Bennett is a writer and a lover of all things video.
Follow @Richard Bennett
Richard Bennett
Mar 27, 2024• Proven solutions
Sharing ideas and opinions on virtually any topic you can think of with millions of people around the world is arguably one of the greatest benefits YouTube gives to content creators. Even so, building your channel exclusively around reaction videos may prove to be difficult, but this doesn’t mean that you can’t use this type of video to comment on what other YouTubers are saying.
The process of making a YouTube reaction video is not overly technical, although you will have to decide which video editing technique you are going to use to make a reaction video. That is why in this article we are going to take a look at different ways to make a YouTube reaction video.
- Method 1: Making Reaction Videos with PIP feature in Filmora
- Method 2: Create YouTube Reaction Video with Split Screen Templates
- Method 3: Make A Reaction Video for YouTube with AI Portrait
How to Make a Reaction Video for Your YouTube Channel? [3 Ways]
Using the footage without the consent of the copyright owner is punishable by the law, which means that you can only include the footage in a reaction video if you have the owner’s consent. Consequently, the selection of videos you can comment on is going to be limited, since it is entirely up to the creator of the video if they are going to give you permission to use their footage in your reaction video.
You can use the following video editing techniques, once you have access to the video you would like to comment on.
Method 1: Making a reaction video with the Picture-in-Picture feature in Filmora
Video editing software, like Filmora , can also be used to create YouTube reaction videos, but you must have all the footage you would like to include in that video before you can start putting it together.
The first step is to create a new project in Filmora and then import the media assets into the editor. Besides video clips, you can also add music, pictures, or create opening titles and end credits for your reaction video.
Place the video you’re reacting to on a video track on the timeline and then add the video of your reaction to the timeline that is directly above the one to which you added the first video clip. Click on the top video in the preview window and use the handles that are positioned around the edges of the video to adjust its size.
If you would like to change the on-screen position of the overlay clip, you should simply click on it and drag it to the new location within the preview window.
Filmora offers more than sixty motion effects, hundreds of transitions, and visual effects that can make your reaction video more visually appealing to the audience.
Moreover, Filmora video editing software offers a variety of blending modes, and it lets you control the opacity of the overlay video so that you can make it more transparent. Whether or not you are going to use these options depends on the footage you’re working with and the demands of a particular project.
Pros of using the Picture in Picture feature to make reaction videos in Filmora: You can place and adjust the videos with more customizable options. Get more tips about Making a PIP video in Filmora .
Method 2: Create several reaction windows with the Split Screen feature
Besides the Picture-in-Picture option, Filmora also enables you to play two or more videos simultaneously with Split Screen templates. Drag and drop the template you want to use in your reaction video to the timeline and click on the Enable Split Screen Animation tick box if you want to use the template without animations.
Afterward, you should drag the video clips from the Media tab and drop them onto the section of the preview window where you want them to be located. Keep in mind that you cannot add more than six videos to a split-screen template.
All videos you add to a split-screen template can be edited, and you just have to click on them if you want to adjust their sizes, enhance colors, mute their audio tracks or add a new audio file to the template.
Check the details about How to make a split-screen video step by step.
Pros of using Split-screen template to make reaction video in Filmora: various templates for creating stylish video side by side easily.
Method 3: Create A YouTube Reaction Video with AI Portrait
With the human segmentation effect in AI Portrait, you can now blend the reaction video in a more natural way. The human segmentation effect will isolate people from the background, you can use any background in the video.
Note: You can use this feature after version after V 10.5 for Windows, and V 10.4 for Mac. Click the button below to get the latest version of Filmora on your desktop.
Step 1: Import the videos to the media library, and then drag the background video to the first video track, and the reaction video to the track above.
Step 2: Go to the Effects tab at the top, and click the AI Portrait category, and then you will see many effects such as Human Segmentation, Human Pixelate, Human Noise, and lighting flash. Here, drag and drop the Human segmentation effect to the reaction video.
Step 3: Select the reaction video in the timeline, and then adjust its size and position by dragging it on the preview window. See, the reaction video is fine blended with the background video.
Step 4: That’s the basic editing of making a reaction video. You can also add the neon or flashing effect to the video. If everything goes well, click Export and save the video.
You can find out more details about using the AI Portrait effect to make a reaction video .
How to Avoid Copyright Infringements While Making a YouTube Reaction Video
All videos you can find on YouTube are protected by intellectual property regulations, and you can’t use them without the copyright owner’s permission. The only way to avoid being absolutely sure that your reaction video isn’t violating the law is to contact the video creator and ask for permission to use their intellectual property. However, most YouTubers are reluctant to let others download and edit their videos unless they already have a large fan base.
In case you’re granted permission to comment on a video, you have nothing to worry about. However, if you don’t get the permission you’re all the money the reaction video generates will go to the copyright owner or you will be forced to delete the video from your channel. There are still a few things you can do, even if you don’t get permission to use the video you would like to comment on.
Muting the video’s audio or altering its pitch will make it more difficult for YouTube’s bots to detect copyright infringement, although this method may not always work. In addition, you can play a video for up to thirty seconds, then comment on that segment, and then play another segment of that video.
There is no way of saying whether any of these editing tricks are going to help you avoid a copyright claim, and you should only use them if you have no other option.
Conclusion
Anyone can master the technical aspects of making a reaction video, but the topics you react to need to be related to the general topic your channel covers. What’s more, the idea of your reaction video has to be relevant for your audience if you want to attract their attention. Which video editing techniques are you using to make a YouTube reaction video?
Download Mac Version ](https://tools.techidaily.com/wondershare/filmora/download/ )
Richard Bennett
Richard Bennett is a writer and a lover of all things video.
Follow @Richard Bennett
From Budget Channels to Big Brands: YouTube Sponsorships Demystified
How to Get YouTube Sponsorship for Small Channels (Easy)
Richard Bennett
Mar 27, 2024• Proven solutions
Are you looking for YouTube sponsorship? Getting YouTube sponsorship for small channels might seem to be a very difficult goal. Whenever the word sponsors strikes your mind, you think of the big and expensive commercials.
However, if you lower your expectation from the big commercial companies, there are several other companies in the market that can help you with the YouTube sponsorship.
In this article, you will learn how to get YouTube sponsorship and make money out of it.
- Part1: Before You Start Applying For Sponsorship
- Part2: How To Get A Sponsor For Youtube Channel
- Part3: Types of Sponsorship
Part 1: Before You Start Applying For Sponsorship
1. Read YouTube Rules
As you are a small channel, you must be very cautious about the YouTube rules. Never put up any abusive content on your channel that degrades the value of YouTube. Ensure that your channel’s content fits the directions and guidelines of YouTube.
The supporters of YouTube sponsorship for small channels would never wish to get associated with channels that might be erased due to the strategy infringement of YouTube. So, be careful before uploading your content.

2. Quality Content Is Important
The content you offer through your channel must offer valuable content. Not just that, you must have a library of valuable content so that the potential sponsors can browse through several materials in your channel. Uploading once in a blue moon or just a few contents in the beginning and expecting YouTube sponsorships to pour in is not the way out to acquire supporters.

3. Leave Your Business Email
Always add a business email ID to your channel, which shows that you would love to receive business inquiries. This is the ID where you will receive notifications for friend requests, video comments, and even the battering messages once you have a large fan following.

4. Try to Make Your Video Eye-catching
A high-quality video will also attract sponsors. Don’t just put your footage together and upload it to YouTube, add some transitions, elements, and effects to make it more entertaining and attractive. Yet not everyone is able to edit videos perfectly, that’s why we would like to recommend Filmora for you.
Filmora is a video editing software for people of different levels. For beginners, the Instant Mode, Template Mode saves you from the trouble of finding the proper transitions or elements. For experienced, the Green Screen, Split Screen, Speed Ramping, and more allow you to add more effects to your video.
Check the below videos to find out the features of Filmora and download it to get started with video editing.
Part 2: How To Get A Sponsor For Youtube Channel
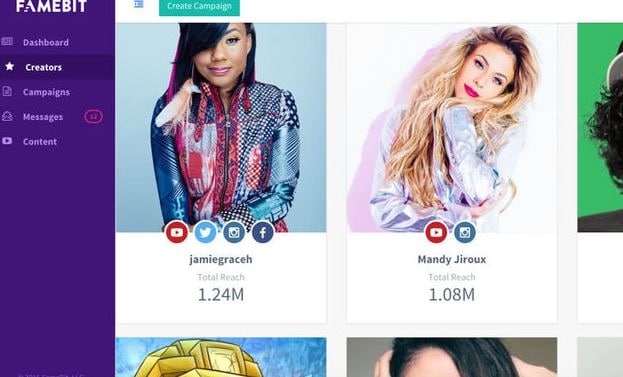
1. Use YouTube Sponsorship Platform – Famebit
If you are searching for YouTube sponsorship for small channels, Famebit is a trusted platform that can be considered. It is an interface for the advertisers and the video creators who require sponsorship for their content.
Utilizing Famebit can be beneficial in acquiring more than the average amount of cash as it is added by Google. If you have 5000 endorsers for your channel, you can very well utilize Famebit to obtain YouTube sponsorship for small channels.
You can explore various items like contraptions, innovations, designs, and more when you get to their commercial center by making a free record. Famebit charges 10% of the sponsored amount and the installment is made by check or PayPal.
2. Reach Out Directly
Reaching out to the people directly is one of the tried and tested ways to acquire YouTube sponsorship for small channels. Research and try to find 50 to 100 companies that would be interested in your channel.
It will not be much difficult to search for that one person within this list whom you can connect with directly. Once you have the company’s list and detailed contact information of those companies, send a mail inviting them to check your channel and show your interest to partner with them.
It is essential to make yourself stand out in the colossal crowd. Ensure your channel is unique and somewhat different from the rest because the contacted companies keep receiving partnering submissions from several other content creators too.
One important thing is not to send out the same old letter to all 50 companies and keep hoping to receive a positive response from at least one. Try to focus on your channel’s USP and highlight the same in your letter to the companies while trying to contact the companies for YouTube Sponsorship.

3. Remember To Attend Exhibition
The trade shows and exhibitions are a great way to search for YouTube sponsorship for small channels. The exhibitions that focus on new media give a huge platform for you to find a sponsor when you participate in it.
Such events offer tricks and tips, helps you to talk to other content creators, and also lets you connect with the brand managers who can offer your channel with YouTube sponsorship.

Part 3: Types of Sponsorship
1. Product Sponsorships
When you are searching for sponsorship for a particular product, ensure that it is relevant to your channel. Never approach the sponsors without ensuring the same as you might put off your viewers and your sponsors will not achieve their expected results. You might lose both your sponsors and audiences in such a case.
When you try to get YouTube sponsorship for small channels, it is quite difficult as the promotion of the product becomes limited to whatever small following they have. Product reviews and tutorials are the best ways to obtain product sponsorships.
2. Paid Sponsorship
Among all sponsorships, paid sponsorship is the most challenging one. Usually, when you review the products of the affiliate links in your videos, you earn revenues, but, in the paid sponsorship you earn by advertising product and company links on your channel.
When you add the company’s products to your videos, you earn money. It appears at the beginning and at the end of your videos after it is played on your YouTube channel.
3. Affiliate Sponsorship
It is the easiest of all sponsorships but also the least revenue-generating one too. Affiliate sponsorship works by sharing affiliate codes and links. It is used by your audiences to obtain discounts or offer you a reward.
There are two types in which affiliate sponsorship works. One is the discounting option where the code is shared and the viewers use these codes to get discounts anywhere between 5-15% in shopping products from that same site. Another option is to use the affiliate code to integrate it into an URL that offers profits to a content creator in form of traffic.
Conclusion
Not just the popular channels, the newbies can also earn YouTube sponsorship when they know the way outs. Follow the above tricks to get the youtube sponsorship for small channels without much effort. If your content is unique and your process to reach the sponsors is right, you can definitely make money through this medium. If you want to edit a YouTube video, Filmora can help you with its powerful features.
Richard Bennett
Richard Bennett is a writer and a lover of all things video.
Follow @Richard Bennett
Richard Bennett
Mar 27, 2024• Proven solutions
Are you looking for YouTube sponsorship? Getting YouTube sponsorship for small channels might seem to be a very difficult goal. Whenever the word sponsors strikes your mind, you think of the big and expensive commercials.
However, if you lower your expectation from the big commercial companies, there are several other companies in the market that can help you with the YouTube sponsorship.
In this article, you will learn how to get YouTube sponsorship and make money out of it.
- Part1: Before You Start Applying For Sponsorship
- Part2: How To Get A Sponsor For Youtube Channel
- Part3: Types of Sponsorship
Part 1: Before You Start Applying For Sponsorship
1. Read YouTube Rules
As you are a small channel, you must be very cautious about the YouTube rules. Never put up any abusive content on your channel that degrades the value of YouTube. Ensure that your channel’s content fits the directions and guidelines of YouTube.
The supporters of YouTube sponsorship for small channels would never wish to get associated with channels that might be erased due to the strategy infringement of YouTube. So, be careful before uploading your content.
2. Quality Content Is Important
The content you offer through your channel must offer valuable content. Not just that, you must have a library of valuable content so that the potential sponsors can browse through several materials in your channel. Uploading once in a blue moon or just a few contents in the beginning and expecting YouTube sponsorships to pour in is not the way out to acquire supporters.
3. Leave Your Business Email
Always add a business email ID to your channel, which shows that you would love to receive business inquiries. This is the ID where you will receive notifications for friend requests, video comments, and even the battering messages once you have a large fan following.
4. Try to Make Your Video Eye-catching
A high-quality video will also attract sponsors. Don’t just put your footage together and upload it to YouTube, add some transitions, elements, and effects to make it more entertaining and attractive. Yet not everyone is able to edit videos perfectly, that’s why we would like to recommend Filmora for you.
Filmora is a video editing software for people of different levels. For beginners, the Instant Mode, Template Mode saves you from the trouble of finding the proper transitions or elements. For experienced, the Green Screen, Split Screen, Speed Ramping, and more allow you to add more effects to your video.
Check the below videos to find out the features of Filmora and download it to get started with video editing.
Part 2: How To Get A Sponsor For Youtube Channel
1. Use YouTube Sponsorship Platform – Famebit
If you are searching for YouTube sponsorship for small channels, Famebit is a trusted platform that can be considered. It is an interface for the advertisers and the video creators who require sponsorship for their content.
Utilizing Famebit can be beneficial in acquiring more than the average amount of cash as it is added by Google. If you have 5000 endorsers for your channel, you can very well utilize Famebit to obtain YouTube sponsorship for small channels.
You can explore various items like contraptions, innovations, designs, and more when you get to their commercial center by making a free record. Famebit charges 10% of the sponsored amount and the installment is made by check or PayPal.
2. Reach Out Directly
Reaching out to the people directly is one of the tried and tested ways to acquire YouTube sponsorship for small channels. Research and try to find 50 to 100 companies that would be interested in your channel.
It will not be much difficult to search for that one person within this list whom you can connect with directly. Once you have the company’s list and detailed contact information of those companies, send a mail inviting them to check your channel and show your interest to partner with them.
It is essential to make yourself stand out in the colossal crowd. Ensure your channel is unique and somewhat different from the rest because the contacted companies keep receiving partnering submissions from several other content creators too.
One important thing is not to send out the same old letter to all 50 companies and keep hoping to receive a positive response from at least one. Try to focus on your channel’s USP and highlight the same in your letter to the companies while trying to contact the companies for YouTube Sponsorship.
3. Remember To Attend Exhibition
The trade shows and exhibitions are a great way to search for YouTube sponsorship for small channels. The exhibitions that focus on new media give a huge platform for you to find a sponsor when you participate in it.
Such events offer tricks and tips, helps you to talk to other content creators, and also lets you connect with the brand managers who can offer your channel with YouTube sponsorship.
Part 3: Types of Sponsorship
1. Product Sponsorships
When you are searching for sponsorship for a particular product, ensure that it is relevant to your channel. Never approach the sponsors without ensuring the same as you might put off your viewers and your sponsors will not achieve their expected results. You might lose both your sponsors and audiences in such a case.
When you try to get YouTube sponsorship for small channels, it is quite difficult as the promotion of the product becomes limited to whatever small following they have. Product reviews and tutorials are the best ways to obtain product sponsorships.
2. Paid Sponsorship
Among all sponsorships, paid sponsorship is the most challenging one. Usually, when you review the products of the affiliate links in your videos, you earn revenues, but, in the paid sponsorship you earn by advertising product and company links on your channel.
When you add the company’s products to your videos, you earn money. It appears at the beginning and at the end of your videos after it is played on your YouTube channel.
3. Affiliate Sponsorship
It is the easiest of all sponsorships but also the least revenue-generating one too. Affiliate sponsorship works by sharing affiliate codes and links. It is used by your audiences to obtain discounts or offer you a reward.
There are two types in which affiliate sponsorship works. One is the discounting option where the code is shared and the viewers use these codes to get discounts anywhere between 5-15% in shopping products from that same site. Another option is to use the affiliate code to integrate it into an URL that offers profits to a content creator in form of traffic.
Conclusion
Not just the popular channels, the newbies can also earn YouTube sponsorship when they know the way outs. Follow the above tricks to get the youtube sponsorship for small channels without much effort. If your content is unique and your process to reach the sponsors is right, you can definitely make money through this medium. If you want to edit a YouTube video, Filmora can help you with its powerful features.
Richard Bennett
Richard Bennett is a writer and a lover of all things video.
Follow @Richard Bennett
- Title: In 2024, The Ultimate Guide to Producing Hysterical YouTube Video Reactions (3 Key Techniques)
- Author: Joseph
- Created at : 2024-05-31 13:46:01
- Updated at : 2024-06-01 13:46:01
- Link: https://youtube-stream.techidaily.com/in-2024-the-ultimate-guide-to-producing-hysterical-youtube-video-reactions-3-key-techniques/
- License: This work is licensed under CC BY-NC-SA 4.0.
