In 2024, The Essential Handheld Guide to YouTube Production
The Essential Handheld Guide to YouTube Production
How To Make YouTube Videos on Your Smartphone

Richard Bennett
Mar 27, 2024• Proven solutions
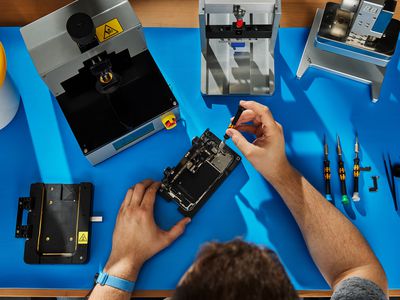
It is fun to be able to record a vlog entry whenever inspiration strikes you, and your smartphone is a great choice for recording on the go. Smartphones have really great cameras, and you probably always have your phone with you. You can even post directly from your phone to YouTube!
How To Make YouTube Videos on Your Smartphone
Making a video on your smartphone is similar to making a video with any other camera in a lot of ways. There are also a lot of ways in which it is different. You always have to watch out for camera shake, for example, but it can be even harder to control when you’re walking around shooting on your mobile device. Here are three things to keep in mind when vlogging with your smartphone.
Part 1. Keep It Steady
For a nice, smooth, shot consider resting your hand up on a railing, table, or anything else that will keep it steady while you film. Camera shake is always distracting to viewers, and smartphone videos are notoriously unstable because you are almost always holding your phone in your hand.
There is equipment you can use to cut out camera shake. You can get a smartphone mount for your tripod, or you can even stabilize your phone using a selfie stick. Many of the very newest smartphones have built in hardware called ‘OIS’ – optical image stabilization – that helps reduce shakiness.
Part 2. Be Heard
You have a lot to say, so make sure people can hear you say it! Smartphones do not tend to have very good microphones built in (neither do most cameras), so try to vlog from somewhere without a lot of background noise. It will help a lot if your voice has nothing to compete with.
Ideally, you should get an external mic to record your voice while you vlog on your phone. There are shotgun mics you can plug directly into the audio jack on your phone which will record great audio, or you can get a high quality MP3 recorder and carry it around in your pocket.
Part 3. Tilt Your Phone
When recording on the spur of the moment with your smartphone it is easy to automatically hold it the same way you would while texting or taking a selfie. If you record a video with your phone held so that it is tall – a ‘portrait’ shot – then your video will have thick black bars on either side when you post it to YouTube. If you tilt your phone so that it is wide you will record a ‘landscape’ shot, which will match the dimensions YouTube plays videos in.
The exception to this is videos you plan to post on Instagram. On Instagram everything is cropped into a square, and it is easier to imagine what your footage will look like as a square when you hold your phone strait up. Simply focus on the top of your screen and treat a portion of the bottom of your screen as if it is not there. When you hold your phone horizontally you need to try and estimate how much of the middle of your screen will make it in to your Instagram video, which can be awkward.
Those are the three main things to keep in mind, but if you are planning on posting directly to YouTube from your phone then you should also make sure you have a mobile app you can use to edit it first.
Filmora is a full-feature video editing app available for both Android and iPhone operating systems. With Filmora you can make awesome YouTube videos quickly using Filmora’s one-touch themes, or take a little bit more time personalizing your creation. One-touch themes are sets of related features, like filters and animated titles, which you can apply to your videos all at once. Filmora’s simple interface also makes it easy to apply filters, titles, overlays, transitions, and even royalty free music to your project one at a time.
After you’ve edited your video in Filmora you can post it directly to YouTube or other social media sites right from the app.
Richard Bennett
Richard Bennett is a writer and a lover of all things video.
Follow @Richard Bennett
Richard Bennett
Mar 27, 2024• Proven solutions
It is fun to be able to record a vlog entry whenever inspiration strikes you, and your smartphone is a great choice for recording on the go. Smartphones have really great cameras, and you probably always have your phone with you. You can even post directly from your phone to YouTube!
How To Make YouTube Videos on Your Smartphone
Making a video on your smartphone is similar to making a video with any other camera in a lot of ways. There are also a lot of ways in which it is different. You always have to watch out for camera shake, for example, but it can be even harder to control when you’re walking around shooting on your mobile device. Here are three things to keep in mind when vlogging with your smartphone.
Part 1. Keep It Steady
For a nice, smooth, shot consider resting your hand up on a railing, table, or anything else that will keep it steady while you film. Camera shake is always distracting to viewers, and smartphone videos are notoriously unstable because you are almost always holding your phone in your hand.
There is equipment you can use to cut out camera shake. You can get a smartphone mount for your tripod, or you can even stabilize your phone using a selfie stick. Many of the very newest smartphones have built in hardware called ‘OIS’ – optical image stabilization – that helps reduce shakiness.
Part 2. Be Heard
You have a lot to say, so make sure people can hear you say it! Smartphones do not tend to have very good microphones built in (neither do most cameras), so try to vlog from somewhere without a lot of background noise. It will help a lot if your voice has nothing to compete with.
Ideally, you should get an external mic to record your voice while you vlog on your phone. There are shotgun mics you can plug directly into the audio jack on your phone which will record great audio, or you can get a high quality MP3 recorder and carry it around in your pocket.
Part 3. Tilt Your Phone
When recording on the spur of the moment with your smartphone it is easy to automatically hold it the same way you would while texting or taking a selfie. If you record a video with your phone held so that it is tall – a ‘portrait’ shot – then your video will have thick black bars on either side when you post it to YouTube. If you tilt your phone so that it is wide you will record a ‘landscape’ shot, which will match the dimensions YouTube plays videos in.
The exception to this is videos you plan to post on Instagram. On Instagram everything is cropped into a square, and it is easier to imagine what your footage will look like as a square when you hold your phone strait up. Simply focus on the top of your screen and treat a portion of the bottom of your screen as if it is not there. When you hold your phone horizontally you need to try and estimate how much of the middle of your screen will make it in to your Instagram video, which can be awkward.
Those are the three main things to keep in mind, but if you are planning on posting directly to YouTube from your phone then you should also make sure you have a mobile app you can use to edit it first.
Filmora is a full-feature video editing app available for both Android and iPhone operating systems. With Filmora you can make awesome YouTube videos quickly using Filmora’s one-touch themes, or take a little bit more time personalizing your creation. One-touch themes are sets of related features, like filters and animated titles, which you can apply to your videos all at once. Filmora’s simple interface also makes it easy to apply filters, titles, overlays, transitions, and even royalty free music to your project one at a time.
After you’ve edited your video in Filmora you can post it directly to YouTube or other social media sites right from the app.
Richard Bennett
Richard Bennett is a writer and a lover of all things video.
Follow @Richard Bennett
Expert Tips: Activating or Deactivating YouTube Comments
How to Turn on or off Comments on YouTube

Liza Brown
Mar 27, 2024• Proven solutions
YouTube comments are enabled by default, and if they aren’t, learning how to turn on comments on YouTube is extremely simple. One of the major benefits of having the comments enabled on your YouTube videos is that you get genuine feedback from your audiences.
As a brand, it is imperative to thoroughly read all the comments that your YouTube videos receive. This not only helps you do sentimental analysis; it also enables you to understand what the viewers expect from you, and where should you focus more while recording and editing your footage.
Keeping all these points in mind, the following sections explain how to enable comments on YouTube and how to turn off comments on YouTube. Here you will also get to know what other types of security and privacy options are there that you can use to filter the comments posted by the disturbing elements.
Part 1: How to Turn on or Turn off Comments for YouTube Channel
If you don’t want any comments on any of the videos that you publish, you must learn how to disable comments on the YouTube channel. The process of doing so is explained below:
Step 1: Get to YouTube Studio
Use your favorite web browser to go to YouTube and sign in to your Google account. Click your profile picture from the top-right corner of the webpage, and click YouTube Studio from the menu that appears.

Step 2: Go to Channel’s Advanced Settings
From the bottom of the left pane, click the Settings icon, click Channel from the Settings box that comes up next, and go to Advanced settings from the right window.

Step 3: Turn Off Comments
From the Audience section in the right pane itself, click to select the Yes, set this channel as made for kids. I always upload content that’s made for kids radio button. Click SAVE from the bottom-right corner to save the changes in order to turn off comments on all the videos on your YouTube channel.
To turn on comments on all the videos on your YouTube channel, you can follow the instructions given below:
1. Set Channel Videos as Not Made for Kids
Use the method explained above to get to the channel’s Advanced settings box. Select the No, set this channel as not made for kids. I never upload content that’s made for kids radio button. Click SAVE to save the changes.

2. Define Acceptable Comment Types
Click the Settings icon from the bottom of the left pane one more time. On the Settings box, go to the Upload defaults category from the left pane, and go to Advanced settings from the right. From the Comment visibility drop-down list under the Comments section in the right, choose your preferred comment allowance type, and click SAVE to allow the comments on the videos the channel has.

3. Set Comment Allowance for Videos
Back on the YouTube Studio page, click Content from the left pane. From the right section, check the Video box at the top of the list to select all the videos the channel has. Click Edit from the column header, and click Comments from the menu that comes up. From the New value drop-down list, choose your preferred allowance option for the comments, click UPDATE VIDEOS from the upper-right area, check the I understand the implications of this action box, and click UPDATE VIDEOS to allow comments on all the videos of the channel.

Additional Info about Comments Options
The four options that become available when you allow the comments on your YouTube channel along with their meaning are:
- Allow all comments
When you choose this option, YouTube allows everyone to post any kind of comment, irrespective of how inappropriate or unacceptable the text is.
- Hold potentially inappropriate comments for review
This option allows all the comments from all the users only if YouTube assumes that the text is safe, and doesn’t contain any inappropriate words. In case YouTube detects some objectionable content such as spam or slang, the comment is not published, until you review the text, and approve it manually.
- Hold all comments for review
Selecting this option holds all the comments from all the users, and waits for you to review and allow or disallow each of them manually.
- Disable comments
When this option is selected, no one can post a comment to the video(s) whatsoever.
Part 2: Turn on or Turn off Comments for Specific Videos
As you might have noticed, any video that is marked as ‘Made for kids’ doesn’t allow users to post comments. You can exploit this feature to enable or disable commenting on specific YouTube videos as well.
To learn how to turn on comments on YouTube for a specific video, you can follow the steps given below:
Step 1: Go to the Content Page
Use the method explained earlier to go to YouTube Studio, and click Content from the navigation bar in the left.
Step 2: Go to the Target Video’s Details Page
Hover the mouse over the target video in the right window, and click the Details icon.
Step 3: Turn on Comments
From under the Audience section in the right window of the Video details page, select the No, it’s not made for kids radio button. Next, click SHOW MORE, scroll down to the Comments and ratings section, and choose your preferred privacy option from the Comment visibility drop-down list. Click SAVE from the upper-right area to save the changes.

Note: To learn how to disable comments on YouTube for specific video, you can repeat the above steps, and choose the Yes, it’s made for kids radio button from the Audience section when you are on the Video details page.
FAQs About YouTube Comments
1. Why can’t I comment on the YouTube video?
There could be several reasons for this. For instance, the video or the entire channel is configured as ‘Made for kids’ by the owner, comments are disabled for the video or the channel by the owner, you are using some inappropriate words in the comment that have been temporarily blocked by YouTube, and the text requires to be reviewed and approved by the owner before it becomes visible, etc.
2. I want people to comment on my Private video. What should I do?
At the time of this writing, YouTube doesn’t allow anyone to post a comment on any video that has been set as ‘Private’. If your video is configured that way, you must change its nature to ‘Unlisted’, and share its link to the users before they can post a comment.
3. How can I block certain words and links on the YouTube comments?
You can go to YouTube Studio > Settings > Community, and on the Automated Filters tab in the right window, add the words to block in the Blocked words field. You can add multiple words by separating them with commas. To block the comments with links, check the Block links box. Click SAVE to save the changes.

4. If I turn comments off and back on again, will the old comments come back?
Yes. When you turn off the comments, the existing comments disappear. When you turn them back on, all the previous comments reappear, and become visible to the audience.
5. If I change my comment settings, will the existing comments be impacted?
That depends on the nature of the comments. For instance, if you modify the settings, the changes are reflected on the comments posted on the new videos, and the new comments on your channel homepage. However, there will be no impact on the existing comments on the existing videos, new comments on the existing videos, and the existing comments on your channel’s homepage.
Conclusion
It is easy to understand how to turn on comments on YouTube. The best thing is, the comments are enabled by default, and if you don’t need them, you can simply disable them by configuring the videos or the entire channel as ‘Made for kids’. If the comments on any video were enabled previously, and are disabled later on, the existing comments automatically disappear. They reappear when the comments on the video are reenabled.
Liza Brown
Liza Brown is a writer and a lover of all things video.
Follow @Liza Brown
Liza Brown
Mar 27, 2024• Proven solutions
YouTube comments are enabled by default, and if they aren’t, learning how to turn on comments on YouTube is extremely simple. One of the major benefits of having the comments enabled on your YouTube videos is that you get genuine feedback from your audiences.
As a brand, it is imperative to thoroughly read all the comments that your YouTube videos receive. This not only helps you do sentimental analysis; it also enables you to understand what the viewers expect from you, and where should you focus more while recording and editing your footage.
Keeping all these points in mind, the following sections explain how to enable comments on YouTube and how to turn off comments on YouTube. Here you will also get to know what other types of security and privacy options are there that you can use to filter the comments posted by the disturbing elements.
Part 1: How to Turn on or Turn off Comments for YouTube Channel
If you don’t want any comments on any of the videos that you publish, you must learn how to disable comments on the YouTube channel. The process of doing so is explained below:
Step 1: Get to YouTube Studio
Use your favorite web browser to go to YouTube and sign in to your Google account. Click your profile picture from the top-right corner of the webpage, and click YouTube Studio from the menu that appears.
Step 2: Go to Channel’s Advanced Settings
From the bottom of the left pane, click the Settings icon, click Channel from the Settings box that comes up next, and go to Advanced settings from the right window.
Step 3: Turn Off Comments
From the Audience section in the right pane itself, click to select the Yes, set this channel as made for kids. I always upload content that’s made for kids radio button. Click SAVE from the bottom-right corner to save the changes in order to turn off comments on all the videos on your YouTube channel.
To turn on comments on all the videos on your YouTube channel, you can follow the instructions given below:
1. Set Channel Videos as Not Made for Kids
Use the method explained above to get to the channel’s Advanced settings box. Select the No, set this channel as not made for kids. I never upload content that’s made for kids radio button. Click SAVE to save the changes.
2. Define Acceptable Comment Types
Click the Settings icon from the bottom of the left pane one more time. On the Settings box, go to the Upload defaults category from the left pane, and go to Advanced settings from the right. From the Comment visibility drop-down list under the Comments section in the right, choose your preferred comment allowance type, and click SAVE to allow the comments on the videos the channel has.
3. Set Comment Allowance for Videos
Back on the YouTube Studio page, click Content from the left pane. From the right section, check the Video box at the top of the list to select all the videos the channel has. Click Edit from the column header, and click Comments from the menu that comes up. From the New value drop-down list, choose your preferred allowance option for the comments, click UPDATE VIDEOS from the upper-right area, check the I understand the implications of this action box, and click UPDATE VIDEOS to allow comments on all the videos of the channel.
Additional Info about Comments Options
The four options that become available when you allow the comments on your YouTube channel along with their meaning are:
- Allow all comments
When you choose this option, YouTube allows everyone to post any kind of comment, irrespective of how inappropriate or unacceptable the text is.
- Hold potentially inappropriate comments for review
This option allows all the comments from all the users only if YouTube assumes that the text is safe, and doesn’t contain any inappropriate words. In case YouTube detects some objectionable content such as spam or slang, the comment is not published, until you review the text, and approve it manually.
- Hold all comments for review
Selecting this option holds all the comments from all the users, and waits for you to review and allow or disallow each of them manually.
- Disable comments
When this option is selected, no one can post a comment to the video(s) whatsoever.
Part 2: Turn on or Turn off Comments for Specific Videos
As you might have noticed, any video that is marked as ‘Made for kids’ doesn’t allow users to post comments. You can exploit this feature to enable or disable commenting on specific YouTube videos as well.
To learn how to turn on comments on YouTube for a specific video, you can follow the steps given below:
Step 1: Go to the Content Page
Use the method explained earlier to go to YouTube Studio, and click Content from the navigation bar in the left.
Step 2: Go to the Target Video’s Details Page
Hover the mouse over the target video in the right window, and click the Details icon.
Step 3: Turn on Comments
From under the Audience section in the right window of the Video details page, select the No, it’s not made for kids radio button. Next, click SHOW MORE, scroll down to the Comments and ratings section, and choose your preferred privacy option from the Comment visibility drop-down list. Click SAVE from the upper-right area to save the changes.
Note: To learn how to disable comments on YouTube for specific video, you can repeat the above steps, and choose the Yes, it’s made for kids radio button from the Audience section when you are on the Video details page.
FAQs About YouTube Comments
1. Why can’t I comment on the YouTube video?
There could be several reasons for this. For instance, the video or the entire channel is configured as ‘Made for kids’ by the owner, comments are disabled for the video or the channel by the owner, you are using some inappropriate words in the comment that have been temporarily blocked by YouTube, and the text requires to be reviewed and approved by the owner before it becomes visible, etc.
2. I want people to comment on my Private video. What should I do?
At the time of this writing, YouTube doesn’t allow anyone to post a comment on any video that has been set as ‘Private’. If your video is configured that way, you must change its nature to ‘Unlisted’, and share its link to the users before they can post a comment.
3. How can I block certain words and links on the YouTube comments?
You can go to YouTube Studio > Settings > Community, and on the Automated Filters tab in the right window, add the words to block in the Blocked words field. You can add multiple words by separating them with commas. To block the comments with links, check the Block links box. Click SAVE to save the changes.
4. If I turn comments off and back on again, will the old comments come back?
Yes. When you turn off the comments, the existing comments disappear. When you turn them back on, all the previous comments reappear, and become visible to the audience.
5. If I change my comment settings, will the existing comments be impacted?
That depends on the nature of the comments. For instance, if you modify the settings, the changes are reflected on the comments posted on the new videos, and the new comments on your channel homepage. However, there will be no impact on the existing comments on the existing videos, new comments on the existing videos, and the existing comments on your channel’s homepage.
Conclusion
It is easy to understand how to turn on comments on YouTube. The best thing is, the comments are enabled by default, and if you don’t need them, you can simply disable them by configuring the videos or the entire channel as ‘Made for kids’. If the comments on any video were enabled previously, and are disabled later on, the existing comments automatically disappear. They reappear when the comments on the video are reenabled.
Liza Brown
Liza Brown is a writer and a lover of all things video.
Follow @Liza Brown
Also read:
- [New] 2024 Approved Precision in Storyboard Planning
- [New] Hone Your Message Effective Use of Templates for Shorts
- [New] In 2024, Detailed Procedure for Sending Time-Synchronized SRT Files Online
- [New] Permitted Recording YouTube Video Screenshots?
- [New] Step-by-Step Editing & Uploading 360 Videos on YouTube
- [Updated] Connect Your TikTok Creativity to Twitter for 2024
- [Updated] In 2024, The Ultimate Visual Diary Unparalleled Tips for Documenting Your Sims' Stories in Sims 4
- [Updated] Simplifying AVI-GIF Conversion with Filmora on Windows/Mac
- 2024 Approved Navigating YouTube Triumphs An In-Depth Guide to Creator Studio
- 2024 Approved Timing of YouTube Earnings A Closer Insight
- Delving Into Past Facebook Chronicles with Tech Help
- Go Premium or Go Free? Discover Why You Should Still Consider ChatGPT Plus with GPT- 4'S Release!
- In 2024, Go Global with Music Transform Your Spotify Lists Into YouTube Videos
- In 2024, Instant Adjustment Match YouTube to Mac Aspects
- In 2024, Tips for a Secure YouTube Identity Check
- What Is a SIM Network Unlock PIN? Get Your OnePlus 11R Phone Network-Ready
- Windows 11 Audio Enhancement Feature Disablement Tutorial
- Title: In 2024, The Essential Handheld Guide to YouTube Production
- Author: Joseph
- Created at : 2024-12-29 19:06:49
- Updated at : 2025-01-03 17:42:04
- Link: https://youtube-stream.techidaily.com/in-2024-the-essential-handheld-guide-to-youtube-production/
- License: This work is licensed under CC BY-NC-SA 4.0.