:max_bytes(150000):strip_icc()/Mediacomoutagemap-067f88aca591414eb04b103a36693e0c.JPG)
"In 2024, The Art of the End Scene Tutorials & Templates for YouTube"
The Art of the End Scene: Tutorials & Templates for YouTube
Free YouTube End Screen Templates

Richard Bennett
Oct 26, 2023• Proven solutions
YouTube end screens are a great way to get your viewers who have watched your YouTube video until the end to subscribe to your channel, visit your website, or watch more of your videos. End screens work on all devices, including mobile phones and tablets. This was not the case for annotations (YouTube’s former way of doing these things). As more YouTubers have jumped onto using end screens, the need for well-designed end screen templates have rapidly grown. In this post, I will
- List some places you can download free end screen templates
- Give you a step-by-step tutorial on how to build your own outro for free


Part 1: Free End Screen Templates Download
Wondershare Filmstock Gaming Video Editing Skils ](https://filmstock.wondershare.com/creative-theme-game?source%5Fchannel=seo%5Farticle?spm=rs.filmora%5Fweb )
(The images displayed below are for preview purposes only. For the highest quality and ideal dimensions to add into your own video, click the image and follow the links that we provide)
1. The Sales Lion
In exchange for your name and e-mail address, the Sales Lion will let you download their YouTube templates pack, which includes a PhotoShop PSD file of their designed YouTube end screen.
sales-lion-outro-end-screen ](https://www.thesaleslion.com/download-youtube-templates-pack/ “The Sales Lion YouTube Templates Pack”)
2. Grabster
Grabster offers five free YouTube end screen templates. With each download, you’ll get a PhotoShop PSD file and a font file so that you can change the text.
grabster-outro ](https://mega.nz/#!l5VVwR7J!w9hv%5FBgVIN2SsEdlf5IZViISJvXgmkDbErhG4A3gGYQ “Grabster Channel Art Template”)
grabster-your-channel-name-outro ](https://mega.nz/#!RoMXlTbR!ALzroPD6CNRVuDABR7Uv3WAPajr0WJ1BT9ZVDwF4m0Y “Grabster Channel Art Template”)
grabster-youtube-end-screen ](https://mega.nz/#!B8sAhL6Q!iIaTl4uGojXONee6k%5FdTLWdSVrGOiRWPQu4BjU2zJ5o “Grabster Channel Art Template”)
grabster-youtube-end-screen-2 ](https://mega.nz/#!RokxlYTK!vuKGcwG-ymNdR9tBfSp8xjhynNIkn%5F4PC9ob%5Fq2TvWc “Grabster Channel Art Template”)
grabster-youtube-end-screen-3 ](https://mega.nz/#!otc2wRaK!pk%5F7smhaRSuymYkKpf6DVPh2yt40Vlhz8xd8wRuu9Oo “Grabster Channel Art Template”)
3. Taha Chimar
Those who do not have PhotoShop can use Taha Chimar’s end screen designs that come in png file format.
To download, you will have to follow a URL link in the description box of the YouTube videos. Be careful, though, as a lot of the links lead to free hosting websites with pop-ups that can harm your computer if you are easily fooled by them.
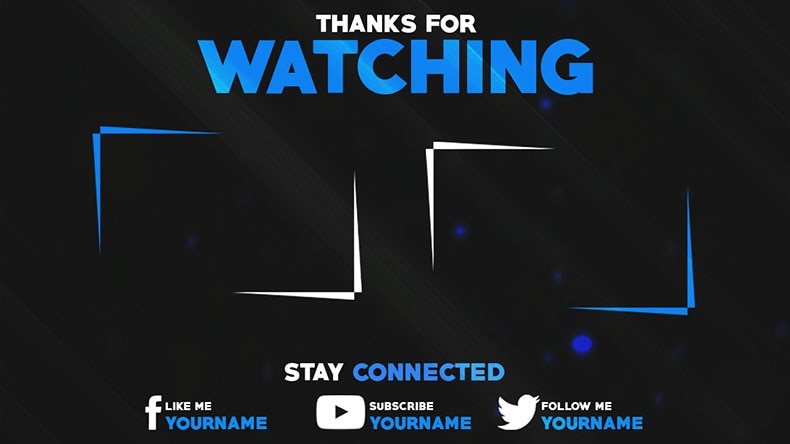
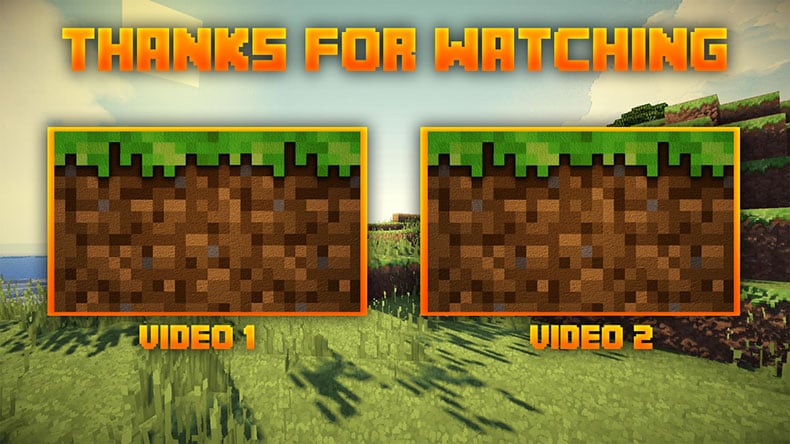
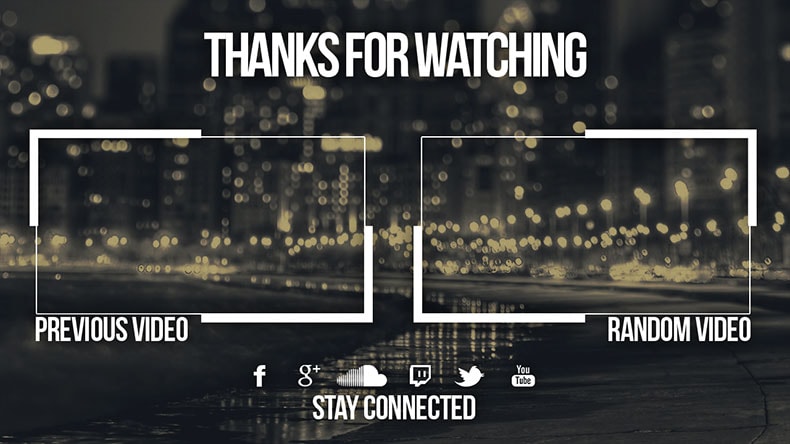
4. SoapyEdits
SoapyEdits is a YouTuber with a channel offering a whole playlist of PhotoShop PSD file end screen designs.
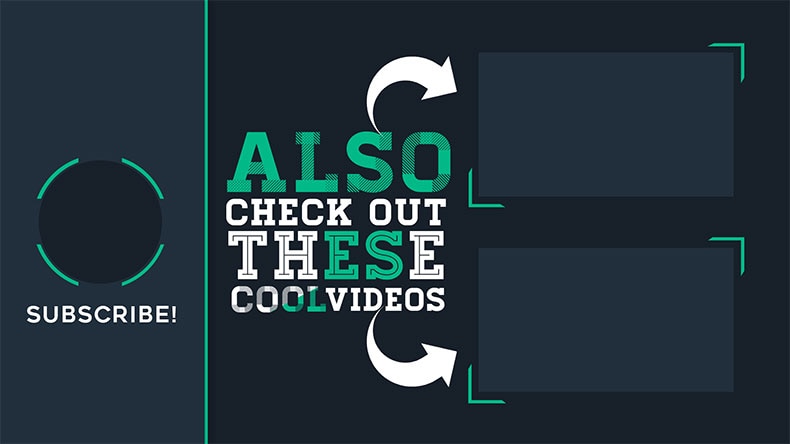
Here are some of our favorite ones.
Here’s one for the Minecraft fans:
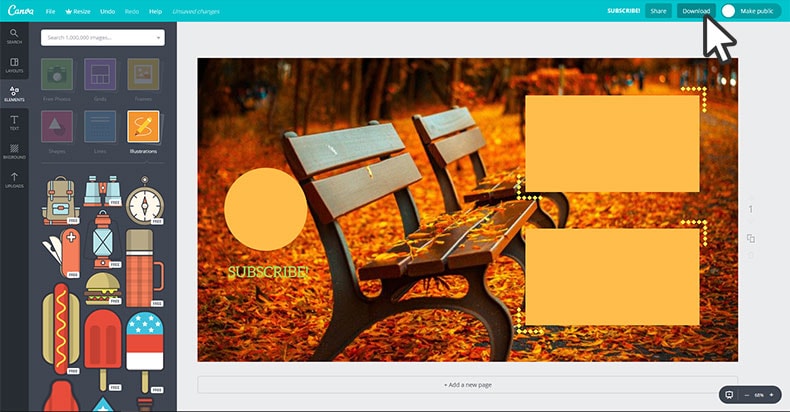
Another way to get your YouTube end screens for free, of course, is to make them yourself. Canva is a great free online design tool for this.
Part 2: How To Build Your Outro For Free (Step-by-step Canva Tutorial)
1. First, you have to sign up with an e-mail address

2. Once logged in, select “use custom dimensions” and plug in “1920” pixels as your width and “1080” pixels as your height (this, of course, may vary depending on the resolution of your video project).
3. After clicking “Design!,” a new browser will open with a blank canvas.
4. Next, do an image search for “YouTube End Screen,” choose an end screen with a layout that you would like to build off of, and save the image onto your computer.
5. Upload the image onto your Canva project.

6. Stretch your image to the ends of your canvas.

7. Insert your own shapes, lines, colours, images, and text over the image.
8. When you’re done, delete the original image so that you’re left with just your own design. Go ahead and click “download.”
If you’re looking for other options to design your end screen, make sure to also check out our article on The YouTube Outro Guide . To edit the YouTube video with more effects and templates, you can try Wondershare Filmora video editor.
Richard Bennett
Richard Bennett is a writer and a lover of all things video.
Follow @Richard Bennett
Richard Bennett
Oct 26, 2023• Proven solutions
YouTube end screens are a great way to get your viewers who have watched your YouTube video until the end to subscribe to your channel, visit your website, or watch more of your videos. End screens work on all devices, including mobile phones and tablets. This was not the case for annotations (YouTube’s former way of doing these things). As more YouTubers have jumped onto using end screens, the need for well-designed end screen templates have rapidly grown. In this post, I will
- List some places you can download free end screen templates
- Give you a step-by-step tutorial on how to build your own outro for free
Part 1: Free End Screen Templates Download
Wondershare Filmstock Gaming Video Editing Skils ](https://filmstock.wondershare.com/creative-theme-game?source%5Fchannel=seo%5Farticle?spm=rs.filmora%5Fweb )
(The images displayed below are for preview purposes only. For the highest quality and ideal dimensions to add into your own video, click the image and follow the links that we provide)
1. The Sales Lion
In exchange for your name and e-mail address, the Sales Lion will let you download their YouTube templates pack, which includes a PhotoShop PSD file of their designed YouTube end screen.
sales-lion-outro-end-screen ](https://www.thesaleslion.com/download-youtube-templates-pack/ “The Sales Lion YouTube Templates Pack”)
2. Grabster
Grabster offers five free YouTube end screen templates. With each download, you’ll get a PhotoShop PSD file and a font file so that you can change the text.
grabster-outro ](https://mega.nz/#!l5VVwR7J!w9hv%5FBgVIN2SsEdlf5IZViISJvXgmkDbErhG4A3gGYQ “Grabster Channel Art Template”)
grabster-your-channel-name-outro ](https://mega.nz/#!RoMXlTbR!ALzroPD6CNRVuDABR7Uv3WAPajr0WJ1BT9ZVDwF4m0Y “Grabster Channel Art Template”)
grabster-youtube-end-screen ](https://mega.nz/#!B8sAhL6Q!iIaTl4uGojXONee6k%5FdTLWdSVrGOiRWPQu4BjU2zJ5o “Grabster Channel Art Template”)
grabster-youtube-end-screen-2 ](https://mega.nz/#!RokxlYTK!vuKGcwG-ymNdR9tBfSp8xjhynNIkn%5F4PC9ob%5Fq2TvWc “Grabster Channel Art Template”)
grabster-youtube-end-screen-3 ](https://mega.nz/#!otc2wRaK!pk%5F7smhaRSuymYkKpf6DVPh2yt40Vlhz8xd8wRuu9Oo “Grabster Channel Art Template”)
3. Taha Chimar
Those who do not have PhotoShop can use Taha Chimar’s end screen designs that come in png file format.
To download, you will have to follow a URL link in the description box of the YouTube videos. Be careful, though, as a lot of the links lead to free hosting websites with pop-ups that can harm your computer if you are easily fooled by them.
4. SoapyEdits
SoapyEdits is a YouTuber with a channel offering a whole playlist of PhotoShop PSD file end screen designs.
Here are some of our favorite ones.
Here’s one for the Minecraft fans:
Another way to get your YouTube end screens for free, of course, is to make them yourself. Canva is a great free online design tool for this.
Part 2: How To Build Your Outro For Free (Step-by-step Canva Tutorial)
1. First, you have to sign up with an e-mail address
2. Once logged in, select “use custom dimensions” and plug in “1920” pixels as your width and “1080” pixels as your height (this, of course, may vary depending on the resolution of your video project).
3. After clicking “Design!,” a new browser will open with a blank canvas.
4. Next, do an image search for “YouTube End Screen,” choose an end screen with a layout that you would like to build off of, and save the image onto your computer.
5. Upload the image onto your Canva project.
6. Stretch your image to the ends of your canvas.
7. Insert your own shapes, lines, colours, images, and text over the image.
8. When you’re done, delete the original image so that you’re left with just your own design. Go ahead and click “download.”
If you’re looking for other options to design your end screen, make sure to also check out our article on The YouTube Outro Guide . To edit the YouTube video with more effects and templates, you can try Wondershare Filmora video editor.
Richard Bennett
Richard Bennett is a writer and a lover of all things video.
Follow @Richard Bennett
Richard Bennett
Oct 26, 2023• Proven solutions
YouTube end screens are a great way to get your viewers who have watched your YouTube video until the end to subscribe to your channel, visit your website, or watch more of your videos. End screens work on all devices, including mobile phones and tablets. This was not the case for annotations (YouTube’s former way of doing these things). As more YouTubers have jumped onto using end screens, the need for well-designed end screen templates have rapidly grown. In this post, I will
- List some places you can download free end screen templates
- Give you a step-by-step tutorial on how to build your own outro for free
Part 1: Free End Screen Templates Download
Wondershare Filmstock Gaming Video Editing Skils ](https://filmstock.wondershare.com/creative-theme-game?source%5Fchannel=seo%5Farticle?spm=rs.filmora%5Fweb )
(The images displayed below are for preview purposes only. For the highest quality and ideal dimensions to add into your own video, click the image and follow the links that we provide)
1. The Sales Lion
In exchange for your name and e-mail address, the Sales Lion will let you download their YouTube templates pack, which includes a PhotoShop PSD file of their designed YouTube end screen.
sales-lion-outro-end-screen ](https://www.thesaleslion.com/download-youtube-templates-pack/ “The Sales Lion YouTube Templates Pack”)
2. Grabster
Grabster offers five free YouTube end screen templates. With each download, you’ll get a PhotoShop PSD file and a font file so that you can change the text.
grabster-outro ](https://mega.nz/#!l5VVwR7J!w9hv%5FBgVIN2SsEdlf5IZViISJvXgmkDbErhG4A3gGYQ “Grabster Channel Art Template”)
grabster-your-channel-name-outro ](https://mega.nz/#!RoMXlTbR!ALzroPD6CNRVuDABR7Uv3WAPajr0WJ1BT9ZVDwF4m0Y “Grabster Channel Art Template”)
grabster-youtube-end-screen ](https://mega.nz/#!B8sAhL6Q!iIaTl4uGojXONee6k%5FdTLWdSVrGOiRWPQu4BjU2zJ5o “Grabster Channel Art Template”)
grabster-youtube-end-screen-2 ](https://mega.nz/#!RokxlYTK!vuKGcwG-ymNdR9tBfSp8xjhynNIkn%5F4PC9ob%5Fq2TvWc “Grabster Channel Art Template”)
grabster-youtube-end-screen-3 ](https://mega.nz/#!otc2wRaK!pk%5F7smhaRSuymYkKpf6DVPh2yt40Vlhz8xd8wRuu9Oo “Grabster Channel Art Template”)
3. Taha Chimar
Those who do not have PhotoShop can use Taha Chimar’s end screen designs that come in png file format.
To download, you will have to follow a URL link in the description box of the YouTube videos. Be careful, though, as a lot of the links lead to free hosting websites with pop-ups that can harm your computer if you are easily fooled by them.
4. SoapyEdits
SoapyEdits is a YouTuber with a channel offering a whole playlist of PhotoShop PSD file end screen designs.
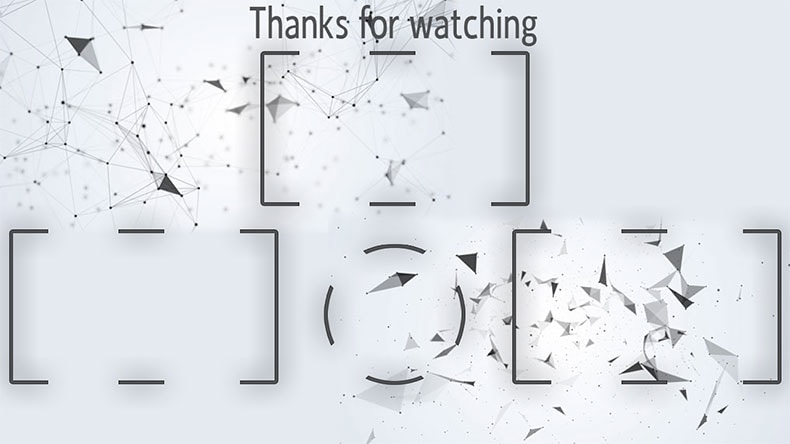
Here are some of our favorite ones.
Here’s one for the Minecraft fans:
Another way to get your YouTube end screens for free, of course, is to make them yourself. Canva is a great free online design tool for this.
Part 2: How To Build Your Outro For Free (Step-by-step Canva Tutorial)
1. First, you have to sign up with an e-mail address
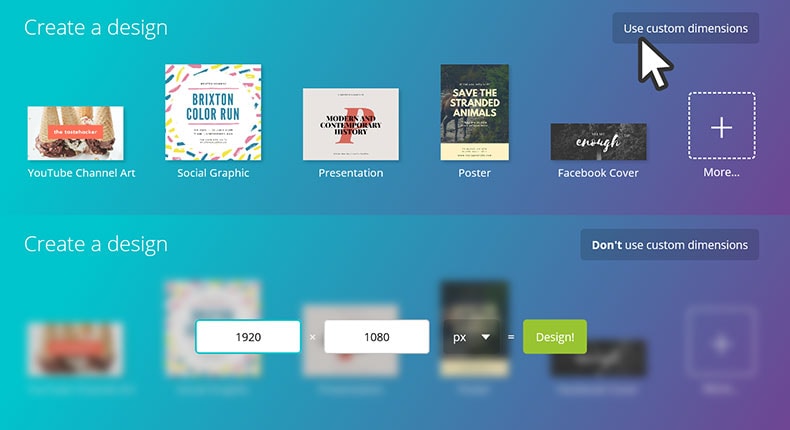
2. Once logged in, select “use custom dimensions” and plug in “1920” pixels as your width and “1080” pixels as your height (this, of course, may vary depending on the resolution of your video project).
3. After clicking “Design!,” a new browser will open with a blank canvas.
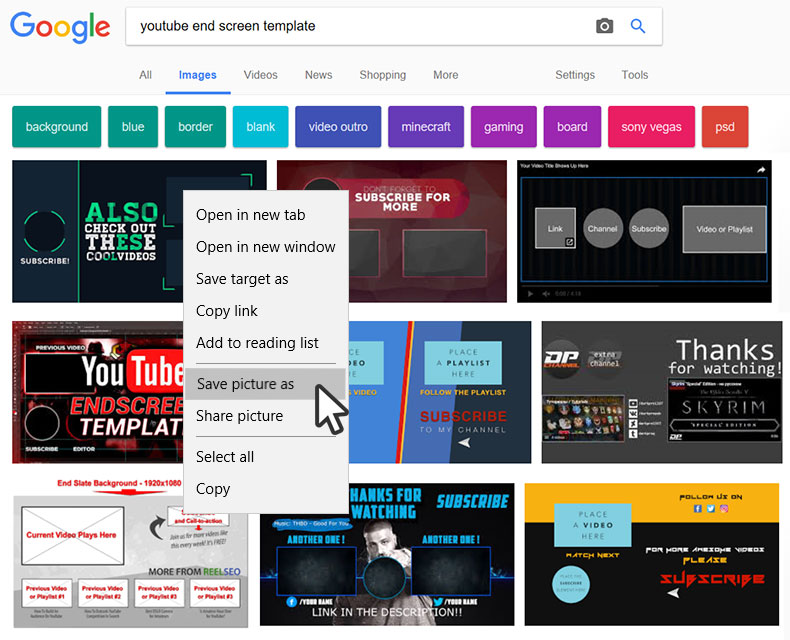
4. Next, do an image search for “YouTube End Screen,” choose an end screen with a layout that you would like to build off of, and save the image onto your computer.
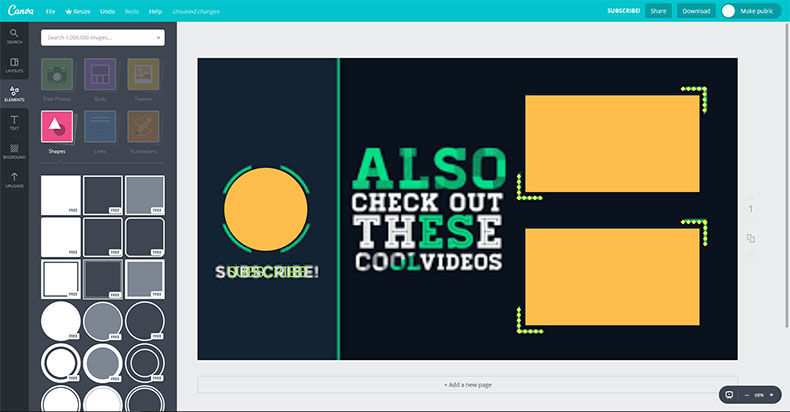
5. Upload the image onto your Canva project.
6. Stretch your image to the ends of your canvas.
7. Insert your own shapes, lines, colours, images, and text over the image.
8. When you’re done, delete the original image so that you’re left with just your own design. Go ahead and click “download.”
If you’re looking for other options to design your end screen, make sure to also check out our article on The YouTube Outro Guide . To edit the YouTube video with more effects and templates, you can try Wondershare Filmora video editor.
Richard Bennett
Richard Bennett is a writer and a lover of all things video.
Follow @Richard Bennett
Mastering Quick Subtitle/Closed Caption Integration on YouTube
How to Easily Add Subtitles and Closed Captions to YouTube Video
Richard Bennett
Mar 27, 2024• Proven solutions
In this article, we are going to show you how important it is to add subtitle and closed captions in your YouTube video, and how to add them.
The best video editor for YouTubers - Wondershare Filmora , not only allows you to cut, crop, rotate, reverse videos, but also offers your advanced features like PIP, Green Screen, or audio mixing. What’s more, you can find lots of effects for Fashion, gaming, education, tutorial, sports, etc. Check this article to know more.
Why subtitle and closed captions are important for YouTube videos?
- Forced closed captions and subtitles actually help the viewers to understand the content in your video if the audio quality of your video is bad, muffled or barely audible. Reading makes it easier for them to understand.
- This also helps people with hearing impairments. People with troubled ears can still watch and understand your content.
- It’s a great aid to such videos which have been recorded in other foreign languages that you don’t understand. Hence it will increase the number of viewers all around the world.
- They both are generally added for easy accessibility to the viewers who wish to watch in sound sensitive environments.
So, here we are going to show you two ways to add subtittles to video: directly or uploading caption or transcript files
Adding subtitles and closed captions manually
To add subtitles and closed captions to your YouTube video, fisrt, you should sign in to your YouTube account. On left right below ‘Home’ you will find ‘My Channel’. It will direct you to your personal YouTube page. On the top, right next to your subscribers lays the ‘Video manager’, giving you the list of your uploaded videos.
Select the video and click on edit to get a drop down menu. Click on subtitles and CC. This will take you to the subtitling interface. To the right of video select ‘add new subtitles’ and then ‘create new subtitles’. Select the subtitle language. Play the video to listen to the content and type down in the box. Click on ‘+’ button once you are done.
This will create a subtitle timeline right beneath the video. You can manage by dragging and expanding the subtitle duration according to the audio of the video. The subtitle will appear at the bottom of the video screen. Click ‘publish’ once done.
An interruption might occur with appearing of subtitles in accordance with video. Hence a lot precision is required while doing so.
Uploading Caption or Transcript Files automatically
To upload Caption or Transcript Files to YouTube Videos you first need to create a format on a text editor. For windows use Notepad and for Mac you may use TextEdit. Create a format of putting the number of subtitle first, time stamp and then text of the subtitle. For example
1\
00:02:34:12 using a format of (hour : minute : second : millisecond)
2. *text*
This is the sample text for first subtitle at zero hours, two minutes, thirty four seconds and twelve milliseconds. Once done with this. Go to file, select ‘save as’. Write the file name with an extension of .srt and select ‘All files’ for type of file. Click encoding menu and select UTF-8. Once saved, sign in to your YouTube account.
On left right below ‘Home’ you will find ‘My Channel’. It will direct you to your personal YouTube page. On the top, right next to your subscribers lays the ‘Video manager’, giving you the list of your uploaded videos.
Select the video and click on edit to get a drop down menu. Click on subtitles and CC. Go to ‘add subtitles’ and then ‘upload a file’. A pop-up menu will appear select ‘subtitles file’. Click upload. The file will send subtitles to your video.
This will create a subtitle timeline right beneath the video. You can manage by dragging and expanding the subtitle duration according to the audio of the video. The subtitle will appear at the bottom of the video screen. Click ‘publish’ once done.
3 Best Tools for add/managing video Subtitles/CC
1. Amara
Amara is a smart video editor which helps insert captions and subtitles to videos. It also helps in transcribing the videos. It takes help of crowd sourcing to subtitle any YouTube video. They take help from viewers to subtitle the videos. By making crowd subtitling available for any YouTube creator, they are allowing them to reach more viewers in more languages
2. DIY Captions
DIY captions help you to transcribe the YouTube videos, if not in most accurate manner, then in a little easier way. All you have to do is just paste the URL of the YouTube video and it will provide you all the subtitles. These may not be accurate but will provide you major base material which can be tweaked a bit here and there and is far better than making all the subtitles starting from scratch.
3 Subtitles for YouTube
Subtitles for YouTube is a Google Chrome extension which provides subtitles for YouTube videos. For this you will have to provide a subtitle file with .srt extension. The attractive feature of this is that you won’t have to download the video and still run the subtitles on it. This is very much helpful for people who work on YouTube or watch movies without subtitles.
Richard Bennett
Richard Bennett is a writer and a lover of all things video.
Follow @Richard Bennett
Richard Bennett
Mar 27, 2024• Proven solutions
In this article, we are going to show you how important it is to add subtitle and closed captions in your YouTube video, and how to add them.
The best video editor for YouTubers - Wondershare Filmora , not only allows you to cut, crop, rotate, reverse videos, but also offers your advanced features like PIP, Green Screen, or audio mixing. What’s more, you can find lots of effects for Fashion, gaming, education, tutorial, sports, etc. Check this article to know more.
Why subtitle and closed captions are important for YouTube videos?
- Forced closed captions and subtitles actually help the viewers to understand the content in your video if the audio quality of your video is bad, muffled or barely audible. Reading makes it easier for them to understand.
- This also helps people with hearing impairments. People with troubled ears can still watch and understand your content.
- It’s a great aid to such videos which have been recorded in other foreign languages that you don’t understand. Hence it will increase the number of viewers all around the world.
- They both are generally added for easy accessibility to the viewers who wish to watch in sound sensitive environments.
So, here we are going to show you two ways to add subtittles to video: directly or uploading caption or transcript files
Adding subtitles and closed captions manually
To add subtitles and closed captions to your YouTube video, fisrt, you should sign in to your YouTube account. On left right below ‘Home’ you will find ‘My Channel’. It will direct you to your personal YouTube page. On the top, right next to your subscribers lays the ‘Video manager’, giving you the list of your uploaded videos.
Select the video and click on edit to get a drop down menu. Click on subtitles and CC. This will take you to the subtitling interface. To the right of video select ‘add new subtitles’ and then ‘create new subtitles’. Select the subtitle language. Play the video to listen to the content and type down in the box. Click on ‘+’ button once you are done.
This will create a subtitle timeline right beneath the video. You can manage by dragging and expanding the subtitle duration according to the audio of the video. The subtitle will appear at the bottom of the video screen. Click ‘publish’ once done.
An interruption might occur with appearing of subtitles in accordance with video. Hence a lot precision is required while doing so.
Uploading Caption or Transcript Files automatically
To upload Caption or Transcript Files to YouTube Videos you first need to create a format on a text editor. For windows use Notepad and for Mac you may use TextEdit. Create a format of putting the number of subtitle first, time stamp and then text of the subtitle. For example
1\
00:02:34:12 using a format of (hour : minute : second : millisecond)
2. *text*
This is the sample text for first subtitle at zero hours, two minutes, thirty four seconds and twelve milliseconds. Once done with this. Go to file, select ‘save as’. Write the file name with an extension of .srt and select ‘All files’ for type of file. Click encoding menu and select UTF-8. Once saved, sign in to your YouTube account.
On left right below ‘Home’ you will find ‘My Channel’. It will direct you to your personal YouTube page. On the top, right next to your subscribers lays the ‘Video manager’, giving you the list of your uploaded videos.
Select the video and click on edit to get a drop down menu. Click on subtitles and CC. Go to ‘add subtitles’ and then ‘upload a file’. A pop-up menu will appear select ‘subtitles file’. Click upload. The file will send subtitles to your video.
This will create a subtitle timeline right beneath the video. You can manage by dragging and expanding the subtitle duration according to the audio of the video. The subtitle will appear at the bottom of the video screen. Click ‘publish’ once done.
3 Best Tools for add/managing video Subtitles/CC
1. Amara
Amara is a smart video editor which helps insert captions and subtitles to videos. It also helps in transcribing the videos. It takes help of crowd sourcing to subtitle any YouTube video. They take help from viewers to subtitle the videos. By making crowd subtitling available for any YouTube creator, they are allowing them to reach more viewers in more languages
2. DIY Captions
DIY captions help you to transcribe the YouTube videos, if not in most accurate manner, then in a little easier way. All you have to do is just paste the URL of the YouTube video and it will provide you all the subtitles. These may not be accurate but will provide you major base material which can be tweaked a bit here and there and is far better than making all the subtitles starting from scratch.
3 Subtitles for YouTube
Subtitles for YouTube is a Google Chrome extension which provides subtitles for YouTube videos. For this you will have to provide a subtitle file with .srt extension. The attractive feature of this is that you won’t have to download the video and still run the subtitles on it. This is very much helpful for people who work on YouTube or watch movies without subtitles.
Richard Bennett
Richard Bennett is a writer and a lover of all things video.
Follow @Richard Bennett
Also read:
- 'The Outer Worlds': Sci-Fi RPG with a Blend of Comedy & Strategic Firefights Reviewed
- [New] In 2024, An In-Depth Look at Video Apps for iPhone & Android Users
- [New] Logic Pro's Way to Softly Diminish Loud Passages
- [New] Panasonic HX-A1 Wearable Camera Explored for 2024
- [Updated] 2024 Approved Nocturnal Notions for iPhone Photographers
- 2024 Approved Journey to Discovering Your Personal Youtube Musical Realm
- 2024 Approved Paving the Way for Individuality in the Digital Age Your YouTube Journey
- 2024 Approved Peak PSD Gradient Innovations
- 2024 Approved Quick Recap of Chromakey and Green Screen Processes
- 2024 Approved The Ultimate Guide to Transforming Your Youtube Channel via WireCast
- 2024 Approved TV-Friendly Settings for Repeated Online Videos
- In 2024, Finance Frontiers The Finest YouTube Channels to Follow
- In 2024, Optimizing Video Clarity with YouTube Tools
- Navigating Through 9 Typical iCloud Hiccups on Your iPhone or iPad: A Step-by-Step Guide
- Pinpointing Video Picks 'S Social Landscape (Facebook) for 2024
- The Reinvented Echo Dot (4Th Gen) - A Complete Assessment
- Title: In 2024, The Art of the End Scene Tutorials & Templates for YouTube
- Author: Joseph
- Created at : 2025-01-27 23:46:57
- Updated at : 2025-01-29 21:05:57
- Link: https://youtube-stream.techidaily.com/in-2024-the-art-of-the-end-scene-tutorials-and-templates-for-youtube/
- License: This work is licensed under CC BY-NC-SA 4.0.