:max_bytes(150000):strip_icc()/GettyImages-1139003653-835c81e938ba43e8be021cc8d0364b71.jpg)
"In 2024, Step-by-Step Guide Moving YouTube Content to Dailymotion"
Step-by-Step Guide: Moving YouTube Content to Dailymotion
How to Transfer Video From YouTube to Dailymotion?

Ollie Mattison
Mar 27, 2024• Proven solutions
It is significant for a business to stay connected to its customers and videos are a wonderful medium to build that connect! Dailymotion gives you a golden opportunity and platform to share your videos on websites other than YouTube. This means that you can transfer your videos from YouTube to dailymotion in few minutes and increase the audience. There is no direct transfer feature in YouTube and hence this post will help in guiding how can you transfer the video content from YouTube to Dailymotion!
- Method 1: Download YouTube video and upload to Dailymotion
- Method 2: Sync YouTube videos to Dailymotion
Note: We resolutely oppose all forms of copyright-infringing downloads. This tutorial is only for downloading YouTube videos/audio materials from your own channel.
Method 1: Download YouTube video and upload to Dailymotion
This one is little longer but many people vote for it as a safer one! All you have to do is to login to your YouTube official account and download all the videos that you have uploaded in MP4 format by clicking on Edit option appearing at right of the video.
Ready to learn How to Download YouTube Videos . It’s easy, fun and a great way to share your movies with the world.
Save it to the desired folder on your PC and navigate to the Dailymotion account page. Sign in with your credentials and click on upload video. Browse the video from the location where you saved, give it a title and description.
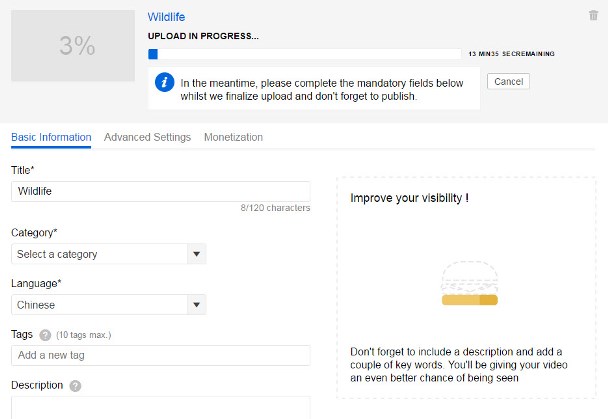
Next, click on channel drop-down menu and choose a category which best describes your video. Besides this, you would see a ‘Tags’ text box. You can add one or more tags (maximum 10) and select the privacy options as per your requirement. Tags act as a criterion for SEO optimization and help people in finding your video. Finally, just click on save to upload the video on dailymotion.
Method 2: Sync YouTube videos to Dailymotion
You can do this by liaising with Freedom MCN Network as it allows you to grow faster on Dailymotion. All you have to do is to search for ‘dashboard.tm’ on Google and sign in using you email and password. It will direct you to Dailymotion page; you can also opt to sign in with your Facebook credentials. When you will press enter and login, the first screen only will show the prompt if you want to synch YouTube and Dailymotion channels? Since, our answer is yes, the screen will ask you to login into your YouTube account and the screen will navigate you to the login into Google account linked to your YouTube account. Just like in all apps, you have to allow Freedom to access the data from your YouTube account. The next screen will list down number of videos that have been uploaded to your YouTube Account and the ones which are already synched with Dailymotion will have a check against their name. The ones which are not synched will have a box; you can simply check it and click on ‘Synch videos’ at the top right corner.
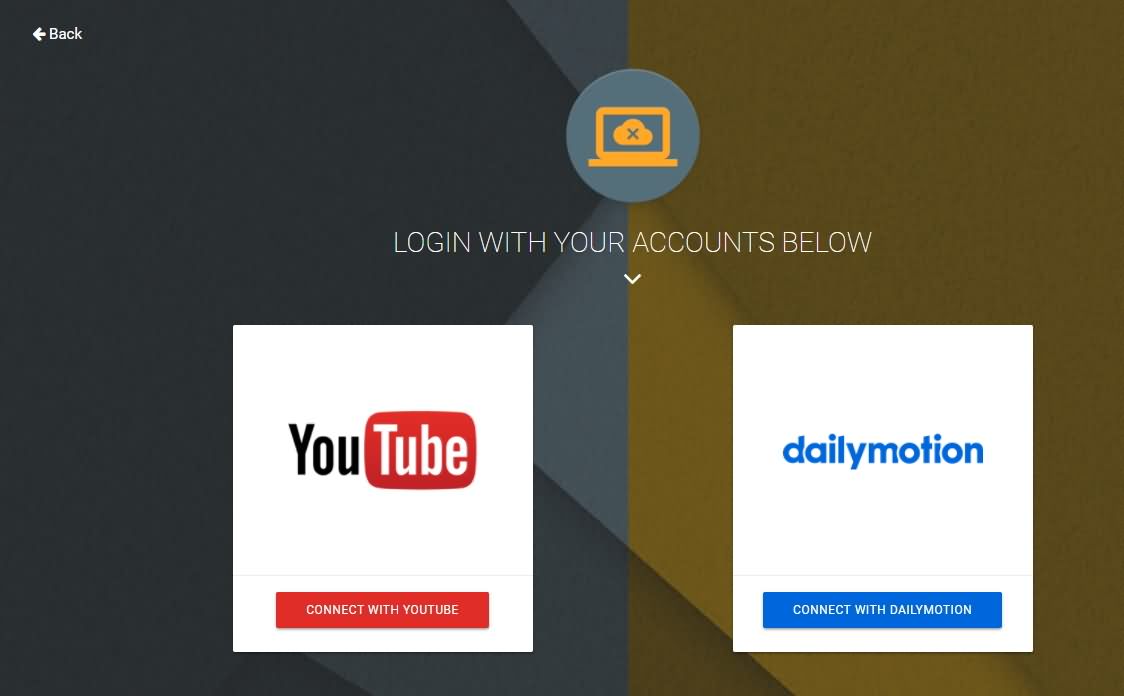
It will ask for your email address to get notifications, put in your email ID and click on Sync. Once they are active and synched you will receive a notification on your email with a subject ‘Done reuploading’ followed by the tile of the video. This simply means that you need not upload any video separately on dailymotion, you can simply synch it with YouTube and put in your efforts of uploading only once!
Ollie Mattison
Ollie Mattison is a writer and a lover of all things video.
Follow @Ollie Mattison
Ollie Mattison
Mar 27, 2024• Proven solutions
It is significant for a business to stay connected to its customers and videos are a wonderful medium to build that connect! Dailymotion gives you a golden opportunity and platform to share your videos on websites other than YouTube. This means that you can transfer your videos from YouTube to dailymotion in few minutes and increase the audience. There is no direct transfer feature in YouTube and hence this post will help in guiding how can you transfer the video content from YouTube to Dailymotion!
- Method 1: Download YouTube video and upload to Dailymotion
- Method 2: Sync YouTube videos to Dailymotion
Note: We resolutely oppose all forms of copyright-infringing downloads. This tutorial is only for downloading YouTube videos/audio materials from your own channel.
Method 1: Download YouTube video and upload to Dailymotion
This one is little longer but many people vote for it as a safer one! All you have to do is to login to your YouTube official account and download all the videos that you have uploaded in MP4 format by clicking on Edit option appearing at right of the video.
Ready to learn How to Download YouTube Videos . It’s easy, fun and a great way to share your movies with the world.
Save it to the desired folder on your PC and navigate to the Dailymotion account page. Sign in with your credentials and click on upload video. Browse the video from the location where you saved, give it a title and description.
Next, click on channel drop-down menu and choose a category which best describes your video. Besides this, you would see a ‘Tags’ text box. You can add one or more tags (maximum 10) and select the privacy options as per your requirement. Tags act as a criterion for SEO optimization and help people in finding your video. Finally, just click on save to upload the video on dailymotion.
Method 2: Sync YouTube videos to Dailymotion
You can do this by liaising with Freedom MCN Network as it allows you to grow faster on Dailymotion. All you have to do is to search for ‘dashboard.tm’ on Google and sign in using you email and password. It will direct you to Dailymotion page; you can also opt to sign in with your Facebook credentials. When you will press enter and login, the first screen only will show the prompt if you want to synch YouTube and Dailymotion channels? Since, our answer is yes, the screen will ask you to login into your YouTube account and the screen will navigate you to the login into Google account linked to your YouTube account. Just like in all apps, you have to allow Freedom to access the data from your YouTube account. The next screen will list down number of videos that have been uploaded to your YouTube Account and the ones which are already synched with Dailymotion will have a check against their name. The ones which are not synched will have a box; you can simply check it and click on ‘Synch videos’ at the top right corner.
It will ask for your email address to get notifications, put in your email ID and click on Sync. Once they are active and synched you will receive a notification on your email with a subject ‘Done reuploading’ followed by the tile of the video. This simply means that you need not upload any video separately on dailymotion, you can simply synch it with YouTube and put in your efforts of uploading only once!
Ollie Mattison
Ollie Mattison is a writer and a lover of all things video.
Follow @Ollie Mattison
Beginner’s Guide: Adding Text Overlays on YouTube
How To Add Captions to YouTube Videos

Richard Bennett
Mar 27, 2024• Proven solutions
By captioning your YouTube videos you help to make them accessible to more potential viewers. Subtitles are useful to viewers who have hearing impairments, whose first language is different from yours, or who are unable to watch your video with sound. Closed captioning can also be useful for you as a YouTuber because it helps with your SEO, or search engine optimization. Practicing better SEO can get your videos ranked higher in search results. Google and YouTube both index subtitles and transcripts much like they do your video’s description, unless you use automated captions.
This article will first explain how you can turn on subtitles for the videos you watch and then walk you through adding captions to your own videos.
How To Turn On Captions on YouTube
In order for you to be able to view subtitles for a YouTube video the uploader of the video will need to have added them, unless you change your account settings to display automatic captions.

To toggle subtitles on and off click on the Closed Captioning icon in the bottom right of your video player.
If the creator of the video has not added captions then you can enable automatic captions by going into your Account Settings and selecting Playback. Check the box next to Always Show Captions, and then check Show Automatic Captions by Speech Recognition. These captions may be flawed, but you will still be able to see the more accurate user submitted captions on videos that have them. The Always Show Captions feature may be useful not only to the hearing impaired, but to users who do not speak the same language as the video producer.
If you want to change the language of the subtitles click on the settings icon (the one that looks like a gear) next to the closed captioning icon and choose your language next to Subtitles/CC . If the language you want is not there select Auto-Translate and then pick a language. Google Translate will be used to generate subtitles in your chosen language.
Adding YouTube Captions in 4 Steps
1. Go to Video Manager in your Creator Studio and then look at your videos. Decide which one you want to add captions to.
2. Click on the drop-down menu next to the video you want to add captions to and choose Subtitles and CC.
3. Select Add New Subtitles or CC.
4. Choose whether to create your captions, upload a file that has them, transcribe your video, use automatic captioning, or use captioning software.
Create Subtitles or Closed Captions will allow you to create your subtitles on YouTube.
Upload A File allows you to upload a pre-made subtitle file from your computer. Supported file types include SubRip (.srt) and SubViewer (.sbv). You cannot use a word or PDF document for your subtitles.
Transcribe and Set Timings is where you can type a transcript of your video and set timings to sync it to your video. This differs from Create Subtitles or Closed Captions in that your transcript is all typed in to one text field.
Use Automatic Captioning will automatically use speech recognition technology to create captions. You can edit these auto-generated captions later if there are mistakes.
Use Captioning Software or Services is what you choose if you want to use a program or service to create the subtitles for your video.
The easiest way to add subtitles to your videos is to use Automatic Captioning. However, Automatic Captioning is imperfect and may result in your viewers getting a sloppy, skewed, interpretation of your video. Automatic captions are also not indexed by YouTube and Google the way subtitles you create or upload are. This means that they will not have any value to your SEO strategy. If you do not input your own captions or transcript you are missing out on an opportunity for better search engine rankings. Automatic Captions are great if you do not have time to input subtitles and need a temporary solution, though.
Richard Bennett
Richard Bennett is a writer and a lover of all things video.
Follow @Richard Bennett
Richard Bennett
Mar 27, 2024• Proven solutions
By captioning your YouTube videos you help to make them accessible to more potential viewers. Subtitles are useful to viewers who have hearing impairments, whose first language is different from yours, or who are unable to watch your video with sound. Closed captioning can also be useful for you as a YouTuber because it helps with your SEO, or search engine optimization. Practicing better SEO can get your videos ranked higher in search results. Google and YouTube both index subtitles and transcripts much like they do your video’s description, unless you use automated captions.
This article will first explain how you can turn on subtitles for the videos you watch and then walk you through adding captions to your own videos.
How To Turn On Captions on YouTube
In order for you to be able to view subtitles for a YouTube video the uploader of the video will need to have added them, unless you change your account settings to display automatic captions.
To toggle subtitles on and off click on the Closed Captioning icon in the bottom right of your video player.
If the creator of the video has not added captions then you can enable automatic captions by going into your Account Settings and selecting Playback. Check the box next to Always Show Captions, and then check Show Automatic Captions by Speech Recognition. These captions may be flawed, but you will still be able to see the more accurate user submitted captions on videos that have them. The Always Show Captions feature may be useful not only to the hearing impaired, but to users who do not speak the same language as the video producer.
If you want to change the language of the subtitles click on the settings icon (the one that looks like a gear) next to the closed captioning icon and choose your language next to Subtitles/CC . If the language you want is not there select Auto-Translate and then pick a language. Google Translate will be used to generate subtitles in your chosen language.
Adding YouTube Captions in 4 Steps
1. Go to Video Manager in your Creator Studio and then look at your videos. Decide which one you want to add captions to.
2. Click on the drop-down menu next to the video you want to add captions to and choose Subtitles and CC.
3. Select Add New Subtitles or CC.
4. Choose whether to create your captions, upload a file that has them, transcribe your video, use automatic captioning, or use captioning software.
Create Subtitles or Closed Captions will allow you to create your subtitles on YouTube.
Upload A File allows you to upload a pre-made subtitle file from your computer. Supported file types include SubRip (.srt) and SubViewer (.sbv). You cannot use a word or PDF document for your subtitles.
Transcribe and Set Timings is where you can type a transcript of your video and set timings to sync it to your video. This differs from Create Subtitles or Closed Captions in that your transcript is all typed in to one text field.
Use Automatic Captioning will automatically use speech recognition technology to create captions. You can edit these auto-generated captions later if there are mistakes.
Use Captioning Software or Services is what you choose if you want to use a program or service to create the subtitles for your video.
The easiest way to add subtitles to your videos is to use Automatic Captioning. However, Automatic Captioning is imperfect and may result in your viewers getting a sloppy, skewed, interpretation of your video. Automatic captions are also not indexed by YouTube and Google the way subtitles you create or upload are. This means that they will not have any value to your SEO strategy. If you do not input your own captions or transcript you are missing out on an opportunity for better search engine rankings. Automatic Captions are great if you do not have time to input subtitles and need a temporary solution, though.
Richard Bennett
Richard Bennett is a writer and a lover of all things video.
Follow @Richard Bennett
Also read:
- [New] 2024 Approved Essential Steps for Instagram Chat Novices
- [New] Evaluating the Benefits of Instagram’s Selfie Credentials for 2024
- [New] Say Goodbye to Vertical and Horizontal Bars in YouTube Movies
- [Updated] 2024 Approved Unlock the Secrets to Increasing Views in 60-Second YouTube Shorts
- [Updated] Unmatched Virtual Speedway Showdowns Top 5 List for 2024
- 2024 Approved Expert Tips Top 8 Verified Video Marketing Strategies
- 2024 Approved Identifying Creator Types Six Intriguing YouTube Categorization Tests
- 2024 Approved Imitation Ingenuity Generating Parodies of Films
- 2024 Approved Master the Craft Essential Filmmaking Advice From YouTube Pros
- 2024 Approved Mirrorless vs DSLR Video Mastery in Focus
- Complete Tutorial to Use VPNa to Fake GPS Location On Vivo V27 | Dr.fone
- Download and Launch An Easy Path with VRecord for 2024
- In 2024, Unlock Content Reach Smart Use of Video Tags
- In-Depth Analysis of the Clever Escort iX: The Self-Learning Car Radar Detector
- Leading Cable Modems of the Year: 2024 Picks
- Leading Converter YouTube Dialogue to Text for 2024
- Navigating Through Paid Product Evaluations Online for 2024
- QuickShot Recorder Evaluation Summary
- YouTube Creators' Guide 15 Unrestricted Music Archives
- Title: In 2024, Step-by-Step Guide Moving YouTube Content to Dailymotion
- Author: Joseph
- Created at : 2025-01-28 23:07:09
- Updated at : 2025-01-29 16:44:58
- Link: https://youtube-stream.techidaily.com/in-2024-step-by-step-guide-moving-youtube-content-to-dailymotion/
- License: This work is licensed under CC BY-NC-SA 4.0.