"In 2024, Quick Transition From Original Pictures To Standout YouTube Thumbnails"
Quick Transition: From Original Pictures To Standout YouTube Thumbnails
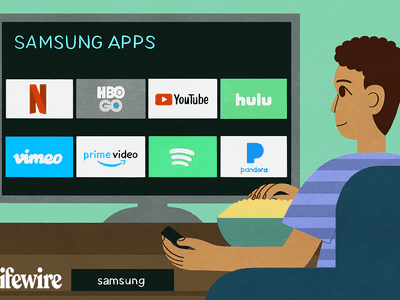
There is a saying that first impressions last, and this is proven true, especially when it comes to YouTube video viewership. For sure, you have experienced watching a video out of curiosity because of its thumbnail. That is why content creators take time to resize YouTube thumbnails or use a YouTube thumbnail size converter to customize the preview images that represent their videos.
This technique not only attract viewers to watch your video, but it also gives a glimpse of your content. In this article, we will provide you with a quick tutorial on how to resize a YouTube thumbnail and suggest handy tools you can use to create the perfect YouTube video thumbnail!

Best YouTube Thumbnail Size
According to YouTube’s help center, there are some things to remember when creating a thumbnail for your YouTube videos.
- First, make sure that the thumbnail size is 1280 pixels by 720 pixels and 640 pixels wide. It is the best YouTube thumbnail size.
- When it comes to the thumbnail dimension, make sure to use an aspect ratio of 16:9.
- Also, your YouTube thumbnail image should not exceed 2MB and is in either JPG, GIF or PNG format.
How To Resize Your YouTube Thumbnail
The primary reason for changing the YouTube thumbnail size is to gain more audience. If you are a content creator, your main goal is to introduce your content to a wider range of viewers, right? So you have to pay attention to even the smallest detail, such as YouTube thumbnails to increase viewership and top YouTube SEO.
In fact, YouTube recommends this technique to get more viewers. Also, resizing your YouTube thumbnail will prevent you from getting the “file larger than 2MB error” which can cause your thumbnail to be discarded.
So, how can you use this technique? Check our tutorial below as we walk you through various recommended methods for resizing a YouTube thumbnail:
Method 1: Resize YouTube Thumbnail With Windows Default App
The easiest way to resize YouTube thumbnails is through the Windows default app. Within just a few modifications, you can resize your thumbnail to fit as a preview image for your YouTube video.
Please take note that your image should be at least 2 megabytes or less to achieve the perfect YouTube thumbnail fit. If your image exceeds the limit, your thumbnail will either be rejected, or your image will have a black screen around it-which is not ideal at all.
Now, let us start the tutorial.
Step1 Open an image you want to set as a thumbnail. Then, Right-click> Resize.

Step2 Select “Define custom dimensions.”

Step3 Set the width to 1280 and the height to 720. Then tick the box for “Maintain Aspect Ratio “and click “Save Resized Copy.”

Step4 Click the upload thumbnail button on YouTube and import your resized image.

Method 2. Online YouTube Thumbnail Size Converter
The second method you can use is the online YouTube thumbnail size converter. As it completely works in browsers, you do not need to worry about any app installation to access the feature. Furthermore, using online YouTube thumbnail size converters ensures you maintain your image resolution and prevents it from getting blurry or pixelated.
There are various YouTube thumbnail resizers available online. Some of the most popular are Fotor, Super Image Converter, Pixelied, Super Image Converter , Adobe Express , Newisty, and Promo . Let us focus on the last online tool and the steps on how to use it.
Promo is a free online software you can use to convert an image to a YouTube thumbnail. It is one of the best YouTube Thumbnail tools as it uses simple operation steps and automatically resizes your image without losing its quality.

Here are the steps on how to use the Promo YouTube thumbnail size converter:
Step1 Go to Promo’s official website and import your image

Step2 Scroll down and find the YouTube thumbnail size where your resized image is displayed. Then, click “Download.”

Method 3: Convert the Image to YouTube Thumbnail Using Wondershare Filmora
It is without a doubt that online YouTube thumbnail resizers are great tools for converting your image to an ideal YouTube thumbnail. But it would be much better if you resize your video using the same app you use for editing. That way, you will save time using two separate apps, and your task will be much more efficient using an all-in-one video editing tool.
Wondershare Filmora , one of the most well-known software for creating high-quality and compelling videos, combines these functions in one app. Filmora is not just an excellent software for crafting YouTube videos but also a reliable tool you can use in creating and resizing YouTube thumbnails.
Free Download For Win 7 or later(64-bit)
Free Download For macOS 10.14 or later
Here is the step-by-step tutorial on how to use Filmora in resizing your YouTube thumbnail. It is divided into two parts:
1. Take a Snapshot as the Thumbnail with Filmora
Step1 Open the video in the timeline, click the play icon in the player window, and pause when you reach the desired frame for the YouTube thumbnail. Click the camera icon to take a snapshot.

Step2 In the snapshot window, choose to save the snapshot as a PNG or JPG file.
Step3 Select the output storage location and click OK.

2. Resize the YouTube Thumbnail
Step1 Import the image into the app timeline.

Step2 Drag and drop the image into the timeline and click the green “Export“ button. In the popup Export window, select GIF. Next, click “Settings“ to adjust the resolution.

Step3 As the recommended size of a YouTube Thumbnail is 1280 * 720 pixels, you can set the resolution to 1280 * 720. Then click Apply and Export the GIF. You can now upload the GIF thumbnail to your YouTube account.

Method 4. Convert Images to YouTube Thumbnail Using Third-Party Software
In addition to using dedicated video editing software, several third-party image editing programs can be used to resize images for use as YouTube thumbnails. Programs like GIMP are popular for this purpose, as it offers a wide range of tools and features for editing and resizing images.
This program allows you to import an image, resize it to the dimensions required for a YouTube thumbnail (typically 1280 x 720 pixels), and save the edited version to your desired location. Using an image editing program can be a good option if you need more control over the appearance of your thumbnail or if you want to make more extensive edits beyond simply resizing the image.
To resize an image using an image editing program like GIMP, follow these steps:
Step1 Install and launch GIMP on your computer.

Step2 Click on “File“ > “Open,” then search for the file you want to resize.

Step3 Click on “Image“ > “Scale Image“ and make sure that the resolution is 1920 by 1080.

Step4 Click on “File“ > “Export As“ and toggle the “Select File Type (By Extension)“ option. Choose JPG/JPEG format because it can compress the thumbnail enough to stay within the limit of 2 megabytes.


Step5 You can change the quality of the image and click the “Export“ button to save the thumbnail.

Comparison of These 4 YouTube Thumbnail Resizing Methods
Now that we’ve explored the four methods for resizing YouTube thumbnails, it’s time to compare the pros and cons of each method. In this section, we’ll consider factors such as ease of use, speed, quality, cost, and compatibility to help you determine the best option for your needs.
Take a look at the table below for a more detailed comparison.
| | Windows Default App | Online YouTube Thumbnail Size Converter | Wondershare Filmora | Third-Party Software | |
| ————————————————– | ——————————————- | ———————– | ———————— | ——– |
| Other Software Required or Not | No | Yes (Internet Browser) | Yes | Yes |
| Internet Connection Required | No | Yes | No | No |
| Complexity of Operations | Easy | Easy | Easy | Moderate |
| Support Other Editing of the YouTube Thumbnail | No | No | Yes | Yes |
| File Size Limit | None | 25MB | None | None |
Resizing YouTube thumbnails using the Windows default app is a quick and easy method that requires no additional software or tools. However, the quality of the resized thumbnail may improve if the original image is low resolution, and this method is only suitable for users on Windows operating systems.
Online YouTube thumbnail size converters are convenient and easy to use, and they can be accessed from any device with an internet connection. They also typically preserve the quality of the original image. However, some online converters may have size limits or require a subscription to unlock all features, and using an online converter can be slower than using a dedicated software tool.
Using Wondershare Filmora allows you to create and edit YouTube thumbnails within a single application, which can be a time-saving advantage if you’re already using Filmora for other video editing tasks. However, Filmora is a paid software, so there is a cost associated with using it, and it may have a steeper learning curve for users new to video editing.
Image editing programs like GIMP offer many features and tools for customizing your thumbnail, including adding text, applying filters, and making more extensive edits beyond simply resizing the image. They also typically offer more control over the quality and appearance of the resized thumbnail.
However, using a third-party image editing program may require a learning curve and maybe more time-consuming than other methods, and there may be a cost associated with purchasing the software.
Each of the four methods for resizing YouTube thumbnails has its pros and cons, and the best method will depend on the user’s specific needs and preferences.
Conclusion
This article explored four methods for resizing YouTube thumbnails: using the Windows default app, online converters, Wondershare Filmora, and image editing programs like GIMP. Each method has advantages and disadvantages; the best one depends on your specific needs and preferences. No matter your chosen method, you can resize YouTube thumbnails confidently with these tools and techniques.
Free Download For macOS 10.14 or later
Here is the step-by-step tutorial on how to use Filmora in resizing your YouTube thumbnail. It is divided into two parts:
1. Take a Snapshot as the Thumbnail with Filmora
Step1 Open the video in the timeline, click the play icon in the player window, and pause when you reach the desired frame for the YouTube thumbnail. Click the camera icon to take a snapshot.
Step2 In the snapshot window, choose to save the snapshot as a PNG or JPG file.
Step3 Select the output storage location and click OK.
2. Resize the YouTube Thumbnail
Step1 Import the image into the app timeline.
Step2 Drag and drop the image into the timeline and click the green “Export“ button. In the popup Export window, select GIF. Next, click “Settings“ to adjust the resolution.
Step3 As the recommended size of a YouTube Thumbnail is 1280 * 720 pixels, you can set the resolution to 1280 * 720. Then click Apply and Export the GIF. You can now upload the GIF thumbnail to your YouTube account.
Method 4. Convert Images to YouTube Thumbnail Using Third-Party Software
In addition to using dedicated video editing software, several third-party image editing programs can be used to resize images for use as YouTube thumbnails. Programs like GIMP are popular for this purpose, as it offers a wide range of tools and features for editing and resizing images.
This program allows you to import an image, resize it to the dimensions required for a YouTube thumbnail (typically 1280 x 720 pixels), and save the edited version to your desired location. Using an image editing program can be a good option if you need more control over the appearance of your thumbnail or if you want to make more extensive edits beyond simply resizing the image.
To resize an image using an image editing program like GIMP, follow these steps:
Step1 Install and launch GIMP on your computer.
Step2 Click on “File“ > “Open,” then search for the file you want to resize.
Step3 Click on “Image“ > “Scale Image“ and make sure that the resolution is 1920 by 1080.
Step4 Click on “File“ > “Export As“ and toggle the “Select File Type (By Extension)“ option. Choose JPG/JPEG format because it can compress the thumbnail enough to stay within the limit of 2 megabytes.
Step5 You can change the quality of the image and click the “Export“ button to save the thumbnail.
Comparison of These 4 YouTube Thumbnail Resizing Methods
Now that we’ve explored the four methods for resizing YouTube thumbnails, it’s time to compare the pros and cons of each method. In this section, we’ll consider factors such as ease of use, speed, quality, cost, and compatibility to help you determine the best option for your needs.
Take a look at the table below for a more detailed comparison.
| | Windows Default App | Online YouTube Thumbnail Size Converter | Wondershare Filmora | Third-Party Software | |
| ————————————————– | ——————————————- | ———————– | ———————— | ——– |
| Other Software Required or Not | No | Yes (Internet Browser) | Yes | Yes |
| Internet Connection Required | No | Yes | No | No |
| Complexity of Operations | Easy | Easy | Easy | Moderate |
| Support Other Editing of the YouTube Thumbnail | No | No | Yes | Yes |
| File Size Limit | None | 25MB | None | None |
Resizing YouTube thumbnails using the Windows default app is a quick and easy method that requires no additional software or tools. However, the quality of the resized thumbnail may improve if the original image is low resolution, and this method is only suitable for users on Windows operating systems.
Online YouTube thumbnail size converters are convenient and easy to use, and they can be accessed from any device with an internet connection. They also typically preserve the quality of the original image. However, some online converters may have size limits or require a subscription to unlock all features, and using an online converter can be slower than using a dedicated software tool.
Using Wondershare Filmora allows you to create and edit YouTube thumbnails within a single application, which can be a time-saving advantage if you’re already using Filmora for other video editing tasks. However, Filmora is a paid software, so there is a cost associated with using it, and it may have a steeper learning curve for users new to video editing.
Image editing programs like GIMP offer many features and tools for customizing your thumbnail, including adding text, applying filters, and making more extensive edits beyond simply resizing the image. They also typically offer more control over the quality and appearance of the resized thumbnail.
However, using a third-party image editing program may require a learning curve and maybe more time-consuming than other methods, and there may be a cost associated with purchasing the software.
Each of the four methods for resizing YouTube thumbnails has its pros and cons, and the best method will depend on the user’s specific needs and preferences.
Conclusion
This article explored four methods for resizing YouTube thumbnails: using the Windows default app, online converters, Wondershare Filmora, and image editing programs like GIMP. Each method has advantages and disadvantages; the best one depends on your specific needs and preferences. No matter your chosen method, you can resize YouTube thumbnails confidently with these tools and techniques.
Step Up Your Mobile Filmmaking with These 9 Must-Have Tools
Smartphone Camera Accessories Vloggers Should Try to Improve Recording

Richard Bennett
Oct 26, 2023• Proven solutions
As smartphone camera technology is rapidly advancing, more and more people are using smartphones as their primary vlogging device. They’re convenient and they draw the least amount of attention. But since most smartphones weren’t made specifically for vlogging, there’s a lot of room to make them more suitable for that purpose. Here is a list of the nine best smartphone camera accessories for vloggers.
| Table of Contents 1. PORTABLE CHARGER2. TRIPOD MOUNT3. ANTI-GRAVITY CASE4. SELFIE RING LIGHT5. DIRECTIONAL MICROPHONE6. LENS SET7. FILMMAKING RIG8. FILMMAKING RIG9. GIMBAL |
|---|
1. RAVPower Portable Charger

Vlogging uses a lot more power. If you’re planning to vlog all throughout your day with your phone, you need a portable way to charge it back up. RAVPower has a great line up of portable chargers with multiple USB inputs that hold a total charge of more than 20,000 mAh. With that amount, you can fully charge your smartphone more than 6 times! I own one myself and it’s been great for me during my travels. A 22,000 mAh charger goes for about $42 USD.
2. Arkon Tripod Mount

The Arkon tripod mount is a great portable tripod option that you can get at the fair price of around $20 USD. Not only does it have bendable legs, like the more expensive Joby GorillaPod tripod, that you can wrap around all kinds of structures, but it also comes with the smartphone mount, which Joby sells separately. Another great thing about the Arkon tripod is that its smartphone mount can be rotated so that you can position your phone to film in either widescreen or portrait mode.
3. Mega Tiny Anti-Gravity Case

For all the flat surfaces that the bendable legs of the Arkon tripod mount can’t wrap around, Mega Tiny’s anti-gravity cases will do the job of holding your iPhone or Android phone in one fixed position. These cases can stick to glass, mirrors, metal, and more. They range from $20 to $30 USD.
4. FLII Selfie Ring Light

As much as smartphone camera technology has advanced, phone cameras still underperform when it comes to filming video in low-light. In low-light, your footage is very grainy because your phone is equipped with a small camera sensor, an engineering choice by the manufacturers to keep the size of the phone small. A handy accessory that you can use to get more light is the FLII selfie ring light. This ring light clamps onto your phone and emits a neutral white light. You can clamp this light to either side of your phone, depending on whether you want to use your rear-facing camera or your front-facing camera. This selfie ring light sells for around $16 USD.
5. RODE VideoMic Me

The mic that is already built into your phone is equally sensitive to the sounds that come from behind the phone as it is to the sounds that are in front of the phone. This can be problematic when you’re trying to vlog in selfie mode while there’s a loud concert on the other side. One smartphone accessory that can improve the sound that you record from your phone in these situations is the RODE VideoMic Me. This mini directional shotgun mic plugs right into your phone’s headphone jack and sells for around $60 USD. In windy conditions, the dead cat windshield that it comes with does a great job of minimizing noise from the wind. In quiet, indoor conditions where you are the only person speaking, this device performs no better than your phone’s internal microphone. Your phone will also have to be in airplane mode to prevent the Rode VideoMic Me from recording unwanted clicking noise caused by background processes performed by your phone. So you wouldn’t want to use this for livestreaming.
6. Aukey Optic 3-in-1 Smartphone Lens Set

Aukey makes a 3-in-1 lens set that you can clamp onto your smartphone so that you can vlog at different focal lengths. The 3-in-1 set comes with a wide-angle lens, a fisheye lens, and a macro lens. The clamp it comes with is long enough for these lenses to reach any camera on a smartphone, not just those of iPhones which are positioned close to the phone’s outer edge. To get the most out of these lenses, you’ll have to use them without your phone’s protective case on. Although you are free to use this lens set on either your phone’s rear-facing camera or front-facing camera, the metal housing of these lenses is likely to show up in your footage when you use them with your front-facing camera. So, instead of having your recorded image stretch to the ends of a 16:9 ratio rectangular frame, your recorded image will look as if it is contained inside a circle. This lens set sells for around $30 USD.
7. iOgrapher Go for Android and iPhone

There’s many more accessories that you can take advantage of if you don’t limit yourself to just smartphone camera accessories. Sound and lighting equipment made for stand-alone cameras perform much better too. Many of these accessories are meant to connect to the camera “shoe” (a bracket on top of the camera that accessories can be attached to). Smartphones don’t come with these kinds of shoes. So, to take advantage of these higher quality accessories, you’ll need some kind of camera rig for your smartphone that also comes with shoes. The iOgrapher Go offers this at around $60 USD. This accessory comes with three shoes.
8. Manfrotto TwistGrip System

Manfrotto’s TwistGrip System does a similar job to the above iOgrapher Go. This system also comes with three shoes. An advantage the TwistGrip System has over the iOgrapher Go is that it is much more portable. Its three connected parts can be detached to take up less space in your bag. This system sells for around $50 USD.
9. Zhiyun Smooth-Q 3-Axis Handheld Gimbal Stabilizer for Smartphones

My favorite smartphone camera accessory that I own is the Zhiyun Smooth-Q gimbal stabilizer. This gimbal is very effective in helping you record smooth video. Using the app that it comes with, you can even preset this gimbal to smoothly pan and rotate from a starting position to an ending position, giving you the opportunity to film beautiful time lapses. You can get this device at around $100 USD.
Polish Your YouTube Videos with Filmora
As one of the most widely used video editing software in YouTube video editing, Filmora provides lots of templates and effects with an intuitive interface, which saves much time. Download the free trial version and get started now.


Richard Bennett
Richard Bennett is a writer and a lover of all things video.
Follow @Richard Bennett
Richard Bennett
Oct 26, 2023• Proven solutions
As smartphone camera technology is rapidly advancing, more and more people are using smartphones as their primary vlogging device. They’re convenient and they draw the least amount of attention. But since most smartphones weren’t made specifically for vlogging, there’s a lot of room to make them more suitable for that purpose. Here is a list of the nine best smartphone camera accessories for vloggers.
| Table of Contents 1. PORTABLE CHARGER2. TRIPOD MOUNT3. ANTI-GRAVITY CASE4. SELFIE RING LIGHT5. DIRECTIONAL MICROPHONE6. LENS SET7. FILMMAKING RIG8. FILMMAKING RIG9. GIMBAL |
|---|
1. RAVPower Portable Charger
Vlogging uses a lot more power. If you’re planning to vlog all throughout your day with your phone, you need a portable way to charge it back up. RAVPower has a great line up of portable chargers with multiple USB inputs that hold a total charge of more than 20,000 mAh. With that amount, you can fully charge your smartphone more than 6 times! I own one myself and it’s been great for me during my travels. A 22,000 mAh charger goes for about $42 USD.
2. Arkon Tripod Mount
The Arkon tripod mount is a great portable tripod option that you can get at the fair price of around $20 USD. Not only does it have bendable legs, like the more expensive Joby GorillaPod tripod, that you can wrap around all kinds of structures, but it also comes with the smartphone mount, which Joby sells separately. Another great thing about the Arkon tripod is that its smartphone mount can be rotated so that you can position your phone to film in either widescreen or portrait mode.
3. Mega Tiny Anti-Gravity Case
For all the flat surfaces that the bendable legs of the Arkon tripod mount can’t wrap around, Mega Tiny’s anti-gravity cases will do the job of holding your iPhone or Android phone in one fixed position. These cases can stick to glass, mirrors, metal, and more. They range from $20 to $30 USD.
4. FLII Selfie Ring Light
As much as smartphone camera technology has advanced, phone cameras still underperform when it comes to filming video in low-light. In low-light, your footage is very grainy because your phone is equipped with a small camera sensor, an engineering choice by the manufacturers to keep the size of the phone small. A handy accessory that you can use to get more light is the FLII selfie ring light. This ring light clamps onto your phone and emits a neutral white light. You can clamp this light to either side of your phone, depending on whether you want to use your rear-facing camera or your front-facing camera. This selfie ring light sells for around $16 USD.
5. RODE VideoMic Me
The mic that is already built into your phone is equally sensitive to the sounds that come from behind the phone as it is to the sounds that are in front of the phone. This can be problematic when you’re trying to vlog in selfie mode while there’s a loud concert on the other side. One smartphone accessory that can improve the sound that you record from your phone in these situations is the RODE VideoMic Me. This mini directional shotgun mic plugs right into your phone’s headphone jack and sells for around $60 USD. In windy conditions, the dead cat windshield that it comes with does a great job of minimizing noise from the wind. In quiet, indoor conditions where you are the only person speaking, this device performs no better than your phone’s internal microphone. Your phone will also have to be in airplane mode to prevent the Rode VideoMic Me from recording unwanted clicking noise caused by background processes performed by your phone. So you wouldn’t want to use this for livestreaming.
6. Aukey Optic 3-in-1 Smartphone Lens Set
Aukey makes a 3-in-1 lens set that you can clamp onto your smartphone so that you can vlog at different focal lengths. The 3-in-1 set comes with a wide-angle lens, a fisheye lens, and a macro lens. The clamp it comes with is long enough for these lenses to reach any camera on a smartphone, not just those of iPhones which are positioned close to the phone’s outer edge. To get the most out of these lenses, you’ll have to use them without your phone’s protective case on. Although you are free to use this lens set on either your phone’s rear-facing camera or front-facing camera, the metal housing of these lenses is likely to show up in your footage when you use them with your front-facing camera. So, instead of having your recorded image stretch to the ends of a 16:9 ratio rectangular frame, your recorded image will look as if it is contained inside a circle. This lens set sells for around $30 USD.
7. iOgrapher Go for Android and iPhone
There’s many more accessories that you can take advantage of if you don’t limit yourself to just smartphone camera accessories. Sound and lighting equipment made for stand-alone cameras perform much better too. Many of these accessories are meant to connect to the camera “shoe” (a bracket on top of the camera that accessories can be attached to). Smartphones don’t come with these kinds of shoes. So, to take advantage of these higher quality accessories, you’ll need some kind of camera rig for your smartphone that also comes with shoes. The iOgrapher Go offers this at around $60 USD. This accessory comes with three shoes.
8. Manfrotto TwistGrip System
Manfrotto’s TwistGrip System does a similar job to the above iOgrapher Go. This system also comes with three shoes. An advantage the TwistGrip System has over the iOgrapher Go is that it is much more portable. Its three connected parts can be detached to take up less space in your bag. This system sells for around $50 USD.
9. Zhiyun Smooth-Q 3-Axis Handheld Gimbal Stabilizer for Smartphones
My favorite smartphone camera accessory that I own is the Zhiyun Smooth-Q gimbal stabilizer. This gimbal is very effective in helping you record smooth video. Using the app that it comes with, you can even preset this gimbal to smoothly pan and rotate from a starting position to an ending position, giving you the opportunity to film beautiful time lapses. You can get this device at around $100 USD.
Polish Your YouTube Videos with Filmora
As one of the most widely used video editing software in YouTube video editing, Filmora provides lots of templates and effects with an intuitive interface, which saves much time. Download the free trial version and get started now.
Richard Bennett
Richard Bennett is a writer and a lover of all things video.
Follow @Richard Bennett
Also read:
- [New] In 2024, Best Android Videography 6 Must-Try Music Videos Apps
- [New] MoneySmart Cumulus Storage - Scaling Files Economically for 2024
- 2024 Approved Maintaining Confidentiality with Professional Zoom Recordings
- 2024 Approved Relentless Joy in 9 Full-Length Holiday Spectacles, Free Online
- 2024 Approved The Key to Attracting Views YouTube Image Marketing
- 9 Solutions to Fix Process System Isnt Responding Error on Motorola Edge 2023 | Dr.fone
- Amplify Sales Discover the Leading 15 Facebook Monitoring Tools for 2024
- Effective Remedies When Windows Explorer Frequently Fails - Uncover Secrets!
- Guide De Restauration Des Vidéos Endommagées Par HandBrake Lors De L'extraction DVD Sous Windows 10
- In 2024, How to Bypass FRP on Infinix Note 30?
- In 2024, Income Investigation The Streamlined 3-Part Method to Assess Your YouTube Income Levels
- In 2024, Infographic-Led Exploration of Future Social Trends
- In 2024, Jumpstart Your Video Projects Access Free, Stunning Banner Templates
- In 2024, Techniques for Enthralling Try-On Haul Videos
- Infuse Your Visuals With Melody Adding Music in YouTube Editing for 2024
- Instant Download: Brother HL-3170CDW Printer Drivers - Fast and Easy Setup
- Maximize Your Channel Revenue with YouTube's New Policies for 2024
- Monetizing Makeup Tutorial Content for 2024
- Recovering Damaged .txt Files: A Guide to Four Reliable Strategies
- Title: In 2024, Quick Transition From Original Pictures To Standout YouTube Thumbnails
- Author: Joseph
- Created at : 2024-11-03 16:53:35
- Updated at : 2024-11-04 22:59:18
- Link: https://youtube-stream.techidaily.com/in-2024-quick-transition-from-original-pictures-to-standout-youtube-thumbnails/
- License: This work is licensed under CC BY-NC-SA 4.0.