
In 2024, Perfecting Audio Quality for Your YouTube Channel
Perfecting Audio Quality for Your YouTube Channel
How to Edit Audio on YouTube

Richard Bennett
Mar 27, 2024• Proven solutions
In this article, we are going to show you how to edit audio with YouTube Video Editor, and the tips on adding your own audio file to YouTube.
- Part 1: Add your Own Audio File to YouTube Video
- Part 2: How to Edit Audio with YouTube Video Editor
Part 1: Add your Own Audio File to YouTube Video
Tools You Are Going to Need
YouTube video editor is far from meeting the needs of people who want to have more control on their audio. On the bright side, if you are interested in learning how to edit audio on YouTube, there is a solution. There are many video editors in the market that allow you to add your own music or audio files to a video. Windows Movie Maker, iMovie, Adobe Premiere, and Magisto are some of the video editors available for you to choose from. In this guide, we recommend the Wondershare Filmora video editor. Below is a quick tutorial about how to edit audio in Filmora.
 Download Mac Version ](https://tools.techidaily.com/wondershare/filmora/download/ )
Why Should You Choose Wondershare Filmora?
There are many advantages associated with the use of Wondershare Filmora. You will see that it allows you to fully edit any audio file and gain 100% control over your files. It is an integrated solution that lacks nothing in terms of efficiency and quality standards. To be more specific, Filmora offers the following unique features:
- Built-in audio editing tools that allow you to gain full control of your audio in an easy way
- Exclusive audio track that enables you to mute, detach or even de-noise the audio from video
- All audio effects can easily be adjusted with one click only
- The built-in Equalizer is capable enough to create amazing audio effects
- Directly upload your video to YouTube, Facebook or Vimeo from Wondershare Filmora
How to add audio files to YouTube video with Wondershare Filmora
Do you want to know more about audio editing? Please read this article: How to add audio to video.
Step 1 Import Video Clips into Filmora
Filmora supports a wide range of video formats, such as MKV, MOV, AVI, WebM and MP4, you can import the video clip shot with Camera, smartphone or camcorder easily to it.
Step 2 Detach Audio
If you want to edit the original audio of the video, you can choose to split the audio file from the video by using the Audio Detach option on Wondershare Filmora. Then, the audio file will be shown in the audio track, and you can cut or trim it.

Note: If you do not want to keep the original audio file in the video, you can delete it from the audio track directly.
Step 3Add Audio Files
Wondershare Filmora offers you multiple royalty free audio effects and music in its rich audio library. What is more, you can also import your own music or audio file from your computer or iTunes. Of course, you should know that the audio should be royalty free for you to make use of. In a different situation, you cannot upload it and benefit from its quality and nature.
Step 4Edit Audio
In this step, you can adjust the audio volume and pitch, etc. There are multiple options for you to benefit from, including the Audio Equalizer, Music, Mix Audio. In this way, you can make sure that the audio is exactly like you have wanted it to be. For further information as to how you can improve the sound quality of your recorded videos, you can check out: How to improve sound quality of recorded videos.
Step 5Save Your Work and Upload on YouTube
If you are satisfied with your work on the audio file and you wish to publish it, the process is quite simple. You just hit Export and select to upload the video to YouTube. After signing in to your YouTube account, you will be ready to start uploading the audio file.

In case you wish to edit the audio from an already published video, you have to download the video first. Then, you can follow the steps above to edit the audio file in Filmora. As one of the widely used video editing software for YouTubers, Filmora is here to empower your imagination. Just download the free trial version and try it now.

Part 2: How to Edit Audio with YouTube Video Editor
Unfortunately, YouTube does not allow users to upload audio files such as MP3, WAV, etc. Instead, you can only upload audio files which are offered by YouTube in the first place. Since YouTube has got a plentiful audio library, you can find a lot of audio there. In this part, we will show you how to add and edit audio with YouTube Video Editor.
You may also like: How to Add Music to YouTube Videos >>
Note: From 20th September 2017 users will no longer be able to use the complimentary editing suite. Check the best YouTube video editor alternatives from this complete guide. In the following part, I will show you how to add audio track , replace the original audio and adjust the audio position and length as well.
- Step 1: Sign in to your YouTube account
- **Step 2:**Click your profile avatar and select Creator Studio option.
- Step 3: In the left pane, go to Video Manager and then click Videos. In the Videos list, choose the video that you want to add new audio track, and then select Audio from the Edit button.

- Step 4: Now you can add or replace the audio in your video. Here you will find that there are various songs and audio files you can choose from. Click ADD TO VIDEO and the audio track will be added to the video directly.

- Step 5: Now you will see the audio track appears at the bottom of the player. Here you can trim and drag the audio bar to adjust the audio positon and length. To Trim the audio, click the beginning or the end of the audio bar and then drag it to the left or right. After trimming, drag it to meet the target position.

Conclusion
Normally, it would be better to add and edit audio to video before updating to YouTube. In this case, Filmora is highly recommended as one of the best video editor for YouTubers , which provides some royalty free music sound in the Music Library to choose from and also the audio editing tools like remove background noise from the video, add fade in and fade out effects with ease or play the video backward or fast forward.
Richard Bennett
Richard Bennett is a writer and a lover of all things video.
Follow @Richard Bennett
Richard Bennett
Mar 27, 2024• Proven solutions
In this article, we are going to show you how to edit audio with YouTube Video Editor, and the tips on adding your own audio file to YouTube.
- Part 1: Add your Own Audio File to YouTube Video
- Part 2: How to Edit Audio with YouTube Video Editor
Part 1: Add your Own Audio File to YouTube Video
Tools You Are Going to Need
YouTube video editor is far from meeting the needs of people who want to have more control on their audio. On the bright side, if you are interested in learning how to edit audio on YouTube, there is a solution. There are many video editors in the market that allow you to add your own music or audio files to a video. Windows Movie Maker, iMovie, Adobe Premiere, and Magisto are some of the video editors available for you to choose from. In this guide, we recommend the Wondershare Filmora video editor. Below is a quick tutorial about how to edit audio in Filmora.
Download Mac Version ](https://tools.techidaily.com/wondershare/filmora/download/ )
Why Should You Choose Wondershare Filmora?
There are many advantages associated with the use of Wondershare Filmora. You will see that it allows you to fully edit any audio file and gain 100% control over your files. It is an integrated solution that lacks nothing in terms of efficiency and quality standards. To be more specific, Filmora offers the following unique features:
- Built-in audio editing tools that allow you to gain full control of your audio in an easy way
- Exclusive audio track that enables you to mute, detach or even de-noise the audio from video
- All audio effects can easily be adjusted with one click only
- The built-in Equalizer is capable enough to create amazing audio effects
- Directly upload your video to YouTube, Facebook or Vimeo from Wondershare Filmora
How to add audio files to YouTube video with Wondershare Filmora
Do you want to know more about audio editing? Please read this article: How to add audio to video.
Step 1 Import Video Clips into Filmora
Filmora supports a wide range of video formats, such as MKV, MOV, AVI, WebM and MP4, you can import the video clip shot with Camera, smartphone or camcorder easily to it.
Step 2 Detach Audio
If you want to edit the original audio of the video, you can choose to split the audio file from the video by using the Audio Detach option on Wondershare Filmora. Then, the audio file will be shown in the audio track, and you can cut or trim it.
Note: If you do not want to keep the original audio file in the video, you can delete it from the audio track directly.
Step 3Add Audio Files
Wondershare Filmora offers you multiple royalty free audio effects and music in its rich audio library. What is more, you can also import your own music or audio file from your computer or iTunes. Of course, you should know that the audio should be royalty free for you to make use of. In a different situation, you cannot upload it and benefit from its quality and nature.
Step 4Edit Audio
In this step, you can adjust the audio volume and pitch, etc. There are multiple options for you to benefit from, including the Audio Equalizer, Music, Mix Audio. In this way, you can make sure that the audio is exactly like you have wanted it to be. For further information as to how you can improve the sound quality of your recorded videos, you can check out: How to improve sound quality of recorded videos.
Step 5Save Your Work and Upload on YouTube
If you are satisfied with your work on the audio file and you wish to publish it, the process is quite simple. You just hit Export and select to upload the video to YouTube. After signing in to your YouTube account, you will be ready to start uploading the audio file.
In case you wish to edit the audio from an already published video, you have to download the video first. Then, you can follow the steps above to edit the audio file in Filmora. As one of the widely used video editing software for YouTubers, Filmora is here to empower your imagination. Just download the free trial version and try it now.
Part 2: How to Edit Audio with YouTube Video Editor
Unfortunately, YouTube does not allow users to upload audio files such as MP3, WAV, etc. Instead, you can only upload audio files which are offered by YouTube in the first place. Since YouTube has got a plentiful audio library, you can find a lot of audio there. In this part, we will show you how to add and edit audio with YouTube Video Editor.
You may also like: How to Add Music to YouTube Videos >>
Note: From 20th September 2017 users will no longer be able to use the complimentary editing suite. Check the best YouTube video editor alternatives from this complete guide. In the following part, I will show you how to add audio track , replace the original audio and adjust the audio position and length as well.
- Step 1: Sign in to your YouTube account
- **Step 2:**Click your profile avatar and select Creator Studio option.
- Step 3: In the left pane, go to Video Manager and then click Videos. In the Videos list, choose the video that you want to add new audio track, and then select Audio from the Edit button.
- Step 4: Now you can add or replace the audio in your video. Here you will find that there are various songs and audio files you can choose from. Click ADD TO VIDEO and the audio track will be added to the video directly.
- Step 5: Now you will see the audio track appears at the bottom of the player. Here you can trim and drag the audio bar to adjust the audio positon and length. To Trim the audio, click the beginning or the end of the audio bar and then drag it to the left or right. After trimming, drag it to meet the target position.
Conclusion
Normally, it would be better to add and edit audio to video before updating to YouTube. In this case, Filmora is highly recommended as one of the best video editor for YouTubers , which provides some royalty free music sound in the Music Library to choose from and also the audio editing tools like remove background noise from the video, add fade in and fade out effects with ease or play the video backward or fast forward.
Richard Bennett
Richard Bennett is a writer and a lover of all things video.
Follow @Richard Bennett
YouTube’s Creative Commons License Explained Simply
What’s YouTube Creative Commons and How to Use it to Make Video
Richard Bennett
Mar 27, 2024• Proven solutions
Creative Commons is a non-profit organization internationally active in providing free licenses that creators can use in order to make their work available to the public. With the creative commons (CC) licenses, the creator has basically given others permission in order to use their work but under specific conditions.
Whenever a work is created, an article or a photograph was taken, there is a copyright that protects it so that it cannot be used in certain ways. On the other hand, the CC licenses allow the creator to choose how they would want others to use their creativity.
If you are new to the video editing world, and want to make your YouTube videos more beautiful, here I recommend an easy-to-use video editing software - Wondershare Filmora which not only allows you cut, crop, rotate, and split your videos in minutes, but also simplify the advanced video editing like green screen effect and PIP. You can also find over 300 video effects
Download Mac Version ](https://tools.techidaily.com/wondershare/filmora/download/ )
- Part 1: What is YouTube Commons
- Part 2: How to Find Creative Commons (CC) Licensed Videos
- Part 3: Can You Download Creative Commons-licensed YouTube videos to Edit
- Part 4: How to Use YouTube Creative Commons to Make Videos
Part 1: What is YouTube Creative Commons
YouTube utilizes CC licenses in its content. With it, the content creators can grant others to use their work as sort of a standard. YouTube users can use the Creative Commons CC BY license in marking their videos. When they use the CC By license, the system will generate a signature to the video automatically. This indicates that you are using Creative Commons content and will show the source video’s titles below the video player. The creator retains the copyright of the video while others can reuse your video but under the terms of the license.
You May Also Like: Standard YouTube License vs. Creative Commons>>
Part 2: How to Find Creative Commons (CC) Licensed Videos
If you are looking for Creative Commons licensed videos, there are different ways or rather, different websites you can go to. These websites are the best place you can find CC-licensed videos and ensure that what you are sharing is legal.
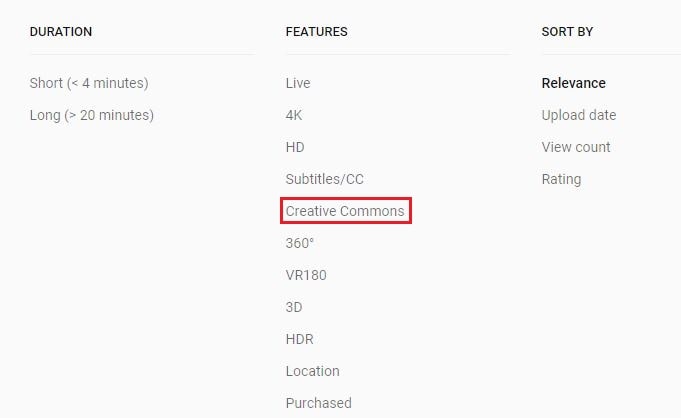
- **YouTube **– YouTube is one of the most common websites you can find CC licensed videos. The easy way to search for CC licensed videos on YouTube is simply to search ‘creative commons’ to the end of the search term you are going for.
- Vimeo – This site offers different licenses complete with an explanation for each in the right side of the main page. Underneath each license, you can find a link to browse all the videos of the specific type of license you chose. You can also search using the Advance Option to find the right video you are looking for.
- SpinXpress – Lets you search for CC licensed videos using just a search term and the kind of Creative Commons license you are looking for. As long as it’s one of the sources they use, you can also specify the media source of the video.
Part 3: Can You Download Creative Commons-licensed YouTube videos to Edit
Many people are asking that can I edit creative commons videos? Well, this is a tricky question because it really depends on what creative commons license is used. If the video is CC-BY, it is no doubt that you can download and edit it. CC-BY-SA means you can edit video under the condition of you also allow others to edit it after you upload it to YouTube. If it is non-commercial, you are definitely not allowed to edit it.
Part 4: How to Use YouTube Creative Commons to Make Videos
YouTube Creative Commons provides you a simple way of using creative works to make your own videos. All you simply need is the YouTube Video Editor and the expanded library of Creative Commons videos o YouTube. There you can choose what videos to edit and then incorporate in your own projects. To find what videos to use, you simply have to search in the YouTube search bar from YouTube Video Editor.
Visit youtube.com/editor and then select CC tab to get started. In order to mark your video with CC license, select the ‘Creative Commons Attribution license’ on the Video Description page or upload page. When using a Creative Commons content to incorporate in your video, you will see the source title of the videos underneath your video player. With that a well, any or all of the videos you used with Creative Commons license, others will be able to share and remix your own creation as long as they give credit for your work.
Richard Bennett
Richard Bennett is a writer and a lover of all things video.
Follow @Richard Bennett
Richard Bennett
Mar 27, 2024• Proven solutions
Creative Commons is a non-profit organization internationally active in providing free licenses that creators can use in order to make their work available to the public. With the creative commons (CC) licenses, the creator has basically given others permission in order to use their work but under specific conditions.
Whenever a work is created, an article or a photograph was taken, there is a copyright that protects it so that it cannot be used in certain ways. On the other hand, the CC licenses allow the creator to choose how they would want others to use their creativity.
If you are new to the video editing world, and want to make your YouTube videos more beautiful, here I recommend an easy-to-use video editing software - Wondershare Filmora which not only allows you cut, crop, rotate, and split your videos in minutes, but also simplify the advanced video editing like green screen effect and PIP. You can also find over 300 video effects
Download Mac Version ](https://tools.techidaily.com/wondershare/filmora/download/ )
- Part 1: What is YouTube Commons
- Part 2: How to Find Creative Commons (CC) Licensed Videos
- Part 3: Can You Download Creative Commons-licensed YouTube videos to Edit
- Part 4: How to Use YouTube Creative Commons to Make Videos
Part 1: What is YouTube Creative Commons
YouTube utilizes CC licenses in its content. With it, the content creators can grant others to use their work as sort of a standard. YouTube users can use the Creative Commons CC BY license in marking their videos. When they use the CC By license, the system will generate a signature to the video automatically. This indicates that you are using Creative Commons content and will show the source video’s titles below the video player. The creator retains the copyright of the video while others can reuse your video but under the terms of the license.
You May Also Like: Standard YouTube License vs. Creative Commons>>
Part 2: How to Find Creative Commons (CC) Licensed Videos
If you are looking for Creative Commons licensed videos, there are different ways or rather, different websites you can go to. These websites are the best place you can find CC-licensed videos and ensure that what you are sharing is legal.
- **YouTube **– YouTube is one of the most common websites you can find CC licensed videos. The easy way to search for CC licensed videos on YouTube is simply to search ‘creative commons’ to the end of the search term you are going for.
- Vimeo – This site offers different licenses complete with an explanation for each in the right side of the main page. Underneath each license, you can find a link to browse all the videos of the specific type of license you chose. You can also search using the Advance Option to find the right video you are looking for.
- SpinXpress – Lets you search for CC licensed videos using just a search term and the kind of Creative Commons license you are looking for. As long as it’s one of the sources they use, you can also specify the media source of the video.
Part 3: Can You Download Creative Commons-licensed YouTube videos to Edit
Many people are asking that can I edit creative commons videos? Well, this is a tricky question because it really depends on what creative commons license is used. If the video is CC-BY, it is no doubt that you can download and edit it. CC-BY-SA means you can edit video under the condition of you also allow others to edit it after you upload it to YouTube. If it is non-commercial, you are definitely not allowed to edit it.
Part 4: How to Use YouTube Creative Commons to Make Videos
YouTube Creative Commons provides you a simple way of using creative works to make your own videos. All you simply need is the YouTube Video Editor and the expanded library of Creative Commons videos o YouTube. There you can choose what videos to edit and then incorporate in your own projects. To find what videos to use, you simply have to search in the YouTube search bar from YouTube Video Editor.
Visit youtube.com/editor and then select CC tab to get started. In order to mark your video with CC license, select the ‘Creative Commons Attribution license’ on the Video Description page or upload page. When using a Creative Commons content to incorporate in your video, you will see the source title of the videos underneath your video player. With that a well, any or all of the videos you used with Creative Commons license, others will be able to share and remix your own creation as long as they give credit for your work.
Richard Bennett
Richard Bennett is a writer and a lover of all things video.
Follow @Richard Bennett
Also read:
- [New] 2024 Approved Dispelling Darkness, Enhancing Youtube Views
- [New] From Scripts to Subscribers Mastering the Production of Engaging Educational Videos for YouTube
- [Updated] Experience the Future of Mobile Gaming IPhone VR Leaderboard
- 1. 無限制的網上移動檔案格式轉換:MP4到WAV - 使用 Movavi 圖像工作室
- 2024 Approved Filmora’s Recipe for Captivating YouTube Trailers
- 2024 Approved Influencing Audiences with Short-Form Videos
- 2024 Approved Instantaneous Pro Thumbnail Creation - Valorant Edition
- 2024 Approved The Complete Azure Guide to Speech-to-Text Integration
- 2024 Approved The Financial Frontier Acquiring High-Value Youtubes
- Cloud-Connected Computers: Integrating Files with Dropbox/GoogleDrive in C:
- Efficient Document Production Using ChatGPT Integration in Microsoft Word
- In 2024, How and Where to Find a Shiny Stone Pokémon For ZTE Blade A73 5G? | Dr.fone
- In 2024, Premier Top Selections Affordable SBD Applications
- In 2024, The Algorithm Behind YouTube's Post-Upload Logic
- In 2024, Transforming Spontaneitous Tunes Into Structured YouTube Playlists
- The Essentials: Selecting an Effective AI Conversational Agent
- Ultimate Guide: Why Apple's 201E iPad Pro 11-Inch Is Still Top of Its Class
- Title: In 2024, Perfecting Audio Quality for Your YouTube Channel
- Author: Joseph
- Created at : 2024-11-29 22:19:32
- Updated at : 2024-12-04 00:09:59
- Link: https://youtube-stream.techidaily.com/in-2024-perfecting-audio-quality-for-your-youtube-channel/
- License: This work is licensed under CC BY-NC-SA 4.0.