:max_bytes(150000):strip_icc()/GettyImages-1139003653-835c81e938ba43e8be021cc8d0364b71.jpg)
In 2024, Leading 5 Video Editors Outside YouTube Realm
Leading 5 Video Editors Outside YouTube Realm
Best 5 YouTube Video Editor Alternatives

Richard Bennett
Mar 27, 2024• Proven solutions
YouTube provides a free tool that allows the user to create a video by putting together various clips and then publish them with a single click. All the uploads that the user has made before are added to the YouTube Video Editor. The tool allows the user to combine, trim, add music and customize. However, its functionality is limited to just that, and that’s why people are looking for the best YouTube Video Editor alternative.
Note: From 20th September 2017 users will no longer be able to use the complimentary editing suite. Check the best YouTube video editor alternatives from this complete guide.
Some of the cons of the YouTube Video Editor are:
- It doesn’t have advanced editing features.
- It requires Internet connection to use.
- It is slow.
- Users can only edit videos that were already uploaded to their YouTube account.
Best 5 YouTube Video Editor Alternatives
The good news is that there are good offline YouTube Video Editor Alternatives out there. Below are the top five:
1. Wondershare Filmora
Wondershare Filmora is one of the most popular YouTube Video Editor alternatives. It is available for both Windows and Mac platforms. The best thing about Wondershare Filmora is that it is easy to use. And at the same time, it has more features than the YouTube Video Editor.
 Download Mac Version ](https://tools.techidaily.com/wondershare/filmora/download/ )
Some of the key features of Filmora include:
- Allows the user to crop, cut, and combine video clips in just a few clicks
- Supports the addition of multiple audio and video tracks
- Choose from various overlays and filters
- Supports face off, green screen, and PIP effects
- Supports a wide range of video formats that include MP4, AVI, MOV, MKV, and WMV, just to name a few
- Burn video to DVD, or instantly upload it to YouTube, Facebook, and Vimeo
2. WeVideo
Another YouTube Video Editor alternative is WeVideo . It is a cloud-based video editor that allows the user to do the editing in any web browser. Just like the YouTube editing tool, the user must first upload the clips online in order to edit them, and create a video.
Pros:
One advantage of WeVideo is that it allows different users to collaborate in making a single video. A user can invite others to upload clips to the project, or even make different videos based on the same clips.
Cons:
And because it is a cloud-based video editor, it requires an Internet connection in order to get the clips and do the editing. Not only that, the videos must be uploaded before they can be used. And there are cases in which a five-minute video will require hours of raw footages. Users with slow upload speeds will take hours before they can start editing. And users of the free version can only export 480p videos that have a watermark. Users need to pay for the full version.
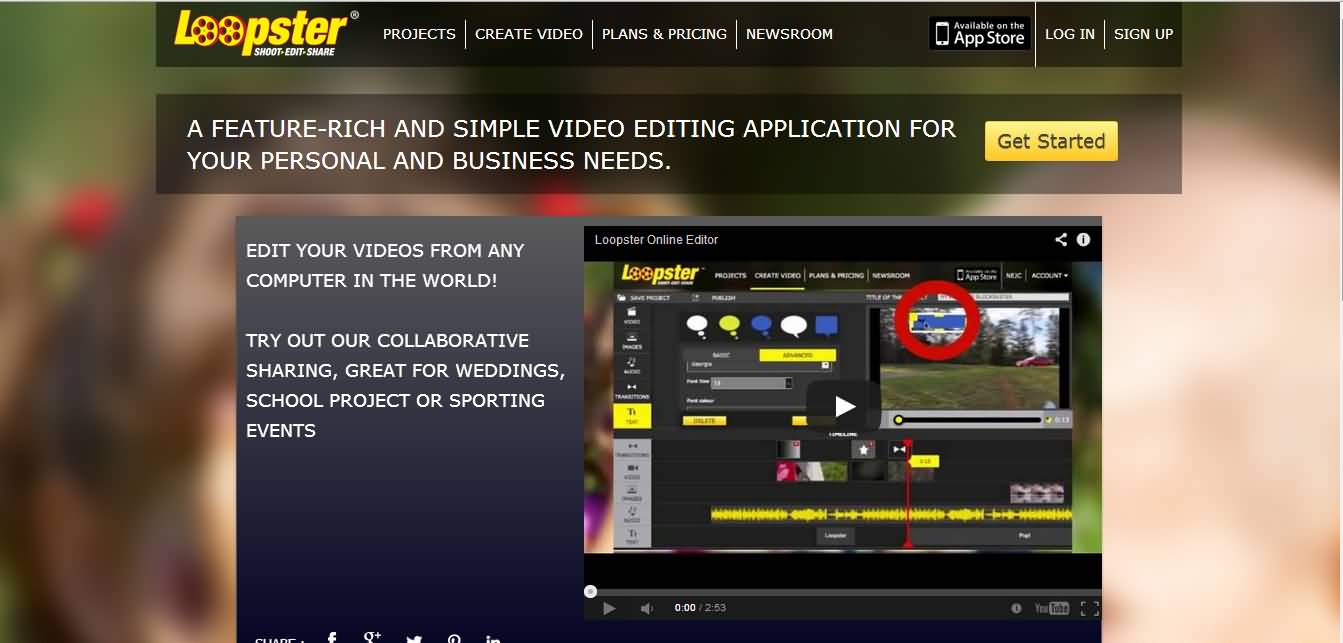
3. Loopster
Loopster is a mobile app that can be a YouTube Video Editor alternative. It is available for both the Android and iOS platforms. The tool allows the user to rotate, splice and add sound effects, zoom, and crop videos directly from one’s smartphone. It comes with advanced features that include title screens, slow motion effect, and bubble text. The app also lets the user record video and sounds directly. After editing the video, the app can export it directly to Facebook or YouTube.
Pros:
It does what it was designed to do when it is working. It is user-friendly and comes with a tutorial. It also works even if the smartphone is not connected to the internet. Editing is done offline. And best of all, it is free.
Cons:
One the downside, it looks like the developer is no longer updating the app. Some users experience crashes and other bugs. There are also some users that stated that the slow motion effect didn’t work for them, which is why they can’t recommend it as a YouTube Video Editor alternative.
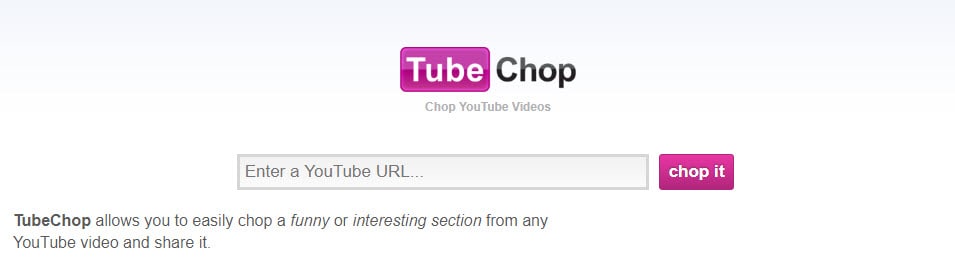
4. Tubechop
Tubechop allows the user to trim a video from any YouTube video and then share it. There are some videos that are just too long, and you want to cut it to the section that you find interesting.
Pros:
Just like the other YouTube Video Editor alternatives, Tubechop is easy to use. The user just needs to enter the YouTube URL of the video, and then indicate the section that’s interesting, and that’s it.
Cons:
However, Tubechop doesn’t allow users to download the resulting video. Tubechop only provides a link that allows users to view the chopped video. And when the original video is deleted, the chopped version will also be deleted.
5. Viddyad
Viddyad is another cloud-based platform that lets users convert images, music, clips, and animated effects into a video. It is said to be the best way to create video ads for businesses.

Pros:
There are several templates to choose from. Users can create video ads by adding videos, text, voiceover, special effects, music, and images. The platform also provides access to millions of image and video stock.
Cons:
Viddyad is a YouTube Video Editor alternative for businesses that want to create video ads. It might not be the right video editor for individuals who just want to create and share their personal videos.
Richard Bennett
Richard Bennett is a writer and a lover of all things video.
Follow @Richard Bennett
Richard Bennett
Mar 27, 2024• Proven solutions
YouTube provides a free tool that allows the user to create a video by putting together various clips and then publish them with a single click. All the uploads that the user has made before are added to the YouTube Video Editor. The tool allows the user to combine, trim, add music and customize. However, its functionality is limited to just that, and that’s why people are looking for the best YouTube Video Editor alternative.
Note: From 20th September 2017 users will no longer be able to use the complimentary editing suite. Check the best YouTube video editor alternatives from this complete guide.
Some of the cons of the YouTube Video Editor are:
- It doesn’t have advanced editing features.
- It requires Internet connection to use.
- It is slow.
- Users can only edit videos that were already uploaded to their YouTube account.
Best 5 YouTube Video Editor Alternatives
The good news is that there are good offline YouTube Video Editor Alternatives out there. Below are the top five:
1. Wondershare Filmora
Wondershare Filmora is one of the most popular YouTube Video Editor alternatives. It is available for both Windows and Mac platforms. The best thing about Wondershare Filmora is that it is easy to use. And at the same time, it has more features than the YouTube Video Editor.
Download Mac Version ](https://tools.techidaily.com/wondershare/filmora/download/ )
Some of the key features of Filmora include:
- Allows the user to crop, cut, and combine video clips in just a few clicks
- Supports the addition of multiple audio and video tracks
- Choose from various overlays and filters
- Supports face off, green screen, and PIP effects
- Supports a wide range of video formats that include MP4, AVI, MOV, MKV, and WMV, just to name a few
- Burn video to DVD, or instantly upload it to YouTube, Facebook, and Vimeo
2. WeVideo
Another YouTube Video Editor alternative is WeVideo . It is a cloud-based video editor that allows the user to do the editing in any web browser. Just like the YouTube editing tool, the user must first upload the clips online in order to edit them, and create a video.
Pros:
One advantage of WeVideo is that it allows different users to collaborate in making a single video. A user can invite others to upload clips to the project, or even make different videos based on the same clips.
Cons:
And because it is a cloud-based video editor, it requires an Internet connection in order to get the clips and do the editing. Not only that, the videos must be uploaded before they can be used. And there are cases in which a five-minute video will require hours of raw footages. Users with slow upload speeds will take hours before they can start editing. And users of the free version can only export 480p videos that have a watermark. Users need to pay for the full version.
3. Loopster
Loopster is a mobile app that can be a YouTube Video Editor alternative. It is available for both the Android and iOS platforms. The tool allows the user to rotate, splice and add sound effects, zoom, and crop videos directly from one’s smartphone. It comes with advanced features that include title screens, slow motion effect, and bubble text. The app also lets the user record video and sounds directly. After editing the video, the app can export it directly to Facebook or YouTube.
Pros:
It does what it was designed to do when it is working. It is user-friendly and comes with a tutorial. It also works even if the smartphone is not connected to the internet. Editing is done offline. And best of all, it is free.
Cons:
One the downside, it looks like the developer is no longer updating the app. Some users experience crashes and other bugs. There are also some users that stated that the slow motion effect didn’t work for them, which is why they can’t recommend it as a YouTube Video Editor alternative.
4. Tubechop
Tubechop allows the user to trim a video from any YouTube video and then share it. There are some videos that are just too long, and you want to cut it to the section that you find interesting.
Pros:
Just like the other YouTube Video Editor alternatives, Tubechop is easy to use. The user just needs to enter the YouTube URL of the video, and then indicate the section that’s interesting, and that’s it.
Cons:
However, Tubechop doesn’t allow users to download the resulting video. Tubechop only provides a link that allows users to view the chopped video. And when the original video is deleted, the chopped version will also be deleted.
5. Viddyad
Viddyad is another cloud-based platform that lets users convert images, music, clips, and animated effects into a video. It is said to be the best way to create video ads for businesses.
Pros:
There are several templates to choose from. Users can create video ads by adding videos, text, voiceover, special effects, music, and images. The platform also provides access to millions of image and video stock.
Cons:
Viddyad is a YouTube Video Editor alternative for businesses that want to create video ads. It might not be the right video editor for individuals who just want to create and share their personal videos.
Richard Bennett
Richard Bennett is a writer and a lover of all things video.
Follow @Richard Bennett
Richard Bennett
Mar 27, 2024• Proven solutions
YouTube provides a free tool that allows the user to create a video by putting together various clips and then publish them with a single click. All the uploads that the user has made before are added to the YouTube Video Editor. The tool allows the user to combine, trim, add music and customize. However, its functionality is limited to just that, and that’s why people are looking for the best YouTube Video Editor alternative.
Note: From 20th September 2017 users will no longer be able to use the complimentary editing suite. Check the best YouTube video editor alternatives from this complete guide.
Some of the cons of the YouTube Video Editor are:
- It doesn’t have advanced editing features.
- It requires Internet connection to use.
- It is slow.
- Users can only edit videos that were already uploaded to their YouTube account.
Best 5 YouTube Video Editor Alternatives
The good news is that there are good offline YouTube Video Editor Alternatives out there. Below are the top five:
1. Wondershare Filmora
Wondershare Filmora is one of the most popular YouTube Video Editor alternatives. It is available for both Windows and Mac platforms. The best thing about Wondershare Filmora is that it is easy to use. And at the same time, it has more features than the YouTube Video Editor.
Download Mac Version ](https://tools.techidaily.com/wondershare/filmora/download/ )
Some of the key features of Filmora include:
- Allows the user to crop, cut, and combine video clips in just a few clicks
- Supports the addition of multiple audio and video tracks
- Choose from various overlays and filters
- Supports face off, green screen, and PIP effects
- Supports a wide range of video formats that include MP4, AVI, MOV, MKV, and WMV, just to name a few
- Burn video to DVD, or instantly upload it to YouTube, Facebook, and Vimeo
2. WeVideo
Another YouTube Video Editor alternative is WeVideo . It is a cloud-based video editor that allows the user to do the editing in any web browser. Just like the YouTube editing tool, the user must first upload the clips online in order to edit them, and create a video.
Pros:
One advantage of WeVideo is that it allows different users to collaborate in making a single video. A user can invite others to upload clips to the project, or even make different videos based on the same clips.
Cons:
And because it is a cloud-based video editor, it requires an Internet connection in order to get the clips and do the editing. Not only that, the videos must be uploaded before they can be used. And there are cases in which a five-minute video will require hours of raw footages. Users with slow upload speeds will take hours before they can start editing. And users of the free version can only export 480p videos that have a watermark. Users need to pay for the full version.
3. Loopster
Loopster is a mobile app that can be a YouTube Video Editor alternative. It is available for both the Android and iOS platforms. The tool allows the user to rotate, splice and add sound effects, zoom, and crop videos directly from one’s smartphone. It comes with advanced features that include title screens, slow motion effect, and bubble text. The app also lets the user record video and sounds directly. After editing the video, the app can export it directly to Facebook or YouTube.
Pros:
It does what it was designed to do when it is working. It is user-friendly and comes with a tutorial. It also works even if the smartphone is not connected to the internet. Editing is done offline. And best of all, it is free.
Cons:
One the downside, it looks like the developer is no longer updating the app. Some users experience crashes and other bugs. There are also some users that stated that the slow motion effect didn’t work for them, which is why they can’t recommend it as a YouTube Video Editor alternative.
4. Tubechop
Tubechop allows the user to trim a video from any YouTube video and then share it. There are some videos that are just too long, and you want to cut it to the section that you find interesting.
Pros:
Just like the other YouTube Video Editor alternatives, Tubechop is easy to use. The user just needs to enter the YouTube URL of the video, and then indicate the section that’s interesting, and that’s it.
Cons:
However, Tubechop doesn’t allow users to download the resulting video. Tubechop only provides a link that allows users to view the chopped video. And when the original video is deleted, the chopped version will also be deleted.
5. Viddyad
Viddyad is another cloud-based platform that lets users convert images, music, clips, and animated effects into a video. It is said to be the best way to create video ads for businesses.
Pros:
There are several templates to choose from. Users can create video ads by adding videos, text, voiceover, special effects, music, and images. The platform also provides access to millions of image and video stock.
Cons:
Viddyad is a YouTube Video Editor alternative for businesses that want to create video ads. It might not be the right video editor for individuals who just want to create and share their personal videos.
Richard Bennett
Richard Bennett is a writer and a lover of all things video.
Follow @Richard Bennett
Streaming to Start: Reversing Order on Your YouTube Watch List
If you have ever created a playlist on YouTube, you may have noticed that the order of the videos is automatically set and based on when they were added to the list. However, it would help if you played them in reverse order.
Surprisingly, there is no built-in way to do this on YouTube. However, four simple workarounds only take a few minutes to complete.
So, keep reading to learn how to reverse a YouTube playlist so you can watch the videos in the order you want!
How to Reverse a YouTube Playlist?
Below we’ve provided four different solutions to help you reverse your YouTube playlist on your computer:
Using Chrome Web Extension
One of the most straightforward and convenient methods of reversing the YouTube playlist is to install a Chrome browser extension that will let you play any playlist in the opposite order.
The “Iridium for YouTube” and “Improve YouTube” extensions on your Google Chrome can play any YouTube video queue or playlist in reverse.
Here’s how to install the “Iridium for YouTube” extension on your Chrome browser to reverse the playlist:
Step 1: In the first step, launch a browser on your computer and click the three dots (ellipsis icon) in the top-right corner of the screen. Scroll down, select “More Tools,” and click Extensions.”

Step 2:
- Now, click the three horizontal-line”Menu”icon.
- Click the”Open Chrome Web Store”option.
- Search for theIridium for YouTubeextension using the search bar.

Step 3:
- Open the extension page.
- Click”Add to Chrome.”
- Click the”Add Extension”option in the pop-up menu.

Step 4:Open a new page, visit YouTube , and a pop-up window will appear. Select”Close”to terminate it, and clickthe”Menu”(hamburger) icon in the top left corner of the screen. Next, scroll down and open your savedPlaylistthat you want to reverse.

Step 5: Click the “Play All” option in the details section of the playlist and click the Iridium button on the right side of the screen. This will open a new tab with different settings for your playlist. Go to the Video tab, and under the “Playlist” header, toggle the button next to “Enable reverse playlist control” to change the settings.

That’s about it. You will now be able to watch a YouTube playlist in reverse order.
Using The Third Website
Several trusted and reliable third-party websites, such as “Playlist. tools,” can help you reverse your YouTube playlists quickly. The platform is free and fully dedicated to instantly changing the order of your Playlist.
Here’s how you can use the Playlist.tools to reverse your videos’ order in a playlist on YouTube:
Step 1: Launch a browser on your laptop or desktop, head to theYouTube website, and click the three-line “Menu” icon. Now, scroll down to access the playlist you want to reverse, click the “Share” icon, and click “Copy” to save the URL to your clipboard.
Step 2: In the next step, open a new tab and visit the “Playlist.Tools” website. Now, paste the copied playlist URL in the provided text box, and the platform will start retrieving it.

Step 3: Finally, click the “Sort” icon and select descending order to reverse your playlist. You can always return to the original sequence by clicking the “Original Sequence” option in the top right corner of the screen.
Changing the Ordering in Settings
If you are a content creator on YouTube and want to reverse the videos’ order in a playlist on your channel, do the following steps in sequence:
Step 1: In the first step, launch the YouTube app on your device or visit the YouTube website on a browser. Go to “Library” and open the playlist of your choice.
Step 2: Hover over the video, and you will see two horizontal lines next to it. Click/tap & hold the video and drag it to a new location to change its order.
You can also utilize the “Sort” option to reverse the playlist. To do so, click “Sort” at the top of the playlist above the videos and select “Date Published (Oldest)” to change the order.

A Bonus Tip for YouTube Creator: Make Your Own YouTube Channel Trailer
As a YouTube content creator, you need to set your videos’ order in your Playlist. Besides, the video’s trailer also influences your audiences’ browsing and watching experience. To help you with this part in case you are in need, we have prepared a video tutorial for you - How To Make Your Own YouTube Channel Trailer. If you have any interests, please don’t miss it, and see how to make a fantastic video trailer with a user-friendly video editor Wondershare Filmora :
Adding Playlist to Your Private Playlist
If you want to reverse a YouTube playlist order, you can create a new private playlist. This quick and easy method will help you get the desired results.
For this method to work, you don’t need to download any third-party app or use a website; all you have to do is open YouTube on any browser or use the YouTube app in the following way:
Step 1: In the first step, launch the YouTube app on your device or visit the YouTube website (if you are logged out, sign into your account using your credentials).
Step 2: In the next step, click your Profile at the top right of the screen and select the “Your Channel” option from the drop-down menu to access your YouTube channel.
Step 3: Scroll down on your channel’s dashboard, select a video, and click the three dots next to it. Next, click “Add to Playlist” from the drop-down list and select the “Create a New Playlist” option to make a new one.

Next, provide a name, set the privacy settings to “Private,” and click “Create.”
Step 4: In the final step, head to the Playlist tab, click “View Full Playlist” to open the new playlist, and click the “three dots” in the details area on the left. Next, select “Playlist Settings” and toggle the button next to “Add new videos to top of playlist” to enable it.
You can now add more videos to your playlist, and each one will be added to the top. This method helps you arrange the YouTube playlist as you desire.
The Bottom Line
In this article, we’ve provided four different step-by-step solutions to show you how to reverse a YouTube playlist on your PC and mobile device using Chrome extension, a third-party website, changing settings, and adding videos to a new private playlist.
Hopefully, you’ve found this article helpful and can now watch your favorite playlist in the order you like without any issues.
If you have ever created a playlist on YouTube, you may have noticed that the order of the videos is automatically set and based on when they were added to the list. However, it would help if you played them in reverse order.
Surprisingly, there is no built-in way to do this on YouTube. However, four simple workarounds only take a few minutes to complete.
So, keep reading to learn how to reverse a YouTube playlist so you can watch the videos in the order you want!
How to Reverse a YouTube Playlist?
Below we’ve provided four different solutions to help you reverse your YouTube playlist on your computer:
Using Chrome Web Extension
One of the most straightforward and convenient methods of reversing the YouTube playlist is to install a Chrome browser extension that will let you play any playlist in the opposite order.
The “Iridium for YouTube” and “Improve YouTube” extensions on your Google Chrome can play any YouTube video queue or playlist in reverse.
Here’s how to install the “Iridium for YouTube” extension on your Chrome browser to reverse the playlist:
Step 1: In the first step, launch a browser on your computer and click the three dots (ellipsis icon) in the top-right corner of the screen. Scroll down, select “More Tools,” and click Extensions.”
Step 2:
- Now, click the three horizontal-line”Menu”icon.
- Click the”Open Chrome Web Store”option.
- Search for theIridium for YouTubeextension using the search bar.
Step 3:
- Open the extension page.
- Click”Add to Chrome.”
- Click the”Add Extension”option in the pop-up menu.
Step 4:Open a new page, visit YouTube , and a pop-up window will appear. Select”Close”to terminate it, and clickthe”Menu”(hamburger) icon in the top left corner of the screen. Next, scroll down and open your savedPlaylistthat you want to reverse.
Step 5: Click the “Play All” option in the details section of the playlist and click the Iridium button on the right side of the screen. This will open a new tab with different settings for your playlist. Go to the Video tab, and under the “Playlist” header, toggle the button next to “Enable reverse playlist control” to change the settings.
That’s about it. You will now be able to watch a YouTube playlist in reverse order.
Using The Third Website
Several trusted and reliable third-party websites, such as “Playlist. tools,” can help you reverse your YouTube playlists quickly. The platform is free and fully dedicated to instantly changing the order of your Playlist.
Here’s how you can use the Playlist.tools to reverse your videos’ order in a playlist on YouTube:
Step 1: Launch a browser on your laptop or desktop, head to theYouTube website, and click the three-line “Menu” icon. Now, scroll down to access the playlist you want to reverse, click the “Share” icon, and click “Copy” to save the URL to your clipboard.
Step 2: In the next step, open a new tab and visit the “Playlist.Tools” website. Now, paste the copied playlist URL in the provided text box, and the platform will start retrieving it.
Step 3: Finally, click the “Sort” icon and select descending order to reverse your playlist. You can always return to the original sequence by clicking the “Original Sequence” option in the top right corner of the screen.
Changing the Ordering in Settings
If you are a content creator on YouTube and want to reverse the videos’ order in a playlist on your channel, do the following steps in sequence:
Step 1: In the first step, launch the YouTube app on your device or visit the YouTube website on a browser. Go to “Library” and open the playlist of your choice.
Step 2: Hover over the video, and you will see two horizontal lines next to it. Click/tap & hold the video and drag it to a new location to change its order.
You can also utilize the “Sort” option to reverse the playlist. To do so, click “Sort” at the top of the playlist above the videos and select “Date Published (Oldest)” to change the order.
A Bonus Tip for YouTube Creator: Make Your Own YouTube Channel Trailer
As a YouTube content creator, you need to set your videos’ order in your Playlist. Besides, the video’s trailer also influences your audiences’ browsing and watching experience. To help you with this part in case you are in need, we have prepared a video tutorial for you - How To Make Your Own YouTube Channel Trailer. If you have any interests, please don’t miss it, and see how to make a fantastic video trailer with a user-friendly video editor Wondershare Filmora :
Adding Playlist to Your Private Playlist
If you want to reverse a YouTube playlist order, you can create a new private playlist. This quick and easy method will help you get the desired results.
For this method to work, you don’t need to download any third-party app or use a website; all you have to do is open YouTube on any browser or use the YouTube app in the following way:
Step 1: In the first step, launch the YouTube app on your device or visit the YouTube website (if you are logged out, sign into your account using your credentials).
Step 2: In the next step, click your Profile at the top right of the screen and select the “Your Channel” option from the drop-down menu to access your YouTube channel.
Step 3: Scroll down on your channel’s dashboard, select a video, and click the three dots next to it. Next, click “Add to Playlist” from the drop-down list and select the “Create a New Playlist” option to make a new one.
Next, provide a name, set the privacy settings to “Private,” and click “Create.”
Step 4: In the final step, head to the Playlist tab, click “View Full Playlist” to open the new playlist, and click the “three dots” in the details area on the left. Next, select “Playlist Settings” and toggle the button next to “Add new videos to top of playlist” to enable it.
You can now add more videos to your playlist, and each one will be added to the top. This method helps you arrange the YouTube playlist as you desire.
The Bottom Line
In this article, we’ve provided four different step-by-step solutions to show you how to reverse a YouTube playlist on your PC and mobile device using Chrome extension, a third-party website, changing settings, and adding videos to a new private playlist.
Hopefully, you’ve found this article helpful and can now watch your favorite playlist in the order you like without any issues.
Also read:
- [New] Create Professional Valorant Thumbnails in No Time
- [Updated] In 2024, Culinary Cinema Mastery - The 7 Pathways to Delectable Vids
- [Updated] In 2024, FrameFusion Instagram Photo Fusion Across OSes
- [Updated] Learn Quick Method for Posting YouTube Shorts From PC/Tablet
- 2024 Approved How to Live Stream to Youtube with Wirecast?
- 2024 Approved The Ultimate Tutorial for Spreading Playlists
- 2024 Approved Unveiling YouTube's Top-Tier Video Ad Creators A Showcase
- Creating a Visual Statement with Stellar Podcast Artwork for 2024
- In 2024, CatchEmAll Celebrate National Pokémon Day with Virtual Location On Motorola G24 Power | Dr.fone
- Innovative Classroom Techniques Utilizing YouTube Effectively for 2024
- Why Isn't My iPhone Rings? Uncover the Reasons & Fix Them Now!
- Will iSpoofer update On Vivo S17 | Dr.fone
- Title: In 2024, Leading 5 Video Editors Outside YouTube Realm
- Author: Joseph
- Created at : 2024-10-29 04:38:12
- Updated at : 2024-10-29 19:50:12
- Link: https://youtube-stream.techidaily.com/in-2024-leading-5-video-editors-outside-youtube-realm/
- License: This work is licensed under CC BY-NC-SA 4.0.