
:max_bytes(150000):strip_icc()/huluerrorcodeplareq17-bb8bbd0df3ec452a8eb8d9d4af597fc3.jpg)
In 2024, Leading 10 Audio Boost Tools for Diverse Systems
Leading 10 Audio Boost Tools for Diverse Systems
Best 10 YouTube Volume Boosters for Windows, macOS, Android, and iPhone

Shanoon Cox
Mar 27, 2024• Proven solutions
Have you ever listened to a YouTube video on max volume but still the sound wasn’t audible - even after turning up the YouTube volume as well as device audio? It is super annoying and inconvenient when you increase volume to max yet the video remains inaudible. YouTube volume issue could be due to various reasons such as poor audio quality of the built-in speakers or low original video sound. Well, there is a simple way to combat this problem i.e., sound booster. You can set different volume levels for the YouTube app on your PC or smartphone’s native volume controls. There are different YouTube volume boosters for Android, Windows, macOS, and iOS devices.
From listening to your favorite podcast to watching vlogs with your friends, you can use the best volume booster apps to increase the media sound volume and quality!
- Part 1: Best YouTube Volume Boosters for Windows and macOS
- Part 2: Best YouTube Volume Boosters for Android and iOS
- Part 3: Best YouTube Video Editing Software-Wondershare Filmora (Bonus Tip)
Part 1: Best YouTube Volume Boosters for Windows and macOS
Let’s introduce the best YouTube volume boosters for Windows and macOS:
1. FxSound (Windows and Mac)
FxSound is a very powerful tool that is made for Windows and macOS to enhance and boost the quality and volume of sound. This app comes with many features. For example, this audio software provides better sound quality, volume booster, and sound effects. Now you can listen to music, watch movies and play games without any distortion. Easily boost base, get customized effects and play with custom presets. You can download this app for your PC for free through the official website. People like this equalizer because it can make any audio format sound good even if it is 100 years old!

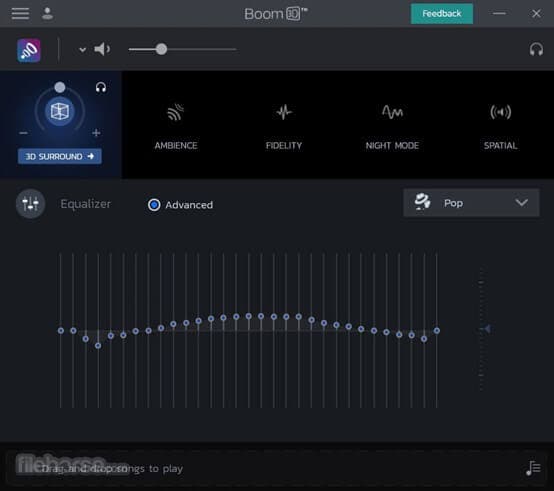
2. Boom 3D (Windows and macOS)
Boom 3D is a very popular app among many Windows and macOS users. This software is designed to help improve the audio on speakers or headphones that are connected to your computer. Boom 3D audio booster software also works with the Bluetooth devices that are connected to your PC. It can make any sound louder, clearer, and much better without buying any external devices. It provides us a 3D audio experience and works with any music player, video player, etc.!
3. Chrome Volume Booster Plugin (Windows)
This plugin has been rated 5 stars on the chrome web store as it is the best plugin for boosting up your volume on windows PC. This booster is so easy to download; you just have to go to the chrome web store and add the extension to your Google Chrome Browser. After adding it you can simply click on the icon and boost your volume up to 1000%! This plugin is free in the chrome store, just add it and choose how much louder you want your sound to be.

4. Letasoft Sound Booster (Windows)
Letasoft Sound Booster can only be used on windows. You can download it through the official website of Letasoft. It comes with a 14 days free trial period but after that, you have to buy their license to keep using it. This software is made to be used as an extra amplifier to boost up the volume of your audio or video if you think it is too low. The Letasoft Sound Booster app is very easy to use as you can control the volume from the slider. Moreover, it auto-starts and has no sound distortion.

5. Froyosoft Sound Booster (Mac)
Froyosoft Sound Booster is made for macOS users so they can boost video and audio file volumes. Individual application volumes can also be adjusted with the help of the Froyosoft Sound Booster. The good thing about this booster is that it is free for all users and it is 100% safe - you will not get any virus on your PC. You can download it from their website and increase the volume as high as you want to. So, get ready to get a clear and enhanced sound with the help of this app!

Part 2: Best YouTube Volume Boosters for Android and iOS
Following are the best YouTube sound boosters for Android and iOS devices:
1. AmpMe (Android and iOS)
With the help of AmpMe, you can start your little party through music apps. You don’t just get to listen to music but you can also chat with your friends - yup that’s right, it is a two-in-one app! The AmpMe app helps you to play the same music with your friends at the same time. It is one of the best volume booster apps that is available for both Android and iOS. It uses Bluetooth to connect with several devices, and the more the devices the higher the volume of the music. AmpMe offers a free trial and it costs $9.99 per week.

2. Super Volume Booster (Android)
To enjoy your music more than ever, you need a good volume enhancer. And, what can be better than an app that is free and boosts your audio? Android users are in luck because Super Volume Booster is a user-friendly app that allows you to increase the volume of YouTube and other apps. It gives you the best music experience. Moreover, it is clean, simple and has a one-touch operation. Not to forget that it has amazing reviews on Playstore. This app also increases the bass and also supports headphones and Bluetooth.

3. Volume Booster GOODEV (Android)
Volume Booster GOODEV is another app that boosts up the audio for you from 20 to 30% more! If you want to listen to an audiobook, watch a YouTube video or a movie on Netflix, volume Booster GOODEV can help you increase the volume of any media on any app! The volume can get so high that it might be dangerous for your ears so be careful. It offers a sound equalizer and is simple to use.

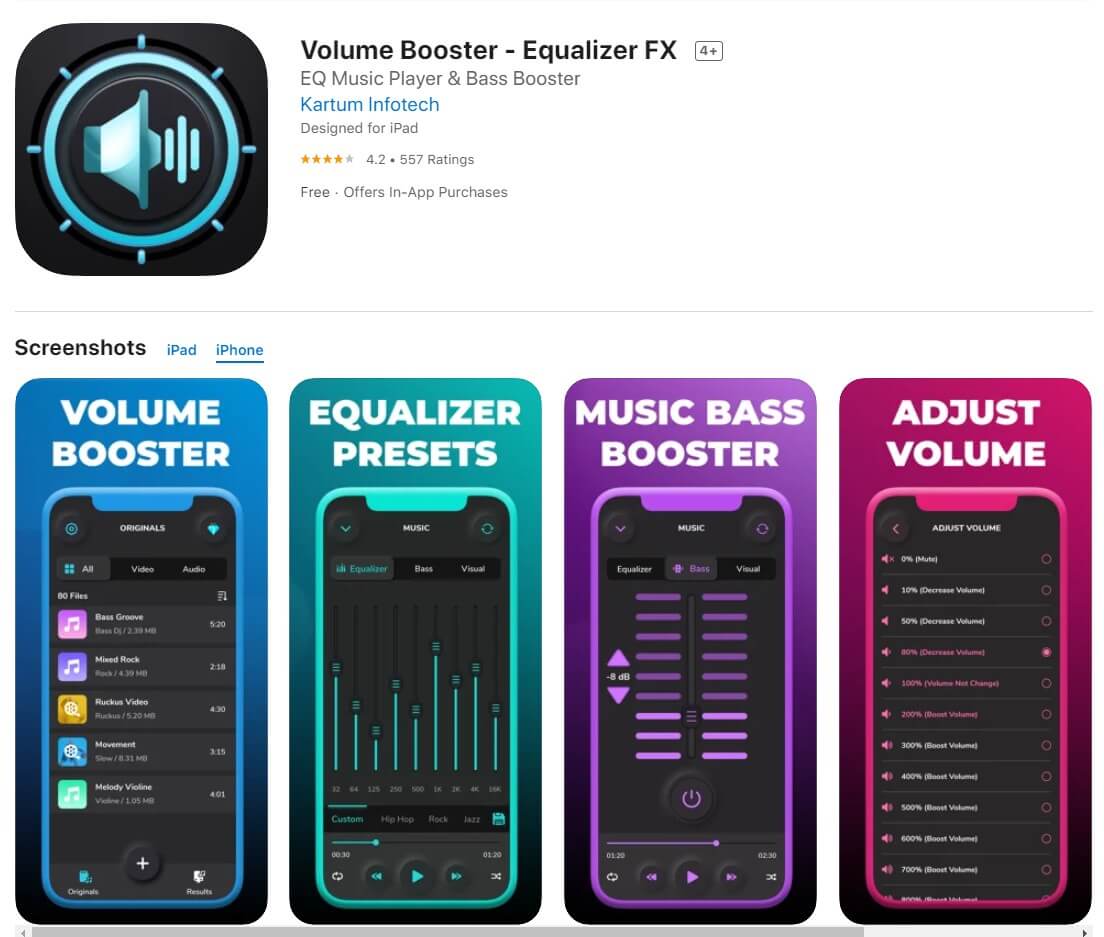
4. Volume Booster - Equalizer FX (iOS)
Volume Booster Equalizer FX can increase your volume higher than the default audio controller. With the help of this app, your device’s speaker will give the best result. You can adjust the sound effect levels according to your need. It makes the sound quality better and boosts up the volume with a single tap. You can get a weekly, monthly or yearly subscription. It is a great premium YouTube Volume booster for all iOS devices.
5. Max Volume Booster (iOS)
Max Volume Booster, as the name shows, boosts the volume to the maximum. You can find this app in the AppStore for free but it offers a premium version as well. With the help of the premium version, you can get an ad-free experience with no time limit. You can decrease or increase the volume based on your needs. Max Volume Booster gives you the experience and you will get addicted to it because it is a high-quality YouTube volume booster.

Part 3: Best YouTube Video Editing Software-Wondershare Filmora (Bonus Tip)
Wondershare Filmora is one of the most popular and user-friendly video editing software available. From beginners to pros, this app world for all. With Filmora you can create home videos, vlogs, Instagram reels, tutorials, guides, podcasts, and more! Wondershare Filmora is also the best YouTube video editor you will find! From editing to volume booster, you will find all the tools to create the perfect YouTube videos.


Here are some of the key features of Filmora that can help YouTubers make their YouTube videos:
- Offers multiple drawing video editing tools like speed control, volume booster, and color grading
- Offers special effects to enhance the appearance of your videos
- Allows you to custom create different animations
- Green Screen feature to help you change backgrounds and make the perfect videos
- Cross-platform accessibility as you can use it on both Windows and Mac
- Supports multiple file formats
- Ultra 4k HD support for the best quality of videos
- Free download and super easy to use with an intuitive interface
- Anyone can use it whether beginner or pro
- Online customer support available 24/7
Summing up
Stop worrying about low audio. Use one of the YouTube volume booster apps mentioned in this article. If you are making vlogs, tutorials, and other YouTube content, you can increase volume and create ideal videos with Wondershare video editor. So, to create the perfect videos with high-quality sound get Wondershare Filmora!
Shanoon Cox
Shanoon Cox is a writer and a lover of all things video.
Follow @Shanoon Cox
Shanoon Cox
Mar 27, 2024• Proven solutions
Have you ever listened to a YouTube video on max volume but still the sound wasn’t audible - even after turning up the YouTube volume as well as device audio? It is super annoying and inconvenient when you increase volume to max yet the video remains inaudible. YouTube volume issue could be due to various reasons such as poor audio quality of the built-in speakers or low original video sound. Well, there is a simple way to combat this problem i.e., sound booster. You can set different volume levels for the YouTube app on your PC or smartphone’s native volume controls. There are different YouTube volume boosters for Android, Windows, macOS, and iOS devices.
From listening to your favorite podcast to watching vlogs with your friends, you can use the best volume booster apps to increase the media sound volume and quality!
- Part 1: Best YouTube Volume Boosters for Windows and macOS
- Part 2: Best YouTube Volume Boosters for Android and iOS
- Part 3: Best YouTube Video Editing Software-Wondershare Filmora (Bonus Tip)
Part 1: Best YouTube Volume Boosters for Windows and macOS
Let’s introduce the best YouTube volume boosters for Windows and macOS:
1. FxSound (Windows and Mac)
FxSound is a very powerful tool that is made for Windows and macOS to enhance and boost the quality and volume of sound. This app comes with many features. For example, this audio software provides better sound quality, volume booster, and sound effects. Now you can listen to music, watch movies and play games without any distortion. Easily boost base, get customized effects and play with custom presets. You can download this app for your PC for free through the official website. People like this equalizer because it can make any audio format sound good even if it is 100 years old!
2. Boom 3D (Windows and macOS)
Boom 3D is a very popular app among many Windows and macOS users. This software is designed to help improve the audio on speakers or headphones that are connected to your computer. Boom 3D audio booster software also works with the Bluetooth devices that are connected to your PC. It can make any sound louder, clearer, and much better without buying any external devices. It provides us a 3D audio experience and works with any music player, video player, etc.!
3. Chrome Volume Booster Plugin (Windows)
This plugin has been rated 5 stars on the chrome web store as it is the best plugin for boosting up your volume on windows PC. This booster is so easy to download; you just have to go to the chrome web store and add the extension to your Google Chrome Browser. After adding it you can simply click on the icon and boost your volume up to 1000%! This plugin is free in the chrome store, just add it and choose how much louder you want your sound to be.
4. Letasoft Sound Booster (Windows)
Letasoft Sound Booster can only be used on windows. You can download it through the official website of Letasoft. It comes with a 14 days free trial period but after that, you have to buy their license to keep using it. This software is made to be used as an extra amplifier to boost up the volume of your audio or video if you think it is too low. The Letasoft Sound Booster app is very easy to use as you can control the volume from the slider. Moreover, it auto-starts and has no sound distortion.
5. Froyosoft Sound Booster (Mac)
Froyosoft Sound Booster is made for macOS users so they can boost video and audio file volumes. Individual application volumes can also be adjusted with the help of the Froyosoft Sound Booster. The good thing about this booster is that it is free for all users and it is 100% safe - you will not get any virus on your PC. You can download it from their website and increase the volume as high as you want to. So, get ready to get a clear and enhanced sound with the help of this app!
Part 2: Best YouTube Volume Boosters for Android and iOS
Following are the best YouTube sound boosters for Android and iOS devices:
1. AmpMe (Android and iOS)
With the help of AmpMe, you can start your little party through music apps. You don’t just get to listen to music but you can also chat with your friends - yup that’s right, it is a two-in-one app! The AmpMe app helps you to play the same music with your friends at the same time. It is one of the best volume booster apps that is available for both Android and iOS. It uses Bluetooth to connect with several devices, and the more the devices the higher the volume of the music. AmpMe offers a free trial and it costs $9.99 per week.
2. Super Volume Booster (Android)
To enjoy your music more than ever, you need a good volume enhancer. And, what can be better than an app that is free and boosts your audio? Android users are in luck because Super Volume Booster is a user-friendly app that allows you to increase the volume of YouTube and other apps. It gives you the best music experience. Moreover, it is clean, simple and has a one-touch operation. Not to forget that it has amazing reviews on Playstore. This app also increases the bass and also supports headphones and Bluetooth.
3. Volume Booster GOODEV (Android)
Volume Booster GOODEV is another app that boosts up the audio for you from 20 to 30% more! If you want to listen to an audiobook, watch a YouTube video or a movie on Netflix, volume Booster GOODEV can help you increase the volume of any media on any app! The volume can get so high that it might be dangerous for your ears so be careful. It offers a sound equalizer and is simple to use.
4. Volume Booster - Equalizer FX (iOS)
Volume Booster Equalizer FX can increase your volume higher than the default audio controller. With the help of this app, your device’s speaker will give the best result. You can adjust the sound effect levels according to your need. It makes the sound quality better and boosts up the volume with a single tap. You can get a weekly, monthly or yearly subscription. It is a great premium YouTube Volume booster for all iOS devices.
5. Max Volume Booster (iOS)
Max Volume Booster, as the name shows, boosts the volume to the maximum. You can find this app in the AppStore for free but it offers a premium version as well. With the help of the premium version, you can get an ad-free experience with no time limit. You can decrease or increase the volume based on your needs. Max Volume Booster gives you the experience and you will get addicted to it because it is a high-quality YouTube volume booster.
Part 3: Best YouTube Video Editing Software-Wondershare Filmora (Bonus Tip)
Wondershare Filmora is one of the most popular and user-friendly video editing software available. From beginners to pros, this app world for all. With Filmora you can create home videos, vlogs, Instagram reels, tutorials, guides, podcasts, and more! Wondershare Filmora is also the best YouTube video editor you will find! From editing to volume booster, you will find all the tools to create the perfect YouTube videos.
Here are some of the key features of Filmora that can help YouTubers make their YouTube videos:
- Offers multiple drawing video editing tools like speed control, volume booster, and color grading
- Offers special effects to enhance the appearance of your videos
- Allows you to custom create different animations
- Green Screen feature to help you change backgrounds and make the perfect videos
- Cross-platform accessibility as you can use it on both Windows and Mac
- Supports multiple file formats
- Ultra 4k HD support for the best quality of videos
- Free download and super easy to use with an intuitive interface
- Anyone can use it whether beginner or pro
- Online customer support available 24/7
Summing up
Stop worrying about low audio. Use one of the YouTube volume booster apps mentioned in this article. If you are making vlogs, tutorials, and other YouTube content, you can increase volume and create ideal videos with Wondershare video editor. So, to create the perfect videos with high-quality sound get Wondershare Filmora!
Shanoon Cox
Shanoon Cox is a writer and a lover of all things video.
Follow @Shanoon Cox
Mastering YouTube Video Illumination Techniques
How To Light Your YouTube Video

Richard Bennett
Oct 26, 2023• Proven solutions
When it comes to sensitivity to light, no consumer-level camera sensor comes close in performance to the human eye. Many newbies to videography, though, don’t think about this when they use their camera indoors and discover that their recorded footage appears too dark.
If you want to use your camera indoors as many YouTubers do, you’ll need to have extra light. But the solution is not as simple as surrounding yourself with lamps that are all randomly placed.
Below, I’ll go into detail on how you can set up your lighting equipment to make your YouTube videos look good.
| Table of Contents Using Light You Already Have Window LightingHome Lighting Home Studio Lighting Light Control3-Point Lighting4-Point Lighting |
|---|
Part 1: Using Light You Already Have
Most beginner YouTubers light their videos with what they already have. That’s what I did to start as well. In the past, my video recording space consisted of natural sunlight coming from my window and ceiling light for times when the sunlight wasn’t strong enough.
1. Window Lighting
The best thing about window lighting is that it’s free. The worst thing about it is that it’s uncontrollable. The amount of light you get in your video can vary with all the changes in the weather.
Window lighting for me was especially difficult to work with because I live in a very rainy and cloudy city, Vancouver, Canada, where we pretty much just get three months of good sun.

Above are two freeze frames from one of Daniel’s past window-lit vlogs. Although these two frames are both from the same vlog, you can see that the image on the right looks brighter due to clearer skies at that moment. These varying amounts of light is what you will have to deal with if you choose to light your YouTube video with window lighting.
2. Home Lighting
Home lighting is another source of light that many new YouTubers use. In the past, when my window light wasn’t strong enough to light my video recording space, I would turn on the ceiling light.

Notice how the color of Daniel’s skin looks much more orange here (above) than the color of the skin in the two side-by-side window lighting examples? The side of the face also appears to look bluer. This all happened because he mixed up different color temperatures shining out of the two lights (cooler window light and warmer ceiling light).
Most home lighting is warmer in its color temperature. If you want to use your home lights without everything being orange-tinted, you’ll need to switch out your light bulbs for daytime LED light bulbs.
Ceiling lights are also typically situated in the center of a room in order to light an entire room evenly. This is not likely to be the best location for your filming video. Since the ceiling light was directly above the face in the above example, you can see harder shadows beneath his cheeks.
Part 2: Home Studio Lighting
If you rather not deal with all the window and home lighting challenges, you can set up studio lighting in your home.
1. Light Control
The first thing you’ll want to do to set up studio lighting in your home is to pick a room to film in and eliminate as much external lighting as you can. Use blinds, curtains, towels, or any thick fabric to block sunlight from shining into your room.
2. 3-Point Lighting
The most common setup for studio lighting is 3-point lighting. For this kind of lighting you’ll need three lights: a key light, a fill light, and a back light (also called a hair light).

Out of the three lights, the key light should be the brightest. When it is positioned to the left of you (as shown in the diagram above) your right side will have shadows.
To minimize the shadows on your right side, use a weaker light as a fill light. You don’t want your fill light to completely eliminate all your shadows or else your shot will look flat.
Lastly, a backlight positioned behind you can give an appealing highlight to the ends of your head and even help to separate your hair from blending into your background if both happen to be dark.
3. 4-Point Lighting
As a YouTuber, you may not only want yourself to be seen optimally with proper lighting, but you may also want your background to be seen optimally, especially if you’ve taken the time to decorate it for your audience.
What you’ll need to ensure that your background is sufficiently lit is 4-point lighting setup. The 4-point lighting setup is the same as a 3-point lighting setup, but with an additional light shining at your background.
For more information on lighting equipment, check out my Top 17 Video Lighting Equipment For YouTubers .
Touch Up YouTube Videos with Filmora
Filmora is one of the best video editing software for YouTube beginners to start the YouTube channel. So, if you find the lighting isn’t perfect after recording, you can use the Auto Color Enhancement feature in Filmora to adjust the color with one-click. Or, you can change the white balance, Light, color, and HSL manually. Filmora also features some presets and LUTs templates , which allows you to apply pre-programmed effects to video for color correction faster.
Richard Bennett
Richard Bennett is a writer and a lover of all things video.
Follow @Richard Bennett
Richard Bennett
Oct 26, 2023• Proven solutions
When it comes to sensitivity to light, no consumer-level camera sensor comes close in performance to the human eye. Many newbies to videography, though, don’t think about this when they use their camera indoors and discover that their recorded footage appears too dark.
If you want to use your camera indoors as many YouTubers do, you’ll need to have extra light. But the solution is not as simple as surrounding yourself with lamps that are all randomly placed.
Below, I’ll go into detail on how you can set up your lighting equipment to make your YouTube videos look good.
| Table of Contents Using Light You Already Have Window LightingHome Lighting Home Studio Lighting Light Control3-Point Lighting4-Point Lighting |
|---|
Part 1: Using Light You Already Have
Most beginner YouTubers light their videos with what they already have. That’s what I did to start as well. In the past, my video recording space consisted of natural sunlight coming from my window and ceiling light for times when the sunlight wasn’t strong enough.
1. Window Lighting
The best thing about window lighting is that it’s free. The worst thing about it is that it’s uncontrollable. The amount of light you get in your video can vary with all the changes in the weather.
Window lighting for me was especially difficult to work with because I live in a very rainy and cloudy city, Vancouver, Canada, where we pretty much just get three months of good sun.
Above are two freeze frames from one of Daniel’s past window-lit vlogs. Although these two frames are both from the same vlog, you can see that the image on the right looks brighter due to clearer skies at that moment. These varying amounts of light is what you will have to deal with if you choose to light your YouTube video with window lighting.
2. Home Lighting
Home lighting is another source of light that many new YouTubers use. In the past, when my window light wasn’t strong enough to light my video recording space, I would turn on the ceiling light.
Notice how the color of Daniel’s skin looks much more orange here (above) than the color of the skin in the two side-by-side window lighting examples? The side of the face also appears to look bluer. This all happened because he mixed up different color temperatures shining out of the two lights (cooler window light and warmer ceiling light).
Most home lighting is warmer in its color temperature. If you want to use your home lights without everything being orange-tinted, you’ll need to switch out your light bulbs for daytime LED light bulbs.
Ceiling lights are also typically situated in the center of a room in order to light an entire room evenly. This is not likely to be the best location for your filming video. Since the ceiling light was directly above the face in the above example, you can see harder shadows beneath his cheeks.
Part 2: Home Studio Lighting
If you rather not deal with all the window and home lighting challenges, you can set up studio lighting in your home.
1. Light Control
The first thing you’ll want to do to set up studio lighting in your home is to pick a room to film in and eliminate as much external lighting as you can. Use blinds, curtains, towels, or any thick fabric to block sunlight from shining into your room.
2. 3-Point Lighting
The most common setup for studio lighting is 3-point lighting. For this kind of lighting you’ll need three lights: a key light, a fill light, and a back light (also called a hair light).
Out of the three lights, the key light should be the brightest. When it is positioned to the left of you (as shown in the diagram above) your right side will have shadows.
To minimize the shadows on your right side, use a weaker light as a fill light. You don’t want your fill light to completely eliminate all your shadows or else your shot will look flat.
Lastly, a backlight positioned behind you can give an appealing highlight to the ends of your head and even help to separate your hair from blending into your background if both happen to be dark.
3. 4-Point Lighting
As a YouTuber, you may not only want yourself to be seen optimally with proper lighting, but you may also want your background to be seen optimally, especially if you’ve taken the time to decorate it for your audience.
What you’ll need to ensure that your background is sufficiently lit is 4-point lighting setup. The 4-point lighting setup is the same as a 3-point lighting setup, but with an additional light shining at your background.
For more information on lighting equipment, check out my Top 17 Video Lighting Equipment For YouTubers .
Touch Up YouTube Videos with Filmora
Filmora is one of the best video editing software for YouTube beginners to start the YouTube channel. So, if you find the lighting isn’t perfect after recording, you can use the Auto Color Enhancement feature in Filmora to adjust the color with one-click. Or, you can change the white balance, Light, color, and HSL manually. Filmora also features some presets and LUTs templates , which allows you to apply pre-programmed effects to video for color correction faster.
Richard Bennett
Richard Bennett is a writer and a lover of all things video.
Follow @Richard Bennett
- Title: In 2024, Leading 10 Audio Boost Tools for Diverse Systems
- Author: Joseph
- Created at : 2024-05-31 13:47:56
- Updated at : 2024-06-01 13:47:56
- Link: https://youtube-stream.techidaily.com/in-2024-leading-10-audio-boost-tools-for-diverse-systems/
- License: This work is licensed under CC BY-NC-SA 4.0.
