
In 2024, How To Use Jump Cuts in Your Vlog
Elevate Narrative Flow: Expert Tips on Using Jump Cuts
How To Use Jump Cuts in Your Vlog

Richard Bennett
Mar 27, 2024• Proven solutions
A common problem for new YouTubers and Vlogers is that they cannot get through a recording without feeling like they have messed up and need to restart. It can be extremely discouraging at first. More experienced vloggers know that mistakes happen and they are no reason to stop recording. Instead of trying to record a perfect clip it is common for vloggers to remove errors from their videos in editing using jump cuts.
How To Use Jump Cuts in Your Vlog
1. What is a Jump Cut?
A jump cut is when you jump from one part of your clip to a later part of that same clip, cutting out the section in-between.
In movies or tv shows jump cuts can be distracting. In vlogs it is the exact opposite; jump cuts are used to remove distractions. It is not strange for a YouTube video to contain a lot of jump cuts. If you go and re-watch a video by your favorite vlogger you will probably notice that every once in a while the vlogger is suddenly sitting differently or that something else has suddenly changed. That is a jump cut, and chances are you did not even think twice about it when you first watched the video.
2. When to use Jump Cuts in your Youtube Video
There are a lot of things you might want to take out of your clips using jump cuts. Here are some examples:
Repetition: You may have had to repeat yourself because you misspoke. Or, you might watch your clip back and realize that two sections you intended – perhaps even scripted – are very similar and you only need one.
Off-Topic Tangents: Once you get comfortable talking to the camera it is easy to find yourself getting off-topic while recording. These tangents might be funny or feel important, but you should still cut them out of your final video. Rather than scrapping them completely, though, consider giving your tangent its very own video. Successful vloggers post new videos frequently, after all.
Silence: Use jump cuts to take out any pauses in your video. Every period of silence is an opportunity for viewers to get distracted and decide to click on something else. Adding music to the background of your video can help with shorter pauses, but cutting out any silence is still a good way to go.
In the video tutorial below, we will share with you some practical and creative jump cuts tips that you can try in video editing. And most of the jump cuts are done with the cutting features in Filmora . You can download the free trial version below by clicking the Free Download button based on your system.
 Download Mac Version ](https://tools.techidaily.com/wondershare/filmora/download/ )
3. How to Make Jump Cuts in Vlog & YouTube Videos
You can make jump cuts in almost every editing program, from free software like Windows Movie Maker to professional programs like Adobe Premiere. Remember no matter which video editing software you are using to edit your videos with jump cut, you need to ensure that the software can scroll through your video clips and audio files frame-by-frame. And some video editors may only allow you to scroll video footage frame by frame. This tutorial is for Filmora Video Editor (Now upgraded to Filmora), but many of the same steps will apply to other software.
Download Mac Version ](https://tools.techidaily.com/wondershare/filmora/download/ )
You may also like: How to trim and cut videos in Windows Movie Maker for Free
Open up Filmora Video Editor and add a clip into the timeline. Watch it through, and then revisit sections where you think you might want to make cuts.
Find a place in your clip that has silence and use the scissors icon to cut your clip into two. Then start playing your clip and pause as soon as you hear sound.
Make sure your clip is selected, and then go back frame by frame until you hear nothing.
Use the scissors icon to make another cut. You will now have three clips; one before the silence, the silent pause, and the section where sound starts again. Delete the quiet middle clip.
4. Keep video shorter for more views
The videos that get the most views on YouTube are an average of three minutes long. People will use the length of a video as a reason not to click on it. Viewers are also more likely to get distracted and stop watching longer videos before they are over. That does not mean you should not take as long as you need to properly explain your ideas, just that you should be careful your video is not longer than it needs to be. It is common for youtubers to use only about a third of the clip they record. The rest is removed using jump cuts.
Filmora video editor will help you to be more creative in video editing and saving your time at the same time. Download and leave a comment below about how do you like it.

Richard Bennett
Richard Bennett is a writer and a lover of all things video.
Follow @Richard Bennett
Richard Bennett
Mar 27, 2024• Proven solutions
A common problem for new YouTubers and Vlogers is that they cannot get through a recording without feeling like they have messed up and need to restart. It can be extremely discouraging at first. More experienced vloggers know that mistakes happen and they are no reason to stop recording. Instead of trying to record a perfect clip it is common for vloggers to remove errors from their videos in editing using jump cuts.

How To Use Jump Cuts in Your Vlog
1. What is a Jump Cut?
A jump cut is when you jump from one part of your clip to a later part of that same clip, cutting out the section in-between.
In movies or tv shows jump cuts can be distracting. In vlogs it is the exact opposite; jump cuts are used to remove distractions. It is not strange for a YouTube video to contain a lot of jump cuts. If you go and re-watch a video by your favorite vlogger you will probably notice that every once in a while the vlogger is suddenly sitting differently or that something else has suddenly changed. That is a jump cut, and chances are you did not even think twice about it when you first watched the video.
2. When to use Jump Cuts in your Youtube Video
There are a lot of things you might want to take out of your clips using jump cuts. Here are some examples:
Repetition: You may have had to repeat yourself because you misspoke. Or, you might watch your clip back and realize that two sections you intended – perhaps even scripted – are very similar and you only need one.
Off-Topic Tangents: Once you get comfortable talking to the camera it is easy to find yourself getting off-topic while recording. These tangents might be funny or feel important, but you should still cut them out of your final video. Rather than scrapping them completely, though, consider giving your tangent its very own video. Successful vloggers post new videos frequently, after all.
Silence: Use jump cuts to take out any pauses in your video. Every period of silence is an opportunity for viewers to get distracted and decide to click on something else. Adding music to the background of your video can help with shorter pauses, but cutting out any silence is still a good way to go.
In the video tutorial below, we will share with you some practical and creative jump cuts tips that you can try in video editing. And most of the jump cuts are done with the cutting features in Filmora . You can download the free trial version below by clicking the Free Download button based on your system.
Download Mac Version ](https://tools.techidaily.com/wondershare/filmora/download/ )
3. How to Make Jump Cuts in Vlog & YouTube Videos
You can make jump cuts in almost every editing program, from free software like Windows Movie Maker to professional programs like Adobe Premiere. Remember no matter which video editing software you are using to edit your videos with jump cut, you need to ensure that the software can scroll through your video clips and audio files frame-by-frame. And some video editors may only allow you to scroll video footage frame by frame. This tutorial is for Filmora Video Editor (Now upgraded to Filmora), but many of the same steps will apply to other software.
Download Mac Version ](https://tools.techidaily.com/wondershare/filmora/download/ )
You may also like: How to trim and cut videos in Windows Movie Maker for Free
Open up Filmora Video Editor and add a clip into the timeline. Watch it through, and then revisit sections where you think you might want to make cuts.
Find a place in your clip that has silence and use the scissors icon to cut your clip into two. Then start playing your clip and pause as soon as you hear sound.
Make sure your clip is selected, and then go back frame by frame until you hear nothing.
Use the scissors icon to make another cut. You will now have three clips; one before the silence, the silent pause, and the section where sound starts again. Delete the quiet middle clip.
4. Keep video shorter for more views
The videos that get the most views on YouTube are an average of three minutes long. People will use the length of a video as a reason not to click on it. Viewers are also more likely to get distracted and stop watching longer videos before they are over. That does not mean you should not take as long as you need to properly explain your ideas, just that you should be careful your video is not longer than it needs to be. It is common for youtubers to use only about a third of the clip they record. The rest is removed using jump cuts.
Filmora video editor will help you to be more creative in video editing and saving your time at the same time. Download and leave a comment below about how do you like it.
Richard Bennett
Richard Bennett is a writer and a lover of all things video.
Follow @Richard Bennett
Richard Bennett
Mar 27, 2024• Proven solutions
A common problem for new YouTubers and Vlogers is that they cannot get through a recording without feeling like they have messed up and need to restart. It can be extremely discouraging at first. More experienced vloggers know that mistakes happen and they are no reason to stop recording. Instead of trying to record a perfect clip it is common for vloggers to remove errors from their videos in editing using jump cuts.
How To Use Jump Cuts in Your Vlog
1. What is a Jump Cut?
A jump cut is when you jump from one part of your clip to a later part of that same clip, cutting out the section in-between.
In movies or tv shows jump cuts can be distracting. In vlogs it is the exact opposite; jump cuts are used to remove distractions. It is not strange for a YouTube video to contain a lot of jump cuts. If you go and re-watch a video by your favorite vlogger you will probably notice that every once in a while the vlogger is suddenly sitting differently or that something else has suddenly changed. That is a jump cut, and chances are you did not even think twice about it when you first watched the video.
2. When to use Jump Cuts in your Youtube Video
There are a lot of things you might want to take out of your clips using jump cuts. Here are some examples:
Repetition: You may have had to repeat yourself because you misspoke. Or, you might watch your clip back and realize that two sections you intended – perhaps even scripted – are very similar and you only need one.
Off-Topic Tangents: Once you get comfortable talking to the camera it is easy to find yourself getting off-topic while recording. These tangents might be funny or feel important, but you should still cut them out of your final video. Rather than scrapping them completely, though, consider giving your tangent its very own video. Successful vloggers post new videos frequently, after all.
Silence: Use jump cuts to take out any pauses in your video. Every period of silence is an opportunity for viewers to get distracted and decide to click on something else. Adding music to the background of your video can help with shorter pauses, but cutting out any silence is still a good way to go.
In the video tutorial below, we will share with you some practical and creative jump cuts tips that you can try in video editing. And most of the jump cuts are done with the cutting features in Filmora . You can download the free trial version below by clicking the Free Download button based on your system.
Download Mac Version ](https://tools.techidaily.com/wondershare/filmora/download/ )
3. How to Make Jump Cuts in Vlog & YouTube Videos
You can make jump cuts in almost every editing program, from free software like Windows Movie Maker to professional programs like Adobe Premiere. Remember no matter which video editing software you are using to edit your videos with jump cut, you need to ensure that the software can scroll through your video clips and audio files frame-by-frame. And some video editors may only allow you to scroll video footage frame by frame. This tutorial is for Filmora Video Editor (Now upgraded to Filmora), but many of the same steps will apply to other software.
Download Mac Version ](https://tools.techidaily.com/wondershare/filmora/download/ )
You may also like: How to trim and cut videos in Windows Movie Maker for Free
Open up Filmora Video Editor and add a clip into the timeline. Watch it through, and then revisit sections where you think you might want to make cuts.
Find a place in your clip that has silence and use the scissors icon to cut your clip into two. Then start playing your clip and pause as soon as you hear sound.
Make sure your clip is selected, and then go back frame by frame until you hear nothing.
Use the scissors icon to make another cut. You will now have three clips; one before the silence, the silent pause, and the section where sound starts again. Delete the quiet middle clip.
4. Keep video shorter for more views
The videos that get the most views on YouTube are an average of three minutes long. People will use the length of a video as a reason not to click on it. Viewers are also more likely to get distracted and stop watching longer videos before they are over. That does not mean you should not take as long as you need to properly explain your ideas, just that you should be careful your video is not longer than it needs to be. It is common for youtubers to use only about a third of the clip they record. The rest is removed using jump cuts.
Filmora video editor will help you to be more creative in video editing and saving your time at the same time. Download and leave a comment below about how do you like it.
Richard Bennett
Richard Bennett is a writer and a lover of all things video.
Follow @Richard Bennett
Top 5 Alternative Editors: Beyond Youtube’s Limits
Best 5 YouTube Video Editor Alternatives
Richard Bennett
Mar 27, 2024• Proven solutions
YouTube provides a free tool that allows the user to create a video by putting together various clips and then publish them with a single click. All the uploads that the user has made before are added to the YouTube Video Editor. The tool allows the user to combine, trim, add music and customize. However, its functionality is limited to just that, and that’s why people are looking for the best YouTube Video Editor alternative.
Note: From 20th September 2017 users will no longer be able to use the complimentary editing suite. Check the best YouTube video editor alternatives from this complete guide.
Some of the cons of the YouTube Video Editor are:
- It doesn’t have advanced editing features.
- It requires Internet connection to use.
- It is slow.
- Users can only edit videos that were already uploaded to their YouTube account.
Best 5 YouTube Video Editor Alternatives
The good news is that there are good offline YouTube Video Editor Alternatives out there. Below are the top five:
1. Wondershare Filmora
Wondershare Filmora is one of the most popular YouTube Video Editor alternatives. It is available for both Windows and Mac platforms. The best thing about Wondershare Filmora is that it is easy to use. And at the same time, it has more features than the YouTube Video Editor.
Download Mac Version ](https://tools.techidaily.com/wondershare/filmora/download/ )
Some of the key features of Filmora include:
- Allows the user to crop, cut, and combine video clips in just a few clicks
- Supports the addition of multiple audio and video tracks
- Choose from various overlays and filters
- Supports face off, green screen, and PIP effects
- Supports a wide range of video formats that include MP4, AVI, MOV, MKV, and WMV, just to name a few
- Burn video to DVD, or instantly upload it to YouTube, Facebook, and Vimeo
2. WeVideo
Another YouTube Video Editor alternative is WeVideo . It is a cloud-based video editor that allows the user to do the editing in any web browser. Just like the YouTube editing tool, the user must first upload the clips online in order to edit them, and create a video.
Pros:
One advantage of WeVideo is that it allows different users to collaborate in making a single video. A user can invite others to upload clips to the project, or even make different videos based on the same clips.
Cons:
And because it is a cloud-based video editor, it requires an Internet connection in order to get the clips and do the editing. Not only that, the videos must be uploaded before they can be used. And there are cases in which a five-minute video will require hours of raw footages. Users with slow upload speeds will take hours before they can start editing. And users of the free version can only export 480p videos that have a watermark. Users need to pay for the full version.
3. Loopster
Loopster is a mobile app that can be a YouTube Video Editor alternative. It is available for both the Android and iOS platforms. The tool allows the user to rotate, splice and add sound effects, zoom, and crop videos directly from one’s smartphone. It comes with advanced features that include title screens, slow motion effect, and bubble text. The app also lets the user record video and sounds directly. After editing the video, the app can export it directly to Facebook or YouTube.
Pros:
It does what it was designed to do when it is working. It is user-friendly and comes with a tutorial. It also works even if the smartphone is not connected to the internet. Editing is done offline. And best of all, it is free.
Cons:
One the downside, it looks like the developer is no longer updating the app. Some users experience crashes and other bugs. There are also some users that stated that the slow motion effect didn’t work for them, which is why they can’t recommend it as a YouTube Video Editor alternative.
4. Tubechop
Tubechop allows the user to trim a video from any YouTube video and then share it. There are some videos that are just too long, and you want to cut it to the section that you find interesting.
Pros:
Just like the other YouTube Video Editor alternatives, Tubechop is easy to use. The user just needs to enter the YouTube URL of the video, and then indicate the section that’s interesting, and that’s it.
Cons:
However, Tubechop doesn’t allow users to download the resulting video. Tubechop only provides a link that allows users to view the chopped video. And when the original video is deleted, the chopped version will also be deleted.
5. Viddyad
Viddyad is another cloud-based platform that lets users convert images, music, clips, and animated effects into a video. It is said to be the best way to create video ads for businesses.

Pros:
There are several templates to choose from. Users can create video ads by adding videos, text, voiceover, special effects, music, and images. The platform also provides access to millions of image and video stock.
Cons:
Viddyad is a YouTube Video Editor alternative for businesses that want to create video ads. It might not be the right video editor for individuals who just want to create and share their personal videos.
Richard Bennett
Richard Bennett is a writer and a lover of all things video.
Follow @Richard Bennett
Richard Bennett
Mar 27, 2024• Proven solutions
YouTube provides a free tool that allows the user to create a video by putting together various clips and then publish them with a single click. All the uploads that the user has made before are added to the YouTube Video Editor. The tool allows the user to combine, trim, add music and customize. However, its functionality is limited to just that, and that’s why people are looking for the best YouTube Video Editor alternative.
Note: From 20th September 2017 users will no longer be able to use the complimentary editing suite. Check the best YouTube video editor alternatives from this complete guide.
Some of the cons of the YouTube Video Editor are:
- It doesn’t have advanced editing features.
- It requires Internet connection to use.
- It is slow.
- Users can only edit videos that were already uploaded to their YouTube account.
Best 5 YouTube Video Editor Alternatives
The good news is that there are good offline YouTube Video Editor Alternatives out there. Below are the top five:
1. Wondershare Filmora
Wondershare Filmora is one of the most popular YouTube Video Editor alternatives. It is available for both Windows and Mac platforms. The best thing about Wondershare Filmora is that it is easy to use. And at the same time, it has more features than the YouTube Video Editor.
Download Mac Version ](https://tools.techidaily.com/wondershare/filmora/download/ )
Some of the key features of Filmora include:
- Allows the user to crop, cut, and combine video clips in just a few clicks
- Supports the addition of multiple audio and video tracks
- Choose from various overlays and filters
- Supports face off, green screen, and PIP effects
- Supports a wide range of video formats that include MP4, AVI, MOV, MKV, and WMV, just to name a few
- Burn video to DVD, or instantly upload it to YouTube, Facebook, and Vimeo
2. WeVideo
Another YouTube Video Editor alternative is WeVideo . It is a cloud-based video editor that allows the user to do the editing in any web browser. Just like the YouTube editing tool, the user must first upload the clips online in order to edit them, and create a video.
Pros:
One advantage of WeVideo is that it allows different users to collaborate in making a single video. A user can invite others to upload clips to the project, or even make different videos based on the same clips.
Cons:
And because it is a cloud-based video editor, it requires an Internet connection in order to get the clips and do the editing. Not only that, the videos must be uploaded before they can be used. And there are cases in which a five-minute video will require hours of raw footages. Users with slow upload speeds will take hours before they can start editing. And users of the free version can only export 480p videos that have a watermark. Users need to pay for the full version.
3. Loopster
Loopster is a mobile app that can be a YouTube Video Editor alternative. It is available for both the Android and iOS platforms. The tool allows the user to rotate, splice and add sound effects, zoom, and crop videos directly from one’s smartphone. It comes with advanced features that include title screens, slow motion effect, and bubble text. The app also lets the user record video and sounds directly. After editing the video, the app can export it directly to Facebook or YouTube.
Pros:
It does what it was designed to do when it is working. It is user-friendly and comes with a tutorial. It also works even if the smartphone is not connected to the internet. Editing is done offline. And best of all, it is free.
Cons:
One the downside, it looks like the developer is no longer updating the app. Some users experience crashes and other bugs. There are also some users that stated that the slow motion effect didn’t work for them, which is why they can’t recommend it as a YouTube Video Editor alternative.
4. Tubechop
Tubechop allows the user to trim a video from any YouTube video and then share it. There are some videos that are just too long, and you want to cut it to the section that you find interesting.
Pros:
Just like the other YouTube Video Editor alternatives, Tubechop is easy to use. The user just needs to enter the YouTube URL of the video, and then indicate the section that’s interesting, and that’s it.
Cons:
However, Tubechop doesn’t allow users to download the resulting video. Tubechop only provides a link that allows users to view the chopped video. And when the original video is deleted, the chopped version will also be deleted.
5. Viddyad
Viddyad is another cloud-based platform that lets users convert images, music, clips, and animated effects into a video. It is said to be the best way to create video ads for businesses.
Pros:
There are several templates to choose from. Users can create video ads by adding videos, text, voiceover, special effects, music, and images. The platform also provides access to millions of image and video stock.
Cons:
Viddyad is a YouTube Video Editor alternative for businesses that want to create video ads. It might not be the right video editor for individuals who just want to create and share their personal videos.
Richard Bennett
Richard Bennett is a writer and a lover of all things video.
Follow @Richard Bennett
Richard Bennett
Mar 27, 2024• Proven solutions
YouTube provides a free tool that allows the user to create a video by putting together various clips and then publish them with a single click. All the uploads that the user has made before are added to the YouTube Video Editor. The tool allows the user to combine, trim, add music and customize. However, its functionality is limited to just that, and that’s why people are looking for the best YouTube Video Editor alternative.
Note: From 20th September 2017 users will no longer be able to use the complimentary editing suite. Check the best YouTube video editor alternatives from this complete guide.
Some of the cons of the YouTube Video Editor are:
- It doesn’t have advanced editing features.
- It requires Internet connection to use.
- It is slow.
- Users can only edit videos that were already uploaded to their YouTube account.
Best 5 YouTube Video Editor Alternatives
The good news is that there are good offline YouTube Video Editor Alternatives out there. Below are the top five:
1. Wondershare Filmora
Wondershare Filmora is one of the most popular YouTube Video Editor alternatives. It is available for both Windows and Mac platforms. The best thing about Wondershare Filmora is that it is easy to use. And at the same time, it has more features than the YouTube Video Editor.
Download Mac Version ](https://tools.techidaily.com/wondershare/filmora/download/ )
Some of the key features of Filmora include:
- Allows the user to crop, cut, and combine video clips in just a few clicks
- Supports the addition of multiple audio and video tracks
- Choose from various overlays and filters
- Supports face off, green screen, and PIP effects
- Supports a wide range of video formats that include MP4, AVI, MOV, MKV, and WMV, just to name a few
- Burn video to DVD, or instantly upload it to YouTube, Facebook, and Vimeo
2. WeVideo
Another YouTube Video Editor alternative is WeVideo . It is a cloud-based video editor that allows the user to do the editing in any web browser. Just like the YouTube editing tool, the user must first upload the clips online in order to edit them, and create a video.
Pros:
One advantage of WeVideo is that it allows different users to collaborate in making a single video. A user can invite others to upload clips to the project, or even make different videos based on the same clips.
Cons:
And because it is a cloud-based video editor, it requires an Internet connection in order to get the clips and do the editing. Not only that, the videos must be uploaded before they can be used. And there are cases in which a five-minute video will require hours of raw footages. Users with slow upload speeds will take hours before they can start editing. And users of the free version can only export 480p videos that have a watermark. Users need to pay for the full version.
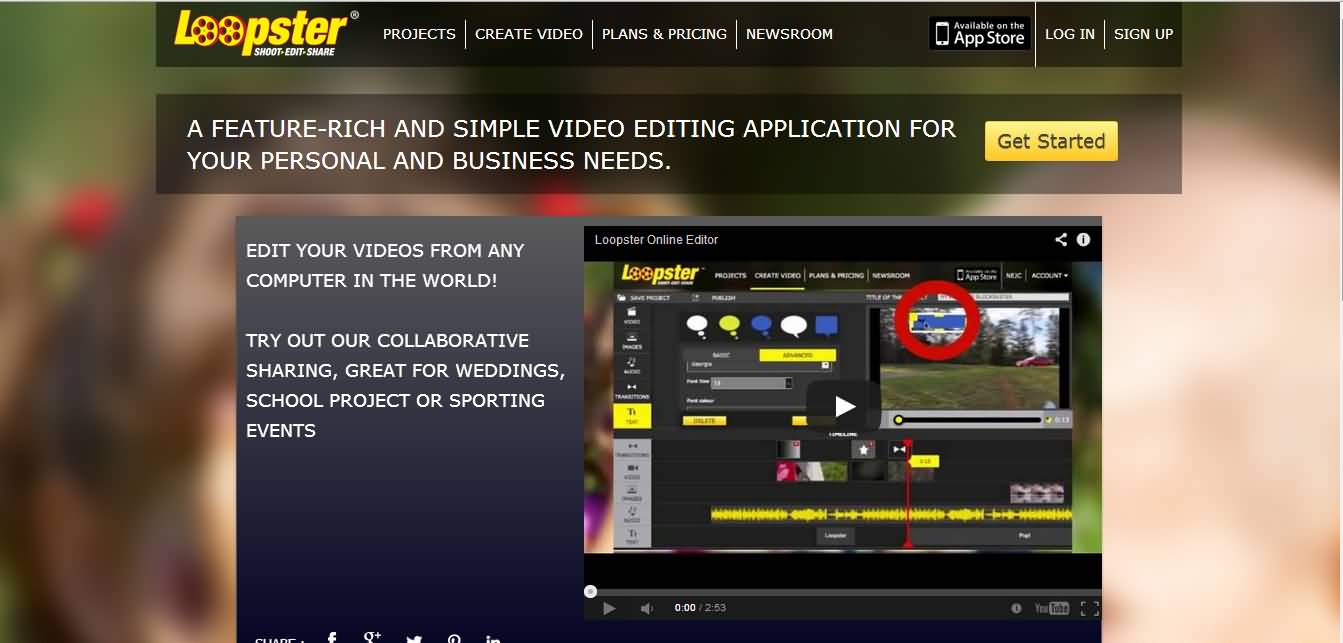
3. Loopster
Loopster is a mobile app that can be a YouTube Video Editor alternative. It is available for both the Android and iOS platforms. The tool allows the user to rotate, splice and add sound effects, zoom, and crop videos directly from one’s smartphone. It comes with advanced features that include title screens, slow motion effect, and bubble text. The app also lets the user record video and sounds directly. After editing the video, the app can export it directly to Facebook or YouTube.
Pros:
It does what it was designed to do when it is working. It is user-friendly and comes with a tutorial. It also works even if the smartphone is not connected to the internet. Editing is done offline. And best of all, it is free.
Cons:
One the downside, it looks like the developer is no longer updating the app. Some users experience crashes and other bugs. There are also some users that stated that the slow motion effect didn’t work for them, which is why they can’t recommend it as a YouTube Video Editor alternative.
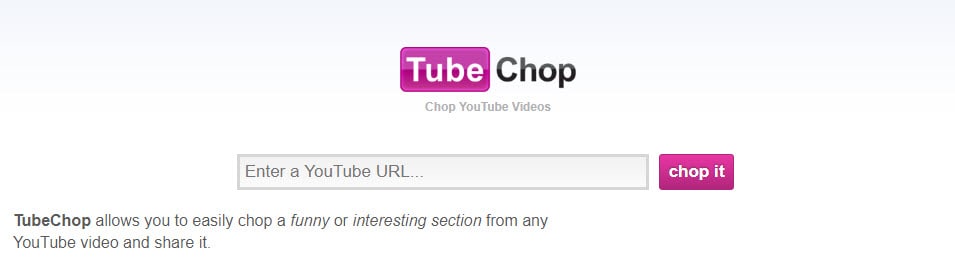
4. Tubechop
Tubechop allows the user to trim a video from any YouTube video and then share it. There are some videos that are just too long, and you want to cut it to the section that you find interesting.
Pros:
Just like the other YouTube Video Editor alternatives, Tubechop is easy to use. The user just needs to enter the YouTube URL of the video, and then indicate the section that’s interesting, and that’s it.
Cons:
However, Tubechop doesn’t allow users to download the resulting video. Tubechop only provides a link that allows users to view the chopped video. And when the original video is deleted, the chopped version will also be deleted.
5. Viddyad
Viddyad is another cloud-based platform that lets users convert images, music, clips, and animated effects into a video. It is said to be the best way to create video ads for businesses.
Pros:
There are several templates to choose from. Users can create video ads by adding videos, text, voiceover, special effects, music, and images. The platform also provides access to millions of image and video stock.
Cons:
Viddyad is a YouTube Video Editor alternative for businesses that want to create video ads. It might not be the right video editor for individuals who just want to create and share their personal videos.
Richard Bennett
Richard Bennett is a writer and a lover of all things video.
Follow @Richard Bennett
Richard Bennett
Mar 27, 2024• Proven solutions
YouTube provides a free tool that allows the user to create a video by putting together various clips and then publish them with a single click. All the uploads that the user has made before are added to the YouTube Video Editor. The tool allows the user to combine, trim, add music and customize. However, its functionality is limited to just that, and that’s why people are looking for the best YouTube Video Editor alternative.
Note: From 20th September 2017 users will no longer be able to use the complimentary editing suite. Check the best YouTube video editor alternatives from this complete guide.
Some of the cons of the YouTube Video Editor are:
- It doesn’t have advanced editing features.
- It requires Internet connection to use.
- It is slow.
- Users can only edit videos that were already uploaded to their YouTube account.
Best 5 YouTube Video Editor Alternatives
The good news is that there are good offline YouTube Video Editor Alternatives out there. Below are the top five:
1. Wondershare Filmora
Wondershare Filmora is one of the most popular YouTube Video Editor alternatives. It is available for both Windows and Mac platforms. The best thing about Wondershare Filmora is that it is easy to use. And at the same time, it has more features than the YouTube Video Editor.
Download Mac Version ](https://tools.techidaily.com/wondershare/filmora/download/ )
Some of the key features of Filmora include:
- Allows the user to crop, cut, and combine video clips in just a few clicks
- Supports the addition of multiple audio and video tracks
- Choose from various overlays and filters
- Supports face off, green screen, and PIP effects
- Supports a wide range of video formats that include MP4, AVI, MOV, MKV, and WMV, just to name a few
- Burn video to DVD, or instantly upload it to YouTube, Facebook, and Vimeo
2. WeVideo
Another YouTube Video Editor alternative is WeVideo . It is a cloud-based video editor that allows the user to do the editing in any web browser. Just like the YouTube editing tool, the user must first upload the clips online in order to edit them, and create a video.
Pros:
One advantage of WeVideo is that it allows different users to collaborate in making a single video. A user can invite others to upload clips to the project, or even make different videos based on the same clips.
Cons:
And because it is a cloud-based video editor, it requires an Internet connection in order to get the clips and do the editing. Not only that, the videos must be uploaded before they can be used. And there are cases in which a five-minute video will require hours of raw footages. Users with slow upload speeds will take hours before they can start editing. And users of the free version can only export 480p videos that have a watermark. Users need to pay for the full version.
3. Loopster
Loopster is a mobile app that can be a YouTube Video Editor alternative. It is available for both the Android and iOS platforms. The tool allows the user to rotate, splice and add sound effects, zoom, and crop videos directly from one’s smartphone. It comes with advanced features that include title screens, slow motion effect, and bubble text. The app also lets the user record video and sounds directly. After editing the video, the app can export it directly to Facebook or YouTube.
Pros:
It does what it was designed to do when it is working. It is user-friendly and comes with a tutorial. It also works even if the smartphone is not connected to the internet. Editing is done offline. And best of all, it is free.
Cons:
One the downside, it looks like the developer is no longer updating the app. Some users experience crashes and other bugs. There are also some users that stated that the slow motion effect didn’t work for them, which is why they can’t recommend it as a YouTube Video Editor alternative.
4. Tubechop
Tubechop allows the user to trim a video from any YouTube video and then share it. There are some videos that are just too long, and you want to cut it to the section that you find interesting.
Pros:
Just like the other YouTube Video Editor alternatives, Tubechop is easy to use. The user just needs to enter the YouTube URL of the video, and then indicate the section that’s interesting, and that’s it.
Cons:
However, Tubechop doesn’t allow users to download the resulting video. Tubechop only provides a link that allows users to view the chopped video. And when the original video is deleted, the chopped version will also be deleted.
5. Viddyad
Viddyad is another cloud-based platform that lets users convert images, music, clips, and animated effects into a video. It is said to be the best way to create video ads for businesses.
Pros:
There are several templates to choose from. Users can create video ads by adding videos, text, voiceover, special effects, music, and images. The platform also provides access to millions of image and video stock.
Cons:
Viddyad is a YouTube Video Editor alternative for businesses that want to create video ads. It might not be the right video editor for individuals who just want to create and share their personal videos.
Richard Bennett
Richard Bennett is a writer and a lover of all things video.
Follow @Richard Bennett
Also read:
- [New] In 2024, Introductory Handbook on Video Quality and Size
- [New] In 2024, Quick Thumbs Up Creating Your Own Google Image Mosaic
- [New] Rapid Ascendancy on YouTube Top Videos Shattering the 100MM Barrier
- [New] Strategies for Deleting Watch Later Items on YouTube
- 2024 Approved Expressive Commentary Utilizing Emojis on YouTube
- 2024 Approved The Game Plan for Thriving as a Livestreamer on YouTube
- 2024 Approved The Roadmap How YouTube Is Cultivating a Flourishing Short-Form Video Culture
- 2024 Approved Transforming Ideas Into Engaging YouTube Video Plans
- How to Artfully Diminish Image Details
- How To Check if Your Vivo V30 Is Unlocked
- In 2024, Inspiring Ideas Gratis Graphics for Your Channel
- In 2024, Revamping YouTube Videos with Smart Post-Upload Techniques
- In 2024, Tune-Up Guide New Gadgets Reviewed
- Masterful Text Effects in Adobe After Effects
- Top 5 Engine Picks for Peak Performance Quadcopters for 2024
- Updated In 2024, Unlock FCP X Advanced Chroma Keying Techniques for Video Editors
- Zero-Cost MP3 The Skype Recording Method for 2024
- Title: In 2024, How To Use Jump Cuts in Your Vlog
- Author: Joseph
- Created at : 2024-10-30 02:14:39
- Updated at : 2024-11-05 00:28:19
- Link: https://youtube-stream.techidaily.com/in-2024-how-to-use-jump-cuts-in-your-vlog/
- License: This work is licensed under CC BY-NC-SA 4.0.