
"In 2024, How to Retain Video Engagement Sustained Use of YouTube's CC License"
How to Retain Video Engagement: Sustained Use of YouTube’s CC License
How to Force YouTube CC to Stay On and Get More Views

Richard Bennett
Oct 26, 2023• Proven solutions
Table of Content:
How YouTube CC Helps You Get More Views?
Benefits of Having YouTube CC Always On
How to Force YouTube CC to Always Turn On?
How to Embed Your Videos with Closed Captions on Your Website
Bonus Tip-Add Subtitles to YouTube Video with Wondershare Filmora
Wondershare Filmora serves as an inevitable video editing software for video lovers. It has a variety of subtitle templates for you to make great creations. Let’s see how to add subtitles to a YouTube video with Wondershare Filmora!


How YouTube CC Helps You to Get More Views?
YouTube CC (Closed Captions) is much capable of bringing more views to your videos.
Why? Because YouTube algorithms prefer to highlight YouTube videos that contain closed captions because such content appears universally acceptable and it helps to boost the experience for viewers. So when your YouTube video has some kind of relevant audio or speech information then it is essential to add closed captions (YouTube CC) to it.
Benefits of Having YouTube CC Always On
YouTube CC can easily bring more viewers to your terminal. But not all users know how to turn it on or bother to turn it on when it can actually help improve the watching experience. So there are few benefits that you can enjoy by having CCs ALWAYS on your videos.
- Closed captions play an important role when you have poor audio quality in your videos. For instance, if your videos did not follow the best audio recording practices , and are affected by background noise or bad audio equipment. In such cases, YouTube subtitles help viewers to understand what is going on videos even if they cannot hear it.
- For those who make videos with a unique accent, discuss something complex, or speaks too fast, turning on the closed captions help your viewers understand explanations and maintain their attention.
- This feature makes videos more accessible and can also appear useful for viewers that are hearing impaired.
How to Force YouTube CC to Always Turn On?
So, as you have gone through several benefits associated with YouTube video closed captions, now it is time to learn the technique to keep them always On.
Go through the steps below to force CCs always on your YouTube videos:
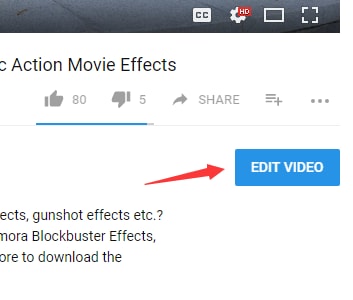
Step 1: Login and click the video in which you wish to add your captions.
Step 2: Click Edit underneath the video
Step 3: Add a specific tag to your content: “yt:cc=on”

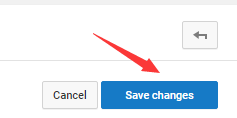
Step 4: Click Save Edit
There you go!

How to Embed your Videos with Closed Captions on your website
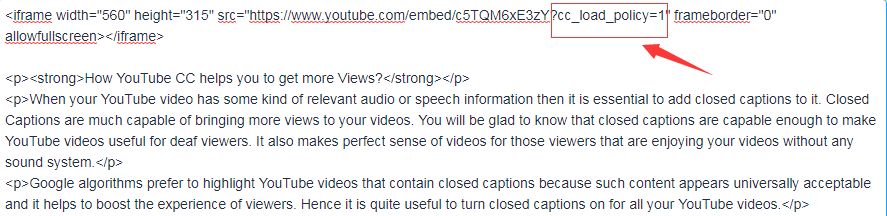
Some of you might also want to embed YouTube videos on your website. In this case, also you will need to use closed captions during display.
To do this, write “?cc_load_policy=1” at the end of your video source URL; it will be inside the iframe.
These simple steps will help you to create videos with the most impactful content and this collection will be enjoyed by all viewers on your channel. The Closed Captioned videos are valued higher by Google because they are capable enough to please the viewers throughout the world.
Even though CCs can be a powerful addition to your videos, it’s always important to prioritize audio, and it all starts with a good microphone. Find out what the best microphones are in this blog post: The Best Microphone for All Types of Creators
Richard Bennett
Richard Bennett is a writer and a lover of all things video.
Follow @Richard Bennett
Richard Bennett
Oct 26, 2023• Proven solutions
Table of Content:
How YouTube CC Helps You Get More Views?
Benefits of Having YouTube CC Always On
How to Force YouTube CC to Always Turn On?
How to Embed Your Videos with Closed Captions on Your Website
Bonus Tip-Add Subtitles to YouTube Video with Wondershare Filmora
Wondershare Filmora serves as an inevitable video editing software for video lovers. It has a variety of subtitle templates for you to make great creations. Let’s see how to add subtitles to a YouTube video with Wondershare Filmora!
How YouTube CC Helps You to Get More Views?
YouTube CC (Closed Captions) is much capable of bringing more views to your videos.
Why? Because YouTube algorithms prefer to highlight YouTube videos that contain closed captions because such content appears universally acceptable and it helps to boost the experience for viewers. So when your YouTube video has some kind of relevant audio or speech information then it is essential to add closed captions (YouTube CC) to it.
Benefits of Having YouTube CC Always On
YouTube CC can easily bring more viewers to your terminal. But not all users know how to turn it on or bother to turn it on when it can actually help improve the watching experience. So there are few benefits that you can enjoy by having CCs ALWAYS on your videos.
- Closed captions play an important role when you have poor audio quality in your videos. For instance, if your videos did not follow the best audio recording practices , and are affected by background noise or bad audio equipment. In such cases, YouTube subtitles help viewers to understand what is going on videos even if they cannot hear it.
- For those who make videos with a unique accent, discuss something complex, or speaks too fast, turning on the closed captions help your viewers understand explanations and maintain their attention.
- This feature makes videos more accessible and can also appear useful for viewers that are hearing impaired.
How to Force YouTube CC to Always Turn On?
So, as you have gone through several benefits associated with YouTube video closed captions, now it is time to learn the technique to keep them always On.
Go through the steps below to force CCs always on your YouTube videos:
Step 1: Login and click the video in which you wish to add your captions.
Step 2: Click Edit underneath the video
Step 3: Add a specific tag to your content: “yt:cc=on”
Step 4: Click Save Edit
There you go!
How to Embed your Videos with Closed Captions on your website
Some of you might also want to embed YouTube videos on your website. In this case, also you will need to use closed captions during display.
To do this, write “?cc_load_policy=1” at the end of your video source URL; it will be inside the iframe.
These simple steps will help you to create videos with the most impactful content and this collection will be enjoyed by all viewers on your channel. The Closed Captioned videos are valued higher by Google because they are capable enough to please the viewers throughout the world.
Even though CCs can be a powerful addition to your videos, it’s always important to prioritize audio, and it all starts with a good microphone. Find out what the best microphones are in this blog post: The Best Microphone for All Types of Creators
Richard Bennett
Richard Bennett is a writer and a lover of all things video.
Follow @Richard Bennett
The Perfected Practice of Combining YouTube Videos
How to Merge/Combine/Join YouTube (FLV) Videos
Richard Bennett
Mar 27, 2024• Proven solutions
YouTube is the most popular video sites in the world. You may have downloaded loads of videos from this website. But how to merge them together so that you can play all YouTube videos as one either on a PC, device, or TV? Here a professional YouTube merger is introduced in part 1 for you to easily complete the job. If you just want to merge the videos that have been already uploaded to YouTube, the YouTube Video Editor can help you with that.
Part 1: How to Merge Downloaded YouTube Videos
Part 2: How to Merge YouTube Videos Online
Part 1: How to Merge Downloaded YouTube Videos

Tool you need: Wondershare Filmora video editor
Wondershare Filmora is an easy-to-use video editing tool. With it, YouTube videos will be automatically merged orderly without interrupts. On top of that, you can add transitions between two YouTube videos to make your videos more harmonious. It also enables you to easily make a picture-in-picture (PIP) video , which is definitely another creative way to merge YouTube videos.
Sounds good? Download it now and use this YouTube merger to merge all your YouTube videos.
Below is the details about how to merge YouTube video in Filmora
Step 1.Import YouTube files to the program
Download and install Wondershare Filmora. It gives good support to the downloaded YouTube videos (usually in FLV or MP4 format). You can either click “Import” on the primary windows and select YouTube video files from your computer, or simply drag and drop YouTube video files from File Explorer to the User’s Album.

Step 2. Drag and drop YouTube videos to merge
To merge YouTube videos, select multiple YouTube videos in the User’s Album by holding down Ctrl or Shift key, and then drag and drop them to the video track on the Timeline. All YouTube files will join one after another without interrupts and there is none transition by default, but you can add transitions between video clips as you want. This will be introduced in Step 3.

Step 3. Merge YouTube videos with transition
By adding transitions, YouTube videos will flow nicely from one to the next. To do so, switch to Transition tab, and drag the desired transition to the Timeline. Alternatively, right click any transition and choose “Apply to All” and “Random to All” from the popup menu to add transitions between YouTube videos in seconds.

Step 4. Merge multiple YouTube files into one
Make sure you are satisfied with everything. You can click Play button to preview how YouTube videos will be merged. If the result is good, click “Export” button to save the YouTube video as one.

Therefore, go to the “Format” tab and select one desired format and click Create to start merging YouTube videos. By the way, if you want to play the merged YouTube files on iPod, iPhone, iPad, choose “Device” and select your device from the list. You can also directly upload back to YouTube for sharing or burn to DVD for playing on TV.
Part 2: How to Merge YouTube Videos Online

Tool you need: YouTube Video Editor
YouTube Video Editor is a browser-based video editor released by YouTube itself. It enables users to make minor edits to videos they’ve uploaded onto YouTube, as well as merge several clips together into one. It requires no additional software, or browser plug-ins (besides Adobe’s Flash), which makes it convenient to use. However, it lacks many basic features of modern day consumer video editing software and often crashes while dealing with large video files.

Get access to the editor
Sign in to your YouTube (or Google) account. Click “Upload”>> “Edit” to the Video Editor tab.

Place videos on the timeline
Simply drag the videos that need merge onto the timeline or hit the plus icon in the top right hand corner of each clip.

Save the settings
Review the result. If satisfied, hit the “Publish” button to save the settings.
Richard Bennett
Richard Bennett is a writer and a lover of all things video.
Follow @Richard Bennett
Richard Bennett
Mar 27, 2024• Proven solutions
YouTube is the most popular video sites in the world. You may have downloaded loads of videos from this website. But how to merge them together so that you can play all YouTube videos as one either on a PC, device, or TV? Here a professional YouTube merger is introduced in part 1 for you to easily complete the job. If you just want to merge the videos that have been already uploaded to YouTube, the YouTube Video Editor can help you with that.
Part 1: How to Merge Downloaded YouTube Videos
Part 2: How to Merge YouTube Videos Online
Part 1: How to Merge Downloaded YouTube Videos
Tool you need: Wondershare Filmora video editor
Wondershare Filmora is an easy-to-use video editing tool. With it, YouTube videos will be automatically merged orderly without interrupts. On top of that, you can add transitions between two YouTube videos to make your videos more harmonious. It also enables you to easily make a picture-in-picture (PIP) video , which is definitely another creative way to merge YouTube videos.
Sounds good? Download it now and use this YouTube merger to merge all your YouTube videos.
Below is the details about how to merge YouTube video in Filmora
Step 1.Import YouTube files to the program
Download and install Wondershare Filmora. It gives good support to the downloaded YouTube videos (usually in FLV or MP4 format). You can either click “Import” on the primary windows and select YouTube video files from your computer, or simply drag and drop YouTube video files from File Explorer to the User’s Album.
Step 2. Drag and drop YouTube videos to merge
To merge YouTube videos, select multiple YouTube videos in the User’s Album by holding down Ctrl or Shift key, and then drag and drop them to the video track on the Timeline. All YouTube files will join one after another without interrupts and there is none transition by default, but you can add transitions between video clips as you want. This will be introduced in Step 3.
Step 3. Merge YouTube videos with transition
By adding transitions, YouTube videos will flow nicely from one to the next. To do so, switch to Transition tab, and drag the desired transition to the Timeline. Alternatively, right click any transition and choose “Apply to All” and “Random to All” from the popup menu to add transitions between YouTube videos in seconds.
Step 4. Merge multiple YouTube files into one
Make sure you are satisfied with everything. You can click Play button to preview how YouTube videos will be merged. If the result is good, click “Export” button to save the YouTube video as one.
Therefore, go to the “Format” tab and select one desired format and click Create to start merging YouTube videos. By the way, if you want to play the merged YouTube files on iPod, iPhone, iPad, choose “Device” and select your device from the list. You can also directly upload back to YouTube for sharing or burn to DVD for playing on TV.
Part 2: How to Merge YouTube Videos Online
Tool you need: YouTube Video Editor
YouTube Video Editor is a browser-based video editor released by YouTube itself. It enables users to make minor edits to videos they’ve uploaded onto YouTube, as well as merge several clips together into one. It requires no additional software, or browser plug-ins (besides Adobe’s Flash), which makes it convenient to use. However, it lacks many basic features of modern day consumer video editing software and often crashes while dealing with large video files.
Get access to the editor
Sign in to your YouTube (or Google) account. Click “Upload”>> “Edit” to the Video Editor tab.
Place videos on the timeline
Simply drag the videos that need merge onto the timeline or hit the plus icon in the top right hand corner of each clip.
Save the settings
Review the result. If satisfied, hit the “Publish” button to save the settings.
Richard Bennett
Richard Bennett is a writer and a lover of all things video.
Follow @Richard Bennett
Also read:
- [New] How to Retain Video Engagement Sustained Use of YouTube's CC License
- [New] In 2024, Inspirational Movies Fuel for the Soul and Spirit
- [New] Mastering Light & Shadow with iPhone X's New Lens Technology
- [Updated] The Scribe's Solution Recording Modern Television
- 2024 Approved Kinemaster's Secrets to Transition Excellence
- 2024 Approved Streamlining Your YouTube Music Journey
- 2024 Approved The Rewind Ritual Making Playlists Run Opposite to Current
- Demystifying and Fixing the Crippling Windows 11 Update Glitch - Code 0Xc190n0028 Revealed
- In 2024, Here are Some of the Best Pokemon Discord Servers to Join On Xiaomi Redmi 13C | Dr.fone
- In 2024, Investing $5 Yields Hundreds of New Viewers Now
- In 2024, Unlock the Power of Pixels Expert Advice on YouTube Thumbnail Sizing
- In 2024, Unraveling Top 6 Your Guide to Free & Favored Shorts Downloaders
- Laughing Along to Mimicked Melodies for 2024
- Streamlining Screen Recording with NVIDIA
- The Ultimate Guide to Choosing the Best MagSafe Battery Packs - Features & Comparisons | ZDNET
- Transform Your Podcast's Identity with AI Name Makers
- Title: In 2024, How to Retain Video Engagement Sustained Use of YouTube's CC License
- Author: Joseph
- Created at : 2024-12-11 17:04:52
- Updated at : 2024-12-16 19:01:56
- Link: https://youtube-stream.techidaily.com/in-2024-how-to-retain-video-engagement-sustained-use-of-youtubes-cc-license/
- License: This work is licensed under CC BY-NC-SA 4.0.