"Google Meet Go Live - Your YouTube Broadcast Companion for 2024"

Google Meet Go Live - Your YouTube Broadcast Companion
Google Meet helps people to connect virtually with each other in a well-protected environment. If you have physical restrictions, Google Meet can provide an enhanced ecosystem to collaborate with your team members. With high video and audio quality, it can prevent you from any sort of disturbance. If you want to connect with a larger audience during your Google Meet sessions, you can go for live streaming.
This article will address how to conduct Google Meet live stream through the platform of YouTube. To learn more, continue reading this guide.
- Available Google Workspace Edition
- Approval of YouTube Channel for Live
- Connect your YouTube Channel to Google Meet
- How to Live Stream from Google Meet to YouTube
- Bonus Tip: Easily Record your Google Meet Live Stream
Part 1: Three Things to Check Before Starting Your Live
Before increasing your audience from Google Meet live stream on YouTube, make sure to check the below prerequisites.
1. Available Google Workspace Edition
For Google Meet YouTube live, there are some requirements. The reason is that not every ordinary user of Google Meet can go for YouTube live streaming. To do so, you should buy any of the following pricing plans:
| Google Workspace Pricing Plan | Price |
|---|---|
| Enterprise Starter | Approx. $10/User/Month |
| Enterprise Standard | Approx. $20/User/Month |
| Enterprise Plus | Approx. $30/User/Month |
| Education Plus | Approx. $5/Student/Month |
| Teaching and Learning Upgrade | Approx. $4/License/Month |
| Workspace Individual Subscriber | Approx. $9.9/Month |
| Google One Subscribers with 2 TB or More Storage Space | Approx. $10/Month |
![]()
Note: To know the exact pricing plans of Google Workspace, you have to contact Google Support.
2. Approval of YouTube Channel for Live
To conduct live streaming, you must receive approval from the YouTube channel. For this, you must access your channel’s YouTube Studio to perform the account verification. Now to activate and enable live streaming on your YouTube account, check the following steps:
Step1 Open your YouTube account and click on the “Profile” icon given at the top-right corner. After opening the Profile menu, click on the “YouTube Studio” option.
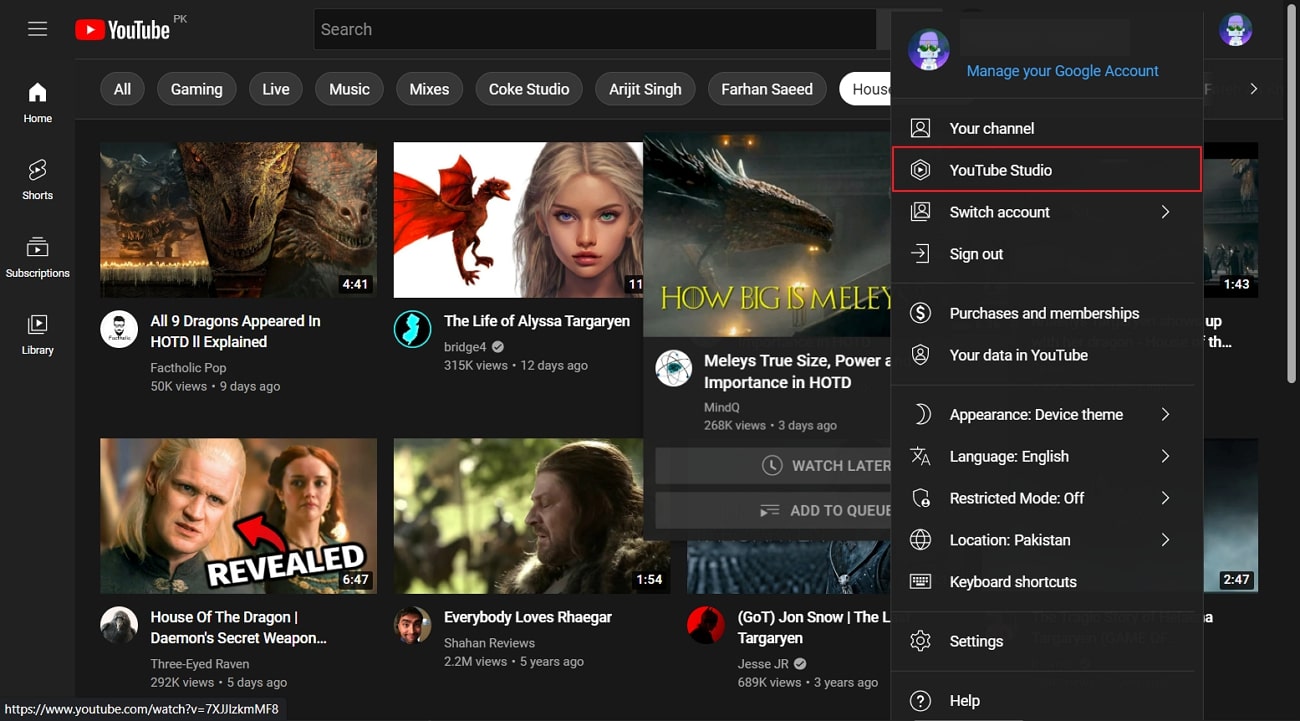
Step2 A new window will be displayed on your screen. From the left panel, select “Content” among other options. Under the section called “Live,” locate the “Get Started” option. Afterward, tap on the “Request” option and perform the verification steps for enabling live streaming. After 24 hours, you would get approval for live streaming on YouTube. Hence, you would be able to live stream Google Meet meetings through your YouTube channel.

3. Connect your YouTube Channel to Google Meet
Once you get approval for live streaming, you can connect the YouTube channel to your Google Meet account. If the Host Management option is disabled, anyone within the Google Meet session can start live streaming. Conversely, only hosts or co-hosts can begin live streaming if this option is activated. Moreover, the individual who is starting the live stream from Google Meet will get connected to his YouTube channel.
Furthermore, you should use the same email address to enter the Google Meet that is connected to your YouTube account. By using the same email address, you can ensure smooth live streaming of Google Meet sessions to your YouTube channel. Also, you can only use laptops or desktops for initiating live streaming. The reason is that the Google Meet live stream on YouTube is not currently available on mobile devices.
Part 2: How to Live Stream from Google Meet to YouTube
Once you have fulfilled all the requirements, you can start a live stream from Google Meet to YouTube. Check the following steps to execute the process:
Step1 To allow Google Meet sessions to live stream on YouTube, the Google Workspace admin must adjust some settings. To begin, log in to the “Admin Console” on the Workspace administrator account. Now go to “Apps” and access the “Google Workspace” option.
Step2 Afterward, click “Google Meet” and tap on the “Stream” option. Once done, click on the “Pencil” icon to open the Settings menu. Now enable the options “Let People Steam Their Meetings” and “Let People Use YouTube to Stream Meetings.” Once done with the changes, click on the “Save” button.
Step3 Make sure that the Google account attached to your YouTube channel is capable of live streaming. Once done, go to your YouTube channel and tap on the “Create” button. Afterward, hit the “Live” button.
Step4 Now enter your Google Meet session and click on the “Activities” option. From the Activities menu, select “Live Streaming.” Now a small menu will open for live-streaming settings. You can create a new event and add an event title. Make sure to choose the privacy options and desired language. Afterward, click on the “Start Streaming” option.
Step5 A small pop-up will appear that will tell you to remind your participants about live streaming. After reminding, click on the “Start” button. You can see the red “Live” button that will indicate to you the ongoing live-streaming session. Once you have concluded the live streaming by clicking on the “Stop Streaming” button, you can check the video analytics by visiting your YouTube channel.
Bonus Tip: Easily Record your Google Meet Live Stream
Do you want to save your Google Meet live-stream session? The best tool through which you can save your essential live-streaming sessions is Wondershare Filmora Screen Recorder . By using this efficient screen recorder, you can access your saved live streaming session and revise the important points discussed in it.
The screen recorder of Filmora is capable of capturing webcam and screen recording simultaneously. You can select a customized recording area through this tool. For example, you can choose a full screen, a specific window, or a customized area. Furthermore, this screen recording tool can also capture your microphone and system’s sounds in high quality. At the same time, as a powerful video editor, you can edit your videos with various advanced features of Filmora to bring them to the next level. Click the video below to learn more about Filmora’s new features.
Steps to Record Live Streaming Using Filmora Screen Recorder
Are you ready to capture your live-streaming session on Google Meet? Here are the simple and accurate steps to begin the process:
Step1 Open the Screen Recorder
Download Wondershare Filmora and open its interface. Click the “Screen Recorder” option given on the main homepage. By doing so, a screen recorder window will open. Here, you can select screen recording modes such as full-screen, target window, or custom. Also, make sure to choose your system’s audio and microphone to proceed.

Step2 Adjust Settings and Start Recording
From Settings, you can also select the quality, frame rate, and color of mouse clicks. Once you have adjusted all the settings properly, hit the “REC” button.

Step3 End the Recording
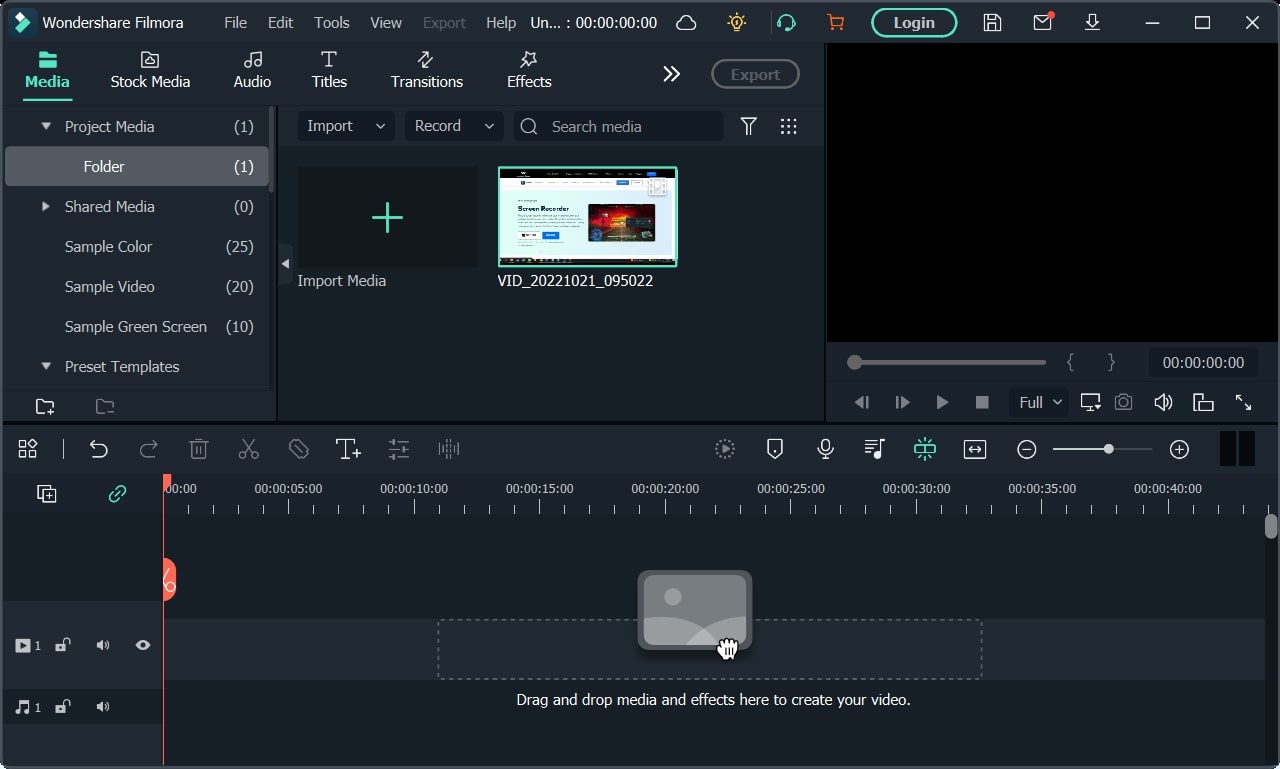
After the countdown, the screen recording will begin. To stop the recording, you can press the F9 button from your keyboard. After the recording ends, the file will be dropped into the media library of Filmora.
Conclusion
Google Meet is a reliable environment to connect and collaborate with people. To increase your reach and target audience, you can conduct Google Meet live streaming on YouTube. This article has discussed a detailed way through which you can live stream your Google Meet session on your YouTube channel.
To save and access your live streaming sessions later, you can try the screen recorder of Wondershare Filmora . This screen recorder can capture screen and respective audio in high quality.
Free Download For Win 7 or later(64-bit)
Free Download For macOS 10.14 or later
Part 1: Three Things to Check Before Starting Your Live
Before increasing your audience from Google Meet live stream on YouTube, make sure to check the below prerequisites.
1. Available Google Workspace Edition
For Google Meet YouTube live, there are some requirements. The reason is that not every ordinary user of Google Meet can go for YouTube live streaming. To do so, you should buy any of the following pricing plans:
| Google Workspace Pricing Plan | Price |
|---|---|
| Enterprise Starter | Approx. $10/User/Month |
| Enterprise Standard | Approx. $20/User/Month |
| Enterprise Plus | Approx. $30/User/Month |
| Education Plus | Approx. $5/Student/Month |
| Teaching and Learning Upgrade | Approx. $4/License/Month |
| Workspace Individual Subscriber | Approx. $9.9/Month |
| Google One Subscribers with 2 TB or More Storage Space | Approx. $10/Month |
![]()
Note: To know the exact pricing plans of Google Workspace, you have to contact Google Support.
2. Approval of YouTube Channel for Live
To conduct live streaming, you must receive approval from the YouTube channel. For this, you must access your channel’s YouTube Studio to perform the account verification. Now to activate and enable live streaming on your YouTube account, check the following steps:
Step1 Open your YouTube account and click on the “Profile” icon given at the top-right corner. After opening the Profile menu, click on the “YouTube Studio” option.

Step2 A new window will be displayed on your screen. From the left panel, select “Content” among other options. Under the section called “Live,” locate the “Get Started” option. Afterward, tap on the “Request” option and perform the verification steps for enabling live streaming. After 24 hours, you would get approval for live streaming on YouTube. Hence, you would be able to live stream Google Meet meetings through your YouTube channel.

3. Connect your YouTube Channel to Google Meet
Once you get approval for live streaming, you can connect the YouTube channel to your Google Meet account. If the Host Management option is disabled, anyone within the Google Meet session can start live streaming. Conversely, only hosts or co-hosts can begin live streaming if this option is activated. Moreover, the individual who is starting the live stream from Google Meet will get connected to his YouTube channel.
Furthermore, you should use the same email address to enter the Google Meet that is connected to your YouTube account. By using the same email address, you can ensure smooth live streaming of Google Meet sessions to your YouTube channel. Also, you can only use laptops or desktops for initiating live streaming. The reason is that the Google Meet live stream on YouTube is not currently available on mobile devices.
Part 2: How to Live Stream from Google Meet to YouTube
Once you have fulfilled all the requirements, you can start a live stream from Google Meet to YouTube. Check the following steps to execute the process:
Step1 To allow Google Meet sessions to live stream on YouTube, the Google Workspace admin must adjust some settings. To begin, log in to the “Admin Console” on the Workspace administrator account. Now go to “Apps” and access the “Google Workspace” option.
Step2 Afterward, click “Google Meet” and tap on the “Stream” option. Once done, click on the “Pencil” icon to open the Settings menu. Now enable the options “Let People Steam Their Meetings” and “Let People Use YouTube to Stream Meetings.” Once done with the changes, click on the “Save” button.
Step3 Make sure that the Google account attached to your YouTube channel is capable of live streaming. Once done, go to your YouTube channel and tap on the “Create” button. Afterward, hit the “Live” button.
Step4 Now enter your Google Meet session and click on the “Activities” option. From the Activities menu, select “Live Streaming.” Now a small menu will open for live-streaming settings. You can create a new event and add an event title. Make sure to choose the privacy options and desired language. Afterward, click on the “Start Streaming” option.
Step5 A small pop-up will appear that will tell you to remind your participants about live streaming. After reminding, click on the “Start” button. You can see the red “Live” button that will indicate to you the ongoing live-streaming session. Once you have concluded the live streaming by clicking on the “Stop Streaming” button, you can check the video analytics by visiting your YouTube channel.
Bonus Tip: Easily Record your Google Meet Live Stream
Do you want to save your Google Meet live-stream session? The best tool through which you can save your essential live-streaming sessions is Wondershare Filmora Screen Recorder . By using this efficient screen recorder, you can access your saved live streaming session and revise the important points discussed in it.
The screen recorder of Filmora is capable of capturing webcam and screen recording simultaneously. You can select a customized recording area through this tool. For example, you can choose a full screen, a specific window, or a customized area. Furthermore, this screen recording tool can also capture your microphone and system’s sounds in high quality. At the same time, as a powerful video editor, you can edit your videos with various advanced features of Filmora to bring them to the next level. Click the video below to learn more about Filmora’s new features.
Steps to Record Live Streaming Using Filmora Screen Recorder
Are you ready to capture your live-streaming session on Google Meet? Here are the simple and accurate steps to begin the process:
Step1 Open the Screen Recorder
Download Wondershare Filmora and open its interface. Click the “Screen Recorder” option given on the main homepage. By doing so, a screen recorder window will open. Here, you can select screen recording modes such as full-screen, target window, or custom. Also, make sure to choose your system’s audio and microphone to proceed.

Step2 Adjust Settings and Start Recording
From Settings, you can also select the quality, frame rate, and color of mouse clicks. Once you have adjusted all the settings properly, hit the “REC” button.

Step3 End the Recording
After the countdown, the screen recording will begin. To stop the recording, you can press the F9 button from your keyboard. After the recording ends, the file will be dropped into the media library of Filmora.

Conclusion
Google Meet is a reliable environment to connect and collaborate with people. To increase your reach and target audience, you can conduct Google Meet live streaming on YouTube. This article has discussed a detailed way through which you can live stream your Google Meet session on your YouTube channel.
To save and access your live streaming sessions later, you can try the screen recorder of Wondershare Filmora . This screen recorder can capture screen and respective audio in high quality.
Free Download For Win 7 or later(64-bit)
Free Download For macOS 10.14 or later
Premier Select: Affordable YouTube SBS Extraction
If you’ve tried to add subtitles to videos on YouTube before, you may have noticed it’s a bit of a pain. Usually, you have to copy the translation and paste it into your clips, which is time-consuming and requires an advanced level of skill.
Therefore, to help you understand YouTube videos and take notes from their content, we’ve brought a complete review of the best YouTube subtitle extractors that will automatically get the required SRT file in no time. In addition, we’ll also provide a bonus tip to edit your subtitles using Filmora.
So, let’s get into the details of each of these tools one by one.
- Wondershare UniConverter
- DVDVideoSoft Free YouTube Subtitles Downloader
- 4K Video Downloader
- ByClick Downloader
10 Free YouTube Subtitle Extractors & Downloaders
We’ve rounded up a list of 10 YouTube subtitle extractors and downloader services to simplify your life and enable you to get the SRT files.
These tools are simple to use and can help you save a lot of time and effort. However, keep in mind that with these software programs, you can only download videos with subtitles automatically generated by YouTube.
![]()
Note: if you want to create subtitles, you can also use the Speech to text function.
Online Free Youtube Subtitle Extractor
You can use one of the following subtitle extractor tools if you only need the SRT file:
1. DownSub
DownSub is an online tool that can help you extract subtitles for your favorite YouTube movies or shows. The tool is entirely free and easy to use. Simply paste the link to the video you want to get subtitles for, click download, and DownSub will do the rest.
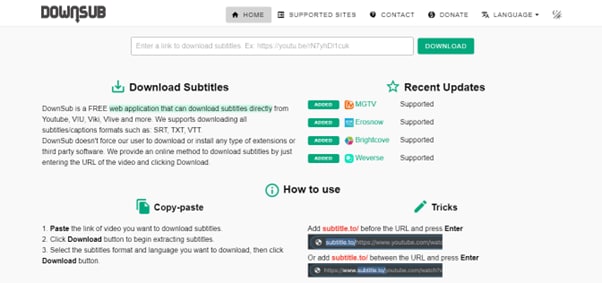
Some of the key features of DownSub are as follows:
- Download subtitles from YouTube in multiple languages
- Supports multiple formats, including SRT, TXT, and VTT
- Extracts directly from YouTube, Viki, VIU, and more
2. Checksub
Checksub is a handy tool for extracting subtitles for your YouTube video. To use the tool, create your account on the website, drag and drop your file or upload the URL, and wait for Checksub to extract the SRT file.
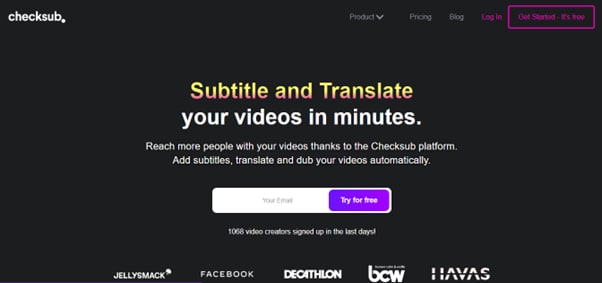
Here are some of the cool features of the Checksub tool:
- Adds subtitles and translates or dubs your videos
- Ability to edit subtitles
- Supports over 190 languages
- Adds automatic voiceover in a foreign language
3. EasySub
EasySub is another simple and fast-to-use tool that can help you extract YouTube subtitles in no time without installing any software or extensions. Moreover, it supports multiple file formats, such as VTT, SRT, ass, and TXT.
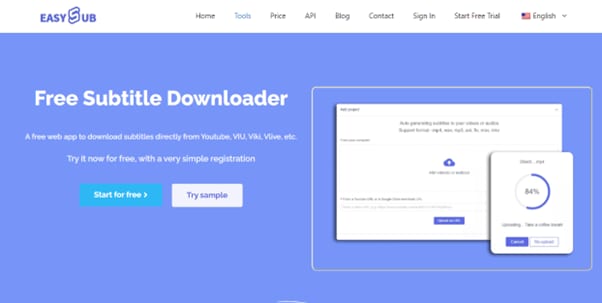
The following are some key features of EasySub:
- Free to use
- Simple and easy to use
- Automatic transcription
- Uses an advanced AI algorithm
- Multi-language support
4. SaveSubs
SaveSubs is a browser-based Youtube subtitles downloader that does not require its users to install any software or touch any code. Just paste the YouTube video link with subtitles, click “Download,” and you can download the file instantly on your device.
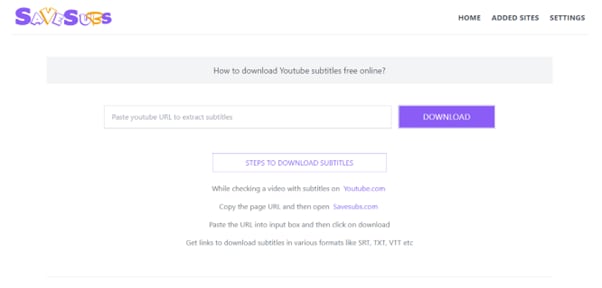
Below are a few key features of the SaveSubs tool:
- Download subtitles in multiple formats, such as VTT, SRT, and TXT
- Clear and simple UI
- Supports editable subtitles
- Comes with a social sharing feature
5. YouSubtitles
With its massive subtitle database, YouSubtitles stands out from other online tools. This tool has an easy-to-use UI and can help you get your required file effortlessly. Furthermore, you can even select the translated version of the file after the download.
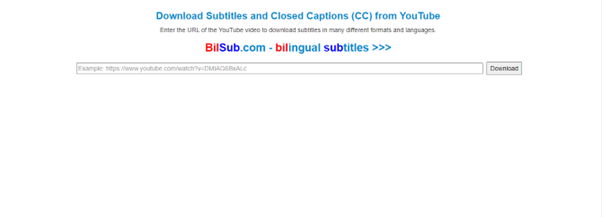
Here’s why YouSubtitles is one of the best YouTube subtitles extractor online:
- Free to use
- Huge subtitle database
- Supports multiple formats and languages
6. DVDVideoSoft
Another trusted source for YouTube subtitle extraction is DVDVideoSoft. With this tool, you can quickly get the required SRT file by providing the URL of the content. Moreover, you can also use it to download music and videos from Youtube.
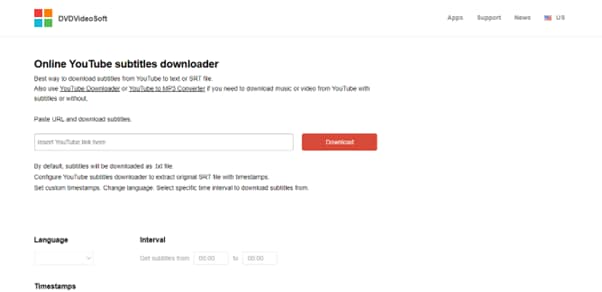
Some key features of DVDVideoSoft are as follows:
- Can set the language, interval, and timestamp for the subtitles
- Supports YouTube to MP3 converter and YouTube downloader
- Free to use
- Perfect for downloading subtitles from a particular segment of a video
Youtube Subtitle Downloader Software
Youtube’s automatic subtitles are sometimes inaccurate while using an online tool. Therefore, we recommend you use dedicated software to make adjustments to the content. Some of these programs are as follows:
1. Wondershare UniConverter
Wondershare UniConverter is an easy-to-use software for Windows and Mac that can help you create, add, and generate subtitles for your favorite Youtube videos in just a few clicks.
Price:
- Quarter: $29.99
- Annual: $39.99
- 2-year: $55.99
- Perpetual (one-time): $79.99
![]()
Key Features:
Here are some of the things UniConverter can do:
- Auto-generates subtitles from videos in over 100 languages
- Supports multiple video and audio formats
- Customizable subtitle styles
- Comes with a visual subtitle timeline for real-time preview
- Converts TXT to SRT format
- Ability to download the YouTube video on your device
2. DVDVideoSoft Free YouTube Subtitles Downloader
Another customizable and powerful software for downloading YouTube SRT is the DVDVideoSoft Free YouTube Downloader. With this tool, you can get subtitles in multiple languages for any video on YouTube with closed captions.
Price: Free
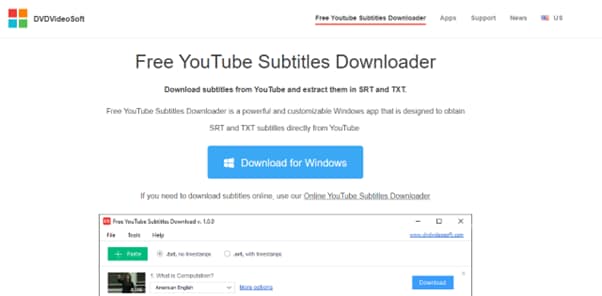
Key Features:
Here are some key features of the DVDVideoSoft Free YouTube Subtitles Downloader:
- Supports TXT and SRT file formats
- Available for Windows
- Ability to extract subtitles from certain intervals
- Available as a browser-based tool
3. 4K Video Downloader
With the 4K Video Downloader user-friendly GUI, you can download videos from YouTube, Facebook, and many other video sites in high definition. It is also possible to extract YouTube video subtitles in over 50 languages.
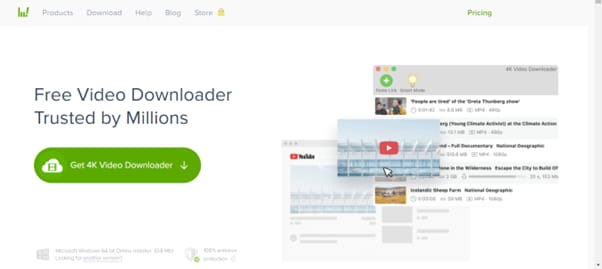
Price: Free
Key Features:
Below are the key features of the 4K Video Downloader software:
- Download the video in 4K
- Supports over 50 languages for YouTube subtitles extraction
- Can download an entire playlist
4. ByClick Downloader
ByClick Downloader is another great option to quickly download YouTube videos with subtitles in any format you want. Not only that, you can convert files into MP3, MP4, FLV, AVI, WMV,3GP, WAV, and WEBM formats with just a few clicks!
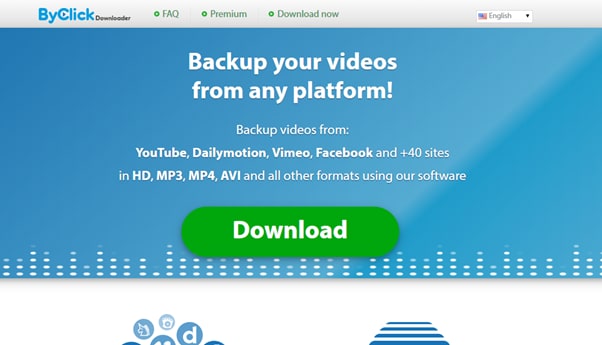
Price: Free
Key Features:
Key features of the ByClick Downloader are as follows:
- Downloads videos from over 50 different sources
- Excellent user interface
- Quickly downloads YouTube subtitles.
- Supports multiple formats
Bonus Tips: Easily Edit Your Subtitle With Filmora
Since most of the above tools only extract or download the YouTube subtitles and do not offer editing features, we recommend using Wondershare Filmora , where you can quickly apply changes to your SRT file.
Free Download For Win 7 or later(64-bit)
Free Download For macOS 10.14 or later
Filmora is a powerful video editing software that lets you create and edit clips like a pro. With its easy-to-use UI and wide range of features, you can also create and edit subtitles for your YouTube video using different parameters, animations, text styles, templates, and colors.
Here’s how you can add and edit subtitles on your videos using Filmora:
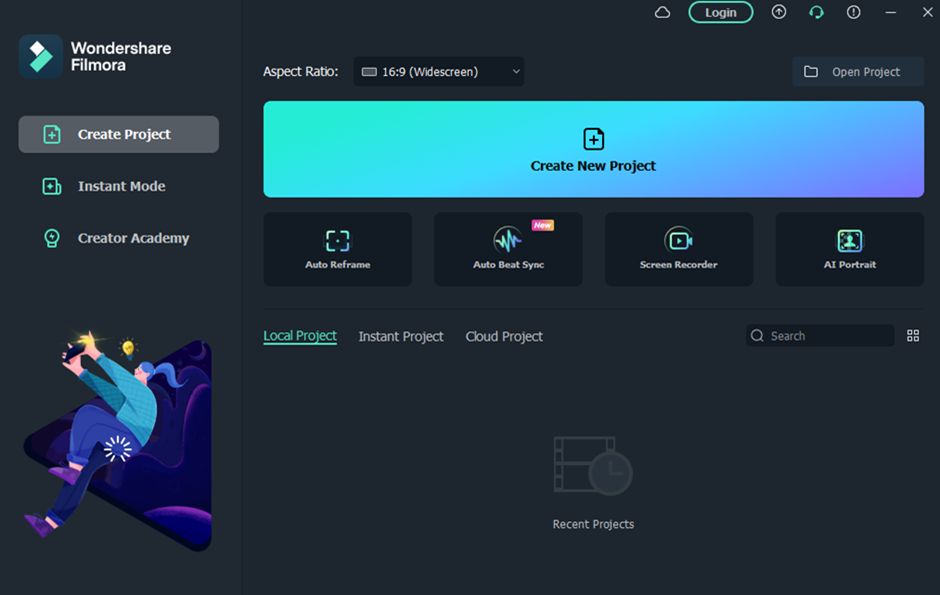
Step 1 Open the Filmora software on your laptop or desktop and click the “Create New Project” option in the main interface. Select the “Click here to import media” option and upload your YouTube video. Alternatively, you can drag and drop your file.
Step 2 Drag the YouTube video, drop it in the timeline, and click the “Play” icon. Listen to the voiceover on your video footage and press the “M” key to add a marker. Next, click “Titles” from the toolbar and open the “Subtitles” tab from the left menu. Double-click the subtitle to download and preview it.
Step 3 Drag the downloaded subtitle template and drop it in the timeline. Now, adjust it in your video along with the marker point. Double-click the subtitle template in the timeline and type the text from the video voiceover.
You can also add color or template and adjust the text space to make them more visible on your video clip.
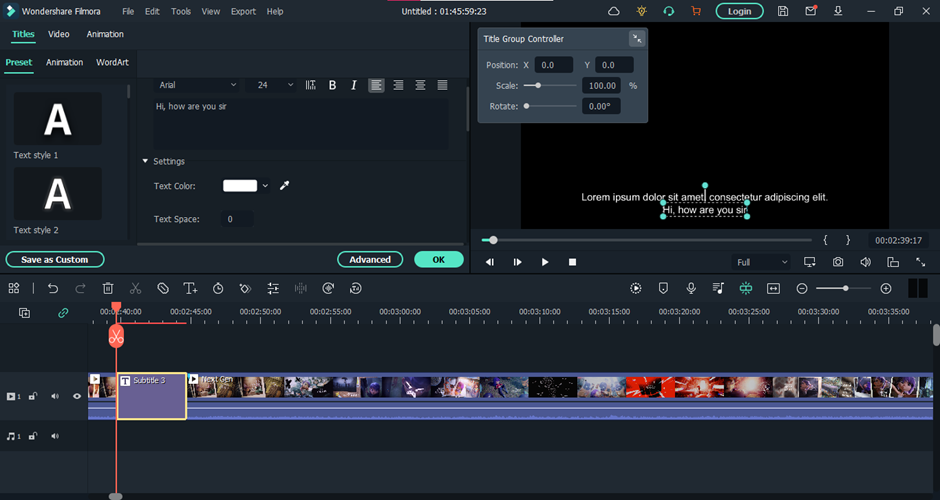
Step 4 Click the “Advanced” option, delete the preset text, and set the one you’ve just typed. Next, head to the “Animation” tab to apply any animation effect and click “OK.” Finally, repeat the steps to add subtitles to the whole video.
Conclusion
In this article, we’ve provided a detailed review of the ten best YouTube subtitle extractors and downloaders to help you automatically extract SRT files without much effort.
We’ve also recommended the Filmora software for quickly downloading and editing YouTube subtitles to make them more engaging and clear using various templates, styles, and animations.
Hopefully, you’ve found this article helpful and can now get the SRT files for your favorite YouTube video in a matter of minutes.
- Wondershare UniConverter
- DVDVideoSoft Free YouTube Subtitles Downloader
- 4K Video Downloader
- ByClick Downloader
- Bonus Tips: Easily Edit Your Subtitle With Filmora
10 Free YouTube Subtitle Extractors & Downloaders
We’ve rounded up a list of 10 YouTube subtitle extractors and downloader services to simplify your life and enable you to get the SRT files.
These tools are simple to use and can help you save a lot of time and effort. However, keep in mind that with these software programs, you can only download videos with subtitles automatically generated by YouTube.
![]()
Note: if you want to create subtitles, you can also use the Speech to text function.
Online Free Youtube Subtitle Extractor
You can use one of the following subtitle extractor tools if you only need the SRT file:
1. DownSub
DownSub is an online tool that can help you extract subtitles for your favorite YouTube movies or shows. The tool is entirely free and easy to use. Simply paste the link to the video you want to get subtitles for, click download, and DownSub will do the rest.

Some of the key features of DownSub are as follows:
- Download subtitles from YouTube in multiple languages
- Supports multiple formats, including SRT, TXT, and VTT
- Extracts directly from YouTube, Viki, VIU, and more
2. Checksub
Checksub is a handy tool for extracting subtitles for your YouTube video. To use the tool, create your account on the website, drag and drop your file or upload the URL, and wait for Checksub to extract the SRT file.

Here are some of the cool features of the Checksub tool:
- Adds subtitles and translates or dubs your videos
- Ability to edit subtitles
- Supports over 190 languages
- Adds automatic voiceover in a foreign language
3. EasySub
EasySub is another simple and fast-to-use tool that can help you extract YouTube subtitles in no time without installing any software or extensions. Moreover, it supports multiple file formats, such as VTT, SRT, ass, and TXT.

The following are some key features of EasySub:
- Free to use
- Simple and easy to use
- Automatic transcription
- Uses an advanced AI algorithm
- Multi-language support
4. SaveSubs
SaveSubs is a browser-based Youtube subtitles downloader that does not require its users to install any software or touch any code. Just paste the YouTube video link with subtitles, click “Download,” and you can download the file instantly on your device.

Below are a few key features of the SaveSubs tool:
- Download subtitles in multiple formats, such as VTT, SRT, and TXT
- Clear and simple UI
- Supports editable subtitles
- Comes with a social sharing feature
5. YouSubtitles
With its massive subtitle database, YouSubtitles stands out from other online tools. This tool has an easy-to-use UI and can help you get your required file effortlessly. Furthermore, you can even select the translated version of the file after the download.

Here’s why YouSubtitles is one of the best YouTube subtitles extractor online:
- Free to use
- Huge subtitle database
- Supports multiple formats and languages
6. DVDVideoSoft
Another trusted source for YouTube subtitle extraction is DVDVideoSoft. With this tool, you can quickly get the required SRT file by providing the URL of the content. Moreover, you can also use it to download music and videos from Youtube.

Some key features of DVDVideoSoft are as follows:
- Can set the language, interval, and timestamp for the subtitles
- Supports YouTube to MP3 converter and YouTube downloader
- Free to use
- Perfect for downloading subtitles from a particular segment of a video
Youtube Subtitle Downloader Software
Youtube’s automatic subtitles are sometimes inaccurate while using an online tool. Therefore, we recommend you use dedicated software to make adjustments to the content. Some of these programs are as follows:
1. Wondershare UniConverter
Wondershare UniConverter is an easy-to-use software for Windows and Mac that can help you create, add, and generate subtitles for your favorite Youtube videos in just a few clicks.
Price:
- Quarter: $29.99
- Annual: $39.99
- 2-year: $55.99
- Perpetual (one-time): $79.99
![]()
Key Features:
Here are some of the things UniConverter can do:
- Auto-generates subtitles from videos in over 100 languages
- Supports multiple video and audio formats
- Customizable subtitle styles
- Comes with a visual subtitle timeline for real-time preview
- Converts TXT to SRT format
- Ability to download the YouTube video on your device
2. DVDVideoSoft Free YouTube Subtitles Downloader
Another customizable and powerful software for downloading YouTube SRT is the DVDVideoSoft Free YouTube Downloader. With this tool, you can get subtitles in multiple languages for any video on YouTube with closed captions.
Price: Free

Key Features:
Here are some key features of the DVDVideoSoft Free YouTube Subtitles Downloader:
- Supports TXT and SRT file formats
- Available for Windows
- Ability to extract subtitles from certain intervals
- Available as a browser-based tool
3. 4K Video Downloader
With the 4K Video Downloader user-friendly GUI, you can download videos from YouTube, Facebook, and many other video sites in high definition. It is also possible to extract YouTube video subtitles in over 50 languages.

Price: Free
Key Features:
Below are the key features of the 4K Video Downloader software:
- Download the video in 4K
- Supports over 50 languages for YouTube subtitles extraction
- Can download an entire playlist
4. ByClick Downloader
ByClick Downloader is another great option to quickly download YouTube videos with subtitles in any format you want. Not only that, you can convert files into MP3, MP4, FLV, AVI, WMV,3GP, WAV, and WEBM formats with just a few clicks!

Price: Free
Key Features:
Key features of the ByClick Downloader are as follows:
- Downloads videos from over 50 different sources
- Excellent user interface
- Quickly downloads YouTube subtitles.
- Supports multiple formats
Bonus Tips: Easily Edit Your Subtitle With Filmora
Since most of the above tools only extract or download the YouTube subtitles and do not offer editing features, we recommend using Wondershare Filmora , where you can quickly apply changes to your SRT file.
Free Download For Win 7 or later(64-bit)
Free Download For macOS 10.14 or later
Filmora is a powerful video editing software that lets you create and edit clips like a pro. With its easy-to-use UI and wide range of features, you can also create and edit subtitles for your YouTube video using different parameters, animations, text styles, templates, and colors.

Here’s how you can add and edit subtitles on your videos using Filmora:
Step 1 Open the Filmora software on your laptop or desktop and click the “Create New Project” option in the main interface. Select the “Click here to import media” option and upload your YouTube video. Alternatively, you can drag and drop your file.

Step 2 Drag the YouTube video, drop it in the timeline, and click the “Play” icon. Listen to the voiceover on your video footage and press the “M” key to add a marker. Next, click “Titles” from the toolbar and open the “Subtitles” tab from the left menu. Double-click the subtitle to download and preview it.
Step 3 Drag the downloaded subtitle template and drop it in the timeline. Now, adjust it in your video along with the marker point. Double-click the subtitle template in the timeline and type the text from the video voiceover.
You can also add color or template and adjust the text space to make them more visible on your video clip.

Step 4 Click the “Advanced” option, delete the preset text, and set the one you’ve just typed. Next, head to the “Animation” tab to apply any animation effect and click “OK.” Finally, repeat the steps to add subtitles to the whole video.
Conclusion
In this article, we’ve provided a detailed review of the ten best YouTube subtitle extractors and downloaders to help you automatically extract SRT files without much effort.
We’ve also recommended the Filmora software for quickly downloading and editing YouTube subtitles to make them more engaging and clear using various templates, styles, and animations.
Hopefully, you’ve found this article helpful and can now get the SRT files for your favorite YouTube video in a matter of minutes.
Also read:
- [New] Exploring NextGen Videostreaming Platforms
- [New] Methods to Validate YouTube Login
- 2024 Approved Crafting Captivating Intros for Podcasts
- 2024 Approved Premium Online Platforms for Video Intro Creation
- 重要なGmailメールを失わずに保管するための4つのスマートな方法
- Beat the Blackout! A Step-by-Step Fix for Call of Duty: WWII's Screen Issues on PC
- Easy steps to recover deleted pictures from Motorola Edge 40 Pro.
- From Text to Touch: How ChatGPT Transforms the Future of Timepieces
- In 2024, Apply These Techniques to Improve How to Detect Fake GPS Location On OnePlus Nord N30 SE | Dr.fone
- In 2024, Breaking Records Olympics Showcase for Short Tracks
- In 2024, Optimal YouTube Playback Adjusting Speed Settings
- Overcoming USB Data Loss on Windows Platforms
- Title: Google Meet Go Live - Your YouTube Broadcast Companion for 2024
- Author: Joseph
- Created at : 2025-02-19 09:47:14
- Updated at : 2025-02-20 03:30:16
- Link: https://youtube-stream.techidaily.com/google-meet-go-live-your-youtube-broadcast-companion-for-2024/
- License: This work is licensed under CC BY-NC-SA 4.0.