
:max_bytes(150000):strip_icc()/GettyImages-953660514-5b1410543de42300371597a7.jpg)
Expert Tips for Embedding Time Stamp Data on YouTube Videos (Desktop/Mobile) for 2024
Expert Tips for Embedding Time Stamp Data on YouTube Videos (Desktop/Mobile)
How to Add Timestamps on YouTube Video Link?

Richard Bennett
Mar 27, 2024• Proven solutions
It is a well-known fact that internet users have a short interest span, about just eight seconds. This attention span applies to all internet platforms including YouTube. YouTube is the second largest and most visited search engine after Google. It provides users with information through engaging and eye-catchy videos. However, certain videos are longer where only a particular section of the video holds the important information. Viewers tend to skip the long videos and if you do not want this to happen to you, you can link to that specific part on your video adding value for your channel viewers with a link known as the YouTube Timestamp link.
When you have a Timestamp link on your video, you can help your viewers directly reach the specific time in the video. This helps avoid the viewers from losing interest or to search for the key part in your video themselves.
Here in this article, we will explain Timestamp links, how to add Timestamp to YouTube video links, and what are the benefits of Timestamp.
- Part 1: YouTube Timestamp Links Introduction
- Part 2: Adding a Timestamp to YouTube Video Link on Desktop
- Part 3: How to Share Specific Parts of YouTube Video
- part 4: Getting YouTube Timestamp Link on Mobile
- Part 5: FAQ About YouTube Timestamps
Part 1: What is YouTube Timestamp Links
In this fast-paced world where viewers have limited time at hand, YouTube Timestamp links are extremely helpful. These links are anchor text or video hyperlinks found either in the description beneath the video or at the video link end.

The Timestamps links allow you to put a link to a key moment in your YouTube video allowing the viewers and subscribers to view the video at the precise time specified. Your YouTube video maybe half an hour long or maybe your users do not have the time now or forget to later watch your video, but when you add Timestamp to the YouTube link, you provide them ways to get to the content quickly enhancing the user experience.
In addition to this, you can even provide a reference in minutes and hours where necessary. The YouTube Timestamp link acts as a guide that directs viewers to the part of the video, which is most relevant to them without having to watch the entire video.
Part 2: How to Add a Timestamp to YouTube Video Link on Desktop?
In the following section, I will show you how to add timestamp to YouTube video link in several ways.
Use YouTube’s Share Feature
Using YouTube’s share feature is the simplest way to add Timestamp to YouTube videos. Here are easy steps to follow to do this.
- Open the YouTube video on your desktop that you want to share.
- Play the video or navigate the timeline and stop at the key moment you wish to apply the timestamp to.
- Now click on the Share button, a pop-up will appear. Under the URL, you will see a small box indicating Start at. The Timestamp is generated automatically, but you can adjust it.

- Copy the updated URL with Timestamp to share the video or click on the social sharing icons to do so.
- When your viewers click on this URL, the video will begin at the specified Timestamp.
Use the Browser URL to add Timestamp manually
You can add Timestamp manually as well. Follow the step-by-step guide below to add a Timestamp manually.
- Open your YouTube video in a browser on your desktop and then find the URL in the browser’s address bar.
- Enter the specific time you want the viewers to watch the video from at the end of the video URL.
You can add time manually in two ways depending on the URL.
?t=As or
&t=As
“youtu.be/” Format
If your YouTube video link is a youtu.be format, then just add ?t=As at the end of the video link. The A denotes the seconds at which you want the viewer to watch your video. The time can also be specified in minutes and seconds and when you want to do that just add ?t=AmBs. For instance, ?t=2m40s.
“youtube.com/” Format
When your YouTube video link has a youtube.com format, the adjustment starts with an ampersand. &t=As or &t=AmBs is what you can use. If you are looking to add the Timestamp at 2m40s, just add “&t=2m40s at the end of the video URL.
Whenever anybody uses the URL with Timestamp, the video will start from the specified time.
However, when adding a Timestamp manually, always leave include whole numbers. For example, if the time starts at 4m, use 4 and not 04.
Copy video URL at current time
You can use YouTube’s built-in feature to share the key parts of your YouTube video. Follow the steps here.
- Visit YouTube and open the video you want to add Timestamp link to.
- Play the video or navigate the timeline to reach the specific part you like to use in Timestamp.
- Now either press Ctrl + click or right-click anywhere on the video. A pop-up opens where you can see various texts, click on the Copy video URL at current time and share the link.

- Anyone who clicks on this link will be instantly transported to the exact segment of your YouTube video.
Part 3: How to Share Specific Parts of Videos with Vibby and Get YouTube Link with Timestamp
The above-mentioned methods to add and send YouTube link with timestamp are quick and easy, but they have a few limitations. If you need more control and share highlighted parts of YouTube video without cutting the video, you need to use a third-party tool known as Vibby.
Vibby allows you to not only share specific parts of videos from YouTube but other platforms as well like Vimeo and Twitch. With the tool, you can clip multiple sections of the video and share them with others.
- To get started, signup either with mail, Google, Twitter, Facebook, or Twitch account.
- Once signed in, go to Create vib at the top left corner and then paste the URL of the YouTube video you would like to share and then click on the Start button.

- Your video will load in the Vibby editor, now click on Highlight the parts to share.
- Here you will see the Start highlight button, jump 5-sec option, option to switch between HD and SD video quality, and volume control button. Navigate to the part you want to share and click on Start highlight.

- When you reach the end of the part, click on Finish highlight. Repeat the process to highlight multiple parts of the video. All the highlighted parts will appear in a list on the right side of the screen.
- Add a description to each part and format it, you have the option to preview before hitting the Save vib button.
- Name the vib and assign a category and then publish it to Vibby or make it a private vib.
- You get a dedicated link to your vib with the ability to embed it on your website or blog.
In this way, you can share the highlights of the YouTube video or Vimeo video easily.
Part 4: How to Get YouTube Timestamp Link on iPhone and Android?
Linking to specific YouTube Timestamp Link is straightforward on both iPhone and Android.
- Go to YouTube and select the video you want to share.
- Move through the progress bar of the video to reach the key part and click on the Share button.
- A pop-up menu appears, highlight the URL and click on the Copy button.
- Paste the URL and manually add the Timestamp using the steps mentioned in add a Timestamp manually.
Part 5: Is Timestamp Beneficial for your Video?
Timestamping your YouTube videos may decrease the watch time, but it enhances the user experience, and they want to see more of your videos. Apart from this, adding Timestamps to your videos make your videos discoverable through Google search. YouTube and Google will reward you for the videos in form of a high search engine ranking.
Bonus: How to Add YouTube Timestamp Link in YouTube Video Description
Adding a YouTube Timestamp link in your video description is easy. Here are the steps to do so.
- Go to your YouTube channel and select the video you want to add Timestamp to and then navigate to the description below it.
- Edit the description by clicking on the Edit Video button.
- You are redirected to the Video Details page. Here write 0:00 at the first part of the timecode, and then continue with the time of the key part of the video you want to add the Timestamp to in 2:40 format. You can add more Timestamp as well and then click on the Save button.

- Reload the video page and you will see auto-generated Timestamp Links at the specific time you provided in the description.
Note: You need to add at least three timestamps which are 10 seconds or longer in order to add timestamps successfully.
Conclusion
As much as possible YouTubers want to make videos short and to the point. However, if a video needs to be longer, you can still help users navigate through to find what is important to them by adding Timestamp to YouTube link or Timestamp the YouTube descriptions. This can help your viewers jump straight to the interesting part in the video, rather than viewing the entire video saving their time and boost user experience.
Richard Bennett
Richard Bennett is a writer and a lover of all things video.
Follow @Richard Bennett
Richard Bennett
Mar 27, 2024• Proven solutions
It is a well-known fact that internet users have a short interest span, about just eight seconds. This attention span applies to all internet platforms including YouTube. YouTube is the second largest and most visited search engine after Google. It provides users with information through engaging and eye-catchy videos. However, certain videos are longer where only a particular section of the video holds the important information. Viewers tend to skip the long videos and if you do not want this to happen to you, you can link to that specific part on your video adding value for your channel viewers with a link known as the YouTube Timestamp link.
When you have a Timestamp link on your video, you can help your viewers directly reach the specific time in the video. This helps avoid the viewers from losing interest or to search for the key part in your video themselves.
Here in this article, we will explain Timestamp links, how to add Timestamp to YouTube video links, and what are the benefits of Timestamp.
- Part 1: YouTube Timestamp Links Introduction
- Part 2: Adding a Timestamp to YouTube Video Link on Desktop
- Part 3: How to Share Specific Parts of YouTube Video
- part 4: Getting YouTube Timestamp Link on Mobile
- Part 5: FAQ About YouTube Timestamps
Part 1: What is YouTube Timestamp Links
In this fast-paced world where viewers have limited time at hand, YouTube Timestamp links are extremely helpful. These links are anchor text or video hyperlinks found either in the description beneath the video or at the video link end.
The Timestamps links allow you to put a link to a key moment in your YouTube video allowing the viewers and subscribers to view the video at the precise time specified. Your YouTube video maybe half an hour long or maybe your users do not have the time now or forget to later watch your video, but when you add Timestamp to the YouTube link, you provide them ways to get to the content quickly enhancing the user experience.
In addition to this, you can even provide a reference in minutes and hours where necessary. The YouTube Timestamp link acts as a guide that directs viewers to the part of the video, which is most relevant to them without having to watch the entire video.
Part 2: How to Add a Timestamp to YouTube Video Link on Desktop?
In the following section, I will show you how to add timestamp to YouTube video link in several ways.
Use YouTube’s Share Feature
Using YouTube’s share feature is the simplest way to add Timestamp to YouTube videos. Here are easy steps to follow to do this.
- Open the YouTube video on your desktop that you want to share.
- Play the video or navigate the timeline and stop at the key moment you wish to apply the timestamp to.
- Now click on the Share button, a pop-up will appear. Under the URL, you will see a small box indicating Start at. The Timestamp is generated automatically, but you can adjust it.
- Copy the updated URL with Timestamp to share the video or click on the social sharing icons to do so.
- When your viewers click on this URL, the video will begin at the specified Timestamp.
Use the Browser URL to add Timestamp manually
You can add Timestamp manually as well. Follow the step-by-step guide below to add a Timestamp manually.
- Open your YouTube video in a browser on your desktop and then find the URL in the browser’s address bar.
- Enter the specific time you want the viewers to watch the video from at the end of the video URL.
You can add time manually in two ways depending on the URL.
?t=As or
&t=As
“youtu.be/” Format
If your YouTube video link is a youtu.be format, then just add ?t=As at the end of the video link. The A denotes the seconds at which you want the viewer to watch your video. The time can also be specified in minutes and seconds and when you want to do that just add ?t=AmBs. For instance, ?t=2m40s.
“youtube.com/” Format
When your YouTube video link has a youtube.com format, the adjustment starts with an ampersand. &t=As or &t=AmBs is what you can use. If you are looking to add the Timestamp at 2m40s, just add “&t=2m40s at the end of the video URL.
Whenever anybody uses the URL with Timestamp, the video will start from the specified time.
However, when adding a Timestamp manually, always leave include whole numbers. For example, if the time starts at 4m, use 4 and not 04.
Copy video URL at current time
You can use YouTube’s built-in feature to share the key parts of your YouTube video. Follow the steps here.
- Visit YouTube and open the video you want to add Timestamp link to.
- Play the video or navigate the timeline to reach the specific part you like to use in Timestamp.
- Now either press Ctrl + click or right-click anywhere on the video. A pop-up opens where you can see various texts, click on the Copy video URL at current time and share the link.
- Anyone who clicks on this link will be instantly transported to the exact segment of your YouTube video.
Part 3: How to Share Specific Parts of Videos with Vibby and Get YouTube Link with Timestamp
The above-mentioned methods to add and send YouTube link with timestamp are quick and easy, but they have a few limitations. If you need more control and share highlighted parts of YouTube video without cutting the video, you need to use a third-party tool known as Vibby.
Vibby allows you to not only share specific parts of videos from YouTube but other platforms as well like Vimeo and Twitch. With the tool, you can clip multiple sections of the video and share them with others.
- To get started, signup either with mail, Google, Twitter, Facebook, or Twitch account.
- Once signed in, go to Create vib at the top left corner and then paste the URL of the YouTube video you would like to share and then click on the Start button.
- Your video will load in the Vibby editor, now click on Highlight the parts to share.
- Here you will see the Start highlight button, jump 5-sec option, option to switch between HD and SD video quality, and volume control button. Navigate to the part you want to share and click on Start highlight.
- When you reach the end of the part, click on Finish highlight. Repeat the process to highlight multiple parts of the video. All the highlighted parts will appear in a list on the right side of the screen.
- Add a description to each part and format it, you have the option to preview before hitting the Save vib button.
- Name the vib and assign a category and then publish it to Vibby or make it a private vib.
- You get a dedicated link to your vib with the ability to embed it on your website or blog.
In this way, you can share the highlights of the YouTube video or Vimeo video easily.
Part 4: How to Get YouTube Timestamp Link on iPhone and Android?
Linking to specific YouTube Timestamp Link is straightforward on both iPhone and Android.
- Go to YouTube and select the video you want to share.
- Move through the progress bar of the video to reach the key part and click on the Share button.
- A pop-up menu appears, highlight the URL and click on the Copy button.
- Paste the URL and manually add the Timestamp using the steps mentioned in add a Timestamp manually.
Part 5: Is Timestamp Beneficial for your Video?
Timestamping your YouTube videos may decrease the watch time, but it enhances the user experience, and they want to see more of your videos. Apart from this, adding Timestamps to your videos make your videos discoverable through Google search. YouTube and Google will reward you for the videos in form of a high search engine ranking.
Bonus: How to Add YouTube Timestamp Link in YouTube Video Description
Adding a YouTube Timestamp link in your video description is easy. Here are the steps to do so.
- Go to your YouTube channel and select the video you want to add Timestamp to and then navigate to the description below it.
- Edit the description by clicking on the Edit Video button.
- You are redirected to the Video Details page. Here write 0:00 at the first part of the timecode, and then continue with the time of the key part of the video you want to add the Timestamp to in 2:40 format. You can add more Timestamp as well and then click on the Save button.
- Reload the video page and you will see auto-generated Timestamp Links at the specific time you provided in the description.
Note: You need to add at least three timestamps which are 10 seconds or longer in order to add timestamps successfully.
Conclusion
As much as possible YouTubers want to make videos short and to the point. However, if a video needs to be longer, you can still help users navigate through to find what is important to them by adding Timestamp to YouTube link or Timestamp the YouTube descriptions. This can help your viewers jump straight to the interesting part in the video, rather than viewing the entire video saving their time and boost user experience.
Richard Bennett
Richard Bennett is a writer and a lover of all things video.
Follow @Richard Bennett
Top 12 Vlogger-Friendly Cameras Unveiled
Best Cameras for Vlogging

Liza Brown
Jan 10, 2024• Proven solutions
It can be challenging to make a decision on purchasing a camera when there’s just so many on the market. Camera manufacturers are racing to update their product line with all the new camera technology advancements. To simplify your search for the ultimate vlogging camera, we’ve come up with a top twelve list.
If you’re looking for a specific type of vlogging camera, check out our other posts on vlogging cameras:
Top 11 Cheap Vlogging Cameras (2024)
7 Best DSLR Cameras For Vlogging (2024)
8 Best Mirrorless Cameras For Vlogging (2024)
12 Best Vlogging Cameras With A Flip Screen (2024)
WHAT TO LOOK FOR IN A VLOGGING CAMERA
1. Fully articulated screen (flip screen)
2. Good continual autofocus while recording video
3. Good focus priority through face recognition
4. Touch to focus
5. Good low-light performance
6. external mic jack, hot/cold shoe bracket
7. optical image stabilization
8. good battery life
Check out my full list of 10 Things To Look For In A Vlogging Camera to understand the importance of these camera features.
12 BEST VLOGGING CAMERAS (2024)
| Camera | Release Date | Camera Type | Flip Screen | Mic Port | Price | |
|---|---|---|---|---|---|---|
| CanonEOSM50 |  |
February2018 | Mirrorless | Fully Articulated | Yes | $- |
| PanasonicLumixDC-GH5S | 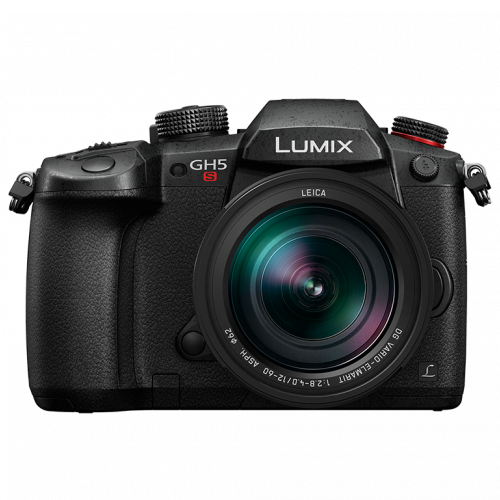 |
January2018 | Mirrorless | Fully Articulated | Yes | $$$ |
| SonyAlphaa7R III | 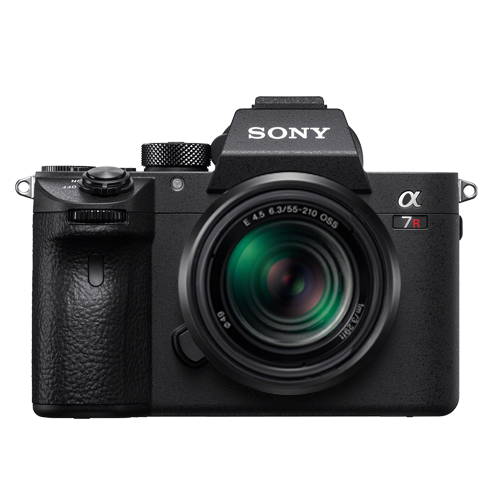 |
October2017 | Mirrorless | Tilting | Yes | $$$ |
| CanonEOSM100 | 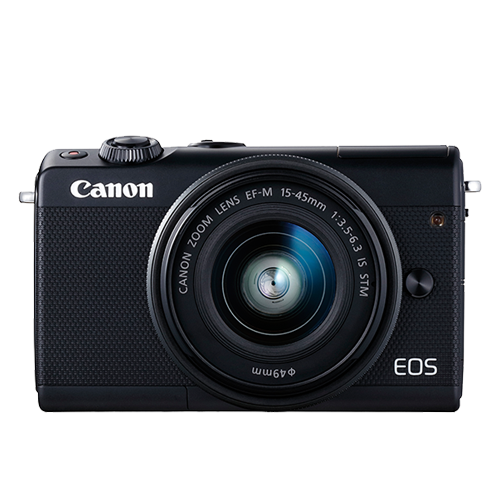 |
August2017 | Mirrorless | Flip Up | No | $ |
| CanonEOS6D Mark II | 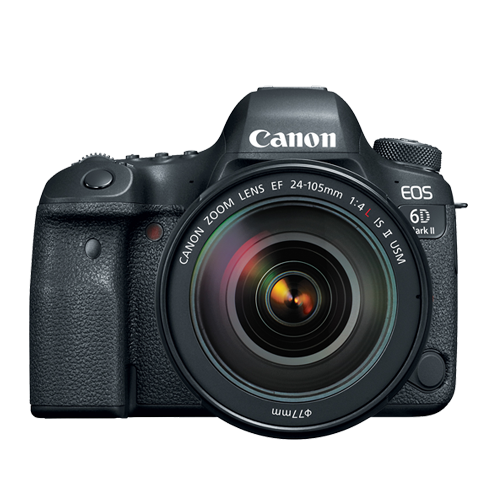 |
June2017 | Mid-size SLR | Fully Articulated | Yes | $$ |
| CanonEOS RebelSL2 | 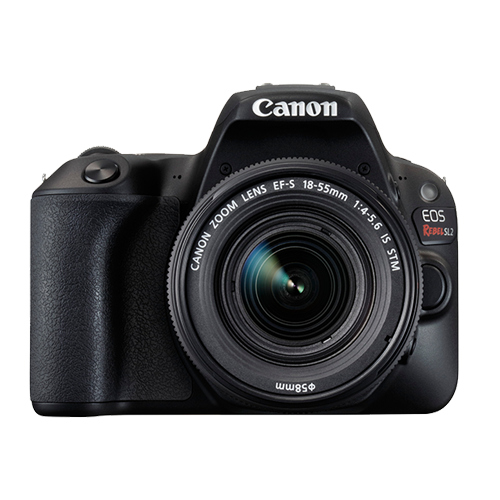 |
June2017 | Compact SLR | Fully Articulated | Yes | $ |
| CanonEOSM6 | 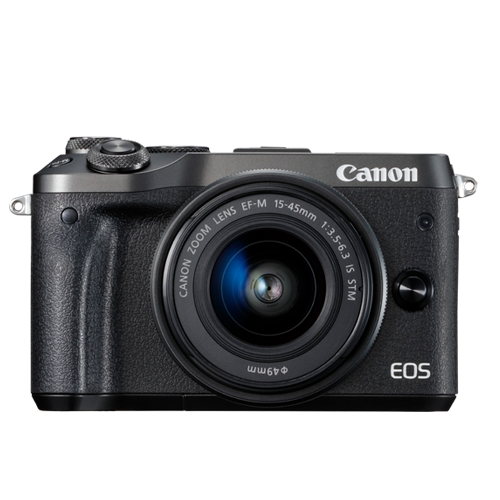 |
February2017 | Mirrorless | Flip Up | Yes | $ |
| SonyCyber-Shot DSCRX 100 V | 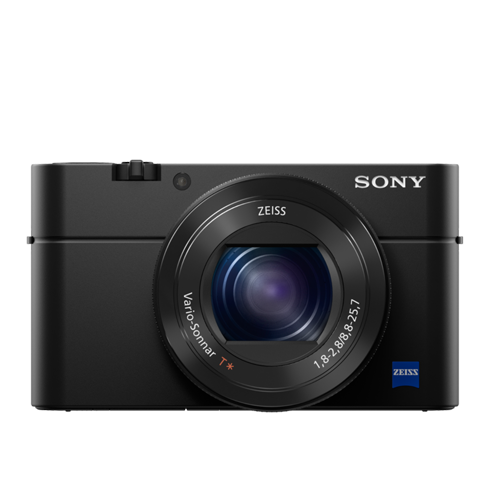 |
October2016 | Compact | Flip Up | No | $- |
| SonyAlphaa6500 | 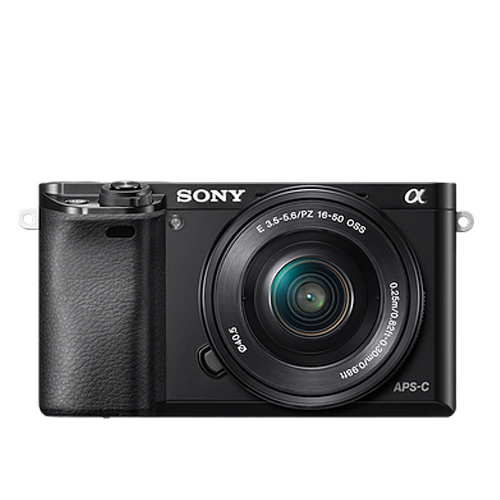 |
October2016 | Mirrorless | Tilting | Yes | $$- |
| PanasonicLumix DMCLX10 | 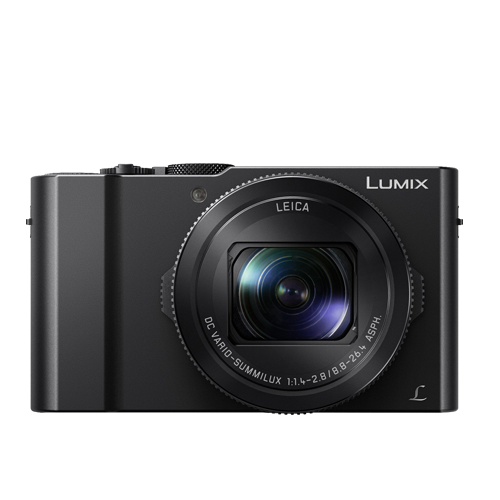 |
September2016 | Compact | Flip Up | No | $ |
| CanonEOS80D | 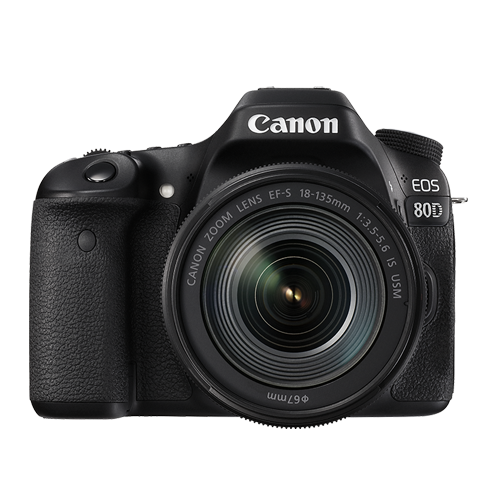 |
February2016 | Mid-size SLR | Fully Articulated | Yes | $$ |
| CanonPowerShotG7 X Mark II | 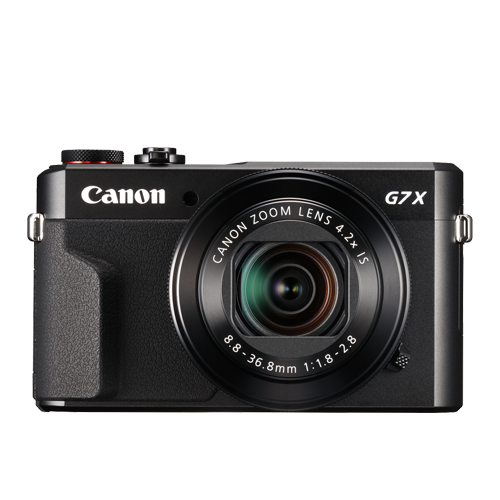 |
February2016 | Compact | Flip Up | No | $ |
At first, you can have a look at the below video.
What Gear Do Creators Actually Use | Vidcon 2023 | Sony vs Canon
|
Best daily vlogging camera: Sony Cyber-Shot DSC-RX 100 V You don’t have to be a filmmaking pro if you want to use a compact camera to record all sorts of videos. Sony’s Cyber-shot series is famous for its cutting-edge features and the DSC-RX 100 V model is not an exception. This camera is equipped with a 20.1 MP Exmor RS BSI CMOS Sensor that supports ISO sensitivities up to ISO 12800. You can record footage in UHD 4K at 30 or 24 fps, although with a five-minute limit, as well as Full HD videos at a maximum of 960 fps when recording in the HFR mode. The Sony Cyber-shot DSC-RX 100 V ships with a non-interchangeable Carl Zeiss Vario Sonnar T lens that performs well under low-light conditions and in broad daylight. The camera features a fast hybrid AF system with 315 phase-detection points and an anti-motion blur mode that allows you to keep the subjects of your vlogs in focus throughout your recording. DSC RX-100 V’s multi-functionality makes it one of the best cameras for daily vlogging, especially for vloggers who are planning on shooting vlogs in various locations. PROS - Light and easy to carry around - Produces high-res videos CONS - Short battery life - Lacking a touchscreen |
|---|---|
|
Best cheap vlogging camera: Canon EOS M100 Canon’s EOS M100 is small and powerful. This mirrorless camera produces full HD videos at 60 fps. It doesn’t, however, shoot 4K footage. The 24.2 MP APS-C CMOS sensor and the DIGIC 7 image processor ensure that your vlogs are always in focus and rich in detail. The Canon EOS M100 provides great ISO sensitivity options, offering ISO values as high as 25600, making it a great option for vloggers that often shoot their videos under difficult light conditions. The 3-inch touchscreen LCD lets you control focus points, navigate through the camera’s menu, or watch videos you’ve created. The screen can also be tilted in the upward direction to provide you a better preview of the shot you’re recording. The camera has a built-in Wi-Fi with NFC so you can transfer your videos seamlessly to a computer and have fun in the process. The Canon EOS M100 is currently one of the best entry-level cameras for daily vlogging on the market because it produces videos in great picture quality that you don’t have to spend a fortune for. PROS - Affordable - Great connectivity options CONS - Lacks advanced video recording features - No viewfinder |
|
Best entry-level mirrorless camera for vlogging: Canon EOS M100 The Canon EOS M100 wins this category as well in our books because it’s a powerful, feature-rich camera that’s also very affordable. In case you missed it, check out my review on the Canon EOS M100. |
|
Best mid-range mirrorless camera for vlogging: Canon EOS M50 The EOS M50 has been on the market for just a few months and it is already regarded as one of the best mirrorless cameras for vlogging. Its 24.1 MP APS-C CMOS sensor and DIGIC 8 Image Processor are improved versions of those in the Canon EOS M100 model. With the Canon EOS M50, you can crank up the ISO sensitivity to 51200. This camera uses the Canon EF lens mount, so you can choose the lens that best suits your needs. The Canon EOS M50 can capture UHD 4K videos at 23.98 fps, and it also lets you record 120 fps slow-motion videos at 720p. PROS - Has an external microphone port - Has a 2.36m-dot OLED electronic viewfinder CONS - No image stabilization - Battery life could be longer |
|
Best professional mirrorless camera for vlogging: Panasonic Lumix DC-GH5S The Panasonic’s GH series was made famous by the LUMIX DMC-GH4 model that will be remembered as the world’s first mirrorless interchangeable lens camera to offer the 4K video recording option. That’s why it comes as no surprise that the GH5S mirrorless micro four-thirds camera can record UHD 4K as well as DCI videos at 60 fps, and 150 Mbps. The full HD 1080p at 240 fps video recording option is also available if you want to capture slow-motion footage for your vlogs. The camera’s 10.28MP multi-aspect ratio MOS sensor enhances its low-light performance and produces high-quality videos even under very challenging lighting conditions. Recording the audio with an external microphone is one of the many advantages offered by the Lumix DC-GH5S, while the Advanced Depth-From-Focus technology is used to automatically focus the video in a fraction of a second. The GH5S’ touchscreen can be rotated in any direction, so you can clearly see your shot no matter where you are. There’s very little doubt that the GH5S is the best professional-level mirrorless camera for vlogging that will help you capture stunning vlogs. PROS - ISO sensitivity goes up to 204800 - High video bit rates CONS - Expensive - The camera body weighs about 1.5 lbs |
|
Best entry-level DSLR camera for vlogging: Canon EOS SL2 The Canon EOS Rebel SL2 is a great entry-level vlogging camera that delivers great power at a low price. The Canon EOS Rebel SL2 has a DIGIC 7 image processor and a 24.2 MP APS-C CMOS sensor that lets you extend the ISO value to 51200 and shoot your vlogs even under low light conditions. This camera can capture full HD 1080p videos at 60 fps, and it features a 9-point AF system and dual pixel CMOS AF technologies that provide precise and quick focusing even when there is not much light. The SL2 also has a microphone jack you can connect an external microphone too for better audio. PROS - Microphone jack - Wi-Fi connectivity CONS - No 4K video support - Optical image stabilizer could be better |
|
Best mid-range DSLR camera for vlogging: Canon EOS 80D The Canon EOS 80D is a feature-rich, mid-range DSLR camera great for vlogging. The 80D lets you capture full HD 1080p videos at 60 fps. It doesn’t provide support for 4K videos, though. The ISO on this camera can be set up to 25600. The 24.2 MP APS-C CMOS sensor and the DIGIC 6 image processor reduce the need for high ISO values, though, as they enable the camera to capture visually stunning footage even when the light in the shot is far from perfect. The 80D’s 45-point all cross phase detection autofocus system and its dual pixel CMOS AF system enable you to produce sharp images without having to pull-focus yourself. The various-angle 3-inch 1.04M-dot ClearView II LCD touchscreen display, as well as the pentaprism type intelligent viewfinder, let you compose shots effortlessly. PROS - Feature-rich - Continuous AF feature performs beautifully while recording high-res videos CONS - Just one SD card slot - PC sync connection features could be better |
|
Best professional DSLR camera for vlogging: Canon 6D Mark II The Canon EOS 6D Mark II is the best professional DSLR camera for vlogging. It is the only DSLR camera on the market (as of writing this review) that comes with a full-frame sensor along with a fully-articulated screen and a microphone jack. The camera’s 26.2 MP full-frame CMOS sensor can take in much more light, giving you the option to shoot with higher quality bokeh (unfocused areas appearing more blurry) and find focus much more quickly and accurately in more challenging lighting conditions. With this camera, you can shoot up to full HD 1080p videos at a maximum of 60 fps. Although the 6D Mark II comes with the same 45-point all cross-type autofocusing system as Canon’s crop sensor 80D camera, the 6D Mark II is equipped with the improved DIGIC 7 image processor unlike the 80D’s DIGIC 6 image processor. If you’re wanting to shoot your vlogs with a full-frame, The 6D Mark II is a great option. PROS - ISO sensitivity goes up to 102400 - Amazing touchscreen controls CONS - No 4K video recording option - No USB 3.0 |
Liza Brown
Liza Brown is a writer and a lover of all things video.
Follow @Liza Brown
Liza Brown
Jan 10, 2024• Proven solutions
It can be challenging to make a decision on purchasing a camera when there’s just so many on the market. Camera manufacturers are racing to update their product line with all the new camera technology advancements. To simplify your search for the ultimate vlogging camera, we’ve come up with a top twelve list.
If you’re looking for a specific type of vlogging camera, check out our other posts on vlogging cameras:
Top 11 Cheap Vlogging Cameras (2024)
7 Best DSLR Cameras For Vlogging (2024)
8 Best Mirrorless Cameras For Vlogging (2024)
12 Best Vlogging Cameras With A Flip Screen (2024)
WHAT TO LOOK FOR IN A VLOGGING CAMERA
1. Fully articulated screen (flip screen)
2. Good continual autofocus while recording video
3. Good focus priority through face recognition
4. Touch to focus
5. Good low-light performance
6. external mic jack, hot/cold shoe bracket
7. optical image stabilization
8. good battery life
Check out my full list of 10 Things To Look For In A Vlogging Camera to understand the importance of these camera features.
12 BEST VLOGGING CAMERAS (2024)
| Camera | Release Date | Camera Type | Flip Screen | Mic Port | Price | |
|---|---|---|---|---|---|---|
| CanonEOSM50 | |
February2018 | Mirrorless | Fully Articulated | Yes | $- |
| PanasonicLumixDC-GH5S | |
January2018 | Mirrorless | Fully Articulated | Yes | $$$ |
| SonyAlphaa7R III | |
October2017 | Mirrorless | Tilting | Yes | $$$ |
| CanonEOSM100 | |
August2017 | Mirrorless | Flip Up | No | $ |
| CanonEOS6D Mark II | |
June2017 | Mid-size SLR | Fully Articulated | Yes | $$ |
| CanonEOS RebelSL2 | |
June2017 | Compact SLR | Fully Articulated | Yes | $ |
| CanonEOSM6 | |
February2017 | Mirrorless | Flip Up | Yes | $ |
| SonyCyber-Shot DSCRX 100 V | |
October2016 | Compact | Flip Up | No | $- |
| SonyAlphaa6500 | |
October2016 | Mirrorless | Tilting | Yes | $$- |
| PanasonicLumix DMCLX10 | |
September2016 | Compact | Flip Up | No | $ |
| CanonEOS80D | |
February2016 | Mid-size SLR | Fully Articulated | Yes | $$ |
| CanonPowerShotG7 X Mark II | |
February2016 | Compact | Flip Up | No | $ |
At first, you can have a look at the below video.
What Gear Do Creators Actually Use | Vidcon 2023 | Sony vs Canon
|
Best daily vlogging camera: Sony Cyber-Shot DSC-RX 100 V You don’t have to be a filmmaking pro if you want to use a compact camera to record all sorts of videos. Sony’s Cyber-shot series is famous for its cutting-edge features and the DSC-RX 100 V model is not an exception. This camera is equipped with a 20.1 MP Exmor RS BSI CMOS Sensor that supports ISO sensitivities up to ISO 12800. You can record footage in UHD 4K at 30 or 24 fps, although with a five-minute limit, as well as Full HD videos at a maximum of 960 fps when recording in the HFR mode. The Sony Cyber-shot DSC-RX 100 V ships with a non-interchangeable Carl Zeiss Vario Sonnar T lens that performs well under low-light conditions and in broad daylight. The camera features a fast hybrid AF system with 315 phase-detection points and an anti-motion blur mode that allows you to keep the subjects of your vlogs in focus throughout your recording. DSC RX-100 V’s multi-functionality makes it one of the best cameras for daily vlogging, especially for vloggers who are planning on shooting vlogs in various locations. PROS - Light and easy to carry around - Produces high-res videos CONS - Short battery life - Lacking a touchscreen |
|---|---|
|
Best cheap vlogging camera: Canon EOS M100 Canon’s EOS M100 is small and powerful. This mirrorless camera produces full HD videos at 60 fps. It doesn’t, however, shoot 4K footage. The 24.2 MP APS-C CMOS sensor and the DIGIC 7 image processor ensure that your vlogs are always in focus and rich in detail. The Canon EOS M100 provides great ISO sensitivity options, offering ISO values as high as 25600, making it a great option for vloggers that often shoot their videos under difficult light conditions. The 3-inch touchscreen LCD lets you control focus points, navigate through the camera’s menu, or watch videos you’ve created. The screen can also be tilted in the upward direction to provide you a better preview of the shot you’re recording. The camera has a built-in Wi-Fi with NFC so you can transfer your videos seamlessly to a computer and have fun in the process. The Canon EOS M100 is currently one of the best entry-level cameras for daily vlogging on the market because it produces videos in great picture quality that you don’t have to spend a fortune for. PROS - Affordable - Great connectivity options CONS - Lacks advanced video recording features - No viewfinder |
|
Best entry-level mirrorless camera for vlogging: Canon EOS M100 The Canon EOS M100 wins this category as well in our books because it’s a powerful, feature-rich camera that’s also very affordable. In case you missed it, check out my review on the Canon EOS M100. |
|
Best mid-range mirrorless camera for vlogging: Canon EOS M50 The EOS M50 has been on the market for just a few months and it is already regarded as one of the best mirrorless cameras for vlogging. Its 24.1 MP APS-C CMOS sensor and DIGIC 8 Image Processor are improved versions of those in the Canon EOS M100 model. With the Canon EOS M50, you can crank up the ISO sensitivity to 51200. This camera uses the Canon EF lens mount, so you can choose the lens that best suits your needs. The Canon EOS M50 can capture UHD 4K videos at 23.98 fps, and it also lets you record 120 fps slow-motion videos at 720p. PROS - Has an external microphone port - Has a 2.36m-dot OLED electronic viewfinder CONS - No image stabilization - Battery life could be longer |
|
Best professional mirrorless camera for vlogging: Panasonic Lumix DC-GH5S The Panasonic’s GH series was made famous by the LUMIX DMC-GH4 model that will be remembered as the world’s first mirrorless interchangeable lens camera to offer the 4K video recording option. That’s why it comes as no surprise that the GH5S mirrorless micro four-thirds camera can record UHD 4K as well as DCI videos at 60 fps, and 150 Mbps. The full HD 1080p at 240 fps video recording option is also available if you want to capture slow-motion footage for your vlogs. The camera’s 10.28MP multi-aspect ratio MOS sensor enhances its low-light performance and produces high-quality videos even under very challenging lighting conditions. Recording the audio with an external microphone is one of the many advantages offered by the Lumix DC-GH5S, while the Advanced Depth-From-Focus technology is used to automatically focus the video in a fraction of a second. The GH5S’ touchscreen can be rotated in any direction, so you can clearly see your shot no matter where you are. There’s very little doubt that the GH5S is the best professional-level mirrorless camera for vlogging that will help you capture stunning vlogs. PROS - ISO sensitivity goes up to 204800 - High video bit rates CONS - Expensive - The camera body weighs about 1.5 lbs |
|
Best entry-level DSLR camera for vlogging: Canon EOS SL2 The Canon EOS Rebel SL2 is a great entry-level vlogging camera that delivers great power at a low price. The Canon EOS Rebel SL2 has a DIGIC 7 image processor and a 24.2 MP APS-C CMOS sensor that lets you extend the ISO value to 51200 and shoot your vlogs even under low light conditions. This camera can capture full HD 1080p videos at 60 fps, and it features a 9-point AF system and dual pixel CMOS AF technologies that provide precise and quick focusing even when there is not much light. The SL2 also has a microphone jack you can connect an external microphone too for better audio. PROS - Microphone jack - Wi-Fi connectivity CONS - No 4K video support - Optical image stabilizer could be better |
|
Best mid-range DSLR camera for vlogging: Canon EOS 80D The Canon EOS 80D is a feature-rich, mid-range DSLR camera great for vlogging. The 80D lets you capture full HD 1080p videos at 60 fps. It doesn’t provide support for 4K videos, though. The ISO on this camera can be set up to 25600. The 24.2 MP APS-C CMOS sensor and the DIGIC 6 image processor reduce the need for high ISO values, though, as they enable the camera to capture visually stunning footage even when the light in the shot is far from perfect. The 80D’s 45-point all cross phase detection autofocus system and its dual pixel CMOS AF system enable you to produce sharp images without having to pull-focus yourself. The various-angle 3-inch 1.04M-dot ClearView II LCD touchscreen display, as well as the pentaprism type intelligent viewfinder, let you compose shots effortlessly. PROS - Feature-rich - Continuous AF feature performs beautifully while recording high-res videos CONS - Just one SD card slot - PC sync connection features could be better |
|
Best professional DSLR camera for vlogging: Canon 6D Mark II The Canon EOS 6D Mark II is the best professional DSLR camera for vlogging. It is the only DSLR camera on the market (as of writing this review) that comes with a full-frame sensor along with a fully-articulated screen and a microphone jack. The camera’s 26.2 MP full-frame CMOS sensor can take in much more light, giving you the option to shoot with higher quality bokeh (unfocused areas appearing more blurry) and find focus much more quickly and accurately in more challenging lighting conditions. With this camera, you can shoot up to full HD 1080p videos at a maximum of 60 fps. Although the 6D Mark II comes with the same 45-point all cross-type autofocusing system as Canon’s crop sensor 80D camera, the 6D Mark II is equipped with the improved DIGIC 7 image processor unlike the 80D’s DIGIC 6 image processor. If you’re wanting to shoot your vlogs with a full-frame, The 6D Mark II is a great option. PROS - ISO sensitivity goes up to 102400 - Amazing touchscreen controls CONS - No 4K video recording option - No USB 3.0 |
Liza Brown
Liza Brown is a writer and a lover of all things video.
Follow @Liza Brown
- Title: Expert Tips for Embedding Time Stamp Data on YouTube Videos (Desktop/Mobile) for 2024
- Author: Joseph
- Created at : 2024-05-31 13:46:47
- Updated at : 2024-06-01 13:46:47
- Link: https://youtube-stream.techidaily.com/expert-tips-for-embedding-time-stamp-data-on-youtube-videos-desktopmobile-for-2024/
- License: This work is licensed under CC BY-NC-SA 4.0.
