
"2024 Approved Setting Up Personalized Video Shots on YouTube"
Setting Up Personalized Video Shots on YouTube
4 Ways To Set Up Your Talking-Head Shots For YouTube

Richard Bennett
Oct 26, 2023• Proven solutions
A big part of being a YouTuber involves talking to the camera. How you set up your talking-head shot depends on many factors, including how much space you have, what kind of look you’re going for, and how many people you want to fit in one frame. Here are four ways to set up your talking-head shots for YouTube.
| Table of Contents 1. Close Quarters Wide-Angle Vlog Set-Up2. Medium Vlog Set-Up3. Two Person Vlog Set-Up4. Long Teleprompter Vlog Set-Up |
|---|
How to Set Up Your Talking Heads Shots for YouTube Video [Infographic]
We’ve summarized the key points about setting up talking head style video shots with the Infographic below. It is welcomed to share on social media.

How to Set Up Your Talking-Head Shots for YouTube [4 Ways]
1. Close Quarters Wide-Angle Vlog Set-Up
Don’t have a lot of space to set up your camera and lighting equipment? No problem! You can be within an arm’s length away from your camera with a close quarters wide-angle vlog set-up.
With this set-up, you’re going to need a camera with a wide-angle lens, a tripod, a camera-mounted shotgun mic for sound, and a ring light for light.
Set your camera on the tripod and mount the shotgun mic directly on the camera shoe (the electronic bracket on the top of the camera). Inside the circular space of your ring light, position your camera right in the middle of it so that you can shoot your video through it without getting any part of the lighting equipment in your shot.
In the video above, Sean Cannell demonstrates this set-up. As you can see from this example, the wide-angle lens is able to squeeze in a lot of what’s in front of the camera into the shot.
Objects and people that just make it into the sides of the frame will appear more stretched out as the wide-angle causes distortion and enhances perspectives.
If you look closely into Sean’s eyes, you can also see a specular highlight in the shape of a circle. Many people like the way eyes look against a ring light.
2. Medium Vlog Set-Up
If you have more space and want to shoot a more professional-looking talking-head shot with more realistic perspectives, a medium vlog set-up may be a better alternative for you.
For this set-up, you’ll be using a slightly longer standard/normal lens (like a 35mm or a 50mm lens) attached to your camera which would be set on a tripod. Since this longer lens will show less of the surrounding areas as it “zooms” closer into whatever is in front, you will need to sit further back, away from your camera.
Now that you’re further away from your camera, a camera-mounted shotgun mic may not be the best mic for you. For better sound recording, you’ll need a shotgun mic fixed on a mic stand that is set up like a boom mic, positioned just outside of your camera frame.
At the 39 second mark of the above video, electronic music producer deadmau5 is positioned right in the center of this particular set-up.
You can see from how even the background and couch looks across the entire camera frame that there is no distortion or enhanced perspective.
It appears that, to the right of deadmau5 (camera left), there is a key light and to his left (camera right) there may be a fill light for additional lighting. Behind the couch, there’s also a background uplight to create depth between the subject and the background. At the 1:30 mark of this trailer video, you can briefly see how the Masterclass camera crew set up their shot.
3. Two Person Vlog Set-Up
If your talking-head shot has got to include two people, you can use a similar set-up as the medium vlog set-up detailed above.
If you look back at the 39-second mark of deadmau5’s Masterclass trailer, you can see that there’s a lot of space to the left and right of deadmau5. Now imagine the same shot but with two people.
With two people, though, you’ll want to set up your mic slightly differently. Rather than using a directional shotgun mic with a narrow area of sensitivity, you’ll want to use a directional mic with a wider area of sensitivity.
4. Long Teleprompter Vlog Set-Up
If you want to read over a script but still make it appear like you’re looking straight into the camera, you’ll need to use a long teleprompter vlog set-up.
For this set-up, you’ll need all the same equipment as the medium vlog set-up, but you’ll additionally need a teleprompter placed in front of your camera equipped with a long telephoto lens.
You will have to sit much further back away from your camera for two main reasons. Firstly, you want to be able to fit yourself in your much more zoomed-in camera frame (effect of the long telephoto lens). Secondly, you want to be far enough that the camera cannot detect your eyes reading from left to right. You’ll want to be around six meters away from a 17” teleprompter monitor or around four meters away from a 10” teleprompter monitor.
In the above video, Jared Polin uses a long teleprompter vlog set-up.
In the video, he says there’s about 8 feet (2.4 meters) between himself and his lens. At the 1:15 mark of his video, Jared demonstrates how this set-up works.
It is difficult to know whether the movement in his eyes is caused by not being far enough from the lens or from his horizontal nystagmus condition in his eyes.
Looking to find the right lights for your video recording set? Check out our Top 17 Video Lighting Equipment For YouTubers .
Tips for Making a Talking Head Video Better
To make a talking-head video more interesting, you can add some background music to the video, apply some interesting texts or elements. Filmora has built-in royalty-free music tracks and sound effects as well as text templates , filters and motivating elements. Download the free trial version below and release your creativity.


Richard Bennett
Richard Bennett is a writer and a lover of all things video.
Follow @Richard Bennett
Richard Bennett
Oct 26, 2023• Proven solutions
A big part of being a YouTuber involves talking to the camera. How you set up your talking-head shot depends on many factors, including how much space you have, what kind of look you’re going for, and how many people you want to fit in one frame. Here are four ways to set up your talking-head shots for YouTube.
| Table of Contents 1. Close Quarters Wide-Angle Vlog Set-Up2. Medium Vlog Set-Up3. Two Person Vlog Set-Up4. Long Teleprompter Vlog Set-Up |
|---|
How to Set Up Your Talking Heads Shots for YouTube Video [Infographic]
We’ve summarized the key points about setting up talking head style video shots with the Infographic below. It is welcomed to share on social media.
How to Set Up Your Talking-Head Shots for YouTube [4 Ways]
1. Close Quarters Wide-Angle Vlog Set-Up
Don’t have a lot of space to set up your camera and lighting equipment? No problem! You can be within an arm’s length away from your camera with a close quarters wide-angle vlog set-up.
With this set-up, you’re going to need a camera with a wide-angle lens, a tripod, a camera-mounted shotgun mic for sound, and a ring light for light.
Set your camera on the tripod and mount the shotgun mic directly on the camera shoe (the electronic bracket on the top of the camera). Inside the circular space of your ring light, position your camera right in the middle of it so that you can shoot your video through it without getting any part of the lighting equipment in your shot.
In the video above, Sean Cannell demonstrates this set-up. As you can see from this example, the wide-angle lens is able to squeeze in a lot of what’s in front of the camera into the shot.
Objects and people that just make it into the sides of the frame will appear more stretched out as the wide-angle causes distortion and enhances perspectives.
If you look closely into Sean’s eyes, you can also see a specular highlight in the shape of a circle. Many people like the way eyes look against a ring light.
2. Medium Vlog Set-Up
If you have more space and want to shoot a more professional-looking talking-head shot with more realistic perspectives, a medium vlog set-up may be a better alternative for you.
For this set-up, you’ll be using a slightly longer standard/normal lens (like a 35mm or a 50mm lens) attached to your camera which would be set on a tripod. Since this longer lens will show less of the surrounding areas as it “zooms” closer into whatever is in front, you will need to sit further back, away from your camera.
Now that you’re further away from your camera, a camera-mounted shotgun mic may not be the best mic for you. For better sound recording, you’ll need a shotgun mic fixed on a mic stand that is set up like a boom mic, positioned just outside of your camera frame.
At the 39 second mark of the above video, electronic music producer deadmau5 is positioned right in the center of this particular set-up.
You can see from how even the background and couch looks across the entire camera frame that there is no distortion or enhanced perspective.
It appears that, to the right of deadmau5 (camera left), there is a key light and to his left (camera right) there may be a fill light for additional lighting. Behind the couch, there’s also a background uplight to create depth between the subject and the background. At the 1:30 mark of this trailer video, you can briefly see how the Masterclass camera crew set up their shot.
3. Two Person Vlog Set-Up
If your talking-head shot has got to include two people, you can use a similar set-up as the medium vlog set-up detailed above.
If you look back at the 39-second mark of deadmau5’s Masterclass trailer, you can see that there’s a lot of space to the left and right of deadmau5. Now imagine the same shot but with two people.
With two people, though, you’ll want to set up your mic slightly differently. Rather than using a directional shotgun mic with a narrow area of sensitivity, you’ll want to use a directional mic with a wider area of sensitivity.
4. Long Teleprompter Vlog Set-Up
If you want to read over a script but still make it appear like you’re looking straight into the camera, you’ll need to use a long teleprompter vlog set-up.
For this set-up, you’ll need all the same equipment as the medium vlog set-up, but you’ll additionally need a teleprompter placed in front of your camera equipped with a long telephoto lens.
You will have to sit much further back away from your camera for two main reasons. Firstly, you want to be able to fit yourself in your much more zoomed-in camera frame (effect of the long telephoto lens). Secondly, you want to be far enough that the camera cannot detect your eyes reading from left to right. You’ll want to be around six meters away from a 17” teleprompter monitor or around four meters away from a 10” teleprompter monitor.
In the above video, Jared Polin uses a long teleprompter vlog set-up.
In the video, he says there’s about 8 feet (2.4 meters) between himself and his lens. At the 1:15 mark of his video, Jared demonstrates how this set-up works.
It is difficult to know whether the movement in his eyes is caused by not being far enough from the lens or from his horizontal nystagmus condition in his eyes.
Looking to find the right lights for your video recording set? Check out our Top 17 Video Lighting Equipment For YouTubers .
Tips for Making a Talking Head Video Better
To make a talking-head video more interesting, you can add some background music to the video, apply some interesting texts or elements. Filmora has built-in royalty-free music tracks and sound effects as well as text templates , filters and motivating elements. Download the free trial version below and release your creativity.
Richard Bennett
Richard Bennett is a writer and a lover of all things video.
Follow @Richard Bennett
Mastering YouTube Channel Aesthetics: Essential Size and Dimension Tips
Best YouTube Banner Size and Channel Art Dimension (The Ultimate Guide)
Richard Bennett
Oct 26, 2023• Proven solutions
YouTube is a social platform that relies on visually exciting material to attract the audience. Just like a book with an appealing cover compels a person to pick it up and read, it is significant to display and advertise your YouTube channel in a way that makes viewers click and browse through the channel.
Despite creating a beautiful banner on your desktop screen, it might end up distorted on a mobile screen if the recommended sizes for all kinds of gadgets are not followed. Hence, choosing your YouTube channel art dimension is essential since it is the viewer’s first impression. To commence with, you must be careful about your YouTube banner size and channel art dimensions. Are you wondering how to create the perfect banner or cover photo as we know it? Worry not as we are going to tell you the exact details to achieve an ideal YouTube banner size that fits all devices from computers to phones.
- Part 1: The Recommended YouTube Banner Size
- Part 2: The Best YouTube Banner Size on Different Devices
- Part 3: The Best YouTube Video Maker–Wondershare Filmora
Part 1: The Recommended YouTube Banner Size
According to YouTube’s official standards, the recommended banner size is 2560×1440 pixels. However, the minimum image dimensions are 2048×1152 pixels. To ensure that your text is visible regardless of the screen size, sticking to the “safe area” of 2560×423 pixels is the best option. Why are these sizes significant? Well, it’s essential to keep in mind the fact that people worldwide will be using different kinds of gadgets to access YouTube, and it is crucial to optimize your YouTube banner size for it to be ideal.
Part 2: The Best YouTube Banner Size on Different Devices
For the best results on all devices, your YouTube banner size should be:
YouTube Channel Art/Banner Dimensions Displayed on TVs
2560 x 1440 px
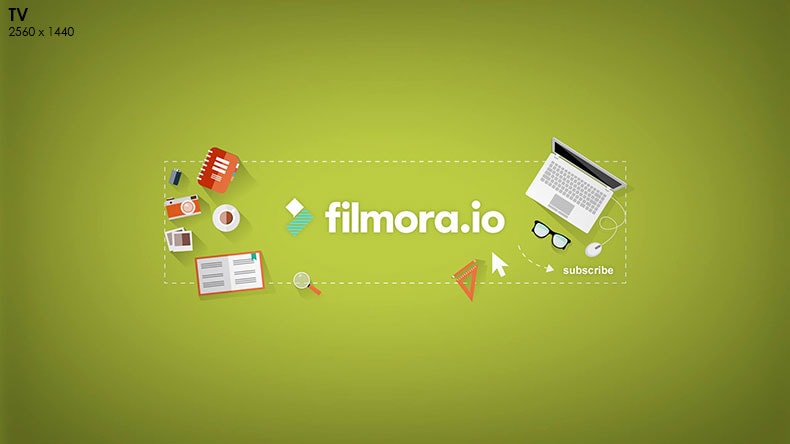
YouTube will display your entire channel art on TVs
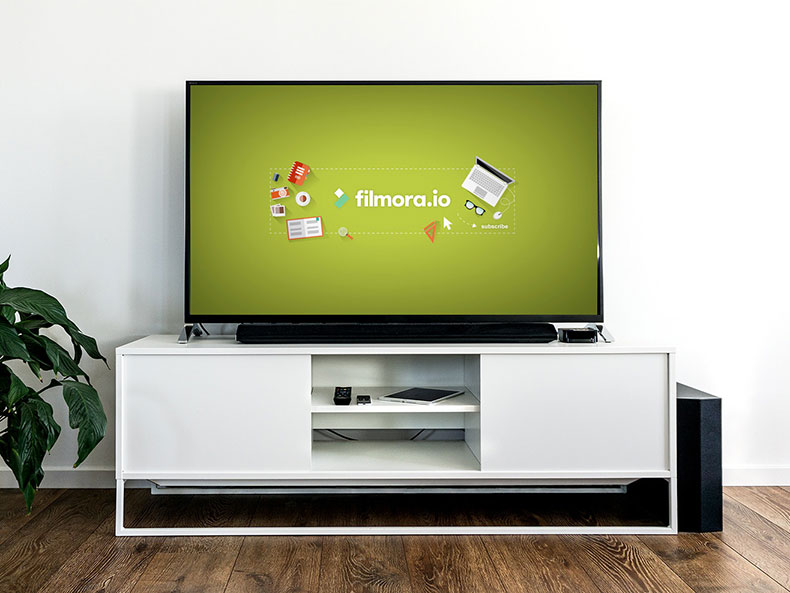
Here’s what our YouTube channel art example would look like on a TV.
YouTube Channel Art/Banner Dimensions Displayed on Smaller Desktop Monitors and Mobile Phones
1546 x 423 px
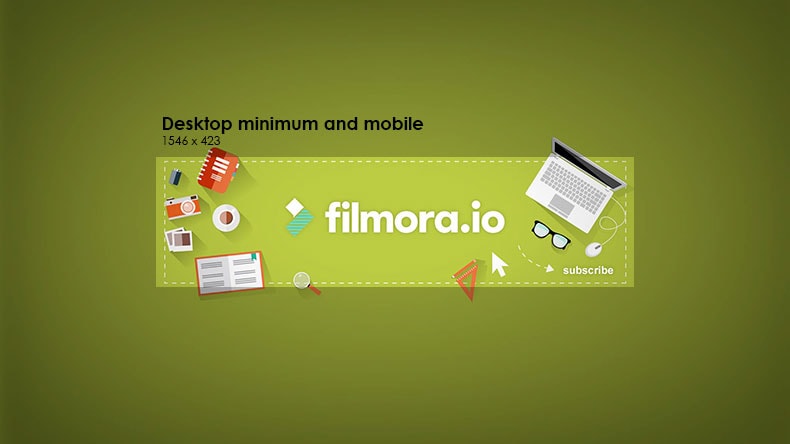
On small desktop monitors and mobile devices, YouTube will display less than 20% of your entire channel art, the center area measuring a width of 1546 pixels and a height of 423 pixels. You want to make sure that your text and logo make it into this part.
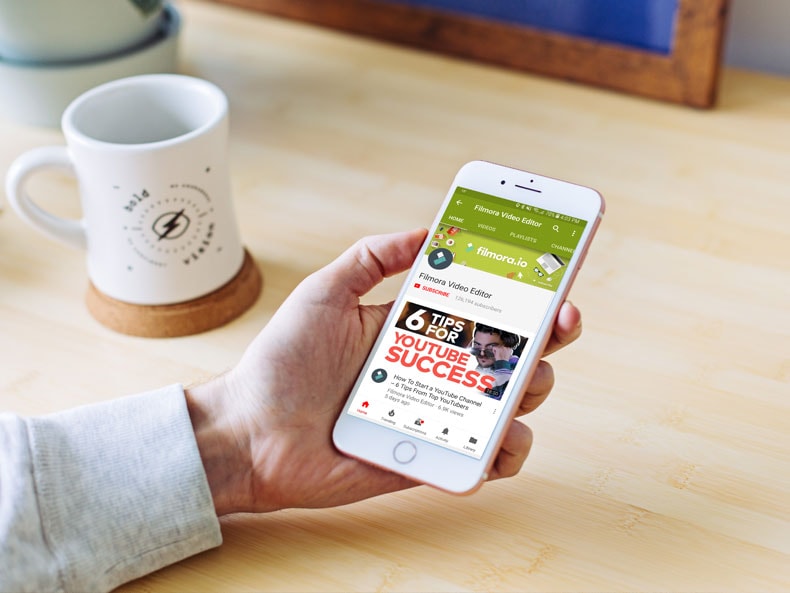
Here’s what our YouTube channel art example would look like on a mobile phone.
YouTube Channel Art/Banner Dimensions Displayed on Tablets
1855 x 423 px
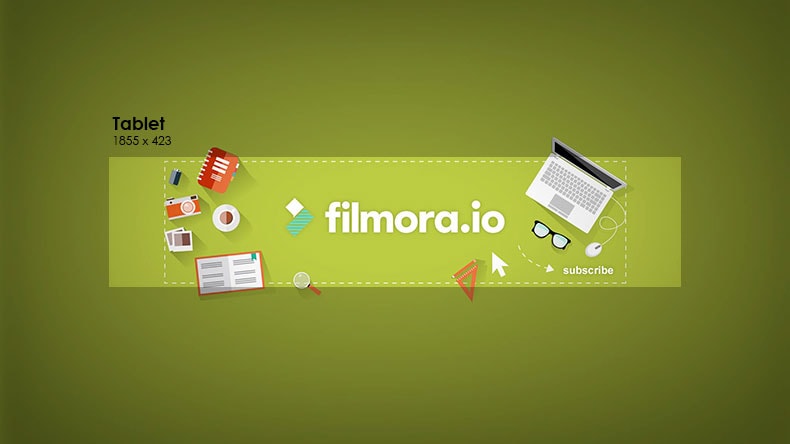
On tablet devices, YouTube will display around 20% more of your channel art, just to the sides of your smaller desktop monitor and mobile device area.
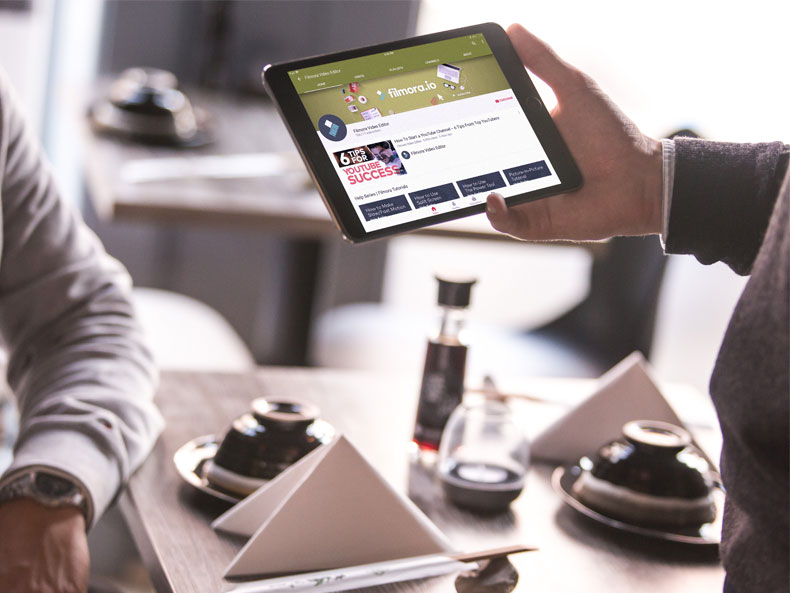
Here’s what our YouTube channel art example would look like on a tablet device.
YouTube Channel Art/Banner Dimensions Displayed on Larger Desktop Monitors
2560 x 423 px
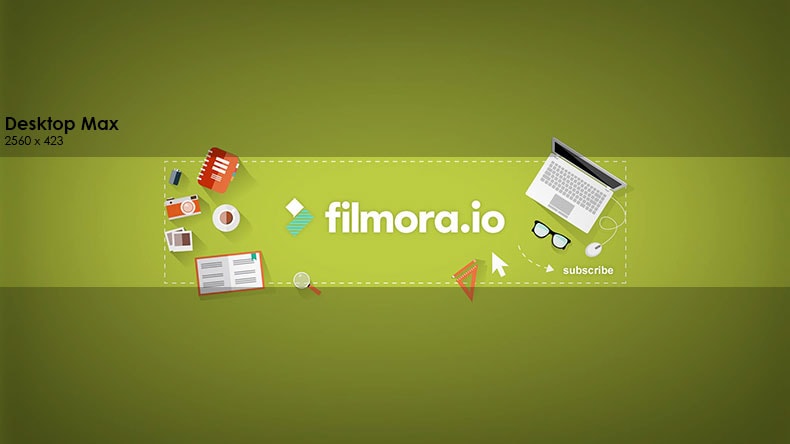
On larger desktop monitors, YouTube will display the entire width of your channel art but not the upper and lower part.

Here’s what our YouTube channel art example would look like on a large desktop monitor.
By following these dimensions in the design of your YouTube channel art/banner, you can be sure to have a responsive image that works best across different devices.
Have you ever had trouble with your YouTube banner size?
If you’d like to make your own channel art, check out our list of Top 9 YouTube Channel Art Makers .
Part 3: The Best YouTube Video Maker–Wondershare Filmora
Want to create a spectacular YouTube video with excellent graphics but lack the expertise? Don’t stress! Wondershare Filmora is here to save the day with its incredible video editing features. Despite the professional outcome it provides, it has been customized for easy use by the beginners.
Key Features:
- Supports GIF and 4K Resolution with advanced text editing features.
- Directly import files from any social media platform, for example, Facebook.
- Transform your video by layering multiple video clips and adding titles, filters, and overlays.
- Time-lapse, noise reduction, and split-screen preset available.
Compatibility:
- Windows: Microsoft Windows 7/Windows 8/Windows 10 (64 bit OS recommended).
- Processor: Intel i3 or better multicore processor, 2GHz or above.
- RAM: 4 GB RAM (8GB required for HD and 4K videos).
To Sum Up
So, are you ready to optimize your channel by following the YouTube banner size’s basic requirements? We hope you are now aware of the importance your YouTube channel art dimension has.
Also, for your channel to be distinctive and attractive enough, it must be edited, which is now relatively easy through video editing apps like the Wondershare Filmora. What are you waiting for? Invest in this pocket-friendly application to create stunning videos in no time and take your channel to the next level.
Richard Bennett
Richard Bennett is a writer and a lover of all things video.
Follow @Richard Bennett
Richard Bennett
Oct 26, 2023• Proven solutions
YouTube is a social platform that relies on visually exciting material to attract the audience. Just like a book with an appealing cover compels a person to pick it up and read, it is significant to display and advertise your YouTube channel in a way that makes viewers click and browse through the channel.
Despite creating a beautiful banner on your desktop screen, it might end up distorted on a mobile screen if the recommended sizes for all kinds of gadgets are not followed. Hence, choosing your YouTube channel art dimension is essential since it is the viewer’s first impression. To commence with, you must be careful about your YouTube banner size and channel art dimensions. Are you wondering how to create the perfect banner or cover photo as we know it? Worry not as we are going to tell you the exact details to achieve an ideal YouTube banner size that fits all devices from computers to phones.
- Part 1: The Recommended YouTube Banner Size
- Part 2: The Best YouTube Banner Size on Different Devices
- Part 3: The Best YouTube Video Maker–Wondershare Filmora
Part 1: The Recommended YouTube Banner Size
According to YouTube’s official standards, the recommended banner size is 2560×1440 pixels. However, the minimum image dimensions are 2048×1152 pixels. To ensure that your text is visible regardless of the screen size, sticking to the “safe area” of 2560×423 pixels is the best option. Why are these sizes significant? Well, it’s essential to keep in mind the fact that people worldwide will be using different kinds of gadgets to access YouTube, and it is crucial to optimize your YouTube banner size for it to be ideal.
Part 2: The Best YouTube Banner Size on Different Devices
For the best results on all devices, your YouTube banner size should be:
YouTube Channel Art/Banner Dimensions Displayed on TVs
2560 x 1440 px
YouTube will display your entire channel art on TVs
Here’s what our YouTube channel art example would look like on a TV.
YouTube Channel Art/Banner Dimensions Displayed on Smaller Desktop Monitors and Mobile Phones
1546 x 423 px
On small desktop monitors and mobile devices, YouTube will display less than 20% of your entire channel art, the center area measuring a width of 1546 pixels and a height of 423 pixels. You want to make sure that your text and logo make it into this part.
Here’s what our YouTube channel art example would look like on a mobile phone.
YouTube Channel Art/Banner Dimensions Displayed on Tablets
1855 x 423 px
On tablet devices, YouTube will display around 20% more of your channel art, just to the sides of your smaller desktop monitor and mobile device area.
Here’s what our YouTube channel art example would look like on a tablet device.
YouTube Channel Art/Banner Dimensions Displayed on Larger Desktop Monitors
2560 x 423 px
On larger desktop monitors, YouTube will display the entire width of your channel art but not the upper and lower part.
Here’s what our YouTube channel art example would look like on a large desktop monitor.
By following these dimensions in the design of your YouTube channel art/banner, you can be sure to have a responsive image that works best across different devices.
Have you ever had trouble with your YouTube banner size?
If you’d like to make your own channel art, check out our list of Top 9 YouTube Channel Art Makers .
Part 3: The Best YouTube Video Maker–Wondershare Filmora
Want to create a spectacular YouTube video with excellent graphics but lack the expertise? Don’t stress! Wondershare Filmora is here to save the day with its incredible video editing features. Despite the professional outcome it provides, it has been customized for easy use by the beginners.
Key Features:
- Supports GIF and 4K Resolution with advanced text editing features.
- Directly import files from any social media platform, for example, Facebook.
- Transform your video by layering multiple video clips and adding titles, filters, and overlays.
- Time-lapse, noise reduction, and split-screen preset available.
Compatibility:
- Windows: Microsoft Windows 7/Windows 8/Windows 10 (64 bit OS recommended).
- Processor: Intel i3 or better multicore processor, 2GHz or above.
- RAM: 4 GB RAM (8GB required for HD and 4K videos).
To Sum Up
So, are you ready to optimize your channel by following the YouTube banner size’s basic requirements? We hope you are now aware of the importance your YouTube channel art dimension has.
Also, for your channel to be distinctive and attractive enough, it must be edited, which is now relatively easy through video editing apps like the Wondershare Filmora. What are you waiting for? Invest in this pocket-friendly application to create stunning videos in no time and take your channel to the next level.
Richard Bennett
Richard Bennett is a writer and a lover of all things video.
Follow @Richard Bennett
Also read:
- [New] From Studio to Stage Stream Your MP3 Tunes on YouTube
- [Updated] Next-Level Thrills with Samsung's Leading VR Games for 2024
- 2024 Approved Expert Insights Switching From WebP to JPG Format
- 2024 Approved From Footage to Fame Premiere Pro Edition Tricks for YouTube
- 2024 Approved Personalize Your Soundtrack Constructing a YouTube Playlist From Home & On-the-Move
- 2024 Approved Simplified Playlist Crafting for YouTube Fans on Desktop & Mobile Devices
- 2024 Approved Tailoring Youtube Shorts Thumbnails Made Simple
- 2024 Approved The Path to VR Storytelling Editing and Streaming 360° Video on YouTube
- 2024 Approved TweetStream Extractor Pull Twitter Videos to iPhone
- Exploring Computer Gear with Tom - A Comprehensive Resource
- In 2024, Top 10 Trends in Effective Podcast Naming
- In 2024, Understanding YouTube's Monthly Revenue Options
- Mastering Audio Capture on Your Mac with Apowersoft - The Complete How-To Guide
- Protecting Your Data From the Top 9 Fake AI Assistant Viruses and Malware Programs
- Troubleshooting: Fixing a Car Stereo That Won't Turn On
- Title: 2024 Approved Setting Up Personalized Video Shots on YouTube
- Author: Joseph
- Created at : 2025-01-27 23:46:57
- Updated at : 2025-01-29 16:58:21
- Link: https://youtube-stream.techidaily.com/2024-approved-setting-up-personalized-video-shots-on-youtube/
- License: This work is licensed under CC BY-NC-SA 4.0.