
:max_bytes(150000):strip_icc()/GettyImages-946931092-2-5c50f6694cedfd0001f911e0.jpg)
"2024 Approved Seamless Online Sound Conversion Ideal Tools for iPhone and YouTube MP3s"
Seamless Online Sound Conversion: Ideal Tools for iPhone and YouTube MP3s
6 Free Software to Convert YouTube to MP3 for iPhone

Ollie Mattison
Mar 27, 2024• Proven solutions
Loved a video on YouTube, but was unable to find the MP3 version? Worry not! Now, with a YouTube music converter, you can easily convert YouTube videos into MP3 files for your iPhone and enjoy them to your heart’s content. A trusted brand can offer you the best MP3 audio files out of your favorite YouTube videos within no time. Here we bring free apps to convert music for your iPhone.
- Part 1: YouTube to MP3 Converter on iPhone
- Part 2: YouTube to MP3 Converter for iPhone (on Desktop)
- Part 3: FAQs About YouTube to MP3 Converter
You may also like:
How to convert Youtube to mp3 [three ways] >>
How to video chat call on Snapchat with 3 steps >>
Best 10 Flvto Alternatives to Convert YouTube Videos >>
Best Video Resolution Converter >>
Part 1: YouTube to MP3 Converter on iPhone
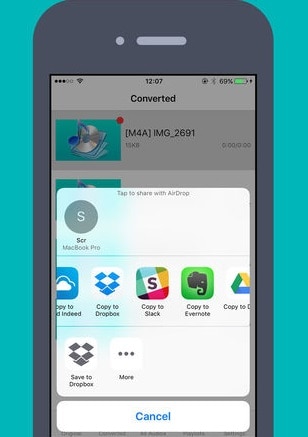
1. Video to MP3 Converter
Video to MP3 Converter is an App that allows you to convert videos into different formats of audio such as MP3, M4A, OPUS, WAV, and a lot more, and save it on your iPhone.
The features of this App are –
- You can select audio tracks and customize sample rate, volume, and bitrate.
- You can decide the starting and ending point of the audio to be converted.
- You can import audio or video from Album, camera roll, One Drive, Google Drive, Dropbox, or iCloud.
- You can open audio files with this App and share them with other Apps as well.
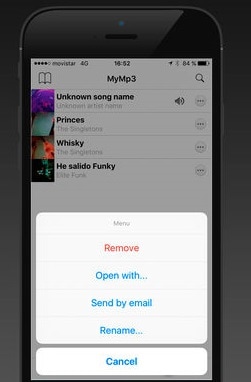
2. MyMP3
MyMP3 can convert videos available on your device into MP3 quickly. You can save recorded audio into MP3 and WAV format.
The main features of MyMP3 are –
- You can convert local videos into MP3 and share them on any social media, email, or instant messaging App.
- It allows you to edit the metadata.
- You can record from a microphone, CD, turntable, audio streamed from the internet, Skype call or phone calls, and the likes.
- It allows ripping CDs, renaming batch files, scheduling recordings, silence detection, and playlist management while recording vinyl albums.
Part 2: YouTube to MP3 converter for iPhone (on Desktop)
1. Filmora Editor
You can use Filmora as a YouTube music converter which will help in converting without much effort. Filmora is basically a video editing software that can help you edit videos in various ways. You can edit any of your video projects with ease when using Filmora. In order to convert Youtube to MP3 in iPhone, you can choose iPhone as the target device while exporting. Let’s check out some amazing features of this software. Or you can learn more from Wondershare Video Community .
Key Features:
- Anyone can easily use it for its extremely easy interface and design.
- People can have the delight in various graphical features with this tool such as filters and overlays.
- With this software, one can seamlessly merge multiple videos without compromising quality.
- There are lots of advanced tools associated with Filmora including background blur option, audio mixer, screen splitting, text editing, green screen, speed ramping, and more.
- If you are looking for stunning effects, Filmstocks, NewBlue FX and BorisFX can definitely meet any of your needs.
- 4k videos are also supported via Filmora easily.


2. Freemake Video Downloader
Freemake Video Downloader is a YouTube music converter that allows you to save YouTube videos and MP3s on your iPhone. While converting the videos into MP3s you need to specify the destination device (Export to iPod/iPhone), so that the right format can be set for the same.
Features of this application are –
- You can have the audios exported to iTunes automatically.
- Simple 3 step process to download and save YouTube videos into your iPhone.

3. Any Audio Converter
Any Audio Converter is an online converter and downloader that allows you to convert YouTube videos to MP3 for iPhone to your desired quality, and size of audio files. This YouTube music converter can convert downloaded videos and music to MP3, WAV, and WMA faster with better quality.
Major features of this audio converter are –
- You can download online videos and music from more than 100 sites.
- It helps you to rip and extract audio from CDs and videos.
- It supports audio conversion in multiple formats without compromising the quality.
- You can burn videos to AVCHD DVD or DVD.
- You can edit videos with special effects, clips, or crop effects.

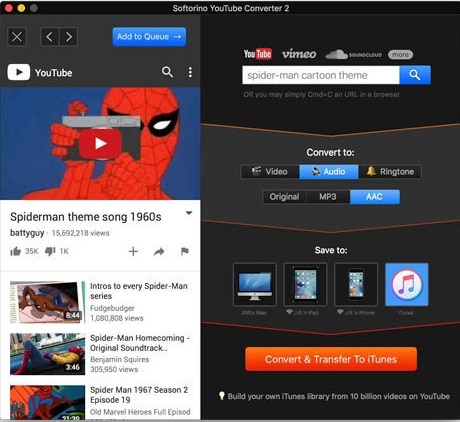
4. Softorino YouTube Converter 2
Softorino YouTube Converter 2 can not only convert YouTube to MP3 for iPhone, but also to MP4 for all iOS devices as well. It is compatible with over 60 top sources.
- With this App, you can access videos, music, and ringtones as well.
- It supports all iOS devices and delivers 4K ultra HD, with subtitles.
- Automatically connects your device to Wi-Fi, and recognizes content automatically for the album
Part 3: FAQs About YouTube to MP3 Converter
1. Can You Convert YouTube Videos to mp3 on iPhone?
Yes, you can. There are numerous YouTube to mp3 convert websites and YouTube audio downloader apps that let you convert YouTube videos to mp3 on your iPhone.
But there are legal issues you need to consider before joining the conversion trend. Technically, it is not illegal to convert a YouTube video to MP3 - but it is illegal to download a copyrighted music video. Moreover, YouTube has stated that stream-ripping violates their Terms of Service, and both YouTube & Google have tried to shut down numerous websites that provide video conversion services.
2. How Can I Save a Song From YouTube to My iPhone?
There are several ways to do that. The legal and recommended method is to get a YouTube Music Premium subscription. This will enable you to download songs from YouTube and save them on your iPhone for offline consumption. The alternative way involves numerous websites and apps that enable you to convert YouTube videos to mp3 and download them on your iPhone. This approach, however, is illegal and should be avoided.
Final Verdict
After going through the list of YouTube music converters in this article, we have found that Filmora is the ultimate solution for all your video download and audio conversion needs. With its matchless features, this App makes your life simple and melodious. However, it is our suggestion, the final call will be yours. We would like to know which was your choice and how was the experience using it. Thanks, readers for having a glance at this post. We hope you are delighted after reading it and finding what you needed.
Ollie Mattison
Ollie Mattison is a writer and a lover of all things video.
Follow @Ollie Mattison
Ollie Mattison
Mar 27, 2024• Proven solutions
Loved a video on YouTube, but was unable to find the MP3 version? Worry not! Now, with a YouTube music converter, you can easily convert YouTube videos into MP3 files for your iPhone and enjoy them to your heart’s content. A trusted brand can offer you the best MP3 audio files out of your favorite YouTube videos within no time. Here we bring free apps to convert music for your iPhone.
- Part 1: YouTube to MP3 Converter on iPhone
- Part 2: YouTube to MP3 Converter for iPhone (on Desktop)
- Part 3: FAQs About YouTube to MP3 Converter
You may also like:
How to convert Youtube to mp3 [three ways] >>
How to video chat call on Snapchat with 3 steps >>
Best 10 Flvto Alternatives to Convert YouTube Videos >>
Best Video Resolution Converter >>
Part 1: YouTube to MP3 Converter on iPhone
1. Video to MP3 Converter
Video to MP3 Converter is an App that allows you to convert videos into different formats of audio such as MP3, M4A, OPUS, WAV, and a lot more, and save it on your iPhone.
The features of this App are –
- You can select audio tracks and customize sample rate, volume, and bitrate.
- You can decide the starting and ending point of the audio to be converted.
- You can import audio or video from Album, camera roll, One Drive, Google Drive, Dropbox, or iCloud.
- You can open audio files with this App and share them with other Apps as well.
2. MyMP3
MyMP3 can convert videos available on your device into MP3 quickly. You can save recorded audio into MP3 and WAV format.
The main features of MyMP3 are –
- You can convert local videos into MP3 and share them on any social media, email, or instant messaging App.
- It allows you to edit the metadata.
- You can record from a microphone, CD, turntable, audio streamed from the internet, Skype call or phone calls, and the likes.
- It allows ripping CDs, renaming batch files, scheduling recordings, silence detection, and playlist management while recording vinyl albums.
Part 2: YouTube to MP3 converter for iPhone (on Desktop)
1. Filmora Editor
You can use Filmora as a YouTube music converter which will help in converting without much effort. Filmora is basically a video editing software that can help you edit videos in various ways. You can edit any of your video projects with ease when using Filmora. In order to convert Youtube to MP3 in iPhone, you can choose iPhone as the target device while exporting. Let’s check out some amazing features of this software. Or you can learn more from Wondershare Video Community .
Key Features:
- Anyone can easily use it for its extremely easy interface and design.
- People can have the delight in various graphical features with this tool such as filters and overlays.
- With this software, one can seamlessly merge multiple videos without compromising quality.
- There are lots of advanced tools associated with Filmora including background blur option, audio mixer, screen splitting, text editing, green screen, speed ramping, and more.
- If you are looking for stunning effects, Filmstocks, NewBlue FX and BorisFX can definitely meet any of your needs.
- 4k videos are also supported via Filmora easily.
2. Freemake Video Downloader
Freemake Video Downloader is a YouTube music converter that allows you to save YouTube videos and MP3s on your iPhone. While converting the videos into MP3s you need to specify the destination device (Export to iPod/iPhone), so that the right format can be set for the same.
Features of this application are –
- You can have the audios exported to iTunes automatically.
- Simple 3 step process to download and save YouTube videos into your iPhone.
3. Any Audio Converter
Any Audio Converter is an online converter and downloader that allows you to convert YouTube videos to MP3 for iPhone to your desired quality, and size of audio files. This YouTube music converter can convert downloaded videos and music to MP3, WAV, and WMA faster with better quality.
Major features of this audio converter are –
- You can download online videos and music from more than 100 sites.
- It helps you to rip and extract audio from CDs and videos.
- It supports audio conversion in multiple formats without compromising the quality.
- You can burn videos to AVCHD DVD or DVD.
- You can edit videos with special effects, clips, or crop effects.
4. Softorino YouTube Converter 2
Softorino YouTube Converter 2 can not only convert YouTube to MP3 for iPhone, but also to MP4 for all iOS devices as well. It is compatible with over 60 top sources.
- With this App, you can access videos, music, and ringtones as well.
- It supports all iOS devices and delivers 4K ultra HD, with subtitles.
- Automatically connects your device to Wi-Fi, and recognizes content automatically for the album
Part 3: FAQs About YouTube to MP3 Converter
1. Can You Convert YouTube Videos to mp3 on iPhone?
Yes, you can. There are numerous YouTube to mp3 convert websites and YouTube audio downloader apps that let you convert YouTube videos to mp3 on your iPhone.
But there are legal issues you need to consider before joining the conversion trend. Technically, it is not illegal to convert a YouTube video to MP3 - but it is illegal to download a copyrighted music video. Moreover, YouTube has stated that stream-ripping violates their Terms of Service, and both YouTube & Google have tried to shut down numerous websites that provide video conversion services.
2. How Can I Save a Song From YouTube to My iPhone?
There are several ways to do that. The legal and recommended method is to get a YouTube Music Premium subscription. This will enable you to download songs from YouTube and save them on your iPhone for offline consumption. The alternative way involves numerous websites and apps that enable you to convert YouTube videos to mp3 and download them on your iPhone. This approach, however, is illegal and should be avoided.
Final Verdict
After going through the list of YouTube music converters in this article, we have found that Filmora is the ultimate solution for all your video download and audio conversion needs. With its matchless features, this App makes your life simple and melodious. However, it is our suggestion, the final call will be yours. We would like to know which was your choice and how was the experience using it. Thanks, readers for having a glance at this post. We hope you are delighted after reading it and finding what you needed.
Ollie Mattison
Ollie Mattison is a writer and a lover of all things video.
Follow @Ollie Mattison
From Stillness to Stirring: Tips for Bouncing Text
How to Create Animated Bouncing Text

Liza Brown
Mar 27, 2024• Proven solutions
Earlier, you learned how to have a bounce text effect in Adobe After Effects . However, because AE is a complex application and has a steep learning curve, this section explains the two alternative ways to get the same effect on your existing video footage.
Method 1: How to Create Bouncing Text in Filmora Video Editor?
When talking about Wondershare Filmora , the application is populated with several presets for texts and titles, animations, effects, filters, and much more.
These pre-built templates not only make your task easier, they also save your decent amount of time that you would spend while working with After Effects or any other similar app that requires you to build things from scratch.
You can follow the instructions given below to add animated bounce text to any of your video footages with Filmora:
Step 1: Add a Footage to Timeline
Launch Wondershare Filmora on your Windows or Mac PC. By default, the aspect ratio of the project is set to 16:9. Click anywhere inside the Media window at the upper-left section, and select and import footage you want to add bounce text to.
Step 2: Insert Text and Add Bounce Effect
Click Titles from the standard toolbar at the top, and click and drag your preferred title template from the Library to the timeline. In case you don’t want any specific animation or style on the title, you can use the default title.
In the timeline, double-click the title you just added, use the upper-left section to edit the text, go to the Animation tab from the left pane, scroll down the list, and double-click the Up Down 1 or Up Down 2 preset to apply the bounce effect to the credits. Click OK to save the changes and to get back to the main window.

Step 3: Add Shake Filters
Go to Effects from the standard toolbar, expand the Filters category from the left pane, and click Shake. From the Library window, click and drag your preferred shake filter to the timeline. Here, I will choose Mild.

You can customize the default effect by double-clicking the shake filter in the timeline, using the sliders in the upper-left area of the interface to make necessary adjustments, and then clicking OK to save the changes and to get back to the previous interface.

Step 4: Export the Final Output
Click EXPORT from the top of the interface, go to the Local tab in the Export box, choose your preferred output format from the list in the left, make required customizations from the right pane, and click EXPORT from the bottom-right corner to export the video.

Now, you can add the bouncing text video and the background video to the timeline, and then place the bouncing text video above the background video track.
Double click the text track, go to the Chroma Key effect, select the Color Picker tool, and click anywhere in the Preview window to get things right. Finally, export the entire project to your preferred output format as explained in Step 4.
As explained before, Wondeshare Filmora makes the entire process of creating and adding bounce text effect pretty simple. With all the pre-build templates, and the versatility of the options that can be used to customize those presets, you can come up with the effects that are usually obtained when you start generating them from the scratch.
Method 2: Generate Animated Bouncing Texts Online
If you don’t want any heavy and resource-intensive app on your PC merely for some special text effects, you can try any of the online solutions instead. The benefit of using any such web app is that all the processing is done on site’s server, and it is only a web browser and an Internet connection that you need to have at your side.
Some most trusted websites to generate bounce text are listed below:
1. ENGFTO
Website: https://engfto.com/index/create%5Fanimated%5Fbouncing%5Ftext/0-26

You can follow the instructions given below to use Engfto to generate bouncing text for your footages:
Step 1: Get to the Animated Bouncing Text Page
Launch your favorite web browser, and go to the link given above to get to the Engfto’s animated bouncing text page.
Step 2: Customize Text and Preferences
Modify the values in the fields under the SIZE AREA and TEXT sections to customize the text area, the text itself, its size, and font. Next, adjust the values in the fields under the EFFECT PARAMETERS section to get the required bounce effect. Also, use the fields under the BACKGROUND section to either change the background color, or pick a background image from your PC.
Step 3: Obtain the Animated Text
Click the SAVE GIF ANIMATION button from the lower section of the page to download the animated text to your PC.
2. Loading.io
The instructions given below explain how to use Loading.io to get animated bounce text effect for your footages:
Step 1: Get to the Loading.io Webpage
Launch your favorite web browser and go to https://loading.io/animation/text/ .
Step 2: Customize the Text and Choose Animation Effect

Use the options available on the webpage to type your text, and change its font, color, background, transparency level etc. Select Bounce (or any of its variants) from the Animation drop-down list, and adjust the speed using the Speed slider.
Step 3: Obtain the Text
Click your preferred option from next to the Download As section to download the animated text to your PC.
Note: Regardless of the web solution you choose to generate and obtain animated bounce text, you will still need a post-production tool to add the downloaded text to your footage.
Conclusion
Generating bounce text effect is much simpler when you use Wondershare Filmora or any of the online solutions as explained in Method 2. While the former gives you more flexibility when it comes to customizations, the latter doesn’t require any app to be installed on your PC. In addition, many times the web apps offer their services for free, and therefore they are preferred by the novice users who are not much into post-production processes.
Liza Brown
Liza Brown is a writer and a lover of all things video.
Follow @Liza Brown
Liza Brown
Mar 27, 2024• Proven solutions
Earlier, you learned how to have a bounce text effect in Adobe After Effects . However, because AE is a complex application and has a steep learning curve, this section explains the two alternative ways to get the same effect on your existing video footage.
Method 1: How to Create Bouncing Text in Filmora Video Editor?
When talking about Wondershare Filmora , the application is populated with several presets for texts and titles, animations, effects, filters, and much more.
These pre-built templates not only make your task easier, they also save your decent amount of time that you would spend while working with After Effects or any other similar app that requires you to build things from scratch.
You can follow the instructions given below to add animated bounce text to any of your video footages with Filmora:
Step 1: Add a Footage to Timeline
Launch Wondershare Filmora on your Windows or Mac PC. By default, the aspect ratio of the project is set to 16:9. Click anywhere inside the Media window at the upper-left section, and select and import footage you want to add bounce text to.
Step 2: Insert Text and Add Bounce Effect
Click Titles from the standard toolbar at the top, and click and drag your preferred title template from the Library to the timeline. In case you don’t want any specific animation or style on the title, you can use the default title.
In the timeline, double-click the title you just added, use the upper-left section to edit the text, go to the Animation tab from the left pane, scroll down the list, and double-click the Up Down 1 or Up Down 2 preset to apply the bounce effect to the credits. Click OK to save the changes and to get back to the main window.
Step 3: Add Shake Filters
Go to Effects from the standard toolbar, expand the Filters category from the left pane, and click Shake. From the Library window, click and drag your preferred shake filter to the timeline. Here, I will choose Mild.
You can customize the default effect by double-clicking the shake filter in the timeline, using the sliders in the upper-left area of the interface to make necessary adjustments, and then clicking OK to save the changes and to get back to the previous interface.
Step 4: Export the Final Output
Click EXPORT from the top of the interface, go to the Local tab in the Export box, choose your preferred output format from the list in the left, make required customizations from the right pane, and click EXPORT from the bottom-right corner to export the video.
Now, you can add the bouncing text video and the background video to the timeline, and then place the bouncing text video above the background video track.
Double click the text track, go to the Chroma Key effect, select the Color Picker tool, and click anywhere in the Preview window to get things right. Finally, export the entire project to your preferred output format as explained in Step 4.
As explained before, Wondeshare Filmora makes the entire process of creating and adding bounce text effect pretty simple. With all the pre-build templates, and the versatility of the options that can be used to customize those presets, you can come up with the effects that are usually obtained when you start generating them from the scratch.
Method 2: Generate Animated Bouncing Texts Online
If you don’t want any heavy and resource-intensive app on your PC merely for some special text effects, you can try any of the online solutions instead. The benefit of using any such web app is that all the processing is done on site’s server, and it is only a web browser and an Internet connection that you need to have at your side.
Some most trusted websites to generate bounce text are listed below:
1. ENGFTO
Website: https://engfto.com/index/create%5Fanimated%5Fbouncing%5Ftext/0-26
You can follow the instructions given below to use Engfto to generate bouncing text for your footages:
Step 1: Get to the Animated Bouncing Text Page
Launch your favorite web browser, and go to the link given above to get to the Engfto’s animated bouncing text page.
Step 2: Customize Text and Preferences
Modify the values in the fields under the SIZE AREA and TEXT sections to customize the text area, the text itself, its size, and font. Next, adjust the values in the fields under the EFFECT PARAMETERS section to get the required bounce effect. Also, use the fields under the BACKGROUND section to either change the background color, or pick a background image from your PC.
Step 3: Obtain the Animated Text
Click the SAVE GIF ANIMATION button from the lower section of the page to download the animated text to your PC.
2. Loading.io
The instructions given below explain how to use Loading.io to get animated bounce text effect for your footages:
Step 1: Get to the Loading.io Webpage
Launch your favorite web browser and go to https://loading.io/animation/text/ .
Step 2: Customize the Text and Choose Animation Effect
Use the options available on the webpage to type your text, and change its font, color, background, transparency level etc. Select Bounce (or any of its variants) from the Animation drop-down list, and adjust the speed using the Speed slider.
Step 3: Obtain the Text
Click your preferred option from next to the Download As section to download the animated text to your PC.
Note: Regardless of the web solution you choose to generate and obtain animated bounce text, you will still need a post-production tool to add the downloaded text to your footage.
Conclusion
Generating bounce text effect is much simpler when you use Wondershare Filmora or any of the online solutions as explained in Method 2. While the former gives you more flexibility when it comes to customizations, the latter doesn’t require any app to be installed on your PC. In addition, many times the web apps offer their services for free, and therefore they are preferred by the novice users who are not much into post-production processes.
Liza Brown
Liza Brown is a writer and a lover of all things video.
Follow @Liza Brown
- Title: "2024 Approved Seamless Online Sound Conversion Ideal Tools for iPhone and YouTube MP3s"
- Author: Joseph
- Created at : 2024-05-31 13:43:28
- Updated at : 2024-06-01 13:43:28
- Link: https://youtube-stream.techidaily.com/2024-approved-seamless-online-sound-conversion-ideal-tools-for-iphone-and-youtube-mp3s/
- License: This work is licensed under CC BY-NC-SA 4.0.
