
"2024 Approved Say Goodbye to Vertical and Horizontal Bars in YouTube Movies"
Say Goodbye to Vertical and Horizontal Bars in YouTube Movies
How to Remove Black Bars from YouTube Videos

Richard Bennett
Mar 27, 2024• Proven solutions
The black bars appear because the video uploaded by the users may include horizontal black bars at the bottom and top of the video player to fit an aspect ratio of 4:3. The YouTube video player has an aspect ratio of 16:9, so it adds vertical black bars to fit according to the dimension. And in this guide, we will help you get rid of this trouble and remove annoying black bars from YouTube videos.
- Part 1: Removing the black bars before uploading
- Part 2: Removing the black bars from uploaded YouTube videos
Remove the black bars before uploading
You can make use of the following software to remove the black bars from your videos.
1. Wondershare Filmora
Filmora supports a large format of videos hence one of the widely used. Follow these steps to remove the black bars:
- Import the video or drag and drop it in Wondershare Flimora.
- Select the video with black bars and right click on it.
- Click on “crop and zoom” which will open the crop window.
- Set your desired frameset (16:9, 4:3 or customized aspect ratio) and see your video in the preview pane.
- Save the new video without the black bars by clicking on “Export”.
 Download Mac Version ](https://tools.techidaily.com/wondershare/filmora/download/ )
2. Sony Vegas Pro
One of the most popular and sought after video editing tool, Sony Vegas Pro can help removing the black bars very simply:
- Open the video.
- You will see the video in preview and a timeline beneath, right click on the video clip on the timeline.
- Click on properties, a new window will pop-up, click on disable resample and make sure that “maintain aspect ratio” is unchecked.
- Your video will be without the black bars. Save the video.
3. Windows Live Movie Maker
This inbuilt tool in Windows for video editing can be used to remove the black bars from your YouTube videos.
- Drop and drag the video to windows live movie maker.
- Select the video and you will see a couple of options to set aspect ratio.
- Click on the desired one and the black bars will be removed.
- You can save the video in different formats.
4. Final Cut Pro
Final Cut pro offers you a whole lot of video editing options that includes removal of black bars. Right aspect ratio ensures there are no unpleasant black bars on either side of the video. To get them removed with the help of Final Cut Pro:
- Import the video with black bars.
- Select the video and change its aspect ratio. (Either stretch it or crop it).
- Save the video after it has been corrected.
Removing the black bars from uploaded YouTube videos
It is very simple to remove black bars from existing YouTube videos or while uploading a video. Click on the Edit button next to the video, and add the most suited instruction in the Tag bar below:

yt:crop=16:9
This tag zooms in on the video because of which the contents at the borders (black bars in this case) do not appear anymore.
yt:stretch=16:9
This tag stretches the video in the aspect ratio of 16:9. It is used to view the video in wide-screen format.
yt:stretch=4:3
if your video is appearing in wide-screen format, but you want it to display in 720 x 480 pixels, apply this tag. It scales down the video 4:3 aspect.
Try any of the above software to remove black bars from existing YouTube videos or the new videos and make it pleasant to viewers.
Richard Bennett
Richard Bennett is a writer and a lover of all things video.
Follow @Richard Bennett
Richard Bennett
Mar 27, 2024• Proven solutions
The black bars appear because the video uploaded by the users may include horizontal black bars at the bottom and top of the video player to fit an aspect ratio of 4:3. The YouTube video player has an aspect ratio of 16:9, so it adds vertical black bars to fit according to the dimension. And in this guide, we will help you get rid of this trouble and remove annoying black bars from YouTube videos.
- Part 1: Removing the black bars before uploading
- Part 2: Removing the black bars from uploaded YouTube videos
Remove the black bars before uploading
You can make use of the following software to remove the black bars from your videos.
1. Wondershare Filmora
Filmora supports a large format of videos hence one of the widely used. Follow these steps to remove the black bars:
- Import the video or drag and drop it in Wondershare Flimora.
- Select the video with black bars and right click on it.
- Click on “crop and zoom” which will open the crop window.
- Set your desired frameset (16:9, 4:3 or customized aspect ratio) and see your video in the preview pane.
- Save the new video without the black bars by clicking on “Export”.
Download Mac Version ](https://tools.techidaily.com/wondershare/filmora/download/ )
2. Sony Vegas Pro
One of the most popular and sought after video editing tool, Sony Vegas Pro can help removing the black bars very simply:
- Open the video.
- You will see the video in preview and a timeline beneath, right click on the video clip on the timeline.
- Click on properties, a new window will pop-up, click on disable resample and make sure that “maintain aspect ratio” is unchecked.
- Your video will be without the black bars. Save the video.
3. Windows Live Movie Maker
This inbuilt tool in Windows for video editing can be used to remove the black bars from your YouTube videos.
- Drop and drag the video to windows live movie maker.
- Select the video and you will see a couple of options to set aspect ratio.
- Click on the desired one and the black bars will be removed.
- You can save the video in different formats.
4. Final Cut Pro
Final Cut pro offers you a whole lot of video editing options that includes removal of black bars. Right aspect ratio ensures there are no unpleasant black bars on either side of the video. To get them removed with the help of Final Cut Pro:
- Import the video with black bars.
- Select the video and change its aspect ratio. (Either stretch it or crop it).
- Save the video after it has been corrected.
Removing the black bars from uploaded YouTube videos
It is very simple to remove black bars from existing YouTube videos or while uploading a video. Click on the Edit button next to the video, and add the most suited instruction in the Tag bar below:
yt:crop=16:9
This tag zooms in on the video because of which the contents at the borders (black bars in this case) do not appear anymore.
yt:stretch=16:9
This tag stretches the video in the aspect ratio of 16:9. It is used to view the video in wide-screen format.
yt:stretch=4:3
if your video is appearing in wide-screen format, but you want it to display in 720 x 480 pixels, apply this tag. It scales down the video 4:3 aspect.
Try any of the above software to remove black bars from existing YouTube videos or the new videos and make it pleasant to viewers.
Richard Bennett
Richard Bennett is a writer and a lover of all things video.
Follow @Richard Bennett
How to Get Started: Signing Up for a YouTube Channel
How to Create a YouTube Account
Richard Bennett
Mar 27, 2024• Proven solutions
People create YouTube accounts for a lot of different reasons. Some YouTubers just love making videos and created their channels so they would have somewhere to post their work. Others have strong opinions they need a platform to share. There are a lot of people on YouTube whose main interest is in a separate website or other social media page, but they use their YouTube channels to help generate traffic. If you are considering starting your own YouTube channel then you should take a second to consider why you want to, since this will have an impact on what kind of videos you make. Your reasons for wanting to make a YouTube account do not have to be very elaborate. Maybe you just think it will be fun. Good news; it will be!
Once you know for sure that you want to create a YouTube account, and also know why you want to do it, you have already started building your channel. There are still a few important things to consider, though. This article will walk you through signing up for a YouTube account, and give you some tips about starting your channel.
Creating Your YouTube Account in 6 Steps
1. Go to YouTube.com and look at the top right corner of your screen. There will either be a blue Sign In button, or an icon representing you. YouTube accounts and Google accounts are the same, so if you are signed into your Gmail account you are already signed into YouTube as well.
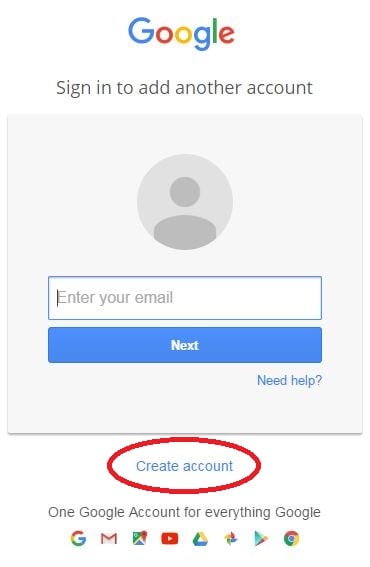
2. If you see a Sign In button, click it. If you see your icon click on that, and in the window that pops up select Add Account. Either way, you will be taken into a sign in screen. Under where it asks for your email address it will say Create Account. Click on Create Account.
3. In the sign up page you will need to put in your name, email address, and mobile phone number as well as some other personal information. Do not enter your current Gmail address. Enter an alternate email you have created for your vlog, or click on I would like a new Gmail address. This will change your page slightly so that the email field becomes Choose a Username.


You will probably need to try a few different usernames before you find one that is not taken.
4. You will have to put in both a first and last name when you create your account, but you can change it to one name later.
5. Your password will need to be at least 8 characters long. Try to use a combination of letters or numbers, and make sure it is not something easily guessable (i.e spouses name).
6. After you finish the form click Next Step and, in the next screen, Continue to YouTube.
Tips on Starting a YouTube Channel
1. Choose a Topic you Love
When choosing a topic for your YouTube channel make sure you pick something you are passionate about. If you already have an interest or hobby which you are always researching and are extremely up-to-date on then that should probably be the theme of your vlog. If you plan to have a channel where people go to learn anything then you will need to be an authority on that topic. Whatever you make videos about it will need to be something you can realistically see yourself putting a lot of time into. If you cannot think of more than a couple ideas for videos on your topic then that is a sign that you need to choose something else to focus on.
You should check to see how much demand there is for videos on your topic. This can be done by googling your topic to see what else is out there. If not many people have addressed your topic yet it probably means that it is not something a lot of people want to know about. However, it could also mean that the people who do want to watch videos like yours have been starved for content. Your channel will flop if you do not love what you are making videos about, so do not choose something just because you think it will be popular. Follow your passion.
2. Check out the Competition
You should look for other vlogs with similar topics to yours not only to gauge how much demand there is for your videos, but to check out the competition. If there are a lot of YouTube channels dedicated to the same topic you want to vlog about then this should not discourage you from going after the same viewers. People who are excited about a topic frequently watch more than one vlog about it. It might not even be correct to think of other vloggers within your genre as ‘the competition’ since you are ultimately part of the same community. You will need to watch these people’s videos as part of keeping yourself informed and will likely become a fan – maybe even a collaborator some day – of theirs.
The main reason you want to look into YouTube channels like yours is because you do not want to be creating content that is overdone and boring. You are tackling the same topic as other people, and may even make some videos on the exact same subjects as others already have. There needs to be something unique about your videos that makes them stand out from what already exists. By looking at what other people are already doing you will be able to come up with ideas for what you can do differently.
3. Choose a Great Name
Picking a great name for your YouTube account can take a lot of effort. Chances are you will not want to use your own name, at least not in full. Although your real name can work for if you are a lifestyle vlogger in most cases you will have a more specific topic that will need to be addressed in your channel’s name. Try out your name or a nickname for yourself in combination with different words associated with the topic of your vlog. Aim to create a name that is catchy and easy to remember.
Chances are a few of your first couple picks will be unavailable. YouTube is a popular site and a lot of the best names are taken. The last thing you should ever do while naming your YouTube channel is add numbers or letters to the end of a name you like because it is taken. Names with numbers at the end are hard for viewers to remember and find again. Choosing a weak name with a trail of numbers or letters after it will make it very hard for your channel to grow. Brainstorm a long list of potential names that are actually good and keep on trying them out until you find one that’s available.
For more information on naming your YouTube channel read our post ‘How To Pick a Name for Your YouTube Channel’.
4. Make a Schedule
Maintaining a YouTube channel is a big time commitment. You need to post videos regularly or people will forget about you, and videos can take a long time to make. When you are first starting your vlog you should make yourself a schedule for when you want to upload videos. Having a schedule will help you budget your time and ensure that your vlog never gets in the way of the rest of your life.
Having a posting schedule will also help you grow your channel. Viewers like it when they know when to expect new content from vloggers they like. They are more likely to subscribe and tune in for every post if they are given a chance to anticipate when your new entry is coming.
5. Take Inventory
Think about what equipment you have that you can use for your YouTube channel. The only thing you absolutely cannot get by without is a decent camera, but there are other types of equipment that it is a good idea to have too. Lights, a tripod, an external microphone – these are all things that a lot of YouTubers find they need in order to produce great videos. If you do not have these things, or money you are prepared to invest in them, then you will need to find ways around them until your situation changes. For more information check out our post ‘The Best YouTube Equipment: What You Need to Start Your Channel’.
Read More to Get : Best Video Websites Like YouTube >>
Richard Bennett
Richard Bennett is a writer and a lover of all things video.
Follow @Richard Bennett
Richard Bennett
Mar 27, 2024• Proven solutions
People create YouTube accounts for a lot of different reasons. Some YouTubers just love making videos and created their channels so they would have somewhere to post their work. Others have strong opinions they need a platform to share. There are a lot of people on YouTube whose main interest is in a separate website or other social media page, but they use their YouTube channels to help generate traffic. If you are considering starting your own YouTube channel then you should take a second to consider why you want to, since this will have an impact on what kind of videos you make. Your reasons for wanting to make a YouTube account do not have to be very elaborate. Maybe you just think it will be fun. Good news; it will be!
Once you know for sure that you want to create a YouTube account, and also know why you want to do it, you have already started building your channel. There are still a few important things to consider, though. This article will walk you through signing up for a YouTube account, and give you some tips about starting your channel.
Creating Your YouTube Account in 6 Steps
1. Go to YouTube.com and look at the top right corner of your screen. There will either be a blue Sign In button, or an icon representing you. YouTube accounts and Google accounts are the same, so if you are signed into your Gmail account you are already signed into YouTube as well.
2. If you see a Sign In button, click it. If you see your icon click on that, and in the window that pops up select Add Account. Either way, you will be taken into a sign in screen. Under where it asks for your email address it will say Create Account. Click on Create Account.
3. In the sign up page you will need to put in your name, email address, and mobile phone number as well as some other personal information. Do not enter your current Gmail address. Enter an alternate email you have created for your vlog, or click on I would like a new Gmail address. This will change your page slightly so that the email field becomes Choose a Username.
You will probably need to try a few different usernames before you find one that is not taken.
4. You will have to put in both a first and last name when you create your account, but you can change it to one name later.
5. Your password will need to be at least 8 characters long. Try to use a combination of letters or numbers, and make sure it is not something easily guessable (i.e spouses name).
6. After you finish the form click Next Step and, in the next screen, Continue to YouTube.
Tips on Starting a YouTube Channel
1. Choose a Topic you Love
When choosing a topic for your YouTube channel make sure you pick something you are passionate about. If you already have an interest or hobby which you are always researching and are extremely up-to-date on then that should probably be the theme of your vlog. If you plan to have a channel where people go to learn anything then you will need to be an authority on that topic. Whatever you make videos about it will need to be something you can realistically see yourself putting a lot of time into. If you cannot think of more than a couple ideas for videos on your topic then that is a sign that you need to choose something else to focus on.
You should check to see how much demand there is for videos on your topic. This can be done by googling your topic to see what else is out there. If not many people have addressed your topic yet it probably means that it is not something a lot of people want to know about. However, it could also mean that the people who do want to watch videos like yours have been starved for content. Your channel will flop if you do not love what you are making videos about, so do not choose something just because you think it will be popular. Follow your passion.
2. Check out the Competition
You should look for other vlogs with similar topics to yours not only to gauge how much demand there is for your videos, but to check out the competition. If there are a lot of YouTube channels dedicated to the same topic you want to vlog about then this should not discourage you from going after the same viewers. People who are excited about a topic frequently watch more than one vlog about it. It might not even be correct to think of other vloggers within your genre as ‘the competition’ since you are ultimately part of the same community. You will need to watch these people’s videos as part of keeping yourself informed and will likely become a fan – maybe even a collaborator some day – of theirs.
The main reason you want to look into YouTube channels like yours is because you do not want to be creating content that is overdone and boring. You are tackling the same topic as other people, and may even make some videos on the exact same subjects as others already have. There needs to be something unique about your videos that makes them stand out from what already exists. By looking at what other people are already doing you will be able to come up with ideas for what you can do differently.
3. Choose a Great Name
Picking a great name for your YouTube account can take a lot of effort. Chances are you will not want to use your own name, at least not in full. Although your real name can work for if you are a lifestyle vlogger in most cases you will have a more specific topic that will need to be addressed in your channel’s name. Try out your name or a nickname for yourself in combination with different words associated with the topic of your vlog. Aim to create a name that is catchy and easy to remember.
Chances are a few of your first couple picks will be unavailable. YouTube is a popular site and a lot of the best names are taken. The last thing you should ever do while naming your YouTube channel is add numbers or letters to the end of a name you like because it is taken. Names with numbers at the end are hard for viewers to remember and find again. Choosing a weak name with a trail of numbers or letters after it will make it very hard for your channel to grow. Brainstorm a long list of potential names that are actually good and keep on trying them out until you find one that’s available.
For more information on naming your YouTube channel read our post ‘How To Pick a Name for Your YouTube Channel’.
4. Make a Schedule
Maintaining a YouTube channel is a big time commitment. You need to post videos regularly or people will forget about you, and videos can take a long time to make. When you are first starting your vlog you should make yourself a schedule for when you want to upload videos. Having a schedule will help you budget your time and ensure that your vlog never gets in the way of the rest of your life.
Having a posting schedule will also help you grow your channel. Viewers like it when they know when to expect new content from vloggers they like. They are more likely to subscribe and tune in for every post if they are given a chance to anticipate when your new entry is coming.
5. Take Inventory
Think about what equipment you have that you can use for your YouTube channel. The only thing you absolutely cannot get by without is a decent camera, but there are other types of equipment that it is a good idea to have too. Lights, a tripod, an external microphone – these are all things that a lot of YouTubers find they need in order to produce great videos. If you do not have these things, or money you are prepared to invest in them, then you will need to find ways around them until your situation changes. For more information check out our post ‘The Best YouTube Equipment: What You Need to Start Your Channel’.
Read More to Get : Best Video Websites Like YouTube >>
Richard Bennett
Richard Bennett is a writer and a lover of all things video.
Follow @Richard Bennett
Also read:
- [New] In 2024, How to Seamlessly Observe the Most Praised YouTube Comments
- [New] Skillful Conversion of YouTube Videos to Interactive GIF Artistry
- For Novices to AI, Here Are 9 Must-Know Toolkits
- How To Restore Missing Messages Files from Vivo Y36
- In 2024, Capture Call Transcript for Study
- In 2024, Excelling at Content Creation A Guide to Gamers' Success
- In 2024, Guide to YouTube's Latest Income Strategies
- In 2024, How to Unlock iPhone 15 Pro Max with/without SIM Card
- In 2024, Unveiling Secrets Sharing Restricted YouTube Content via Email
- Infinix Smart 8 HD Bootloop Problem, How to Fix it Without Data Loss | Dr.fone
- Journey Into Vtuber Life Origins & Opportunities, In 2024
- New In 2024, How to Seamlessly Convert Your Podcast Into the Universal MP3 Format
- Title: 2024 Approved Say Goodbye to Vertical and Horizontal Bars in YouTube Movies
- Author: Joseph
- Created at : 2024-10-02 16:23:27
- Updated at : 2024-10-07 01:20:07
- Link: https://youtube-stream.techidaily.com/2024-approved-say-goodbye-to-vertical-and-horizontal-bars-in-youtube-movies/
- License: This work is licensed under CC BY-NC-SA 4.0.