"2024 Approved Next-Gen Videostreaming Hubs Triumph Beyond Youtube"
Next-Gen Videostreaming Hubs: Triumph Beyond Youtube
YouTube Alternatives: 3 Best Video Sharing Sites

Richard Bennett
Mar 27, 2024• Proven solutions
YouTube is a great platform where almost everyone goes to watches videos. It is not the best platform for every video creator, though. This article will introduce you to some YouTube alternatives.
There are a lot of reasons you might want to learn about other websites like YouTube. You might want a site with less ads, or different ways of monetizing. YouTube can sometimes remove videos unfairly, so you may want a site where copyright claims are handled by people instead of robots. A lot of users simply want a site that is more like YouTube was when it was younger. There are features, like customizable channel pages, which have been discarded over the years.


YouTube Alternatives: 3 Best Video Sharing Sites
Here is a list of other places where you can upload videos:
1. Dailymotion
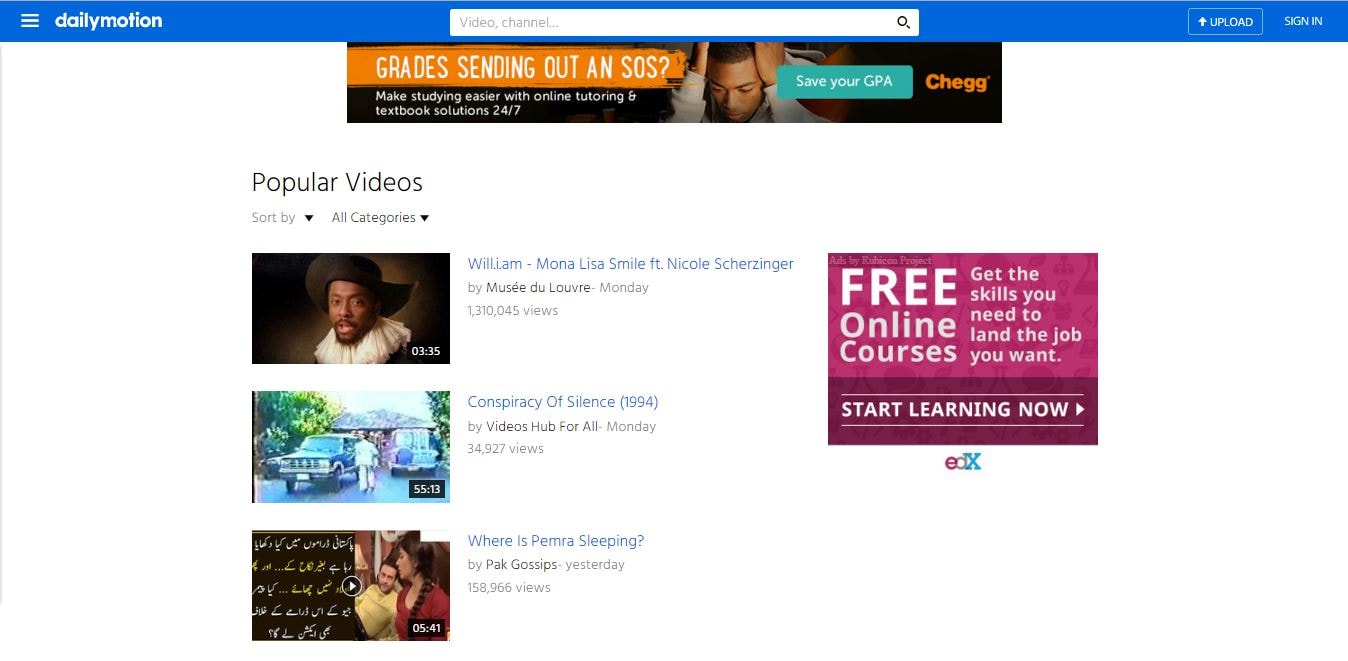
This may be the second most popular free video sharing website, and it is very similar to YouTube in appearance. Like YouTube, Dailymotion recommends videos to users based on what is trending as well as their personal viewing habits. Also like YouTube, there are ads in and around videos and you have the option of monetizing your content to earn ad revenue. There is more than one way to become a Dailymotion partner, though. You can sell a subscription for your channel instead of monetizing ads in your videos.
The main difference between Dailymotion and YouTube is that where YouTube has an abundance of both amateur and professional quality video, Dailymotion skews towards professional. There are personal vlogs and cat videos, but these are less the norm on Dailymotion than on YouTube. You may find less competition in your genre here. However, you should be aware that the expectations of viewers might be higher.
2. Vimeo
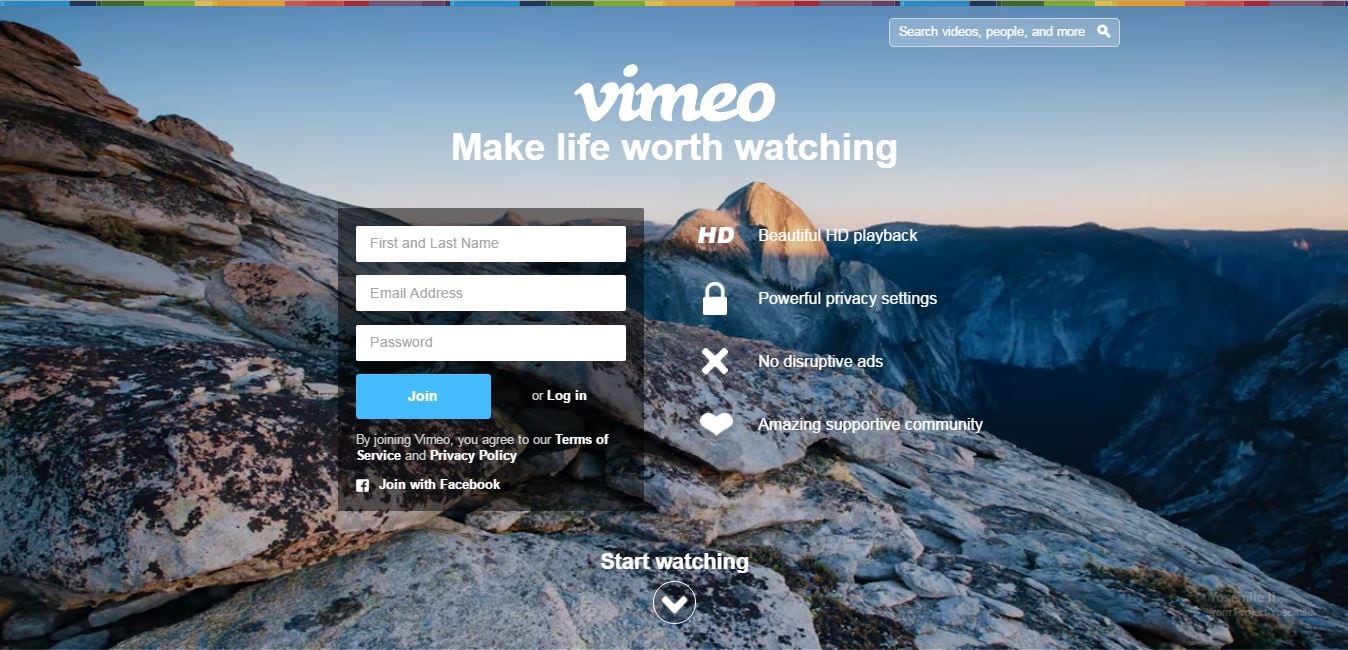
Although Vimeo is also a very popular video site, it is very different from YouTube. Everything from appearance to the types of comments left on videos is vastly different. The front page of this site does not display trending videos, for example. Instead it features high quality creative content that has been reviewed and singled out by Vimeo’s staff as some of the best the site has to offer.
There also are not any ads on Vimeo, whereas YouTube is full of them.
If you create, or are interested in creating, short films then this is where you should be posting. Many festival quality shorts are posted to Vimeo. There are vlogs there too, but they tend to be by serious video creators. The community on Vimeo tends to be a lot friendlier than YouTube so if you are still an amateur, but have dreams of being a pro, then this is probably still the site for you. You should be able to find real constructive criticism here rather than trolls.
Vimeo has a wider variety of privacy settings than YouTube. You can make videos watchable by everyone, just certain people, or require a password.
3. ZippCast
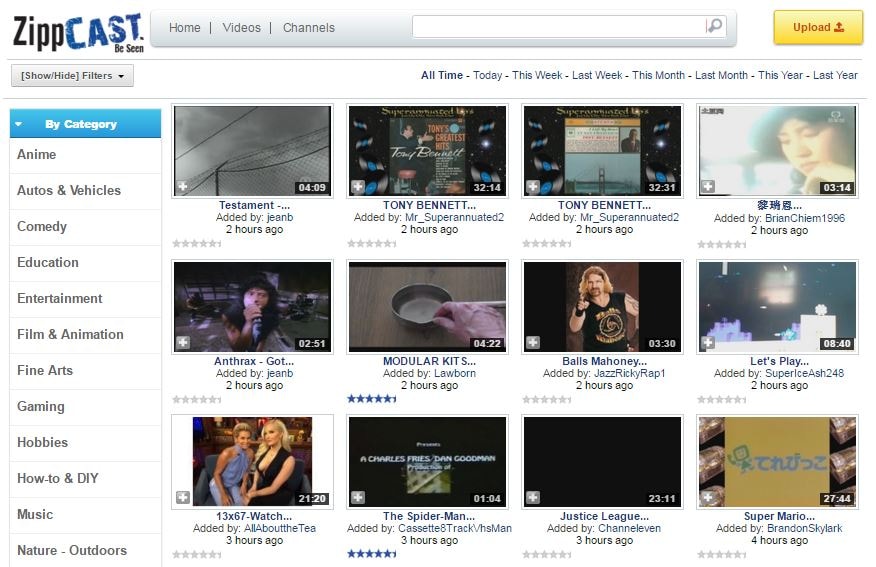
ZippCast is praised by some for being very similar to pre-Google YouTube. While the expectations for video quality may be slightly higher on DailyMotion than YouTube, and are much higher on Vimeo, they are basically the same on ZippCast. Comedy, gaming, music, animation, and vlogging are the most popular categories and almost all content is posted by average people with average skill levels. One of the ways in which ZippCast is like the ‘old’ YouTube is that you can customize the design of your channel.
One of the things users appreciate most about ZippCast is that identifying and removing copyrighted videos is done by humans rather than an automated system, like on YouTube. This means that if you use copyrighted content that is licensed to you or protected by fair use your video should not be taken down. It is common for YouTubers to have their videos unfairly removed, although disputing the copyright claim will usually result in getting the video restored.
Although it is definitely large enough to be considered an alternative to YouTube, ZippCast has been unreliable in the past (i.e shutting down randomly) and has lost the trust of many users.
Richard Bennett
Richard Bennett is a writer and a lover of all things video.
Follow @Richard Bennett
Richard Bennett
Mar 27, 2024• Proven solutions
YouTube is a great platform where almost everyone goes to watches videos. It is not the best platform for every video creator, though. This article will introduce you to some YouTube alternatives.
There are a lot of reasons you might want to learn about other websites like YouTube. You might want a site with less ads, or different ways of monetizing. YouTube can sometimes remove videos unfairly, so you may want a site where copyright claims are handled by people instead of robots. A lot of users simply want a site that is more like YouTube was when it was younger. There are features, like customizable channel pages, which have been discarded over the years.
YouTube Alternatives: 3 Best Video Sharing Sites
Here is a list of other places where you can upload videos:
1. Dailymotion
This may be the second most popular free video sharing website, and it is very similar to YouTube in appearance. Like YouTube, Dailymotion recommends videos to users based on what is trending as well as their personal viewing habits. Also like YouTube, there are ads in and around videos and you have the option of monetizing your content to earn ad revenue. There is more than one way to become a Dailymotion partner, though. You can sell a subscription for your channel instead of monetizing ads in your videos.
The main difference between Dailymotion and YouTube is that where YouTube has an abundance of both amateur and professional quality video, Dailymotion skews towards professional. There are personal vlogs and cat videos, but these are less the norm on Dailymotion than on YouTube. You may find less competition in your genre here. However, you should be aware that the expectations of viewers might be higher.
2. Vimeo
Although Vimeo is also a very popular video site, it is very different from YouTube. Everything from appearance to the types of comments left on videos is vastly different. The front page of this site does not display trending videos, for example. Instead it features high quality creative content that has been reviewed and singled out by Vimeo’s staff as some of the best the site has to offer.
There also are not any ads on Vimeo, whereas YouTube is full of them.
If you create, or are interested in creating, short films then this is where you should be posting. Many festival quality shorts are posted to Vimeo. There are vlogs there too, but they tend to be by serious video creators. The community on Vimeo tends to be a lot friendlier than YouTube so if you are still an amateur, but have dreams of being a pro, then this is probably still the site for you. You should be able to find real constructive criticism here rather than trolls.
Vimeo has a wider variety of privacy settings than YouTube. You can make videos watchable by everyone, just certain people, or require a password.
3. ZippCast
ZippCast is praised by some for being very similar to pre-Google YouTube. While the expectations for video quality may be slightly higher on DailyMotion than YouTube, and are much higher on Vimeo, they are basically the same on ZippCast. Comedy, gaming, music, animation, and vlogging are the most popular categories and almost all content is posted by average people with average skill levels. One of the ways in which ZippCast is like the ‘old’ YouTube is that you can customize the design of your channel.
One of the things users appreciate most about ZippCast is that identifying and removing copyrighted videos is done by humans rather than an automated system, like on YouTube. This means that if you use copyrighted content that is licensed to you or protected by fair use your video should not be taken down. It is common for YouTubers to have their videos unfairly removed, although disputing the copyright claim will usually result in getting the video restored.
Although it is definitely large enough to be considered an alternative to YouTube, ZippCast has been unreliable in the past (i.e shutting down randomly) and has lost the trust of many users.
Richard Bennett
Richard Bennett is a writer and a lover of all things video.
Follow @Richard Bennett
Clear Cut Content: How to Minimize Unwanted Elements in Video
How to Blur Background of Your YouTube Video
Richard Bennett
Mar 27, 2024• Proven solutions
A lot of YouTubers like to vlog in front of blurred backgrounds. Blurring the background of your YouTube video is a fast way to make it look more professional – you stand out when you are entirely in focus, and everything behind you is blurry. Plus, it is an easy way to disguise the room you are vlogging from.

Even if your set is clean, there could be things like books behind you, which will distract viewers; they will be trying to read the spines. Blurring out the background of your shot makes your video look polished and keeps people’s focus entirely on you.
- Part 1: Blur YouTube Video Background in Shooting Videos
- Part 2: Add Tilt-Shift Effects to Video in Editing
Part 1: How to Blur Background of Your YouTube Video in Shooting Videos
Blurring your background is also how you create a beautiful bokeh lighting effect. Bokeh is when you blur lights in the background of your shot, creating halo-like circles of light. By attaching a filter with a shape cut out to the camera lens, you can even generate bokeh lights in other shapes, like hearts or stars.
Aperture refers to the hole in your lens which allows light into your camera. A narrow aperture lets in less light, and a wide aperture lets in more. The wider your aperture is, the shallower your depth of field will be. Widening your aperture also helps your camera perform better in low-light situations. Widening your aperture too much under the wrong circumstances can let in too much light and result in your footage being overexposed.
Depth of Field is the area of your image that is in focus. If you have a large depth of field, then objects close to and far away from your camera will all be in focus. Only a select area will be focused and the rest will be blurred if you have a shallow depth of field.
F-Stops are the measurement of an aperture’s width. The higher your f-stop, the narrower your aperture will be. To create a blurred background or a bokeh effect, you need a wide aperture, and thus a small f-stop. F-stops are written like ‘f/1.4’. You need an f-stop of less than f/4 to blur your background, and less than f/2.8 for bokeh.
1. Blurring and Bokeh
Blurred backgrounds and bokeh are very closely related. A bokeh effect is essentially a blurred background that includes lights.
To achieve a blurred background or a bokeh effect, you need to have a shallow depth of field. That means a wide aperture and a low f-stop.
2. How to Blur your Background
Place your subject – in the case of a vlog, your subject is probably yourself – in a shallow depth of field, and they will remain sharply in focus while everything behind them is blurred.
If the subject is yourself, you might need a helper to either operate your camera or stand in for you while you set up your camera. You will need to be able to check that the place you plan to stand or sit is in focus.
To get a shallow depth of field, make sure your aperture is wide. Do this by setting a low f-stop. Ideally, your f-stop will be 2.8 or lower, but if your camera cannot go that low, then f/3 or f/4 can also work.
Creating a bokeh effect is mostly the same, except that it works best when your subject/depth of field is very close to the camera, and you have a light source off in the background. Zoom Lenses do not usually have wide enough apertures to create bokeh backgrounds.
Blur Video Background in Post-Production with Wondershare Filmora Video Editor
If you need to blur the video background after shooting, you can use some video editing software to add the bokeh effect or the tilt-off effect in post-production. Here, I will show you how to do that in Filmora.
Filmora is one of the most widely used video editing software among YouTubers. Its user-friendly interface and tutorial guide enables green-hands to start video editing quickly. Besides, you can find many free filters, effects, and elements pre-programmed, so you can use them directly without looking for presets and templates somewhere else.
1. Add Bokeh Filter to Video in Filmora
There are about 20 bokeh effects available in filters and overlays. You can find them easily by typing bokeh in the search bar in Effects.
Note: you should select Included to see all bokeh effects pre-programmed in Filmora. If you need more visual effects, just go to the Filmstock effects store.

Double click the bokeh effect to preview the result, and if you find the bokeh effect fits the video, just drop it to the track above the video. And the bokeh filter or overlay will be applied to the video automatically.
2. Use Tilt-Shift Circle/Linear Effect to Blur Video Background
Filmora features two tilt effects, tilt-shift circle and tilt-shift linear, which allows you to highlight people in the video, blur, and conceal the video background.
Go to the Effects tab and then switch to the Utility menu under Included category.

Here, I will select the Tilt-Shift Circle effect and drop it to the track above the video. Now, you can adjust the size, position, and intensity of the tilt-shift circle effect

You see, the video background is blurred, and the people are highlighted. Now it’s your turn to download the Filmora video editor and try it yourself.
Richard Bennett
Richard Bennett is a writer and a lover of all things video.
Follow @Richard Bennett
Richard Bennett
Mar 27, 2024• Proven solutions
A lot of YouTubers like to vlog in front of blurred backgrounds. Blurring the background of your YouTube video is a fast way to make it look more professional – you stand out when you are entirely in focus, and everything behind you is blurry. Plus, it is an easy way to disguise the room you are vlogging from.
Even if your set is clean, there could be things like books behind you, which will distract viewers; they will be trying to read the spines. Blurring out the background of your shot makes your video look polished and keeps people’s focus entirely on you.
- Part 1: Blur YouTube Video Background in Shooting Videos
- Part 2: Add Tilt-Shift Effects to Video in Editing
Part 1: How to Blur Background of Your YouTube Video in Shooting Videos
Blurring your background is also how you create a beautiful bokeh lighting effect. Bokeh is when you blur lights in the background of your shot, creating halo-like circles of light. By attaching a filter with a shape cut out to the camera lens, you can even generate bokeh lights in other shapes, like hearts or stars.
Aperture refers to the hole in your lens which allows light into your camera. A narrow aperture lets in less light, and a wide aperture lets in more. The wider your aperture is, the shallower your depth of field will be. Widening your aperture also helps your camera perform better in low-light situations. Widening your aperture too much under the wrong circumstances can let in too much light and result in your footage being overexposed.
Depth of Field is the area of your image that is in focus. If you have a large depth of field, then objects close to and far away from your camera will all be in focus. Only a select area will be focused and the rest will be blurred if you have a shallow depth of field.
F-Stops are the measurement of an aperture’s width. The higher your f-stop, the narrower your aperture will be. To create a blurred background or a bokeh effect, you need a wide aperture, and thus a small f-stop. F-stops are written like ‘f/1.4’. You need an f-stop of less than f/4 to blur your background, and less than f/2.8 for bokeh.
1. Blurring and Bokeh
Blurred backgrounds and bokeh are very closely related. A bokeh effect is essentially a blurred background that includes lights.
To achieve a blurred background or a bokeh effect, you need to have a shallow depth of field. That means a wide aperture and a low f-stop.
2. How to Blur your Background
Place your subject – in the case of a vlog, your subject is probably yourself – in a shallow depth of field, and they will remain sharply in focus while everything behind them is blurred.
If the subject is yourself, you might need a helper to either operate your camera or stand in for you while you set up your camera. You will need to be able to check that the place you plan to stand or sit is in focus.
To get a shallow depth of field, make sure your aperture is wide. Do this by setting a low f-stop. Ideally, your f-stop will be 2.8 or lower, but if your camera cannot go that low, then f/3 or f/4 can also work.
Creating a bokeh effect is mostly the same, except that it works best when your subject/depth of field is very close to the camera, and you have a light source off in the background. Zoom Lenses do not usually have wide enough apertures to create bokeh backgrounds.
Blur Video Background in Post-Production with Wondershare Filmora Video Editor
If you need to blur the video background after shooting, you can use some video editing software to add the bokeh effect or the tilt-off effect in post-production. Here, I will show you how to do that in Filmora.
Filmora is one of the most widely used video editing software among YouTubers. Its user-friendly interface and tutorial guide enables green-hands to start video editing quickly. Besides, you can find many free filters, effects, and elements pre-programmed, so you can use them directly without looking for presets and templates somewhere else.
1. Add Bokeh Filter to Video in Filmora
There are about 20 bokeh effects available in filters and overlays. You can find them easily by typing bokeh in the search bar in Effects.
Note: you should select Included to see all bokeh effects pre-programmed in Filmora. If you need more visual effects, just go to the Filmstock effects store.
Double click the bokeh effect to preview the result, and if you find the bokeh effect fits the video, just drop it to the track above the video. And the bokeh filter or overlay will be applied to the video automatically.
2. Use Tilt-Shift Circle/Linear Effect to Blur Video Background
Filmora features two tilt effects, tilt-shift circle and tilt-shift linear, which allows you to highlight people in the video, blur, and conceal the video background.
Go to the Effects tab and then switch to the Utility menu under Included category.
Here, I will select the Tilt-Shift Circle effect and drop it to the track above the video. Now, you can adjust the size, position, and intensity of the tilt-shift circle effect
You see, the video background is blurred, and the people are highlighted. Now it’s your turn to download the Filmora video editor and try it yourself.
Richard Bennett
Richard Bennett is a writer and a lover of all things video.
Follow @Richard Bennett
Also read:
- [New] Exploring 8 Truly Effective Video Marketing Strategies
- [New] Free Profile Imagery for YouTubers
- [New] In 2024, Capturing Cultures A Step-by-Step Guide for Aspiring Travel Vloggers
- [Updated] 2024 Approved Distinguished Choices Top iPhone Sound Artisans
- [Updated] In 2024, Unlocking the Past Essential History YouTubes For Educational Journey
- 2024 Approved Top 8 Linux-Compatible Cutting Apps
- Comprehensive Guide on Continuous Data Protection: Strategies & Tips
- How to Soft Reset Your iPhone
- In 2024, Maximizing Your YouTube Clicks with Optimal Dimensions
- In 2024, The Most Compelling List of Free YouTube Platforms for Comic Book Illustrators
- In 2024, The Ultimate List Top 7 Android Apps Blocking Intrusive Ads
- Insightful Analysis: Madden 19'S Impressive Modes Overshadowed by Familiarity
- Two Ways to Sync Contacts from Nubia Red Magic 9 Pro+ to Gmail | Dr.fone
- Unboxing the Asus ROG NUC Groovy Desktop Solution - Compact and Efficient
- Title: 2024 Approved Next-Gen Videostreaming Hubs Triumph Beyond Youtube
- Author: Joseph
- Created at : 2024-12-23 07:28:35
- Updated at : 2024-12-24 18:23:56
- Link: https://youtube-stream.techidaily.com/2024-approved-next-gen-videostreaming-hubs-triumph-beyond-youtube/
- License: This work is licensed under CC BY-NC-SA 4.0.