
"2024 Approved Mastering View Counts by Upholding YouTube's CC License"
Mastering View Counts by Upholding YouTube’s CC License
How to Force YouTube CC to Stay On and Get More Views

Richard Bennett
Oct 26, 2023• Proven solutions
Table of Content:
How YouTube CC Helps You Get More Views?
Benefits of Having YouTube CC Always On
How to Force YouTube CC to Always Turn On?
How to Embed Your Videos with Closed Captions on Your Website
Bonus Tip-Add Subtitles to YouTube Video with Wondershare Filmora
Wondershare Filmora serves as an inevitable video editing software for video lovers. It has a variety of subtitle templates for you to make great creations. Let’s see how to add subtitles to a YouTube video with Wondershare Filmora!


How YouTube CC Helps You to Get More Views?
YouTube CC (Closed Captions) is much capable of bringing more views to your videos.
Why? Because YouTube algorithms prefer to highlight YouTube videos that contain closed captions because such content appears universally acceptable and it helps to boost the experience for viewers. So when your YouTube video has some kind of relevant audio or speech information then it is essential to add closed captions (YouTube CC) to it.
Benefits of Having YouTube CC Always On
YouTube CC can easily bring more viewers to your terminal. But not all users know how to turn it on or bother to turn it on when it can actually help improve the watching experience. So there are few benefits that you can enjoy by having CCs ALWAYS on your videos.
- Closed captions play an important role when you have poor audio quality in your videos. For instance, if your videos did not follow the best audio recording practices , and are affected by background noise or bad audio equipment. In such cases, YouTube subtitles help viewers to understand what is going on videos even if they cannot hear it.
- For those who make videos with a unique accent, discuss something complex, or speaks too fast, turning on the closed captions help your viewers understand explanations and maintain their attention.
- This feature makes videos more accessible and can also appear useful for viewers that are hearing impaired.
How to Force YouTube CC to Always Turn On?
So, as you have gone through several benefits associated with YouTube video closed captions, now it is time to learn the technique to keep them always On.
Go through the steps below to force CCs always on your YouTube videos:
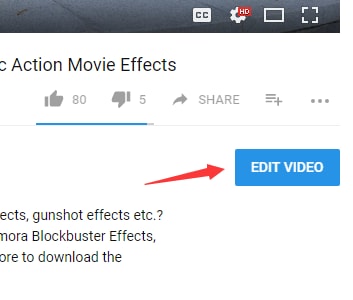
Step 1: Login and click the video in which you wish to add your captions.
Step 2: Click Edit underneath the video
Step 3: Add a specific tag to your content: “yt:cc=on”

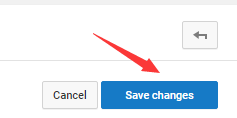
Step 4: Click Save Edit
There you go!

How to Embed your Videos with Closed Captions on your website
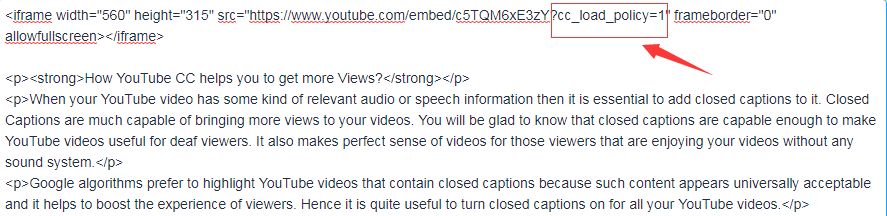
Some of you might also want to embed YouTube videos on your website. In this case, also you will need to use closed captions during display.
To do this, write “?cc_load_policy=1” at the end of your video source URL; it will be inside the iframe.
These simple steps will help you to create videos with the most impactful content and this collection will be enjoyed by all viewers on your channel. The Closed Captioned videos are valued higher by Google because they are capable enough to please the viewers throughout the world.
Even though CCs can be a powerful addition to your videos, it’s always important to prioritize audio, and it all starts with a good microphone. Find out what the best microphones are in this blog post: The Best Microphone for All Types of Creators
Richard Bennett
Richard Bennett is a writer and a lover of all things video.
Follow @Richard Bennett
Richard Bennett
Oct 26, 2023• Proven solutions
Table of Content:
How YouTube CC Helps You Get More Views?
Benefits of Having YouTube CC Always On
How to Force YouTube CC to Always Turn On?
How to Embed Your Videos with Closed Captions on Your Website
Bonus Tip-Add Subtitles to YouTube Video with Wondershare Filmora
Wondershare Filmora serves as an inevitable video editing software for video lovers. It has a variety of subtitle templates for you to make great creations. Let’s see how to add subtitles to a YouTube video with Wondershare Filmora!
How YouTube CC Helps You to Get More Views?
YouTube CC (Closed Captions) is much capable of bringing more views to your videos.
Why? Because YouTube algorithms prefer to highlight YouTube videos that contain closed captions because such content appears universally acceptable and it helps to boost the experience for viewers. So when your YouTube video has some kind of relevant audio or speech information then it is essential to add closed captions (YouTube CC) to it.
Benefits of Having YouTube CC Always On
YouTube CC can easily bring more viewers to your terminal. But not all users know how to turn it on or bother to turn it on when it can actually help improve the watching experience. So there are few benefits that you can enjoy by having CCs ALWAYS on your videos.
- Closed captions play an important role when you have poor audio quality in your videos. For instance, if your videos did not follow the best audio recording practices , and are affected by background noise or bad audio equipment. In such cases, YouTube subtitles help viewers to understand what is going on videos even if they cannot hear it.
- For those who make videos with a unique accent, discuss something complex, or speaks too fast, turning on the closed captions help your viewers understand explanations and maintain their attention.
- This feature makes videos more accessible and can also appear useful for viewers that are hearing impaired.
How to Force YouTube CC to Always Turn On?
So, as you have gone through several benefits associated with YouTube video closed captions, now it is time to learn the technique to keep them always On.
Go through the steps below to force CCs always on your YouTube videos:
Step 1: Login and click the video in which you wish to add your captions.
Step 2: Click Edit underneath the video
Step 3: Add a specific tag to your content: “yt:cc=on”
Step 4: Click Save Edit
There you go!
How to Embed your Videos with Closed Captions on your website
Some of you might also want to embed YouTube videos on your website. In this case, also you will need to use closed captions during display.
To do this, write “?cc_load_policy=1” at the end of your video source URL; it will be inside the iframe.
These simple steps will help you to create videos with the most impactful content and this collection will be enjoyed by all viewers on your channel. The Closed Captioned videos are valued higher by Google because they are capable enough to please the viewers throughout the world.
Even though CCs can be a powerful addition to your videos, it’s always important to prioritize audio, and it all starts with a good microphone. Find out what the best microphones are in this blog post: The Best Microphone for All Types of Creators
Richard Bennett
Richard Bennett is a writer and a lover of all things video.
Follow @Richard Bennett
The Insider’s Guide to YouTube Editing Mastery Using Sony Vegas Software
How to Edit YouTube Videos in Sony Vegas
Richard Bennett
Mar 27, 2024• Proven solutions
Sony Vegas (Vegas Movie Studio) is renowned and particularly popular video editing software which is going to provide you with quite a lot of convenience. It is light, easy to work with and has comprehensive command tools which would provide you with prominent video editing capabilities. You can choose through a variety of exportation presets, including YouTube HD videos. In this article, we’are going to show you how to edit your YouTube Videos with Sony Vegas Pro.
Best Sony Vegas Alternative to Edit YouTube Videos - Even though Sony Vegas is quite comprehensive, it does require knowledge on behalf of the user. Unlike it, Wondershare Filmora is a perfect alternative which would provide you with all the necessary capabilities without presuming any kind of skills on your particular behalf. With this in mind, let’s take a look at some of the benefits:
Download Mac Version ](https://tools.techidaily.com/wondershare/filmora/download/ )
Amongst these, there are tons of other benefits that you can take advantage of.
- It has over 200 unique styles you can take your pick from
- It has animated captions that you can add conveniently
- It has a wide range of different templates and credits that you can use
How to Edit YouTube Videos in Sony Vegas
Let’s walk through the process of editing.
Step 1: Import Videos
The first thing that you would need to do is import the video clip that you would want to re-shape and edit. In order to do so, you want to click on the File button and then go to Import. You will see a side menu on which you need to click Media and select the file that you want to upload. Keep in mind that you might have to wait for a short period of time while the videos are being uploaded.

Note: You can also import videos which have been published on your channel by downloading them and saving them as MP4 files. On the other hand, if you have the intention of editing videos published on other channels, you might want to use Wondershare Video Converter Ultimate in order to download and convert them to your Mac and get them imported on Sony Vegas.
Step 2: Edit the video and audio files on the Timeline

Sony Vegas introduces a Timeline with Video and Audio tracks. They contain the clips you’ve used in the entire editing process. You can edit them by aligning them as you see fit in order to come up with the best sequence. You can also add additional tracks. In order to do so, all you need to do is right click on the space which is empty and then go Add video track.
Step 3: Add special effects

Of course, what’s video editing software without powerful special effect capabilities? You will see the special effects tab located on the left side of your screen. You can easily browse throughout all of them in order to get a sense of what you can achieve with your video. There are quite a lot of different special effects that you can incorporate in your YouTube video and make it perfect.
Step 4: Export

This is the thing that you need to do once you are done with the process to edit YouTube videos with Sony Vegas. It’s a very easy task to handle and if you’ve come that far you are already on the finish line. Go to File -> Export and choose the specific extension that you want to use. The clip is going to be saved in the directory that you’ve selected, and it’s ready to watch and upload.
Richard Bennett
Richard Bennett is a writer and a lover of all things video.
Follow @Richard Bennett
Richard Bennett
Mar 27, 2024• Proven solutions
Sony Vegas (Vegas Movie Studio) is renowned and particularly popular video editing software which is going to provide you with quite a lot of convenience. It is light, easy to work with and has comprehensive command tools which would provide you with prominent video editing capabilities. You can choose through a variety of exportation presets, including YouTube HD videos. In this article, we’are going to show you how to edit your YouTube Videos with Sony Vegas Pro.
Best Sony Vegas Alternative to Edit YouTube Videos - Even though Sony Vegas is quite comprehensive, it does require knowledge on behalf of the user. Unlike it, Wondershare Filmora is a perfect alternative which would provide you with all the necessary capabilities without presuming any kind of skills on your particular behalf. With this in mind, let’s take a look at some of the benefits:
Download Mac Version ](https://tools.techidaily.com/wondershare/filmora/download/ )
Amongst these, there are tons of other benefits that you can take advantage of.
- It has over 200 unique styles you can take your pick from
- It has animated captions that you can add conveniently
- It has a wide range of different templates and credits that you can use
How to Edit YouTube Videos in Sony Vegas
Let’s walk through the process of editing.
Step 1: Import Videos
The first thing that you would need to do is import the video clip that you would want to re-shape and edit. In order to do so, you want to click on the File button and then go to Import. You will see a side menu on which you need to click Media and select the file that you want to upload. Keep in mind that you might have to wait for a short period of time while the videos are being uploaded.
Note: You can also import videos which have been published on your channel by downloading them and saving them as MP4 files. On the other hand, if you have the intention of editing videos published on other channels, you might want to use Wondershare Video Converter Ultimate in order to download and convert them to your Mac and get them imported on Sony Vegas.
Step 2: Edit the video and audio files on the Timeline
Sony Vegas introduces a Timeline with Video and Audio tracks. They contain the clips you’ve used in the entire editing process. You can edit them by aligning them as you see fit in order to come up with the best sequence. You can also add additional tracks. In order to do so, all you need to do is right click on the space which is empty and then go Add video track.
Step 3: Add special effects
Of course, what’s video editing software without powerful special effect capabilities? You will see the special effects tab located on the left side of your screen. You can easily browse throughout all of them in order to get a sense of what you can achieve with your video. There are quite a lot of different special effects that you can incorporate in your YouTube video and make it perfect.
Step 4: Export
This is the thing that you need to do once you are done with the process to edit YouTube videos with Sony Vegas. It’s a very easy task to handle and if you’ve come that far you are already on the finish line. Go to File -> Export and choose the specific extension that you want to use. The clip is going to be saved in the directory that you’ve selected, and it’s ready to watch and upload.
Richard Bennett
Richard Bennett is a writer and a lover of all things video.
Follow @Richard Bennett
Also read:
- [New] 2024 Approved Gaming's Finest Shooters - A Top 7 List
- [New] The Hidden Facets of Instagram Story Consumption
- Combining Images for an Engaging Picture Panorama for 2024
- Evaluating Motorola Edge+: Fails To Meet High-End Phone Expectations
- In 2024, Harness the Power of YT Green Screens for Imaginative Projects
- In 2024, Mastering Youtube Shorts for Profit Essential Requirements and Potential Earnings
- In 2024, The Ultimate Guide How to Bypass Swipe Screen to Unlock on Vivo S17 Device
- In 2024, Transform Your YouTube Presence Effortlessly
- In 2024, Unveiling the Money Map A 3-Step Guide for Calculating Your YouTube Income
- Title: 2024 Approved Mastering View Counts by Upholding YouTube's CC License
- Author: Joseph
- Created at : 2025-01-06 16:17:56
- Updated at : 2025-01-10 17:02:02
- Link: https://youtube-stream.techidaily.com/2024-approved-mastering-view-counts-by-upholding-youtubes-cc-license/
- License: This work is licensed under CC BY-NC-SA 4.0.