
"2024 Approved Incorporating Jump Cuts for Smoother Edits"
Incorporating Jump Cuts for Smoother Edits
How To Use Jump Cuts in Your Vlog

Richard Bennett
Mar 27, 2024• Proven solutions
A common problem for new YouTubers and Vlogers is that they cannot get through a recording without feeling like they have messed up and need to restart. It can be extremely discouraging at first. More experienced vloggers know that mistakes happen and they are no reason to stop recording. Instead of trying to record a perfect clip it is common for vloggers to remove errors from their videos in editing using jump cuts.
How To Use Jump Cuts in Your Vlog
1. What is a Jump Cut?
A jump cut is when you jump from one part of your clip to a later part of that same clip, cutting out the section in-between.
In movies or tv shows jump cuts can be distracting. In vlogs it is the exact opposite; jump cuts are used to remove distractions. It is not strange for a YouTube video to contain a lot of jump cuts. If you go and re-watch a video by your favorite vlogger you will probably notice that every once in a while the vlogger is suddenly sitting differently or that something else has suddenly changed. That is a jump cut, and chances are you did not even think twice about it when you first watched the video.
2. When to use Jump Cuts in your Youtube Video
There are a lot of things you might want to take out of your clips using jump cuts. Here are some examples:
Repetition: You may have had to repeat yourself because you misspoke. Or, you might watch your clip back and realize that two sections you intended – perhaps even scripted – are very similar and you only need one.
Off-Topic Tangents: Once you get comfortable talking to the camera it is easy to find yourself getting off-topic while recording. These tangents might be funny or feel important, but you should still cut them out of your final video. Rather than scrapping them completely, though, consider giving your tangent its very own video. Successful vloggers post new videos frequently, after all.
Silence: Use jump cuts to take out any pauses in your video. Every period of silence is an opportunity for viewers to get distracted and decide to click on something else. Adding music to the background of your video can help with shorter pauses, but cutting out any silence is still a good way to go.
In the video tutorial below, we will share with you some practical and creative jump cuts tips that you can try in video editing. And most of the jump cuts are done with the cutting features in Filmora . You can download the free trial version below by clicking the Free Download button based on your system.
 Download Mac Version ](https://tools.techidaily.com/wondershare/filmora/download/ )
3. How to Make Jump Cuts in Vlog & YouTube Videos
You can make jump cuts in almost every editing program, from free software like Windows Movie Maker to professional programs like Adobe Premiere. Remember no matter which video editing software you are using to edit your videos with jump cut, you need to ensure that the software can scroll through your video clips and audio files frame-by-frame. And some video editors may only allow you to scroll video footage frame by frame. This tutorial is for Filmora Video Editor (Now upgraded to Filmora), but many of the same steps will apply to other software.
Download Mac Version ](https://tools.techidaily.com/wondershare/filmora/download/ )
You may also like: How to trim and cut videos in Windows Movie Maker for Free
Open up Filmora Video Editor and add a clip into the timeline. Watch it through, and then revisit sections where you think you might want to make cuts.
Find a place in your clip that has silence and use the scissors icon to cut your clip into two. Then start playing your clip and pause as soon as you hear sound.
Make sure your clip is selected, and then go back frame by frame until you hear nothing.
Use the scissors icon to make another cut. You will now have three clips; one before the silence, the silent pause, and the section where sound starts again. Delete the quiet middle clip.
4. Keep video shorter for more views
The videos that get the most views on YouTube are an average of three minutes long. People will use the length of a video as a reason not to click on it. Viewers are also more likely to get distracted and stop watching longer videos before they are over. That does not mean you should not take as long as you need to properly explain your ideas, just that you should be careful your video is not longer than it needs to be. It is common for youtubers to use only about a third of the clip they record. The rest is removed using jump cuts.
Filmora video editor will help you to be more creative in video editing and saving your time at the same time. Download and leave a comment below about how do you like it.

Richard Bennett
Richard Bennett is a writer and a lover of all things video.
Follow @Richard Bennett
Richard Bennett
Mar 27, 2024• Proven solutions
A common problem for new YouTubers and Vlogers is that they cannot get through a recording without feeling like they have messed up and need to restart. It can be extremely discouraging at first. More experienced vloggers know that mistakes happen and they are no reason to stop recording. Instead of trying to record a perfect clip it is common for vloggers to remove errors from their videos in editing using jump cuts.
How To Use Jump Cuts in Your Vlog
1. What is a Jump Cut?
A jump cut is when you jump from one part of your clip to a later part of that same clip, cutting out the section in-between.
In movies or tv shows jump cuts can be distracting. In vlogs it is the exact opposite; jump cuts are used to remove distractions. It is not strange for a YouTube video to contain a lot of jump cuts. If you go and re-watch a video by your favorite vlogger you will probably notice that every once in a while the vlogger is suddenly sitting differently or that something else has suddenly changed. That is a jump cut, and chances are you did not even think twice about it when you first watched the video.
2. When to use Jump Cuts in your Youtube Video
There are a lot of things you might want to take out of your clips using jump cuts. Here are some examples:
Repetition: You may have had to repeat yourself because you misspoke. Or, you might watch your clip back and realize that two sections you intended – perhaps even scripted – are very similar and you only need one.
Off-Topic Tangents: Once you get comfortable talking to the camera it is easy to find yourself getting off-topic while recording. These tangents might be funny or feel important, but you should still cut them out of your final video. Rather than scrapping them completely, though, consider giving your tangent its very own video. Successful vloggers post new videos frequently, after all.
Silence: Use jump cuts to take out any pauses in your video. Every period of silence is an opportunity for viewers to get distracted and decide to click on something else. Adding music to the background of your video can help with shorter pauses, but cutting out any silence is still a good way to go.
In the video tutorial below, we will share with you some practical and creative jump cuts tips that you can try in video editing. And most of the jump cuts are done with the cutting features in Filmora . You can download the free trial version below by clicking the Free Download button based on your system.
Download Mac Version ](https://tools.techidaily.com/wondershare/filmora/download/ )
3. How to Make Jump Cuts in Vlog & YouTube Videos
You can make jump cuts in almost every editing program, from free software like Windows Movie Maker to professional programs like Adobe Premiere. Remember no matter which video editing software you are using to edit your videos with jump cut, you need to ensure that the software can scroll through your video clips and audio files frame-by-frame. And some video editors may only allow you to scroll video footage frame by frame. This tutorial is for Filmora Video Editor (Now upgraded to Filmora), but many of the same steps will apply to other software.
Download Mac Version ](https://tools.techidaily.com/wondershare/filmora/download/ )
You may also like: How to trim and cut videos in Windows Movie Maker for Free
Open up Filmora Video Editor and add a clip into the timeline. Watch it through, and then revisit sections where you think you might want to make cuts.
Find a place in your clip that has silence and use the scissors icon to cut your clip into two. Then start playing your clip and pause as soon as you hear sound.
Make sure your clip is selected, and then go back frame by frame until you hear nothing.
Use the scissors icon to make another cut. You will now have three clips; one before the silence, the silent pause, and the section where sound starts again. Delete the quiet middle clip.
4. Keep video shorter for more views
The videos that get the most views on YouTube are an average of three minutes long. People will use the length of a video as a reason not to click on it. Viewers are also more likely to get distracted and stop watching longer videos before they are over. That does not mean you should not take as long as you need to properly explain your ideas, just that you should be careful your video is not longer than it needs to be. It is common for youtubers to use only about a third of the clip they record. The rest is removed using jump cuts.
Filmora video editor will help you to be more creative in video editing and saving your time at the same time. Download and leave a comment below about how do you like it.
Richard Bennett
Richard Bennett is a writer and a lover of all things video.
Follow @Richard Bennett
Prolonged YouTube Visibility Through Continuous CC Membership
How to Force YouTube CC to Stay On and Get More Views
Richard Bennett
Oct 26, 2023• Proven solutions
Table of Content:
How YouTube CC Helps You Get More Views?
Benefits of Having YouTube CC Always On
How to Force YouTube CC to Always Turn On?
How to Embed Your Videos with Closed Captions on Your Website
Bonus Tip-Add Subtitles to YouTube Video with Wondershare Filmora
Wondershare Filmora serves as an inevitable video editing software for video lovers. It has a variety of subtitle templates for you to make great creations. Let’s see how to add subtitles to a YouTube video with Wondershare Filmora!
How YouTube CC Helps You to Get More Views?
YouTube CC (Closed Captions) is much capable of bringing more views to your videos.
Why? Because YouTube algorithms prefer to highlight YouTube videos that contain closed captions because such content appears universally acceptable and it helps to boost the experience for viewers. So when your YouTube video has some kind of relevant audio or speech information then it is essential to add closed captions (YouTube CC) to it.
Benefits of Having YouTube CC Always On
YouTube CC can easily bring more viewers to your terminal. But not all users know how to turn it on or bother to turn it on when it can actually help improve the watching experience. So there are few benefits that you can enjoy by having CCs ALWAYS on your videos.
- Closed captions play an important role when you have poor audio quality in your videos. For instance, if your videos did not follow the best audio recording practices , and are affected by background noise or bad audio equipment. In such cases, YouTube subtitles help viewers to understand what is going on videos even if they cannot hear it.
- For those who make videos with a unique accent, discuss something complex, or speaks too fast, turning on the closed captions help your viewers understand explanations and maintain their attention.
- This feature makes videos more accessible and can also appear useful for viewers that are hearing impaired.
How to Force YouTube CC to Always Turn On?
So, as you have gone through several benefits associated with YouTube video closed captions, now it is time to learn the technique to keep them always On.
Go through the steps below to force CCs always on your YouTube videos:
Step 1: Login and click the video in which you wish to add your captions.
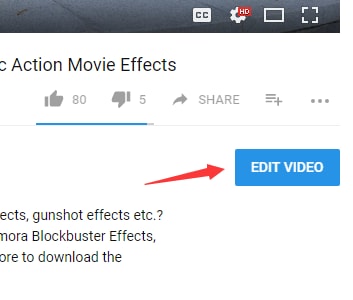
Step 2: Click Edit underneath the video
Step 3: Add a specific tag to your content: “yt:cc=on”

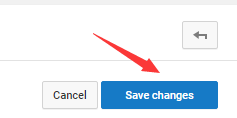
Step 4: Click Save Edit
There you go!

How to Embed your Videos with Closed Captions on your website
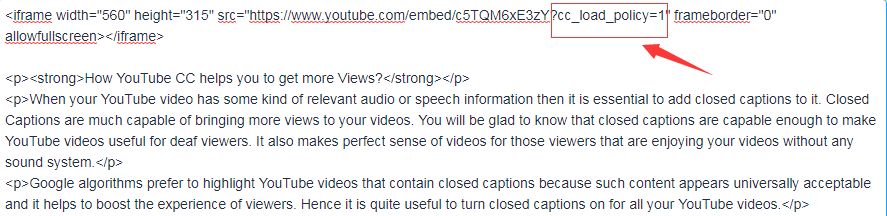
Some of you might also want to embed YouTube videos on your website. In this case, also you will need to use closed captions during display.
To do this, write “?cc_load_policy=1” at the end of your video source URL; it will be inside the iframe.
These simple steps will help you to create videos with the most impactful content and this collection will be enjoyed by all viewers on your channel. The Closed Captioned videos are valued higher by Google because they are capable enough to please the viewers throughout the world.
Even though CCs can be a powerful addition to your videos, it’s always important to prioritize audio, and it all starts with a good microphone. Find out what the best microphones are in this blog post: The Best Microphone for All Types of Creators
Richard Bennett
Richard Bennett is a writer and a lover of all things video.
Follow @Richard Bennett
Richard Bennett
Oct 26, 2023• Proven solutions
Table of Content:
How YouTube CC Helps You Get More Views?
Benefits of Having YouTube CC Always On
How to Force YouTube CC to Always Turn On?
How to Embed Your Videos with Closed Captions on Your Website
Bonus Tip-Add Subtitles to YouTube Video with Wondershare Filmora
Wondershare Filmora serves as an inevitable video editing software for video lovers. It has a variety of subtitle templates for you to make great creations. Let’s see how to add subtitles to a YouTube video with Wondershare Filmora!
How YouTube CC Helps You to Get More Views?
YouTube CC (Closed Captions) is much capable of bringing more views to your videos.
Why? Because YouTube algorithms prefer to highlight YouTube videos that contain closed captions because such content appears universally acceptable and it helps to boost the experience for viewers. So when your YouTube video has some kind of relevant audio or speech information then it is essential to add closed captions (YouTube CC) to it.
Benefits of Having YouTube CC Always On
YouTube CC can easily bring more viewers to your terminal. But not all users know how to turn it on or bother to turn it on when it can actually help improve the watching experience. So there are few benefits that you can enjoy by having CCs ALWAYS on your videos.
- Closed captions play an important role when you have poor audio quality in your videos. For instance, if your videos did not follow the best audio recording practices , and are affected by background noise or bad audio equipment. In such cases, YouTube subtitles help viewers to understand what is going on videos even if they cannot hear it.
- For those who make videos with a unique accent, discuss something complex, or speaks too fast, turning on the closed captions help your viewers understand explanations and maintain their attention.
- This feature makes videos more accessible and can also appear useful for viewers that are hearing impaired.
How to Force YouTube CC to Always Turn On?
So, as you have gone through several benefits associated with YouTube video closed captions, now it is time to learn the technique to keep them always On.
Go through the steps below to force CCs always on your YouTube videos:
Step 1: Login and click the video in which you wish to add your captions.
Step 2: Click Edit underneath the video
Step 3: Add a specific tag to your content: “yt:cc=on”
Step 4: Click Save Edit
There you go!
How to Embed your Videos with Closed Captions on your website
Some of you might also want to embed YouTube videos on your website. In this case, also you will need to use closed captions during display.
To do this, write “?cc_load_policy=1” at the end of your video source URL; it will be inside the iframe.
These simple steps will help you to create videos with the most impactful content and this collection will be enjoyed by all viewers on your channel. The Closed Captioned videos are valued higher by Google because they are capable enough to please the viewers throughout the world.
Even though CCs can be a powerful addition to your videos, it’s always important to prioritize audio, and it all starts with a good microphone. Find out what the best microphones are in this blog post: The Best Microphone for All Types of Creators
Richard Bennett
Richard Bennett is a writer and a lover of all things video.
Follow @Richard Bennett
Also read:
- [New] Step-by-Step Backdrop Be Gone Guide for Images
- [Updated] 2024 Approved Ultimate Cartoony Transformation Tools for PCs & Macs
- 10 Best Travel Youtube Channels You May Want to Follow for 2024
- 2024 Approved Finding Your Portal to YouTube's Video Mastery Hub
- 2024 Approved Techniques for Unlinking YouTube Videos From Devices
- 2024 Approved The Year's Most Loved YouTube Music Video Responses
- Comprehensive Look Into the Amazon Kindle Oasis - Exceptional Style with an Upscale Tag
- Effective Remedies for Microsoft's directx/directinput.dll Error Fixes
- In 2024, Android Unlock Code Sim Unlock Your Honor Magic 6 Lite Phone and Remove Locked Screen
- In 2024, How to Use YouTube Cards and Annotations?
- In 2024, Seamless Audio Transfer YouTube Videos > MP3, MacOS 2023
- In 2024, Seamless Visual Storytelling Through Advanced Chroma Techniques
- In 2024, Top Techniques for Crafting Engaging YouTube Shorts Templates
- In 2024, Ways To Find Unlocking Codes For Xiaomi Redmi K70 Phones
- Incorporating YouTube's Video Content on Your Domain for 2024
- Leveraging Costless Methods for Integrating Videos Into Writing for 2024
- Troubleshooting Dolby Atmos Playback Problems in Windows 11 and 10
- Title: 2024 Approved Incorporating Jump Cuts for Smoother Edits
- Author: Joseph
- Created at : 2024-10-21 16:01:28
- Updated at : 2024-10-24 16:00:43
- Link: https://youtube-stream.techidaily.com/2024-approved-incorporating-jump-cuts-for-smoother-edits/
- License: This work is licensed under CC BY-NC-SA 4.0.