
:max_bytes(150000):strip_icc()/ChatGPT-vs-Gemini-5b3a3afa5db547caac70eb4e607bc48c.jpg)
"2024 Approved How to Setup a Mac Studio for Sports Content"
How to Setup a Mac Studio for Sports Content
How to Create a Sports YouTube Channel on Mac?

Richard Bennett
Dec 14, 2023• Proven solutions
It is no secret that there is a huge audience of sports, including e-sports and gaming, on YouTube who appreciates high-quality content. These viewers are searching for sports YouTubers who create insightful and entertaining content that isn’t only rich in terms of content but production as well. It means that sports channels on YouTube have to rely on special video editing effects to ensure they are delivering what their viewers expect.
That being said, it is usually not easy for aspiring sports YouTubers to start since they have little to no experience when it comes to creating premium sports videos for YouTube. This article will help you out in terms of starting a new YouTube sports channel, especially if you are a mac user.
- Section1. Necessary Elements of a YouTube Sports Channel
- Section2. Must Use Feature for Making a Sports YouTube Channel
- Section3. Which Video Editing Software Has these Features?

Section 1. Necessary Elements of a YouTube Sports Channel
If you want to start a YouTube sports channel, you need to keep in mind that sports videos are fundamentally different from other types of videos. This requires you to have a strong grasp not only on content but video editing as well. Here are some of the top elements that every YouTube sports channel needs.
1.Insightful Producer Perspective
First of all, you should try to have a clear and comprehensive understanding of the sport you are going to talk about on your channel. If you are just an amateur or a casual fan, you will need to do more preparation as a sports YouTuber.

2.Brief and Clear Delivery
The second most important thing is to communicate your perspective in an entertaining, brief, and interactive manner so your viewers remain engaged and keep coming back to your channel. If you fail to communicate properly, your viewers will go somewhere else to watch what they are looking for.
3.Advanced Video Editing
Apart from the content, you need to make yourself familiar with using advanced video editing features such as picture-in-picture, screen recording, and audio recording. These allow you to provide a high-quality viewing experience to your YouTube channel audience.
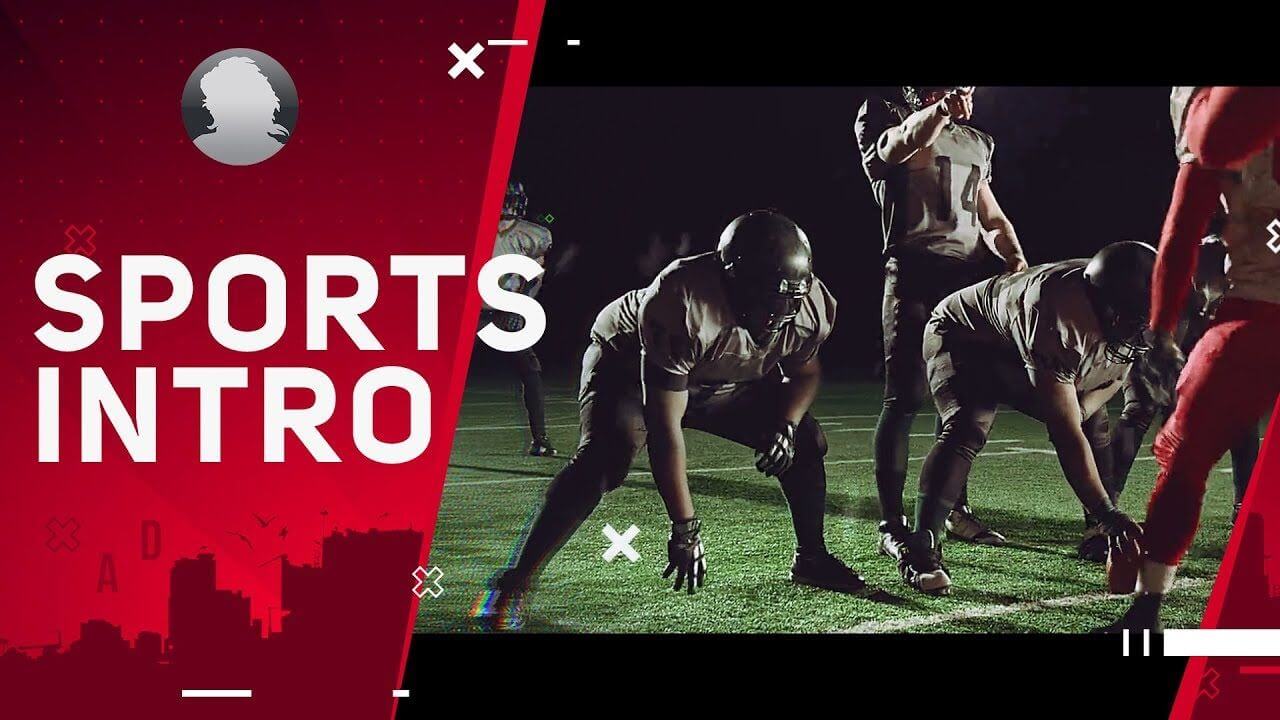
4.Branded Intro & Outro
You need to set yourself apart with the impactful branding of your sports YouTube channel. It means that the software you are using on your Mac needs to have smart editing features including the ability to add cool intros and outros that become the trademark of your sports channel.
You May Also Like:
- YouTuber Skillshare: Essential Video Cutting Skills For YouTubers>>>
- What is the Best MP4 Cutter for YouTubers On Mac?>>>
Section 2. Must Use Feature for Making a Sports YouTube Channel
There are many features that you may need in your sports content creation. High video quality will bring more views and attract more fans to your YouTube channel. Here are some features you may use in making sports videos.
1. Making a Sports YouTube Channel - Screen Recording
One of the top features that you must use in your sports content creation is screen recording. It is a vital feature for all sports YouTubers and it is used extensively for multiple reasons:
- It gives content creators the ability to give demonstrations in a clear and convenient manner that is easily understandable.
- Screen recording also allows them to create how-to and tutorial videos for games and other sports.
- They can also use this feature to record a video clip that may not be easy to include in the final video.
This feature will give your audience the opportunity to understand your point clearly without having to visualize everything in their heads. Everything you say would be right in front of them in the form of screen recording and they can easily get your perspective.
2. Making a Sports YouTube Channel- Picture in Picture
Another key feature that is widely used by YouTube sports channels is picture-in-picture, especially those who engage in live commentary while the game or match is still being played. As a Mac YouTube channel producer, you must use this feature to gain the following advantages:
- Picture in Picture allows you to stay visible to your audience while commentating or giving your opinion on a game.
- It also provides you with the ability to divert more focus on the game so the bigger part of the screen is dedicated to sports.
- You can also switch between the smaller and bigger video sections when necessary, for example during a break or interval.
- It gives you the opportunity to make your YouTube channel more personalized with your own take on picture-in-picture.
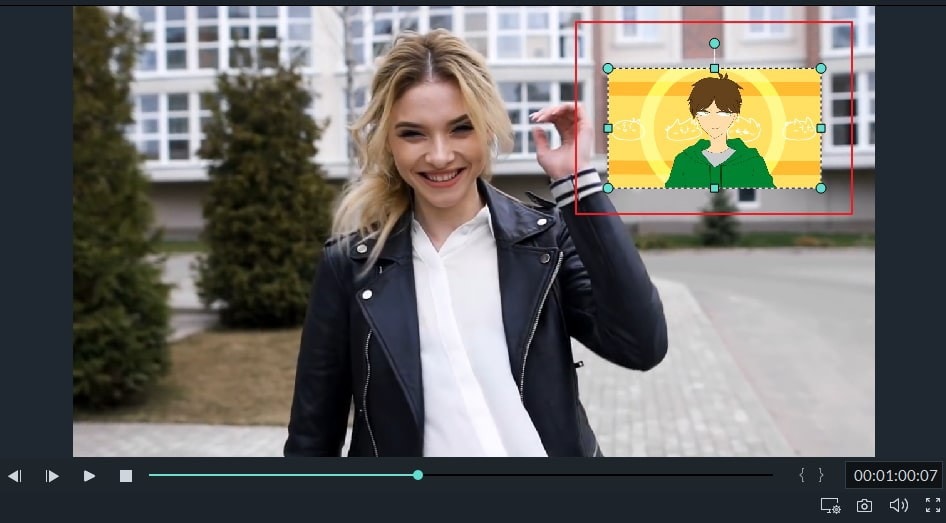
Picture in picture is a great feature for sports YouTubers on Mac as it keeps the video entertaining and personalized. Without using a picture-in-picture feature, you will find it difficult to compete with other sports YouTube channels.
3. Making a Sports YouTube Channel - Audio Recording
There are times when you cannot use the native audio of the sports video and need to add your own. It means that you need to record your own audio file and add it to the video before uploading it to your YouTube channel. This feature allows you to:
- Edit the audio of your sports video to make it more customizable according to your target audience.
- Remove the audio that might cause copyright issues and add your own to ensure your content remains original.
- Add your own remarks, commentary, and opinions in the video in full or in parts to make it more engaging and interactive.
- Make videos where you just need background music and don’t need the original audio such as montages, tributes, etc.


Clear and crisp audio recording is necessary to ensure that the video you upload on your sports YouTube channel is of high quality. Low-quality audio will damage the whole experience and leave a bad taste in the mouth of your viewers.
You May Also Like: Edit Audios in Wondershare Filmora For Mac
Filmstock Stock Media Library ](https://filmstock.wondershare.com/creative-theme-sports?spm=rs.filmora%5Fweb&source%5Fchannel=seo%5Farticle )
Section 3. What Video Editing Software Has these Features?
There are many video editing software applications that enable you to use the above-mentioned features. However, if you are just starting out and want to become a producer of your own YouTube sports channel using Mac, here are some of your options:
1. WonderShare Filmora X - Make sports channel editing easier
If you are just getting ready to do a YouTube sports channel and do not have any experience, Filmora is a good choice. There is no video editing software that provides better value.
This software contains most of the features and functions needed to create sports videos, such as audio and screen recording along with pip capability, and picture-in-picture. You can also use Filmora X to add cool branded intros and outros to customize your sports videos.
2.iMovie - Build-in software for Mac users
If you don’t want to rely on third-party software, the default built-in video editing software on Mac provides you with the basic editing features you may need.
3.Adobe Premiere Elements - Professional software to edit sport videos
If you want professional-grade software and don’t really care about the price, you can get Adobe Premiere Elements. Keep in mind that it is a highly advanced software for professionals and you may not need a wide variety of features offered here.
Richard Bennett
Richard Bennett is a writer and a lover of all things video.
Follow @Richard Bennett
Richard Bennett
Dec 14, 2023• Proven solutions
It is no secret that there is a huge audience of sports, including e-sports and gaming, on YouTube who appreciates high-quality content. These viewers are searching for sports YouTubers who create insightful and entertaining content that isn’t only rich in terms of content but production as well. It means that sports channels on YouTube have to rely on special video editing effects to ensure they are delivering what their viewers expect.
That being said, it is usually not easy for aspiring sports YouTubers to start since they have little to no experience when it comes to creating premium sports videos for YouTube. This article will help you out in terms of starting a new YouTube sports channel, especially if you are a mac user.
- Section1. Necessary Elements of a YouTube Sports Channel
- Section2. Must Use Feature for Making a Sports YouTube Channel
- Section3. Which Video Editing Software Has these Features?
Section 1. Necessary Elements of a YouTube Sports Channel
If you want to start a YouTube sports channel, you need to keep in mind that sports videos are fundamentally different from other types of videos. This requires you to have a strong grasp not only on content but video editing as well. Here are some of the top elements that every YouTube sports channel needs.
1.Insightful Producer Perspective
First of all, you should try to have a clear and comprehensive understanding of the sport you are going to talk about on your channel. If you are just an amateur or a casual fan, you will need to do more preparation as a sports YouTuber.
2.Brief and Clear Delivery
The second most important thing is to communicate your perspective in an entertaining, brief, and interactive manner so your viewers remain engaged and keep coming back to your channel. If you fail to communicate properly, your viewers will go somewhere else to watch what they are looking for.
3.Advanced Video Editing
Apart from the content, you need to make yourself familiar with using advanced video editing features such as picture-in-picture, screen recording, and audio recording. These allow you to provide a high-quality viewing experience to your YouTube channel audience.
4.Branded Intro & Outro
You need to set yourself apart with the impactful branding of your sports YouTube channel. It means that the software you are using on your Mac needs to have smart editing features including the ability to add cool intros and outros that become the trademark of your sports channel.
You May Also Like:
- YouTuber Skillshare: Essential Video Cutting Skills For YouTubers>>>
- What is the Best MP4 Cutter for YouTubers On Mac?>>>
Section 2. Must Use Feature for Making a Sports YouTube Channel
There are many features that you may need in your sports content creation. High video quality will bring more views and attract more fans to your YouTube channel. Here are some features you may use in making sports videos.
1. Making a Sports YouTube Channel - Screen Recording
One of the top features that you must use in your sports content creation is screen recording. It is a vital feature for all sports YouTubers and it is used extensively for multiple reasons:
- It gives content creators the ability to give demonstrations in a clear and convenient manner that is easily understandable.
- Screen recording also allows them to create how-to and tutorial videos for games and other sports.
- They can also use this feature to record a video clip that may not be easy to include in the final video.
This feature will give your audience the opportunity to understand your point clearly without having to visualize everything in their heads. Everything you say would be right in front of them in the form of screen recording and they can easily get your perspective.
2. Making a Sports YouTube Channel- Picture in Picture
Another key feature that is widely used by YouTube sports channels is picture-in-picture, especially those who engage in live commentary while the game or match is still being played. As a Mac YouTube channel producer, you must use this feature to gain the following advantages:
- Picture in Picture allows you to stay visible to your audience while commentating or giving your opinion on a game.
- It also provides you with the ability to divert more focus on the game so the bigger part of the screen is dedicated to sports.
- You can also switch between the smaller and bigger video sections when necessary, for example during a break or interval.
- It gives you the opportunity to make your YouTube channel more personalized with your own take on picture-in-picture.
Picture in picture is a great feature for sports YouTubers on Mac as it keeps the video entertaining and personalized. Without using a picture-in-picture feature, you will find it difficult to compete with other sports YouTube channels.
3. Making a Sports YouTube Channel - Audio Recording
There are times when you cannot use the native audio of the sports video and need to add your own. It means that you need to record your own audio file and add it to the video before uploading it to your YouTube channel. This feature allows you to:
- Edit the audio of your sports video to make it more customizable according to your target audience.
- Remove the audio that might cause copyright issues and add your own to ensure your content remains original.
- Add your own remarks, commentary, and opinions in the video in full or in parts to make it more engaging and interactive.
- Make videos where you just need background music and don’t need the original audio such as montages, tributes, etc.
Clear and crisp audio recording is necessary to ensure that the video you upload on your sports YouTube channel is of high quality. Low-quality audio will damage the whole experience and leave a bad taste in the mouth of your viewers.
You May Also Like: Edit Audios in Wondershare Filmora For Mac
Filmstock Stock Media Library ](https://filmstock.wondershare.com/creative-theme-sports?spm=rs.filmora%5Fweb&source%5Fchannel=seo%5Farticle )
Section 3. What Video Editing Software Has these Features?
There are many video editing software applications that enable you to use the above-mentioned features. However, if you are just starting out and want to become a producer of your own YouTube sports channel using Mac, here are some of your options:
1. WonderShare Filmora X - Make sports channel editing easier
If you are just getting ready to do a YouTube sports channel and do not have any experience, Filmora is a good choice. There is no video editing software that provides better value.
This software contains most of the features and functions needed to create sports videos, such as audio and screen recording along with pip capability, and picture-in-picture. You can also use Filmora X to add cool branded intros and outros to customize your sports videos.
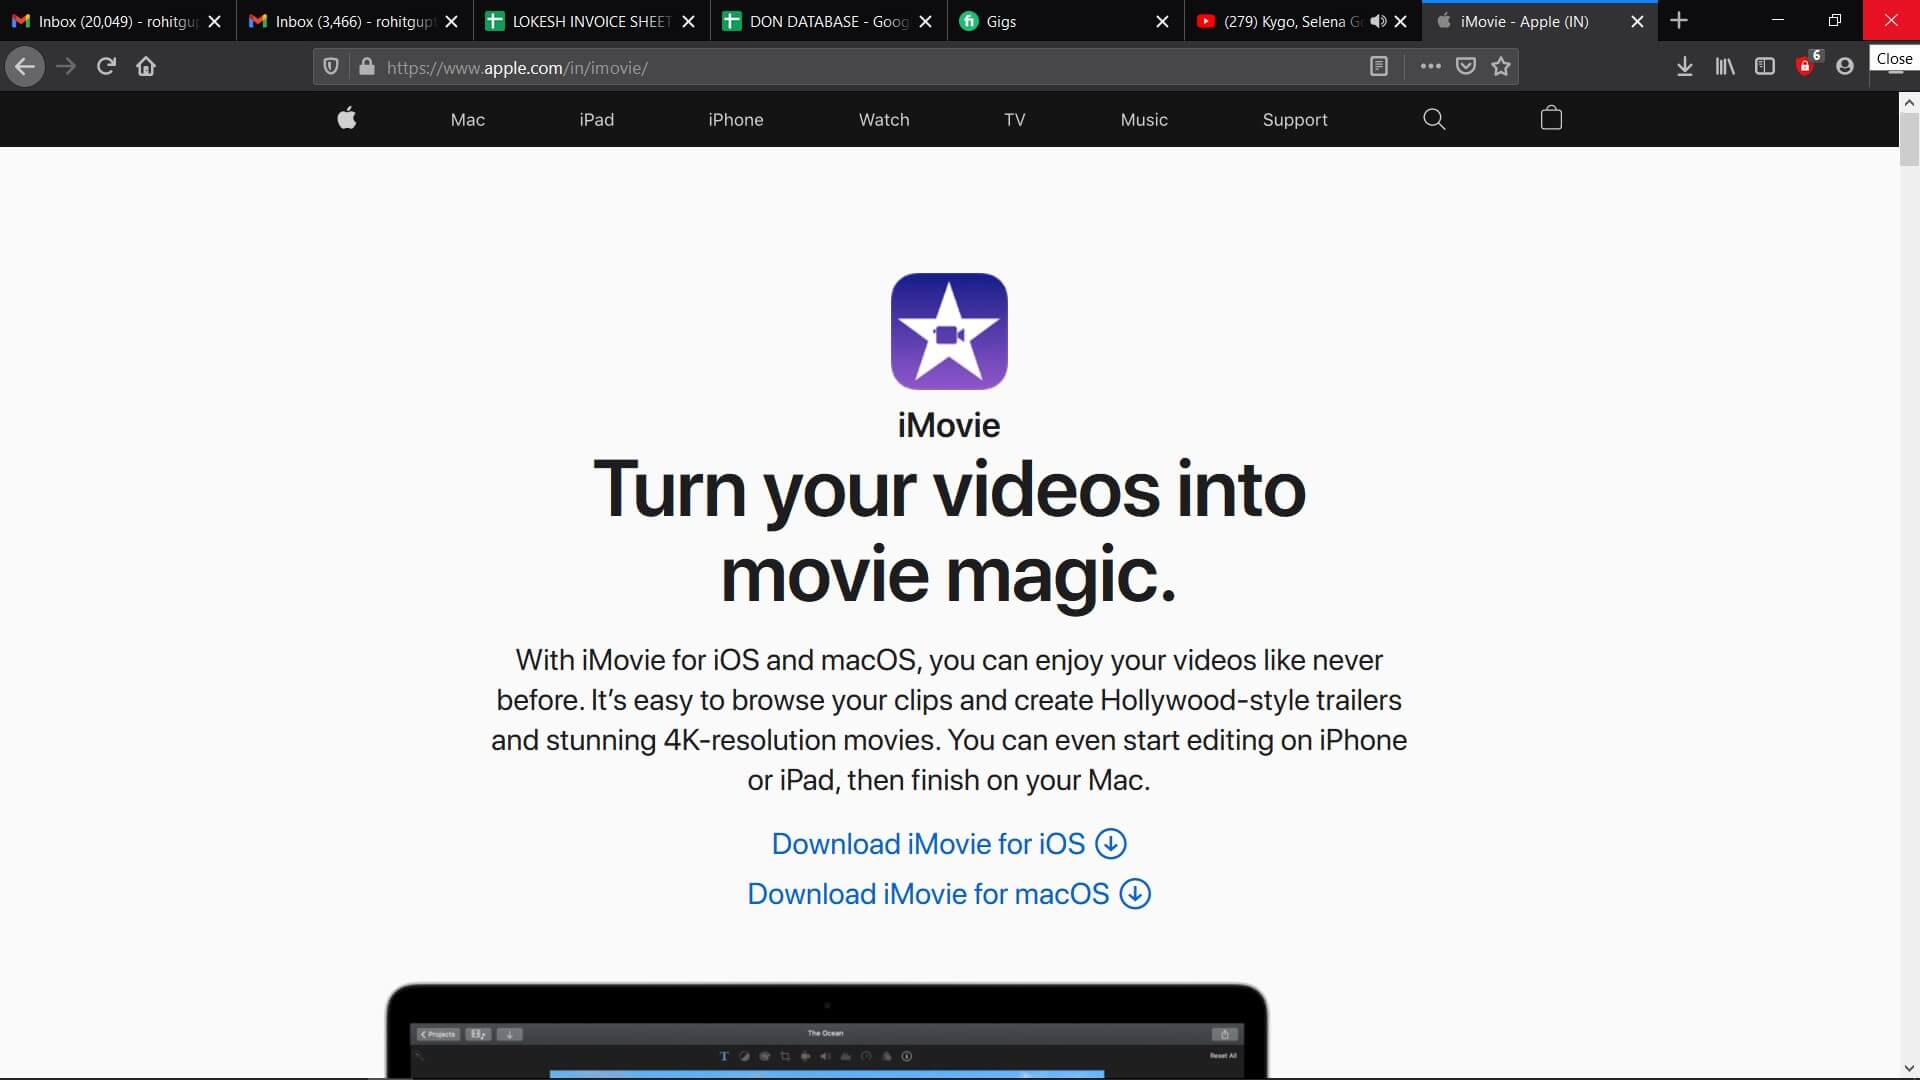
2.iMovie - Build-in software for Mac users
If you don’t want to rely on third-party software, the default built-in video editing software on Mac provides you with the basic editing features you may need.
3.Adobe Premiere Elements - Professional software to edit sport videos
If you want professional-grade software and don’t really care about the price, you can get Adobe Premiere Elements. Keep in mind that it is a highly advanced software for professionals and you may not need a wide variety of features offered here.
Richard Bennett
Richard Bennett is a writer and a lover of all things video.
Follow @Richard Bennett
Crystal Clear Capture: Amping Up Your Home Studio Recordings
10 Recording Tips for Recording Audio with High Quality
Richard Bennett
Oct 26, 2023• Proven solutions
Getting the best sound for your recording is not as simplistic as buying an expensive microphone. There are many different things you can do to record your audio more clearly. Here are 10 recording tips to record high-quality audio.
1. Silence everything you don’t want your microphone to record
2. Put your mobile phone in airplane mode
3. Minimize echo
4. Block wind from reaching your microphone
5. Upgrade your microphone
6. Adjust your levels
7. Start with a sound cue if you’re planning to do some syncing in post
8. Get close to the sound
9. ADR
10. Record Ambient Sound
Bonus Tip-Record Your Audio with Wondershare Filmora
Wondershare Filmora has great recording features that enable you to record screen , voiceover, and webcam. Just connect the recording device to your computer, and start the recording in Wondershare Filmora and you will get high-quality audio. And you can also easily pick a song from the royalty-free music library on Wondershare Filmora. These audio features on Filmora are rare and very simple to use, you only need to click a few times and your video will have a new sound and background song.
1. Silence everything you don’t want your microphone to record
When you’re recording audio, you have to be more aware of the subtle sounds that drone on in your background. These sounds may include humming from machines with fans, buzzing from lights, and jingling from your pet’s collar. Observe your recording space and find ways to silence everything that you don’t want in your audio recording.
2. Put your mobile phone in airplane mode
Although it may be quite obvious to turn your phone’s ring tone off when you’re recording, it may not be as obvious to put your phone in airplane mode. When phones receive calls or perform searches as part of their background processes, they emit signals that can get picked up by your recording system. Avoid ruining good takes with unwanted sounds of phone signals by putting your phones in airplane mode.
3. Minimize echo
If you are recording yourself talk or sing, make sure to set up your recording space in a way where the sound projected from your voice bounces minimally off the walls and back to your microphone. Bare walls and hardwood floors will cause a lot of bouncing. Make use of materials that will absorb your sound rather than bounce it, like a thick rug or a comforter. If you want your voice to echo, that’s something you should do in post-production.
4. Block wind from reaching your microphone
Although it might not sound so loud and distracting to the naked ear, wind sounds terribly loud through a microphone recording and can cause your audio to clip (distortion of waveform due to output of sound exceeding maximum capacity or 0 dB point). This includes the “wind” that comes out of your mouth when you pronounce words starting with the letter “p.” Use pop filters, windscreens, and deadcats to block wind from reaching your microphone.
5. Upgrade your microphone
As much as you try to control all the noise in your surroundings, your greatest recording limitation will come from the hardware that you use. Improve your recordings by plugging in an external microphone into your camera’s microphone jack or record audio completely separately with a professional microphone.
Need help with deciding on a microphone to buy? Check out our recommended list of microphones.
6. Adjust your levels
Before pressing the record button, see how loudly your microphone picks up the sound you wish to record. Adjust your levels (sensitivity of your microphone) until the sound sits in between -6 dBs and -12dBs. This range gives the source of your sound some room to get louder without the recorded audio getting clipped. When you first listen to audio recorded within this range, it may sound very quiet. No need to worry though because you can increase the volume later in editing.
7. Start with a sound cue if you’re planning to do some syncing in post
If you’re recording separate audio that you plan to sync to your video later in editing, start your recording with a short and loud sound cue like a clap or a high pitched “beep” tone. Later, when you’re editing, it’ll be much easier for you to find the section where your video and additional audio match.
8. Get close to the sound
Unless you’re aiming to record ambient sound, bring your microphone close to the source of sound you are wanting to record. The closer your microphone is to the source of sound, the lower your sensitivity setting can be on your microphone. As a result of lowering your levels, sounds you are not meaning to record will also sound fainter.
9. ADR
When you need to record a scene in a loud setting where you have very little control over the noise, record additional vocals later and replace the original vocals through a process called automated dialogue replacement.
10. Record Ambient Sound
Remember to record ambient sound or “room tone.” You can use these recordings to fill in the blanks if you run out of audio and also smooth out parts of your audio where you hear pops, clicks, and other unwanted noise.
Richard Bennett
Richard Bennett is a writer and a lover of all things video.
Follow @Richard Bennett
Richard Bennett
Oct 26, 2023• Proven solutions
Getting the best sound for your recording is not as simplistic as buying an expensive microphone. There are many different things you can do to record your audio more clearly. Here are 10 recording tips to record high-quality audio.
1. Silence everything you don’t want your microphone to record
2. Put your mobile phone in airplane mode
3. Minimize echo
4. Block wind from reaching your microphone
5. Upgrade your microphone
6. Adjust your levels
7. Start with a sound cue if you’re planning to do some syncing in post
8. Get close to the sound
9. ADR
10. Record Ambient Sound
Bonus Tip-Record Your Audio with Wondershare Filmora
Wondershare Filmora has great recording features that enable you to record screen , voiceover, and webcam. Just connect the recording device to your computer, and start the recording in Wondershare Filmora and you will get high-quality audio. And you can also easily pick a song from the royalty-free music library on Wondershare Filmora. These audio features on Filmora are rare and very simple to use, you only need to click a few times and your video will have a new sound and background song.
1. Silence everything you don’t want your microphone to record
When you’re recording audio, you have to be more aware of the subtle sounds that drone on in your background. These sounds may include humming from machines with fans, buzzing from lights, and jingling from your pet’s collar. Observe your recording space and find ways to silence everything that you don’t want in your audio recording.
2. Put your mobile phone in airplane mode
Although it may be quite obvious to turn your phone’s ring tone off when you’re recording, it may not be as obvious to put your phone in airplane mode. When phones receive calls or perform searches as part of their background processes, they emit signals that can get picked up by your recording system. Avoid ruining good takes with unwanted sounds of phone signals by putting your phones in airplane mode.
3. Minimize echo
If you are recording yourself talk or sing, make sure to set up your recording space in a way where the sound projected from your voice bounces minimally off the walls and back to your microphone. Bare walls and hardwood floors will cause a lot of bouncing. Make use of materials that will absorb your sound rather than bounce it, like a thick rug or a comforter. If you want your voice to echo, that’s something you should do in post-production.
4. Block wind from reaching your microphone
Although it might not sound so loud and distracting to the naked ear, wind sounds terribly loud through a microphone recording and can cause your audio to clip (distortion of waveform due to output of sound exceeding maximum capacity or 0 dB point). This includes the “wind” that comes out of your mouth when you pronounce words starting with the letter “p.” Use pop filters, windscreens, and deadcats to block wind from reaching your microphone.
5. Upgrade your microphone
As much as you try to control all the noise in your surroundings, your greatest recording limitation will come from the hardware that you use. Improve your recordings by plugging in an external microphone into your camera’s microphone jack or record audio completely separately with a professional microphone.
Need help with deciding on a microphone to buy? Check out our recommended list of microphones.
6. Adjust your levels
Before pressing the record button, see how loudly your microphone picks up the sound you wish to record. Adjust your levels (sensitivity of your microphone) until the sound sits in between -6 dBs and -12dBs. This range gives the source of your sound some room to get louder without the recorded audio getting clipped. When you first listen to audio recorded within this range, it may sound very quiet. No need to worry though because you can increase the volume later in editing.
7. Start with a sound cue if you’re planning to do some syncing in post
If you’re recording separate audio that you plan to sync to your video later in editing, start your recording with a short and loud sound cue like a clap or a high pitched “beep” tone. Later, when you’re editing, it’ll be much easier for you to find the section where your video and additional audio match.
8. Get close to the sound
Unless you’re aiming to record ambient sound, bring your microphone close to the source of sound you are wanting to record. The closer your microphone is to the source of sound, the lower your sensitivity setting can be on your microphone. As a result of lowering your levels, sounds you are not meaning to record will also sound fainter.
9. ADR
When you need to record a scene in a loud setting where you have very little control over the noise, record additional vocals later and replace the original vocals through a process called automated dialogue replacement.
10. Record Ambient Sound
Remember to record ambient sound or “room tone.” You can use these recordings to fill in the blanks if you run out of audio and also smooth out parts of your audio where you hear pops, clicks, and other unwanted noise.
Richard Bennett
Richard Bennett is a writer and a lover of all things video.
Follow @Richard Bennett
- Title: "2024 Approved How to Setup a Mac Studio for Sports Content"
- Author: Joseph
- Created at : 2024-05-31 13:44:03
- Updated at : 2024-06-01 13:44:03
- Link: https://youtube-stream.techidaily.com/2024-approved-how-to-setup-a-mac-studio-for-sports-content/
- License: This work is licensed under CC BY-NC-SA 4.0.
