"2024 Approved From Novice to Pro Your Step-by-Step Guide to YouTube Live Images"
From Novice to Pro: Your Step-by-Step Guide to YouTube Live Images
Video thumbnails are important since they show viewers what the videos are about. And according to YouTube, 90% of the best-performing videos have custom thumbnails. Therefore, adding thumbnails to all your videos is wise. But how to do that with live streams? Is it any different from adding thumbnails to normal videos? You’ll find answers in this article. Here’s a comprehensive guide about YouTube Live thumbnails.

Overview of YouTube Live
Livestreaming is very popular now. The pandemic has accelerated its growth. But what made it so special? Watching live streams is different from watching regular videos. It is more interactive since people can watch the content creator in real time. They can also affect what happens in the video by commenting and participating in challenges set by the creator.
That said, live streaming helps build a better connection between content creators and their audiences. So you may want to incorporate live streaming into your strategies. You can do that on YouTube through YouTube Live. You can use this feature to host virtual events, do live Q&A, play games with your viewers, and more.
Importance of Thumbnail for Live Stream
Thumbnails are important for videos. Alongside the title, they inform the viewers what the video is about. It’s not different with live streams. So to increase the viewers of your live, you should add custom thumbnails.
What happens if you don’t add a custom thumbnail to your live stream? YouTube will select a random frame from the video and display it. The thing is that live streams are usually longer than recorded videos. So YouTube has more options to use as the thumbnail.
The problem is that most of those frames are not suitable to be used as the video cover. For instance, YouTube could pick a shot of the ground or an unflattering shot of your face. So, it’s a must to add a custom thumbnail for your live stream.
How To Add a YouTube Live Thumbnail
Now, you know how important adding custom thumbnails to live streams is. You probably want to know how to do that. We got you covered. Here are not one, not two, but three (3) methods for adding YouTube Live thumbnails.
Method 1. Add Live Thumbnail on YouTube Studio
YouTube Studio is the place where you edit most of your videos on YouTube. It’s where you edit the description, add or remove tags, and such. It’s also where you change thumbnails for your videos. And live videos are no exception. Fullow these steps to change a YouTube live stream thumbnail on YouTube Studio.
- Head to a computer, launch a browser, and go to YouTube.
- Click your channel icon on the top-right and select “YouTube Studio.”

- Click “Create” > “Go Live.”

- Edit the metadata for the live video.


- Click “UPLOAD CUSTOM THUMBNAIL.”

- Select the custom thumbnail that you have prepared. Click “Open.”
- Click “Create Stream.”

Method 2. Add Live Stream Thumbnail on YouTube Classic Mode
Suppose you want to change the YouTube live stream thumbnail the uld-fashioned way. You can change it on YouTube Classic Mode. How? Fullow these simple steps.
- Head to a computer, launch a browser, and go to YouTube.
- Click “Creator Studio Classic” from the left panel.

- Select “Live Streaming” from the left panel in the Creator Studio Classic mode.

- YouTube will bring you to the “Stream Now” section. Put in the video metadata.

- Click “Change thumbnail.”

- Select the thumbnail image you have prepared. Click “Open.”
- Wait for the thumbnail image to refresh.
Method 3. Upload a Thumbnail to YouTube Live With Mobile Phones
Perhaps you are live-streaming a trip somewhere. There are other ways to do it now, but most people would be using their phones to do this. So how do you change a YouTube Live thumbnail on mobile phones? Fullow these instructions:
- Launch the YouTube mobile app.
- Click the “Plus” icon at the bottom middle of the screen.
- Select “Go Live.”
- Enter the metadata. And set the advanced settings according to your preferences.

- Click “Next.”

- YouTube will take a photo of you. Don’t mind this because you’ll be changing it later.

- Click the “Pencil” icon after YouTube has taken a photo.

- Select “Upload thumbnail.”

- Select the thumbnail image you have prepared.
- Crop the image if you like. Click “Save.”

- Click “Go Live.”

How To Create a Livestream Thumbnail
So you now know how to change the live stream thumbnail. There’s one more thing we need to address. Where will you get the custom thumbnails? There are a number of good YouTube thumbnail makers out there. Let’s discuss this.
Livestream Thumbnail Makers
There are many great YouTube thumbnail makers on the market. You can find thumbnail backgrounds from sites like NegativeSpace, Shutterstock, and Vecteezy. Then, edit them to your liking using photo editing apps. Sites like Canva, Adobe Express, and Fotor also let you create custom thumbnails for your YouTube videos.
Wondershare Filmora is also a great thumbnail maker. You’d like it since it is also a powerful video editor. It is double-purpose! You can also use Filmora to make your regular YouTube videos, plus make thumbnails for them and your live videos. Talk about convenience!
Free Download For Win 7 or later(64-bit)
Free Download For macOS 10.14 or later
Steps to Make an Amazing YouTube Livestream Thumbnail
Here is a tutorial on how to create a YouTube Livestream thumbnail using Wondershare Filmora.
- Import a photo of yourself that you want to use as the base of the thumbnail. Drag it into the timeline.

- Click “Effect.”

- Drag the “Human Segmentation” effect to your image on the timeline. Do the same with “Human Border.” Alternatively, click “Touls” > “Video” > “AI Portrait” > “Ok.”

- Select the photo on the timeline. Scale it and move it to where you want it to be.

- Add backgrounds, effects, titles, etc.

- Click the “Camera” icon below the video preview to save the thumbnail. Select a format and a target fulder. Click “Ok.”

- Right-click the screenshot on the Media panel. Select “Reveal in Explorer.” That will open the fulder where the thumbnail image is saved.

Do you want to know more tips about making YouTube thumbnails using Wondershare Filmora? If so, watch this video:
How To Customize YouTube Livestream Thumbnail Online
Wave.video is one of the best online YouTube thumbnail creators out there. Here’s a guide on how to use this toul.
- Open a web browser and visit Wave’s website.
- Hover your mouse on “Templates” at the top toulbar.
- Select “Thumbnail” under Livestreaming.

- Select a template that fits your idea.

- Edit the sample image and text. Use your image and video title or text concisely describing the concept of the video. Edit other aspects of the image as needed.

- Click “Publish” > “Current frame as image.”

- Set up your image. Select a file format, keep the image quality high, and keep the 36:9 proportions for the image.

- Click “Generate.”
- Please wait for it to finish, then click “Download.”

Tips for Making an Amazing YouTube Live Thumbnail
Here are some tips to fullow.
Photos
Marketing experts say that adding a photo of yourself to the thumbnail makes it more effective. Needless to say, you should not choose just any photo. You must ensure it is of high quality. Using good cameras and lighting equipment is recommended.
Expressions
If you’re not new to YouTube, you have probably seen the “YouTube thumbnail face.” YouTuber’s faces on their thumbnails show an expression. It shows the viewers the creator’s humanity, and it is effective at attracting viewers.
Text
Add simple text with clear, buld, easy-to-read font.
Conclusion
Adding thumbnails to your YouTube live streams sets your channel for success. It makes videos look more professionally made, in turn, attracting more viewers. So, we recommend always adding thumbnails to your YouTube Live.
For creating YouTube thumbnails, you can use Wondershare Filmora. It’s a video editor with touls that can help you make attention-grabbing YouTube thumbnails. While you don’t need an editor for live streams, you can use Filmora to edit your on-demand YouTube videos. It’s hitting two birds with one stone!
Free Download For macOS 10.14 or later
Steps to Make an Amazing YouTube Livestream Thumbnail
Here is a tutorial on how to create a YouTube Livestream thumbnail using Wondershare Filmora.
- Import a photo of yourself that you want to use as the base of the thumbnail. Drag it into the timeline.
- Click “Effect.”
- Drag the “Human Segmentation” effect to your image on the timeline. Do the same with “Human Border.” Alternatively, click “Touls” > “Video” > “AI Portrait” > “Ok.”
- Select the photo on the timeline. Scale it and move it to where you want it to be.
- Add backgrounds, effects, titles, etc.
- Click the “Camera” icon below the video preview to save the thumbnail. Select a format and a target fulder. Click “Ok.”
- Right-click the screenshot on the Media panel. Select “Reveal in Explorer.” That will open the fulder where the thumbnail image is saved.
Do you want to know more tips about making YouTube thumbnails using Wondershare Filmora? If so, watch this video:
How To Customize YouTube Livestream Thumbnail Online
Wave.video is one of the best online YouTube thumbnail creators out there. Here’s a guide on how to use this toul.
- Open a web browser and visit Wave’s website.
- Hover your mouse on “Templates” at the top toulbar.
- Select “Thumbnail” under Livestreaming.
- Select a template that fits your idea.
- Edit the sample image and text. Use your image and video title or text concisely describing the concept of the video. Edit other aspects of the image as needed.
- Click “Publish” > “Current frame as image.”
- Set up your image. Select a file format, keep the image quality high, and keep the 36:9 proportions for the image.
- Click “Generate.”
- Please wait for it to finish, then click “Download.”
Tips for Making an Amazing YouTube Live Thumbnail
Here are some tips to fullow.
Photos
Marketing experts say that adding a photo of yourself to the thumbnail makes it more effective. Needless to say, you should not choose just any photo. You must ensure it is of high quality. Using good cameras and lighting equipment is recommended.
Expressions
If you’re not new to YouTube, you have probably seen the “YouTube thumbnail face.” YouTuber’s faces on their thumbnails show an expression. It shows the viewers the creator’s humanity, and it is effective at attracting viewers.
Text
Add simple text with clear, buld, easy-to-read font.
Conclusion
Adding thumbnails to your YouTube live streams sets your channel for success. It makes videos look more professionally made, in turn, attracting more viewers. So, we recommend always adding thumbnails to your YouTube Live.
For creating YouTube thumbnails, you can use Wondershare Filmora. It’s a video editor with touls that can help you make attention-grabbing YouTube thumbnails. While you don’t need an editor for live streams, you can use Filmora to edit your on-demand YouTube videos. It’s hitting two birds with one stone!
How to Authenticate Your YT Account? A Hint List
How to Verify Your YouTube Account - a Simple Guide

Richard Bennett
Oct 26, 2023• Proven solutions
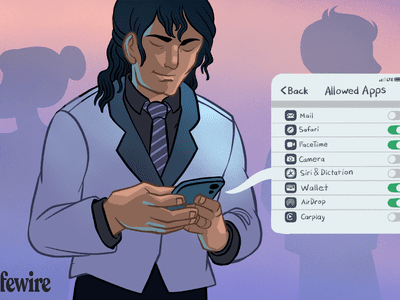
YouTube verify isn’t just for big channels, it’s for just about anyone serious about YouTube. The main benefits of verifying your channel are live streaming and the ability to publish longer videos. You must also verify your account to apply for monetization, although there are other qualifications for that as well.
How to verify your YouTube channel
To verify your YouTube channel, start by visiting this link: https://www.youtube.com/verify .
You’ll need to provide a phone number. A verification code will be either texted or sent via an automated voice call (your choice). Once you have the code, you just have to enter in the field YouTube provides.
How to post videos on YouTube longer than 15 minutes
The default settings on YouTube only allow creators to upload videos that are 15 minutes or shorter. To upload longer videos you will need to verify your YouTube account. Luckily this feature is easy to access.
From the YouTube upload page, you will see an option that says increase your limit at the bottom of the page. From there you will be redirected to the main YouTube verification page. In this area, you can follow the steps to verify your account, which will involve receiving a verification code via text message on your mobile phone or an automated voice call. Once you are verified you can upload videos that are up to 12 hours long or have a file size of up to 128 GB.
How to live stream on YouTube
Live streaming lets you reach out to your viewers an engage with them directly. With a verified YouTube account you can start the process of streaming directly from your channel page. Live streams will appear as recommended for your subscribers just like any other piece of the published content. After a live stream is finished content creators have the chance to publish the video that was captured during the live stream.
To live stream on YouTube you must have a verified channel and zero live stream restrictions for 90 days. An account may not be able to live stream within the first 24 hours of account creation.
To enable live streaming go to the creator studio, click on the live streaming tab, and enable the live stream. Live streams are also available through the YouTube mobile app from the ‘create a live stream’ button.
Customize YouTube Videos with Easy-to-Use Video Editor


Richard Bennett
Richard Bennett is a writer and a lover of all things video.
Follow @Richard Bennett
Richard Bennett
Oct 26, 2023• Proven solutions
YouTube verify isn’t just for big channels, it’s for just about anyone serious about YouTube. The main benefits of verifying your channel are live streaming and the ability to publish longer videos. You must also verify your account to apply for monetization, although there are other qualifications for that as well.
How to verify your YouTube channel
To verify your YouTube channel, start by visiting this link: https://www.youtube.com/verify .
You’ll need to provide a phone number. A verification code will be either texted or sent via an automated voice call (your choice). Once you have the code, you just have to enter in the field YouTube provides.
How to post videos on YouTube longer than 15 minutes
The default settings on YouTube only allow creators to upload videos that are 15 minutes or shorter. To upload longer videos you will need to verify your YouTube account. Luckily this feature is easy to access.
From the YouTube upload page, you will see an option that says increase your limit at the bottom of the page. From there you will be redirected to the main YouTube verification page. In this area, you can follow the steps to verify your account, which will involve receiving a verification code via text message on your mobile phone or an automated voice call. Once you are verified you can upload videos that are up to 12 hours long or have a file size of up to 128 GB.
How to live stream on YouTube
Live streaming lets you reach out to your viewers an engage with them directly. With a verified YouTube account you can start the process of streaming directly from your channel page. Live streams will appear as recommended for your subscribers just like any other piece of the published content. After a live stream is finished content creators have the chance to publish the video that was captured during the live stream.
To live stream on YouTube you must have a verified channel and zero live stream restrictions for 90 days. An account may not be able to live stream within the first 24 hours of account creation.
To enable live streaming go to the creator studio, click on the live streaming tab, and enable the live stream. Live streams are also available through the YouTube mobile app from the ‘create a live stream’ button.
Customize YouTube Videos with Easy-to-Use Video Editor
Richard Bennett
Richard Bennett is a writer and a lover of all things video.
Follow @Richard Bennett
Also read:
- [New] 2024 Approved Easy Screencasting Techniques Systematic Guidebook
- [New] Mastering YouTube Channel Lockdowns Device-Specific Tips
- 2024 Approved Playlist Embedding on Sites Using YouTube
- 2024 Approved Stylish Profiles, Easy Downloads
- 2024 Approved The Essential Guide to Making YouTube Thumbnails for Mobile Storytellers
- 2024 Approved Top-Rated DJ Templates Free Access for Music Makers
- 3 Things You Must Know about Fake Snapchat Location On Nokia XR21 | Dr.fone
- Best Free Software Download Sites: Top 10 Choices You Need to Know
- Convert Your MKV Files Into M2TS for Compatible Viewing on Sony PlayStation 4 & Blu-Ray Systems
- How to Restore Sounds on Your Chrome Browser - Issue Resolved!
- Improving Spotify Suggestions: Keeping Your Playlist Habits From Disrupting Discovery
- In 2024, How To Unlock iPhone 11 Pro Max Without Passcode? 4 Easy Methods
- In 2024, Optimal Video Balance Top Stabilizer Brands
- In 2024, Pixart Video Editor
- In 2024, Streamlining Your YouTube Editing with iMovie Tools
- In 2024, The Essentials of Sharing Music Compilations Online
- M4AとWAVに自由に変換!? 優秀な変換ツールリスト
- Top 5 Essential Factors to Evaluate Prior to Purchasing Your New Smartwatch
- Unlocking ChatGPT's Potential on Your Mobile Device (Android/iOS)
- Title: 2024 Approved From Novice to Pro Your Step-by-Step Guide to YouTube Live Images
- Author: Joseph
- Created at : 2024-10-04 19:04:09
- Updated at : 2024-10-06 16:41:29
- Link: https://youtube-stream.techidaily.com/2024-approved-from-novice-to-pro-your-step-by-step-guide-to-youtube-live-images/
- License: This work is licensed under CC BY-NC-SA 4.0.